
- Windows Subsystem for Android (WSA) comes with the Amazon Appstore. But there is a way to remove it and install the Google Play Store with WSA.
- WSABuilds is an open-source project that adds Play Store to Windows 11 in a few clicks.
- The second method uses WSL to patch the WSA image with Google Play Store.
Microsoft’s Windows Subsystem for Android (WSA) allows you to run Android apps on Windows 11. While WSA is a great feature, it has a few flaws. A major one is the inexistence of Google Play Services and thereby the Play Store. WSA offers the Amazon Appstore instead which doesn’t have a large library of apps like Google Play Store. Thankfully, there are two ways you can install Google Play Store in WSA on Windows. Follow the guide to learn more.
Enable Windows Hypervisor and Virtualization
Both the methods mentioned in the list require you to turn on Windows Hypervisor and Virtualization. To do so, follow these steps.
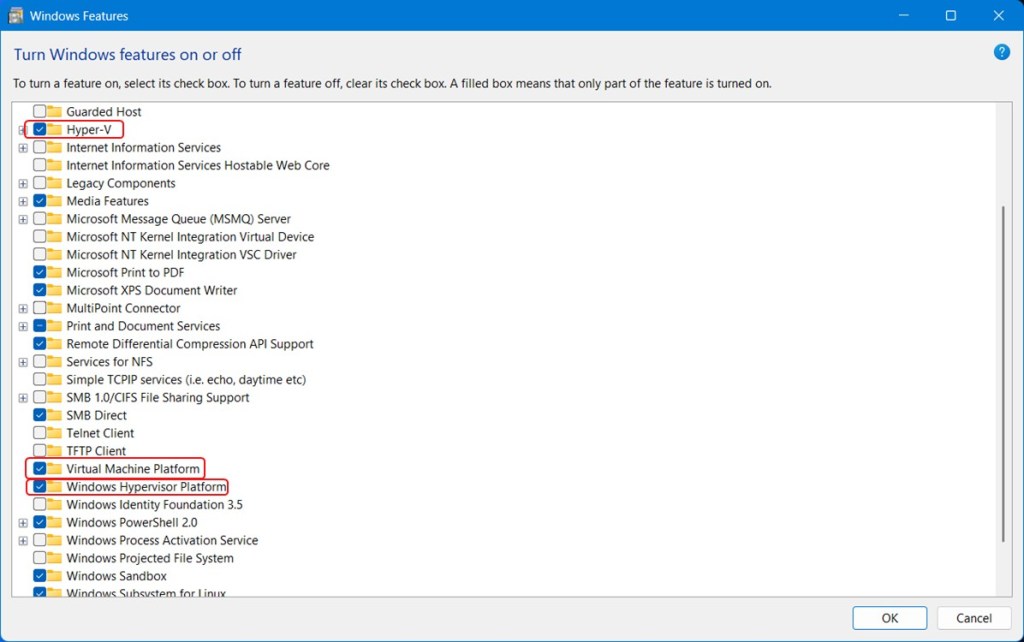
1. Click Start and start typing “Windows features.” Click to open the first search result which reads “Turn Windows features on or off.”


2. A new window with a list of features with checkboxes should pop up.
3. Check the following boxes — Hyper-V, Virtual Machine Platform, and Windows Hypervisor Platform.

4. Once enabled, restart your Windows PC and the features should now be enabled.
5. To check if Virtualization has been enabled, open the Task Manager using the shortcut Ctrl+Shift+Esc, and go to the performance tab.
6. Click on CPU and check the Virtualization option. It should display “Enabled.”


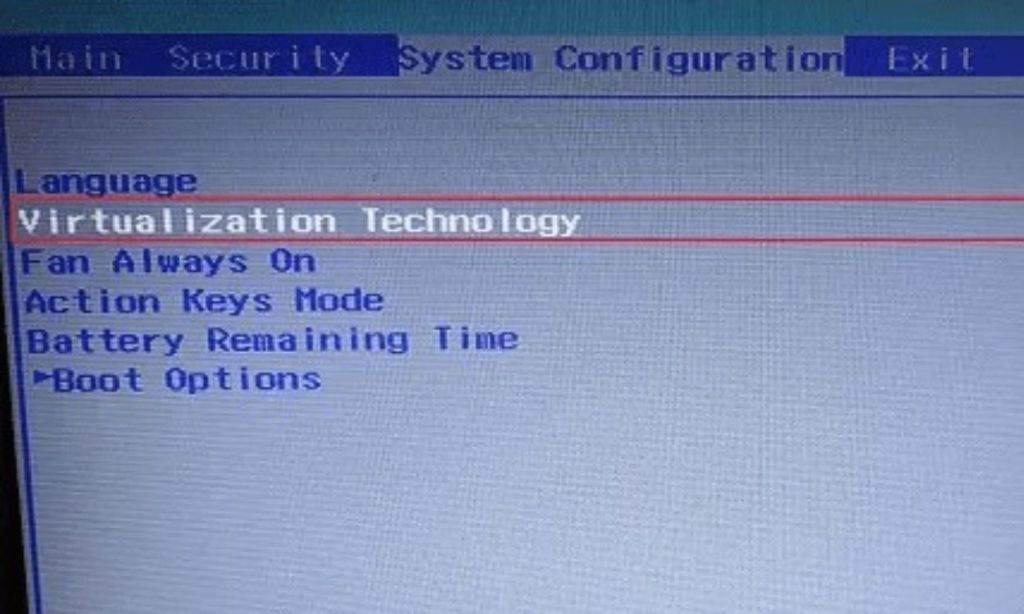
7. If Virtualization is disabled, boot into the BIOS, and look for “Virtualization Technology,” and enable it. On some computers, it’s also called “Intel VT-x” “AMD-V” or “SVM Mode”.

Method 1: Installing Google Play Store Using a WSA Script
One of the quickest ways to get Play Store running in Windows 11 is through the WSABuilds project on GitHub. It’s an open-source project that allows you to install Windows Subsystem for Android on both Windows 11 and Windows 10 with Google Play Store and Magisk. Here’s how to install it on Windows 11:
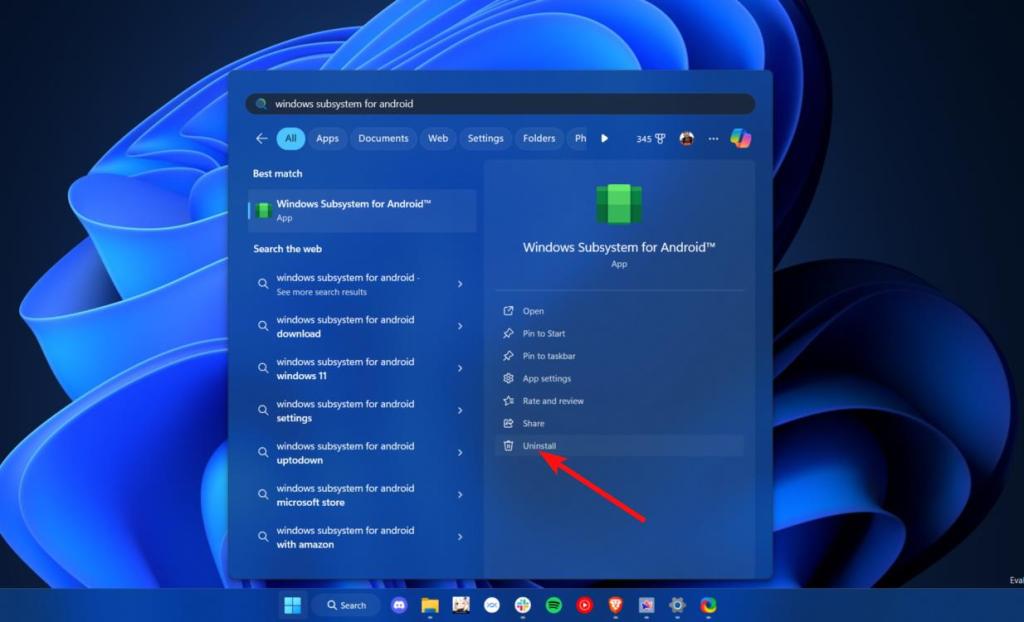
1. If you already have the official WSA installed, you will need to remove it first. You can do that by searching for Windows Subsystem for Android in Windows search and clicking “Uninstall” in the right pane.

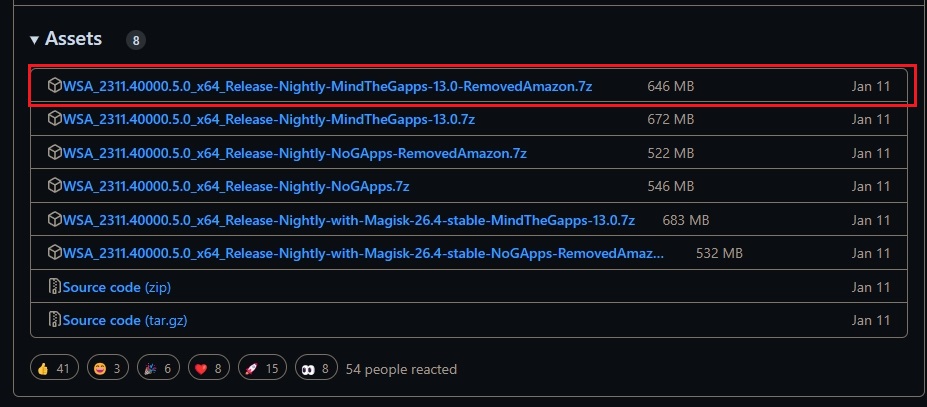
2. Once the official WSA is uninstalled, go to the releases pages, scroll down and move to the x64 section. Here, click on the first link which contains the Google Play Store, and Play Services. In this build, Amazon Appstore is removed. If you’d like root access, download the one that contains the said keywords alongside “Magisk.”

3. Once downloaded, right-click and extract the compressed folder. We’d suggest extracting the folder using 7-Zip or PeaZip as using WinRAR and Window’s built-in file extraction tool throws a bunch of errors.
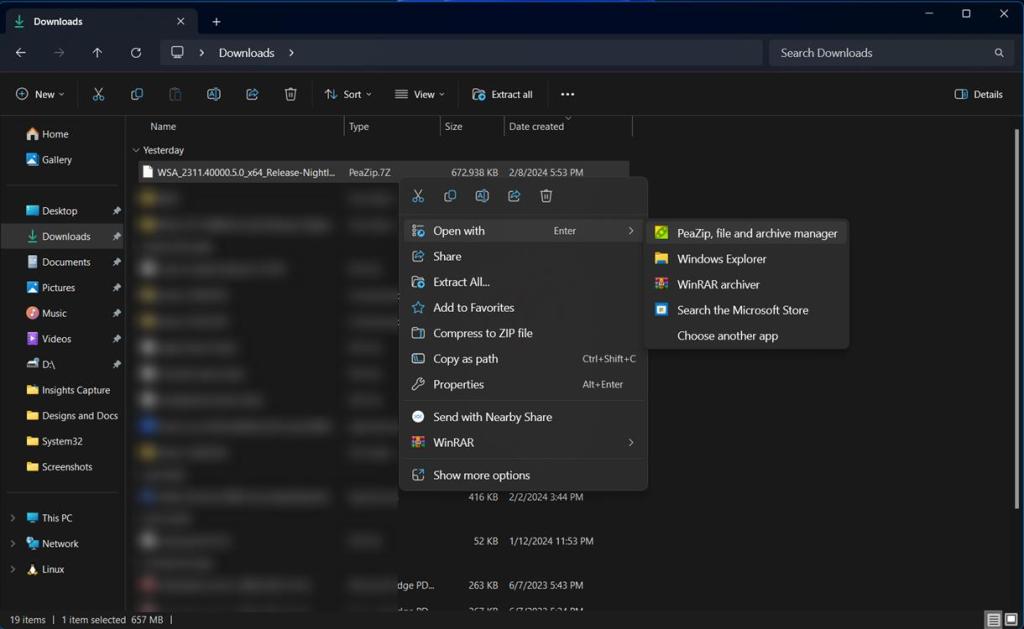

4. Once extracted, all you need to do is go inside the extracted folder -> right-click -> open Terminal here, and enter the following command.
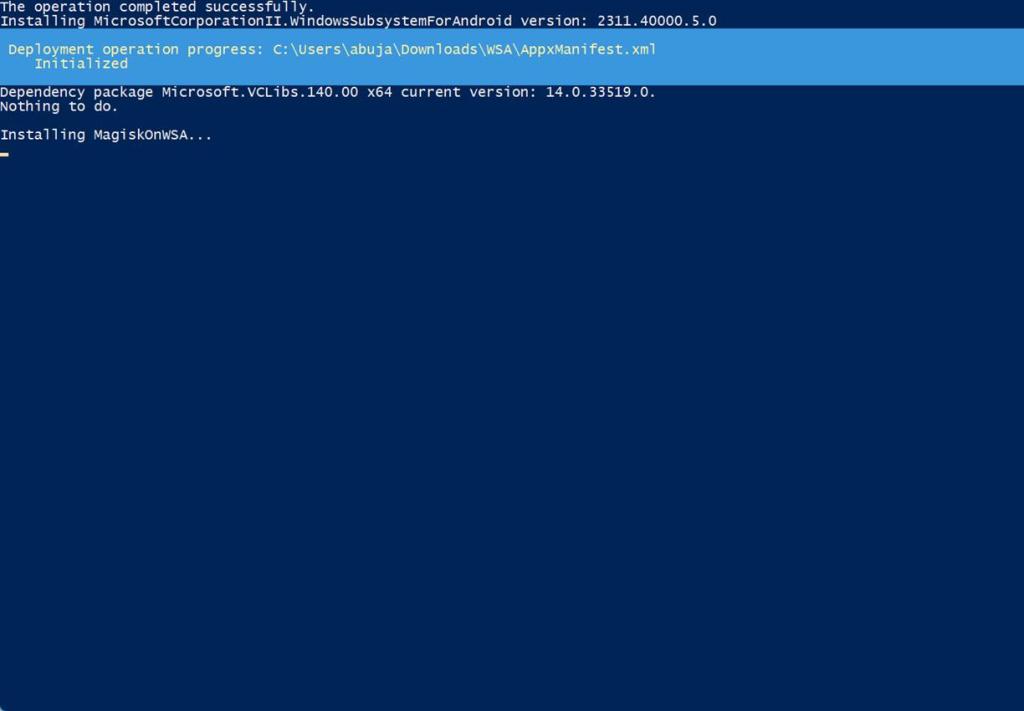
PowerShell.exe -ExecutionPolicy Bypass -File .\Install.ps15. The installation will then start and Windows Subsystem for Android with Google Play Store will launch very soon.

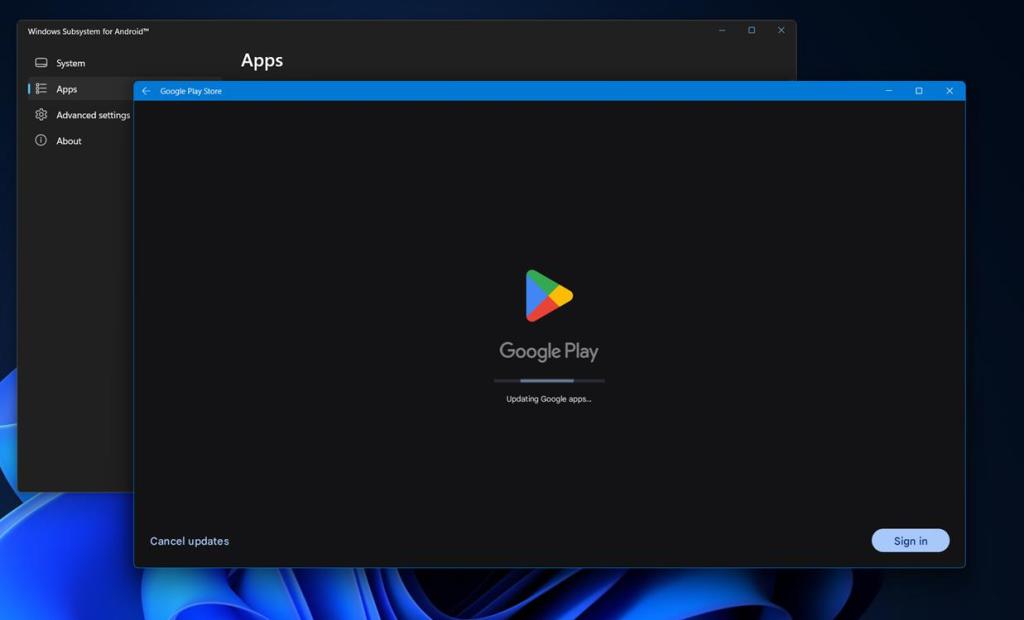
6. Once it launches, go to the “Apps” section, click the three dots beside Google Play Store, and click “Open.”

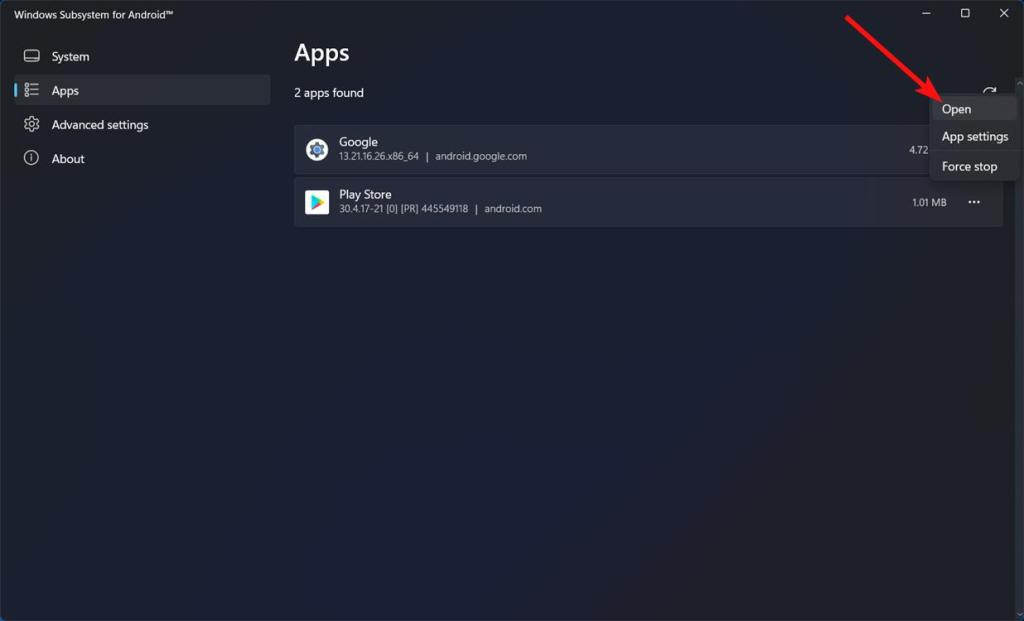
7. Sign in to your Google account and voila! You now have fully-fledged Google Play Store and Google Play Services running on Windows 11.
Method 2: Install Google Play Store using Windows Subsystem for Linux
1. The next important step is to uninstall Windows Subsystem for Android from your PC if you have already installed it from the Microsoft Store.
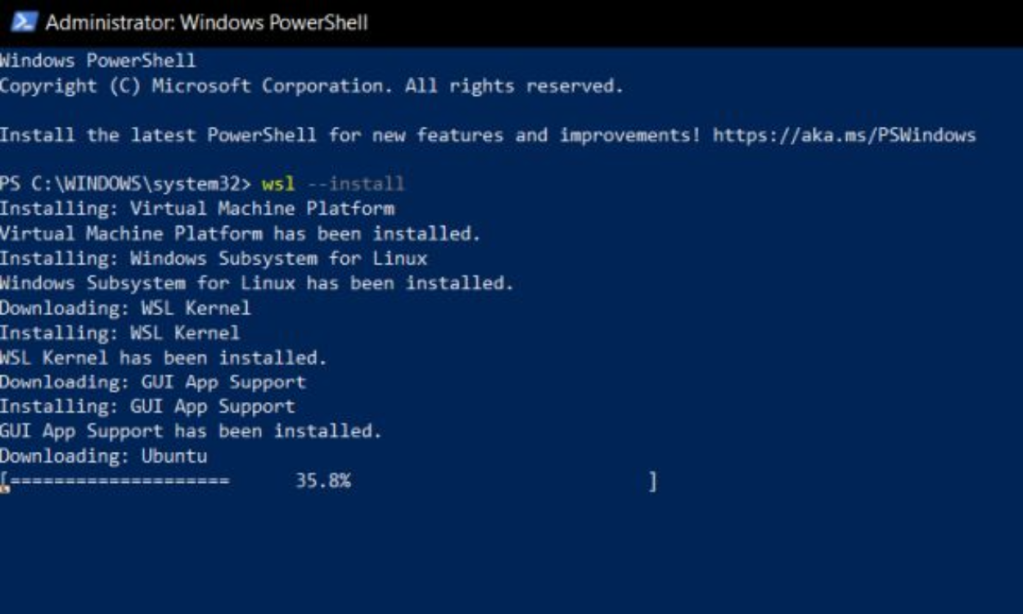
2. Next, you need to set up WSL 2 (Windows Subsystem for Linux) on your Windows 11 PC, which you can do by following our guide. You can install Ubuntu, Debian, or OpenSUSE based on your preference. WSL 2 is required as it enables us to locally generate the modified Windows Subsystem for Android image.
Generating WSA Image With Play Store Support
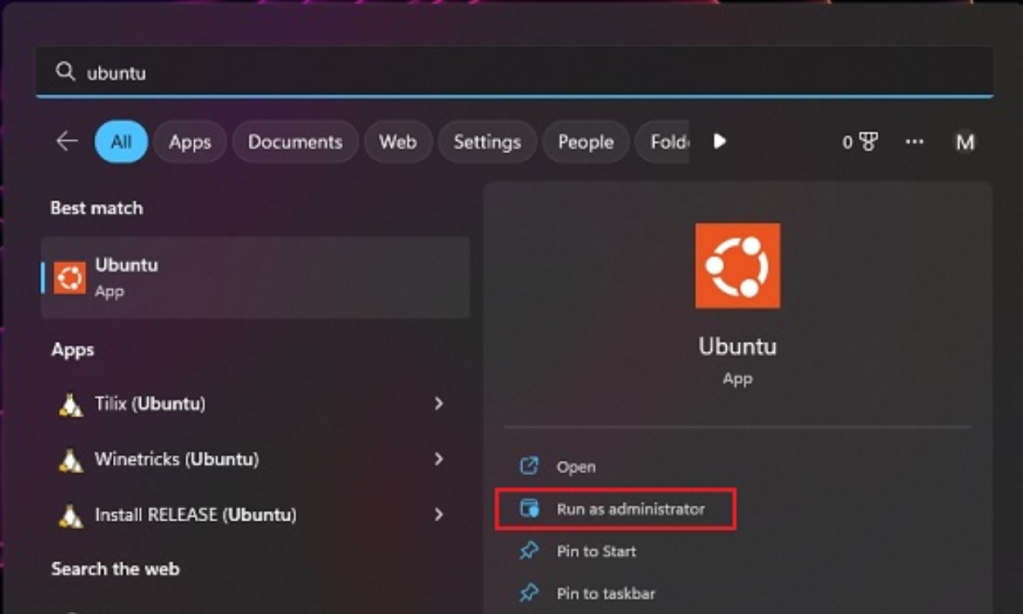
1. Launch Ubuntu (or whichever distro you have installed) as Administrator by opening the Start menu, searching “Ubuntu,” and clicking on “Run as Administrator” in the right pane.
2. After that, open the MagiskOnWSALocal GitHub page linked here, click Code and Copy the URL.

3. Move back to the WSL Terminal and run the following command. Paste the URL you copied above after git clone. This will copy the files in the repository to your computer.
git clone https://github.com/LSPosed/MagiskOnWSALocal.git
4. Next, run the following commands to get into the “scripts” directory.
cd MagiskOnWSALocal/scripts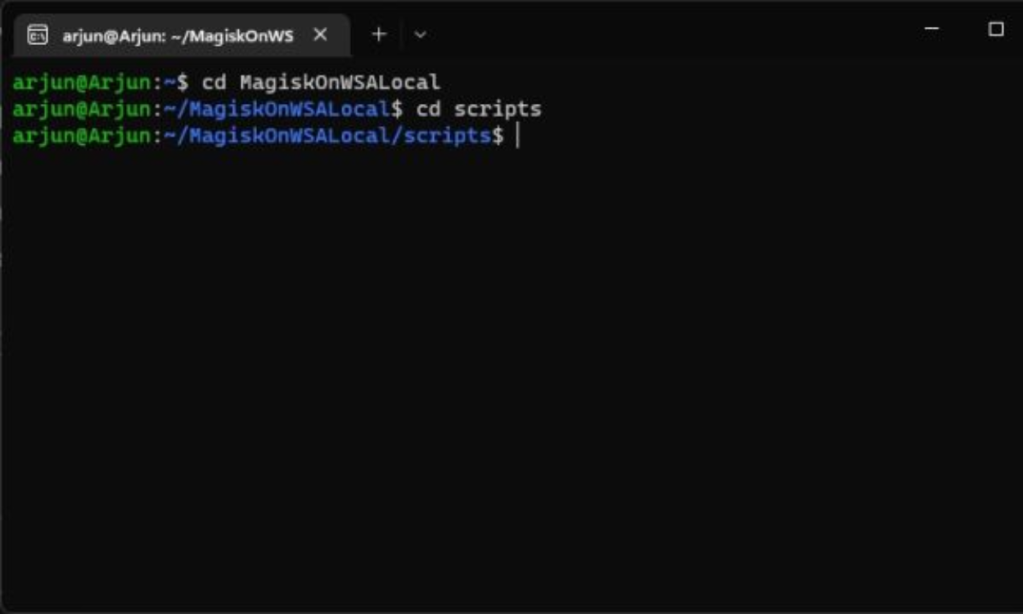
5. Run the script by executing the following command. This will download the required dependencies and start the command-line installer. Depending on your internet speed, this should take around 5 to 10 minutes.
./run.sh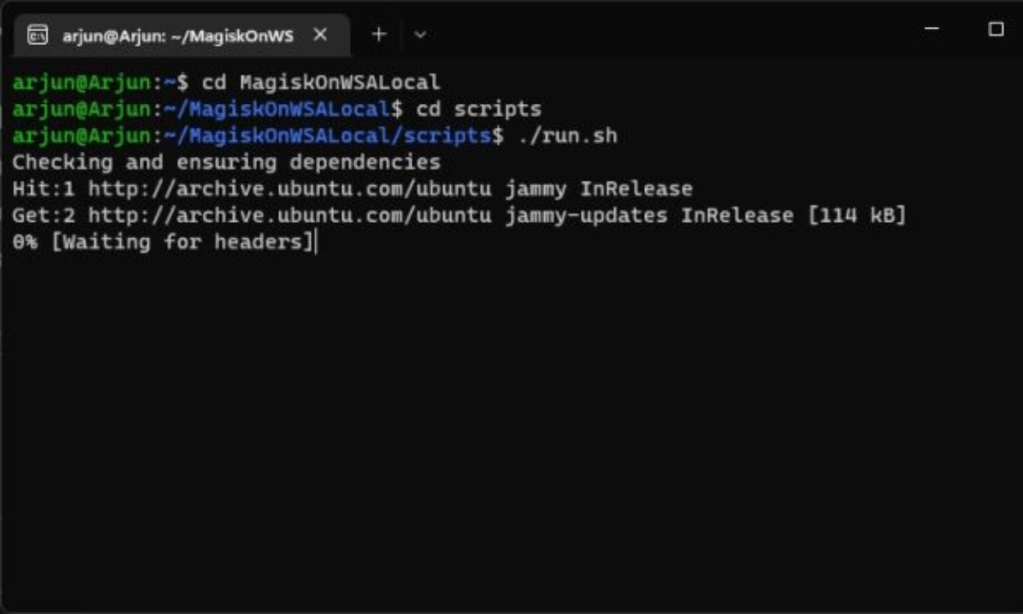
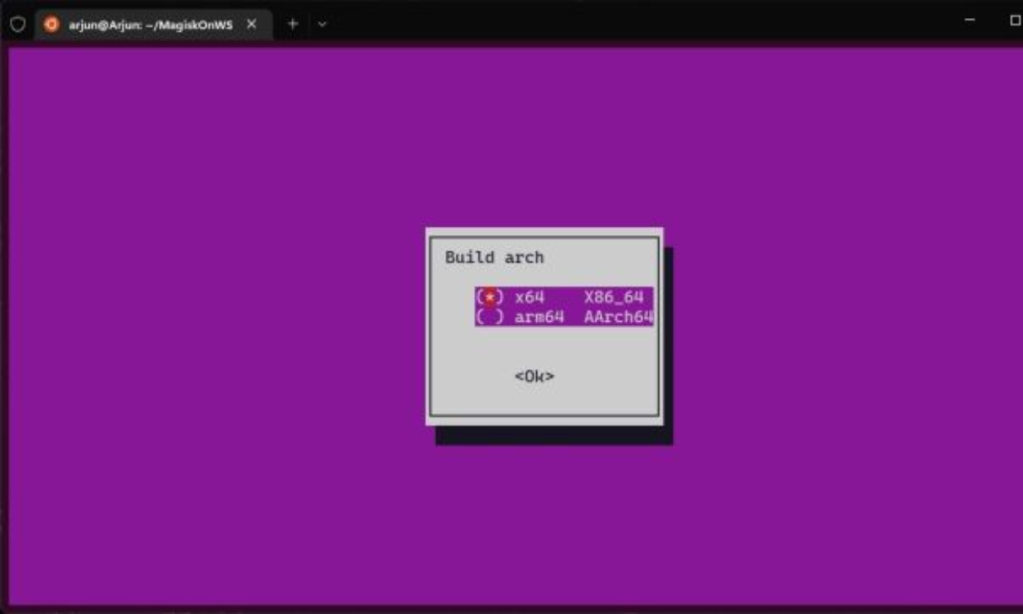
6. A command-line installer will open up. Choose “x64.” You can navigate the options by pressing the space key and hitting enter to choose.
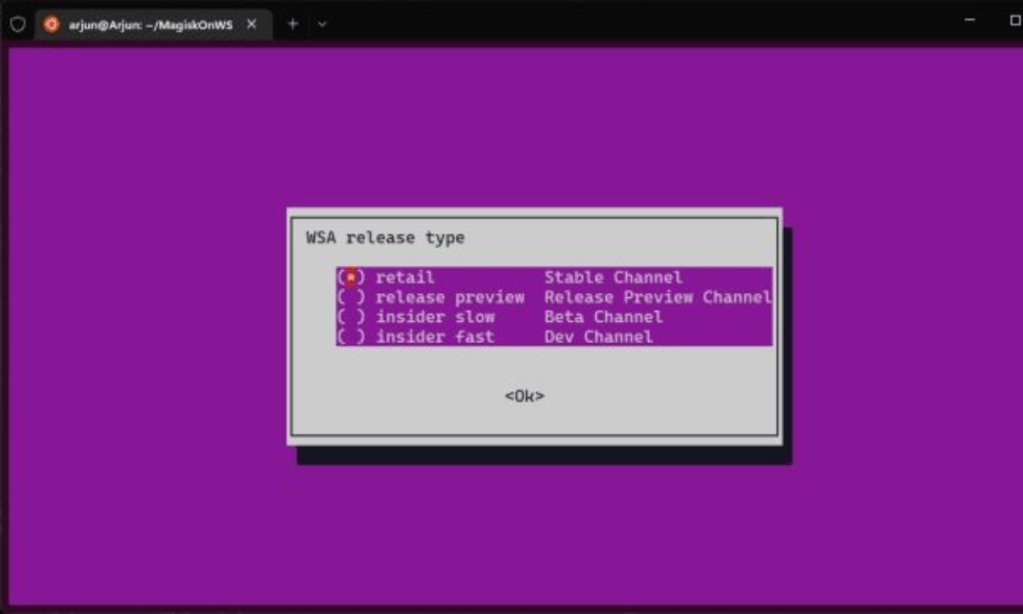
7. After that, choose “retail” as it’s meant for the stable channel.
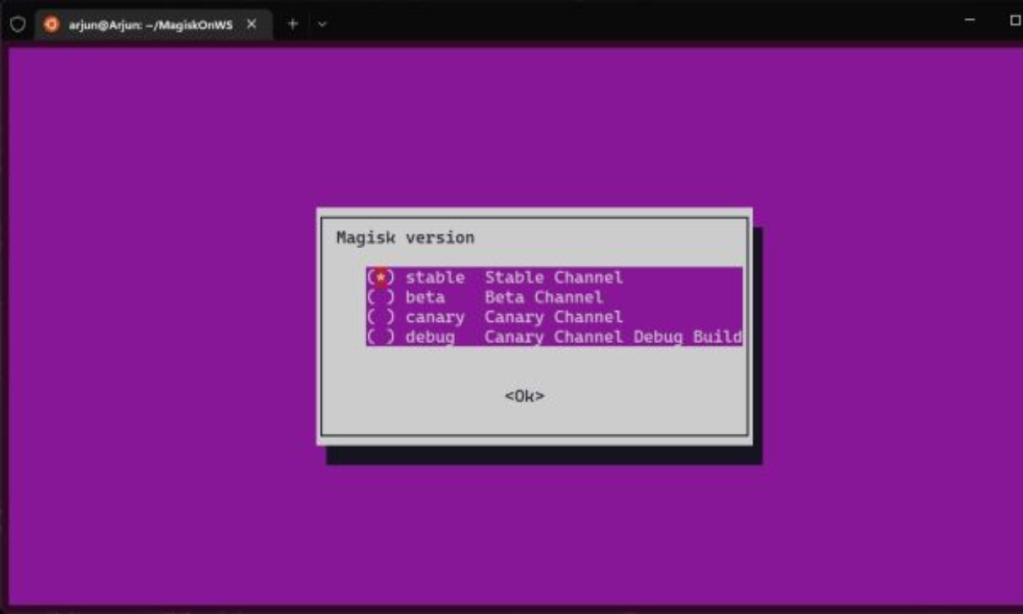
8. Under the Magisk version, we’d suggest sticking to the “Stable” release.
9. In the next step, choose “Yes” as you want to install Google Play Store on Windows 11.
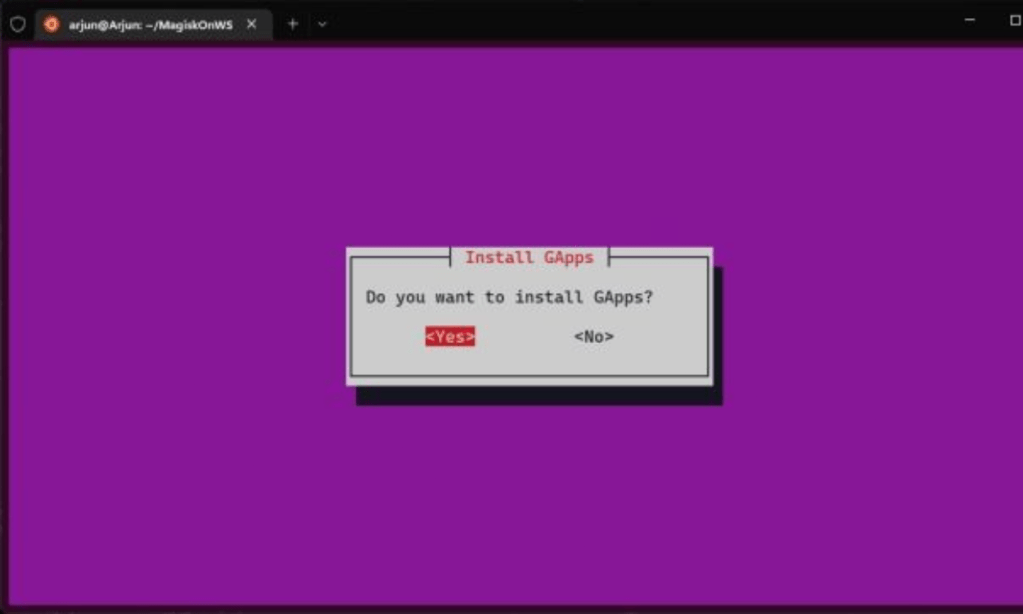
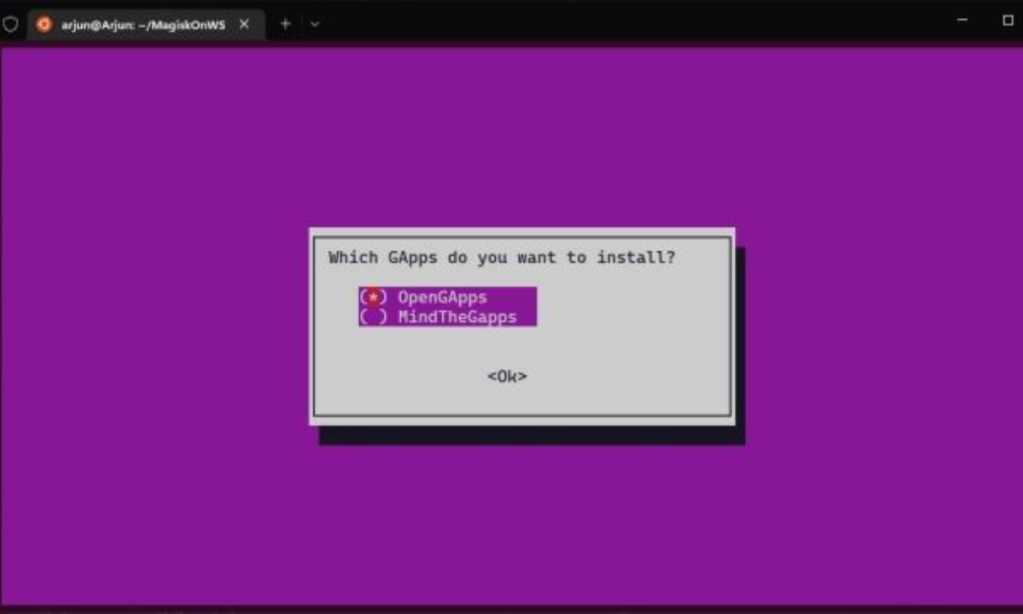
10. Select “OpenGApps” as it’s one of the oldest, widely-known projects.
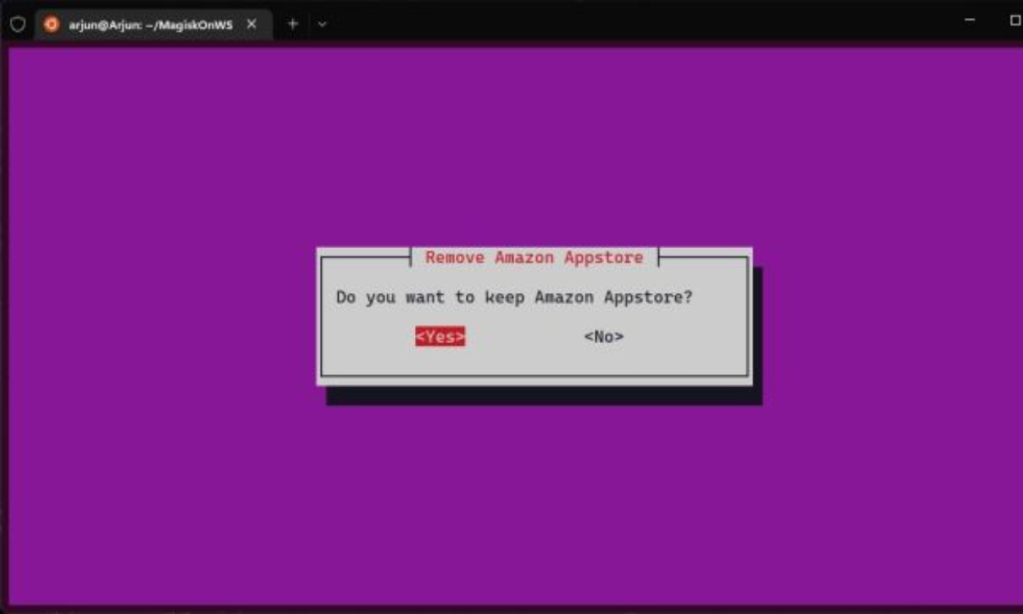
11. On the next screen choose whether you want to keep the Amazon Appstore.
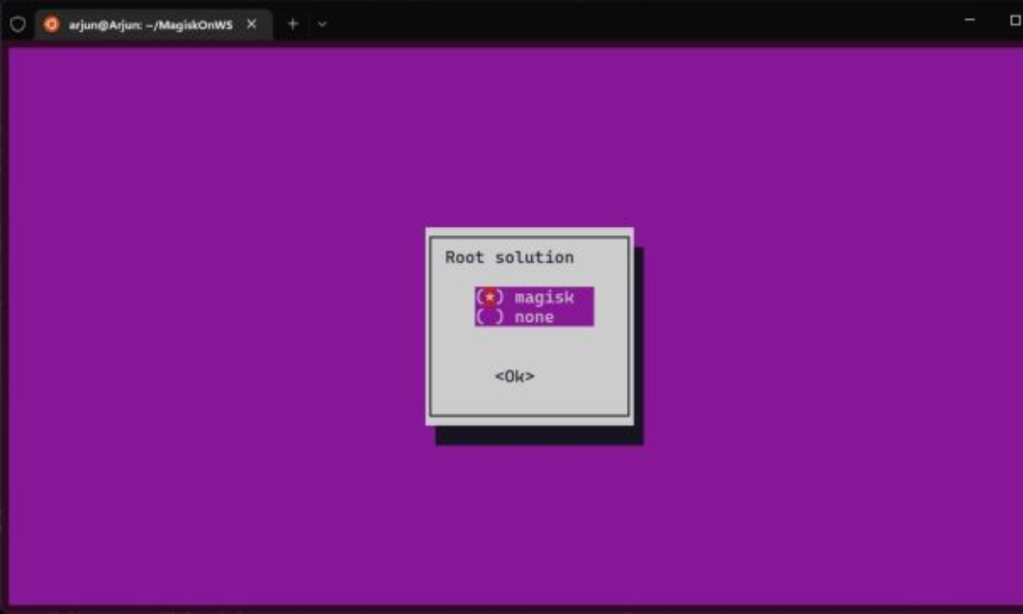
12. You can then select if you want to root WSA with Magisk. If you don’t want to, choose “none”.
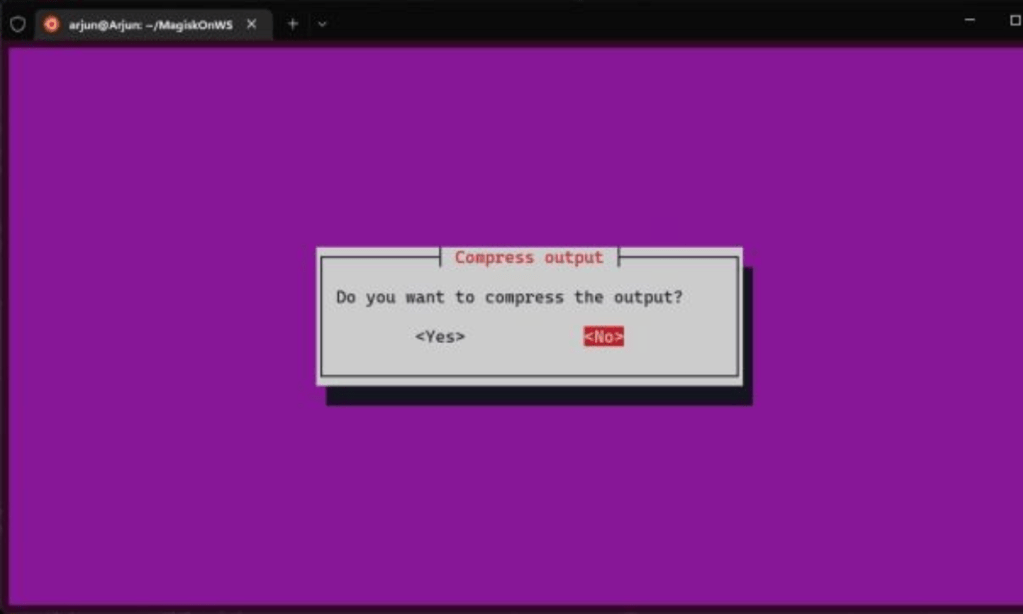
13. Select “No” when asked if you want to compress the output.
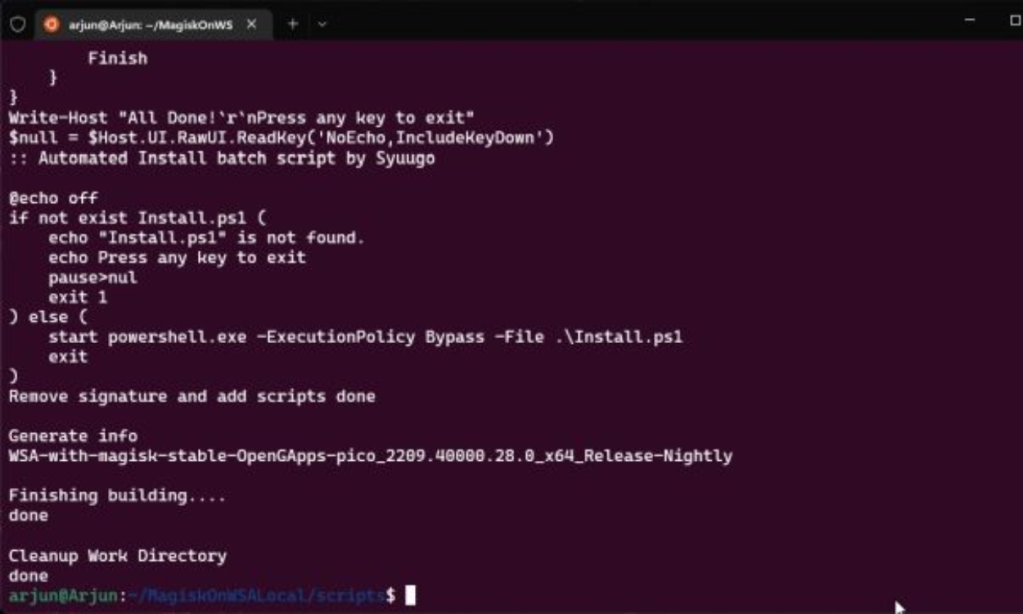
14. Finally, WSA will start downloading. This will take anywhere from 10-15 minutes so sit back and relax.
15. Once done, you will see something like this in the Terminal. It’s time to advance to the next step, i.e., to manage the files and bring up the Google Play Store.
Managing Windows Subsystem for Android Files
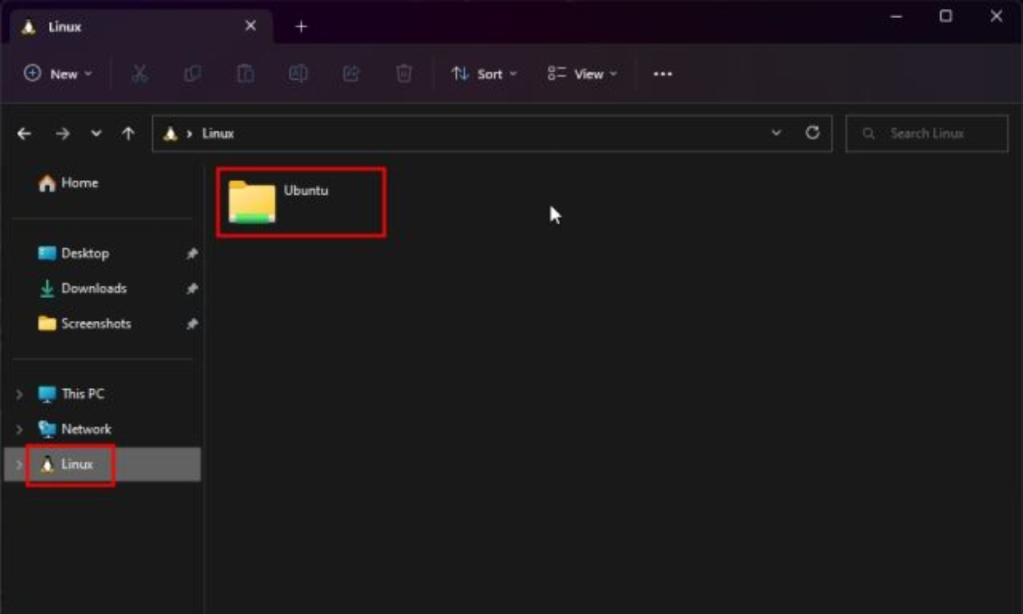
1. Open File Explorer and move to the “Linux” directory from the left pane. You should see a folder with the name of the distribution you’ve installed, which in our case is Ubuntu.
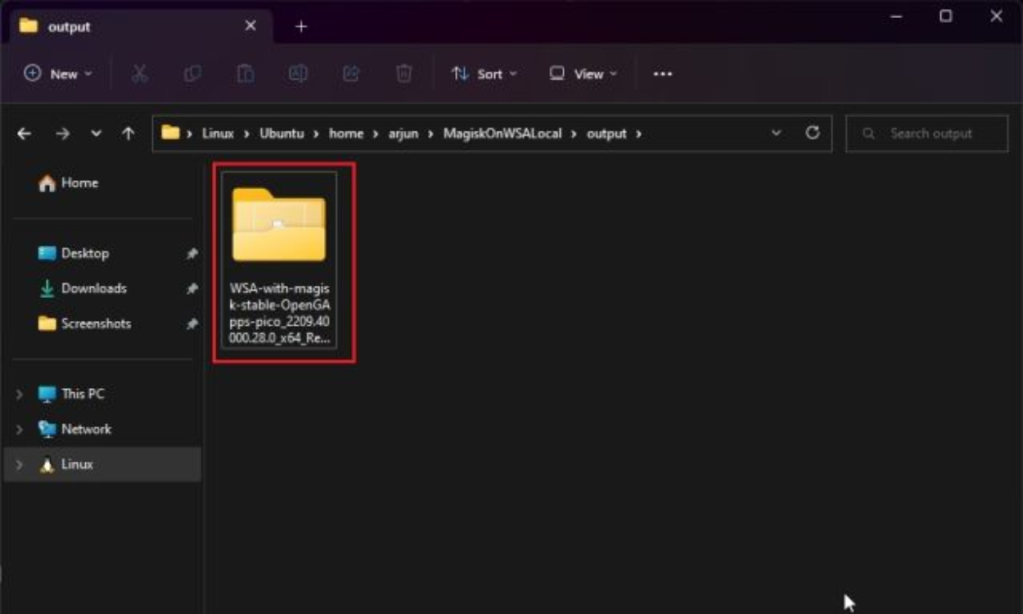
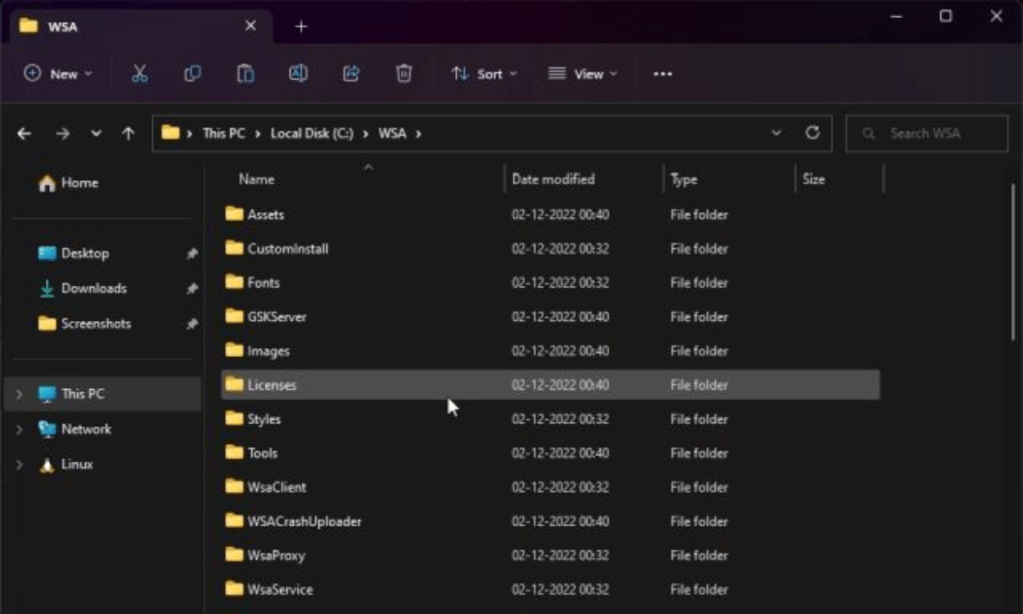
2. Navigate to home -> [Ubuntu username] folder -> MagiskOnWSALocal -> output. Find a folder that starts with the name WSA and double-click to open it.
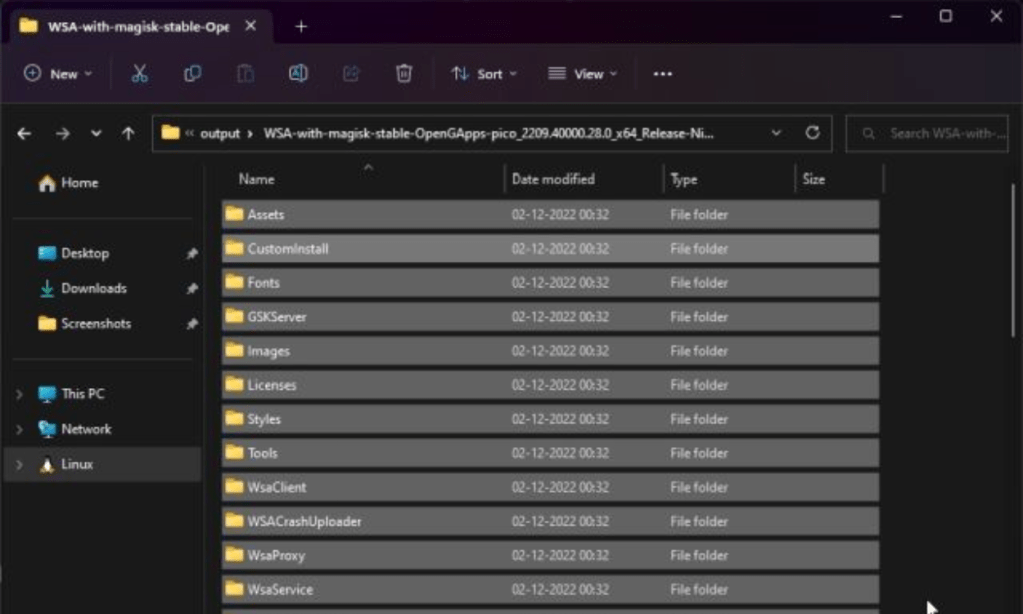
3. Copy the contents of the folder.
4. Open the C drive on your Windows 11 PC and create a folder named “WSA.”
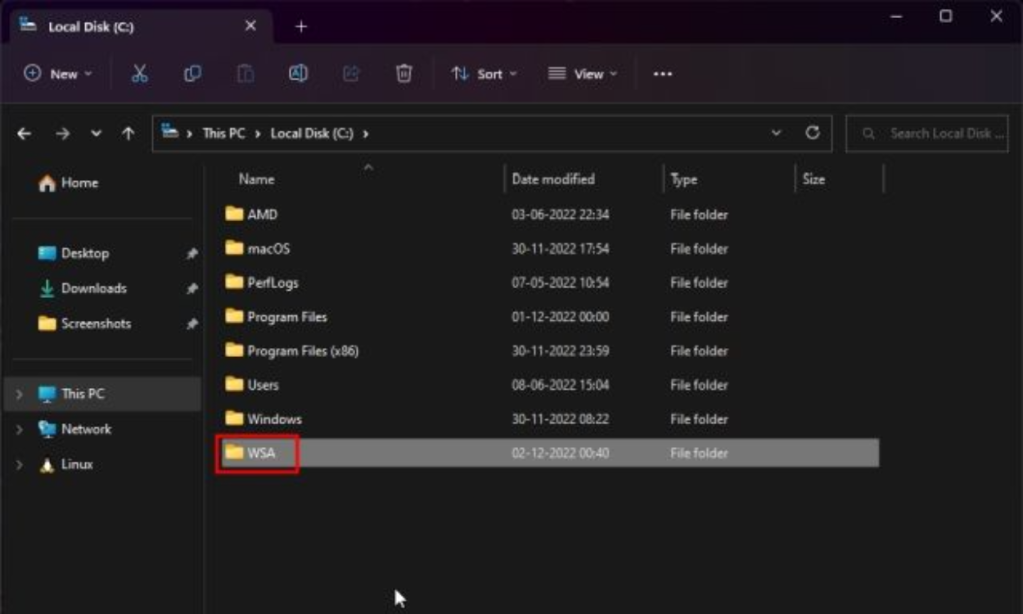
5. Paste the copied content inside the “WSA” folder.
Installing Google Play Store on Windows 11
Pat your back because you’ve come a long way. It’s time to install Google Play Store on Windows 11.
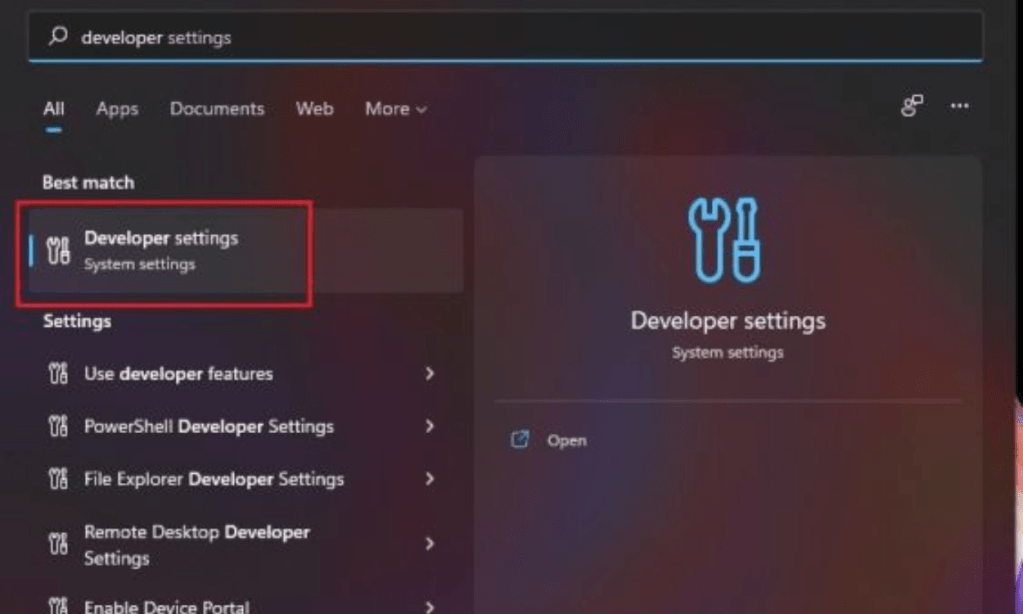
1. Go to Start and search “developer” without quotes. Click the first search option.
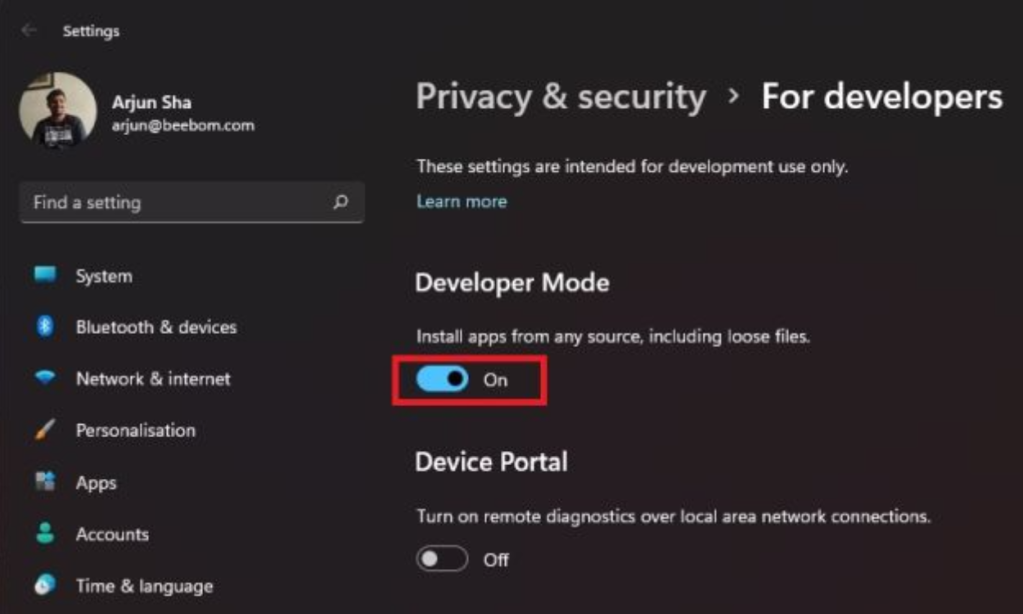
2. Turn on the “Install apps from any source, including loose files” toggle under the Developer Mode section. Choose “Yes” if prompted.
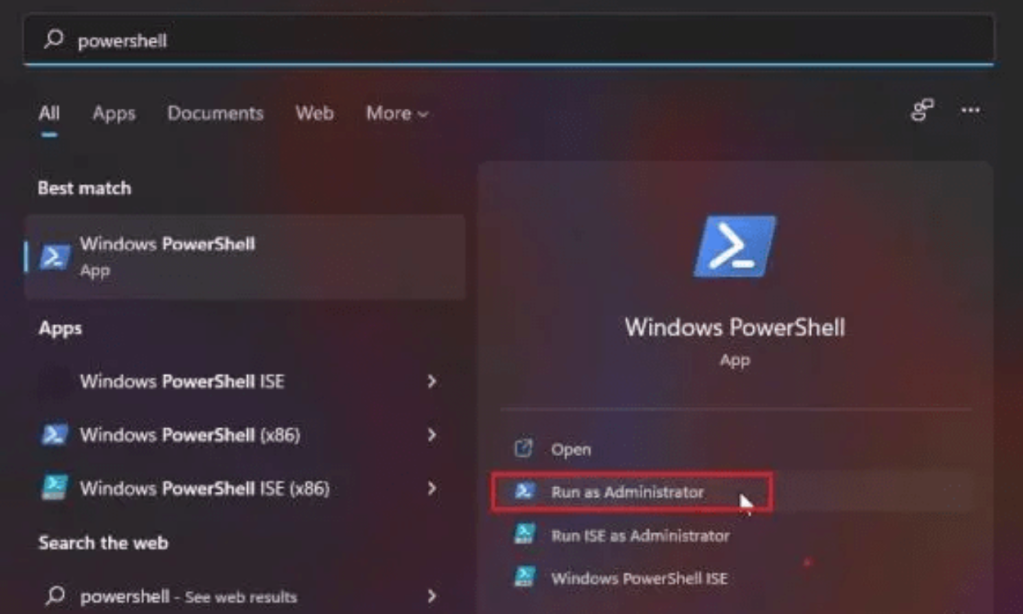
3. Open Start and search for “Powershell“. Click “Run as Administrator” in the right pane.
4. To move to the WSA folder, execute the following command in PowerShell
cd C:\WSA
5. Once inside the folder, run the following command. This should start installing the modified WSA image with Google Play Store support on Windows 11.
PowerShell.exe -ExecutionPolicy Bypass -File .\Install.ps1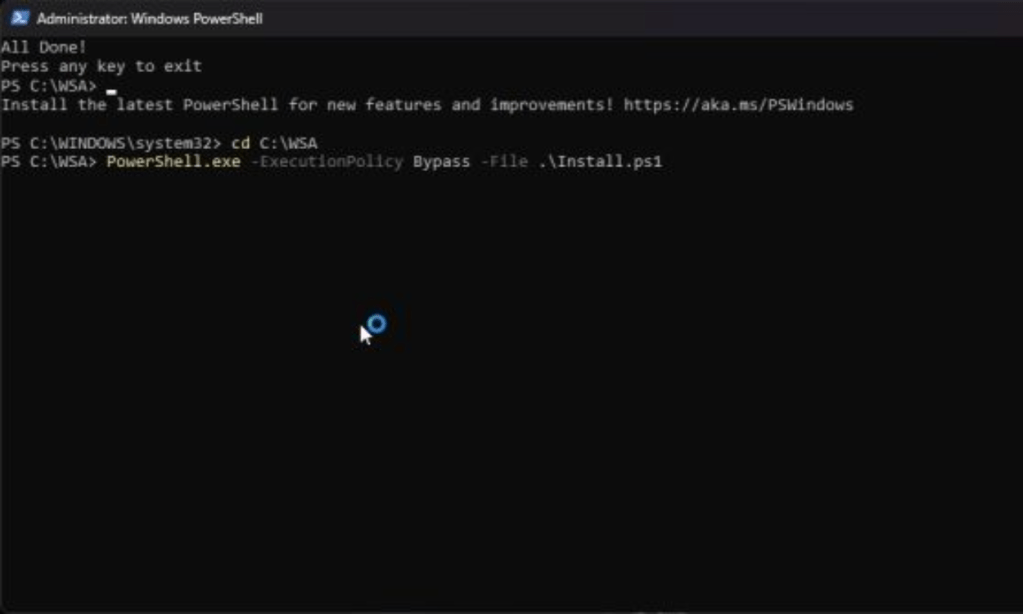
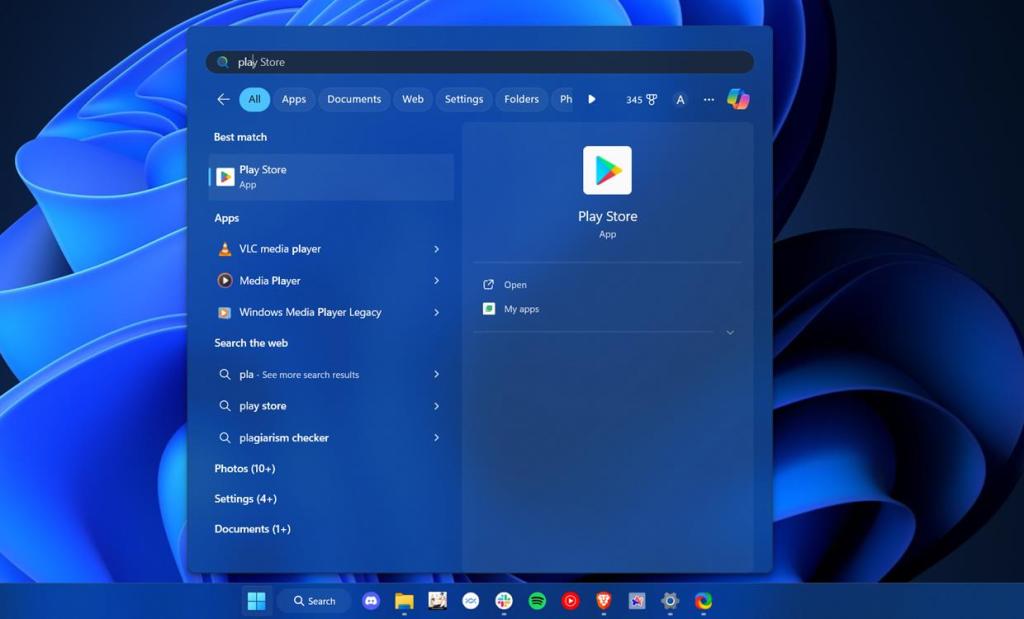
6. Once done, open Start and you should find a “Play Store” icon. If it does not appear, search for “play store,”and you may find it.

7. Launch the Play Store app on Windows 11, and it should work without issues. We suggest you signing in with a secondary Google account to be on the safer side.
And that’s how you can install Google Play Services and other Google frameworks with WSA in Windows 11. We comprehensively tested out both the methods by installing apps and testing Google services, and everything worked flawlessly. However, if you encounter issues do let us know in the comment section below.

