Google’s Pixel 6 series is certainly something to behold. With a powerful arsenal of specs coupled with the Google Tensor chip, this flagship line is getting a lot of love from users. However, there is more than just simple hardware that captivates Pixel 6 users, and that’s the amazing new Android 12 software features. One of the hallmark features of the Google Pixel 6 is the new Magic Eraser tool introduced in the Google Photos app. The Magic Eraser tool is amazing and allows you to remove people, objects, and distractions from photos. However, did you know you can use this tool on phones other than the Pixel 6? Yes, we have found a handy way for other Pixel users to take advantage of this feature. Keep reading to find out how to get Google’s Magic Eraser feature on your Pixel device.
Get Google’s Magic Eraser on Your Pixel Device
While we will cover how to get this amazing tool on your Pixel phone, we will also talk about what exactly is Google’s Magic Eraser tool. If you already know that part and want to skip ahead, use the table below.
What Is Google’s Magic Eraser Tool?
If you are someone who takes photographs on the regular, we are sure you are no stranger to photobombing. Sometimes you just can’t help when people or even objects get in the way of a good photo. Google Photos’ Magic Eraser is the solution to that exact problem. Aimed as an addition to the Pixel’s 6 photo editing capabilities, the Magic Eraser is a powerful tool.
This handy feature removes any people or objects that you might not want in the frame. For instance – A person standing behind you in a photograph can be removed by simply selecting them using the tool. You can see how this feature works in the GIF attached below:

Google’s Magic Eraser tool automatically identifies and suggests possible distractions in a photo. It then offers you the choice to remove all these distractions or selectively pick among them. For those inclined to take matters into their own hands, the magic eraser has the option to use a brush to select what you might want to remove.
Google’s Magic Eraser tool does all this by incorporating machine learning (ML) into the mix. This intelligent ML algorithm automatically studies an image and replaces the empty space with relevant pixels. This way, your edited image will always feel natural. From what we have seen and tested, the new Magic Eraser feature is an impressive tool that you should try out for yourself. To do that, keep reading to learn how to get it on your Pixel device.
How to Get Google’s Magic Eraser Tool on Your Pixel Device
Since Google is yet to officially roll out the Magic Eraser tool on your device, we will be using the latest Google Photos APK file (version 5.64) that has been going around online. Once installed, the APK file works on any Pixel device (running Android 12) other than the Pixel 6 without any issues. While you can install the APK on first- and second-gen Pixel phones (running Android 11), the feature does not work, and the app crashes while analyzing the image.
Moreover, this method is a workaround, and there’s a chance it might fail to work on your device. There’s also the possibility of Google rolling out a server-side patch to make it available only on the Pixel 6. So go ahead and try it out while it’s still available.
We will be using a Google Pixel 4a to test the Google Photos’ Magic Eraser tool in this tutorial. Once you have your Pixel device ready, go on and download this Google Photos APK from APKMirror and install the official APK Mirror Installer app (Free) from the Google Play Store. Then, follow the steps below.
1. Open the APKMirror Installer app on your Pixel phone.
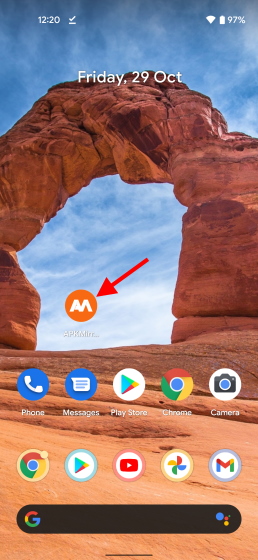
2. Tap the Browse files button to open the directory and allow permissions if asked.

3. The app will then show your Downloads folder. Select the Google Photos APK Bundle we downloaded earlier.
Note: Google has moved away from APKs to AAB (Android App Bundles) by default from August 2021, and we need a third-party app to install these Android app bundles.

4. Then, tap the Install package button to begin. The files will begin to load.
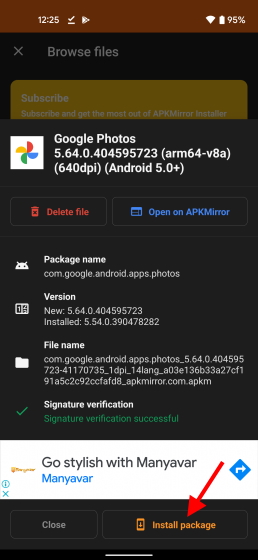
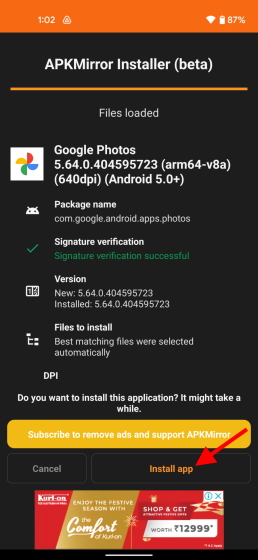
5. Once done, tap the “Install” or “Watch ad and install app” button if you encounter it.
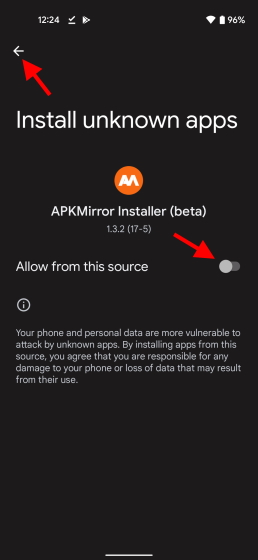
6. Next, tap the “Allow from this source” toggle to grant necessary permissions for APK installation, and go back to the APKMirror Installer.
7. Tap ‘Update‘ to allow the current Google Photos app to be replaced with this latest version on your Pixel device. Let the installation take its course.
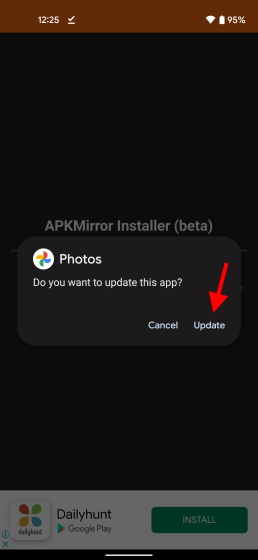
8. Once the installation is complete, tap the “Open app” button to access the new Google Photos app.

And that’s it! You have installed the latest Google Photos app with the new Magic Eraser tool. Now, let’s learn how to go about using it.
How to Use the New Magic Eraser Tool on Pixel Devices
Now that we have installed the APK, we should go ahead and try our hand at the new Magic Eraser tool. While the tool will try its best to remove objects from all types of images, try to pick photos that don’t have distractions too close together. You won’t be satisfied with the results in this case. Anyway, let’s see how it works.
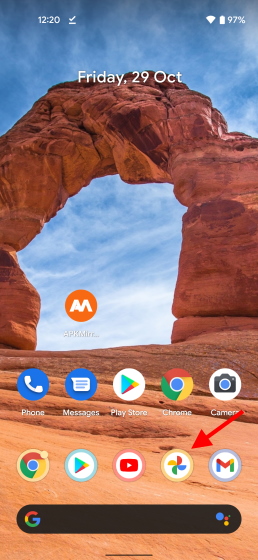
1. Open the Google Photos app on your Pixel device.
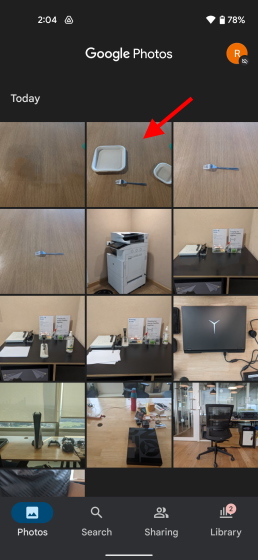
2. From the photos or library section, tap to open a photo you want to use the tool on.
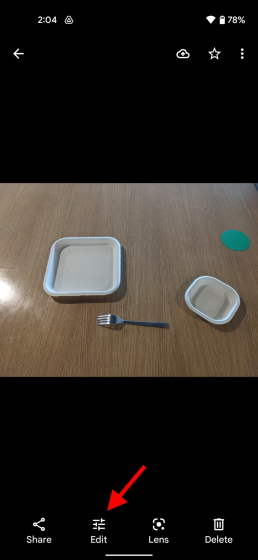
3. Then, tap the “Edit” button at the bottom.
4. Scroll towards the left and select the ‘Tools” menu to see the new Magic Eraser tool.
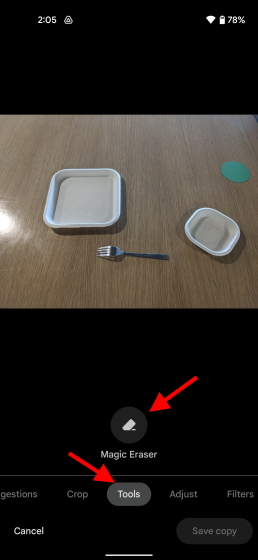
Remove Objects or Distractions from Images Using Magic Eraser Tool
While the tool will try to find suggestions itself, there are times when there may be none detected. In that case, simply do the following:
1. Using your finger, touch and scribble over the object you want to remove until it’s covered in a white layer of color. Alternatively, you can capture the object in a circle.
2. Wait a few seconds for the tool to work its magic. And voila! Your unwanted object will be removed from the image in a few seconds. You can use the Undo and Redo buttons for further manipulation. And if you feel you might have botched it, tap the Reset button to start over.
3. Once you are happy with your edit, tap the “Done” button, and your image will be saved in Google Photos. From there, you can export it any way you wish. And it’s that easy!
If you get confused at any of the steps, watch the video below for help. Now go ahead and make random people disappear in some of your best photos.
Google Photos Magic Eraser Tool: Initial Impressions
My experience with Google’s Magic Eraser tool on Pixel phones other than the Pixel 6 has been a good one. While the tool fails to find any relevant suggestions for me, it does manage to remove the objects I have chosen easily and within seconds. You can check out some of the before and after comparisons right here:


The removal is not spotless, as you can see for yourself. However, remember that the Magic Eraser tool on any device other than the Pixel 6 series is not using the Tensor chip, so the results will naturally be different. But, for social media users looking to reduce clutter from their images, the Magic Eraser tool will do just fine. As for photographers looking to fine tune their pictures, best stick to Photoshop for now.
Erase Unwanted Distractions with Google’s Magic Eraser Tool
We hope you were able to install Google’s new Magic Eraser on your Pixel device using this guide. However, this handy tool is only a part of the experience. The best Android 12 features carry several other amazing additions. And if, by chance, you don’t own a Pixel device, don’t fret. Get these Android 12 features on any Android device and have fun. So how is the magic eraser tool working out for you? Tell us about your experience in the comments below.


