- Stick Drift is a controller malfunction that occurs when physical parts face interference.
- A stick drift causes your in-game character or icon to move even when you're not moving your analog sticks.
- You can fix stick drift on your controller by resetting it, calibrating it with a software or replacing its parts.
If you’re a gamer who likes to play games on a controller, you must’ve experienced a phenomenon called ‘Stick Drift’ once in your life. While it’s a more common issue now, given that most casual gamers resort to consoles, nobody has been able to escape stick drift, whether it’s on PlayStation or Xbox. So if you’re facing stick drift on your PS5 or Xbox controllers while playing GTA 6, here’s how to fix it.
What Is Stick Drift on a Controller?
To put it simply, Stick Drift is a malfunction in your controller’s hardware where an analog stick registers movement even when you’re not touching or moving it in any direction.
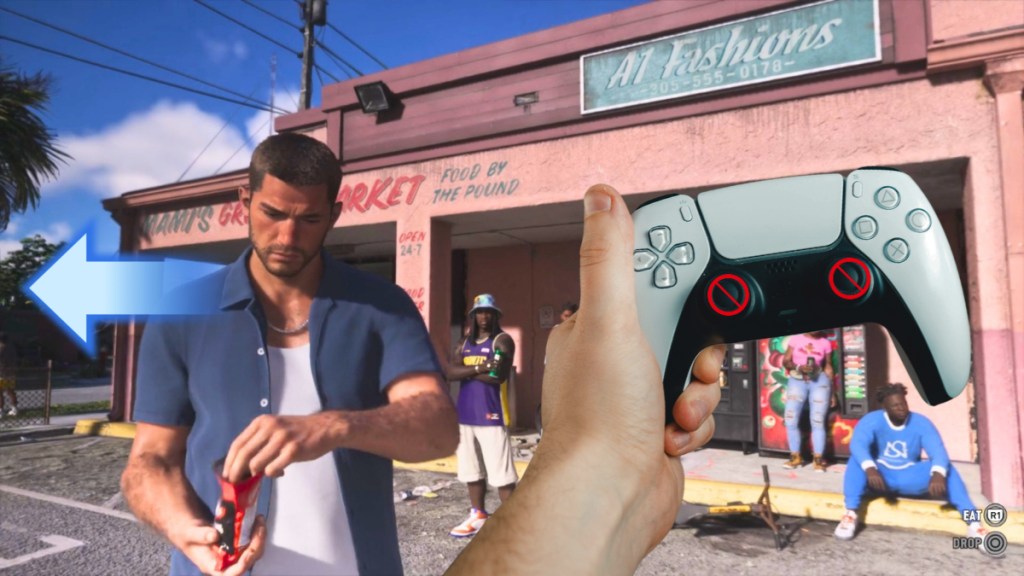
When stick drift occurs in controllers, your character walks in the direction the drift takes them without you needing to touch the controller, your in-game camera moves on its own, and even the menus scroll automatically. Since GTA 6 does not support mouse and keyboard, you’ll have to play it with a controller on your console.
Why Does Stick Drift Happen in Controllers?
Stick Drift occurs due to faulty issues in physical parts on modern gaming controllers called a “Potentiometer.” These are sliding wipers that move across a carbon-film resistive track to measure stick position.
Usually, a potentiometer in a PS5 or Xbox controller can survive for thousands of cycles without wear and tear from friction, but due to excessive dust, hair, or gunk, they get more resistance and interferes with sensor contacts, thus causing stick drift.
In controllers with a spring mechanism, it’s also possible that the spring inside the analog thumbsticks can fail to pull the stick back to its original positions, which may further require replacement.
How to Fix Stick Drift on PS5 and Xbox Controllers Before GTA 6
While there are numerous myths about how to “fix” stick drift on a PS5 or an Xbox controller, we’ve narrowed it down to the three best methods you can actually fix it before you boot up GTA 6 on launch day.
The 360° Rotation Method or Reset Controller
The easiest and most straightforward method any gamer would use to remove stick drift from their controller is the 360-degree rotation technique. This technique basically requires you to rotate both the analog sticks in clockwise and counterclockwise directions repeatedly.
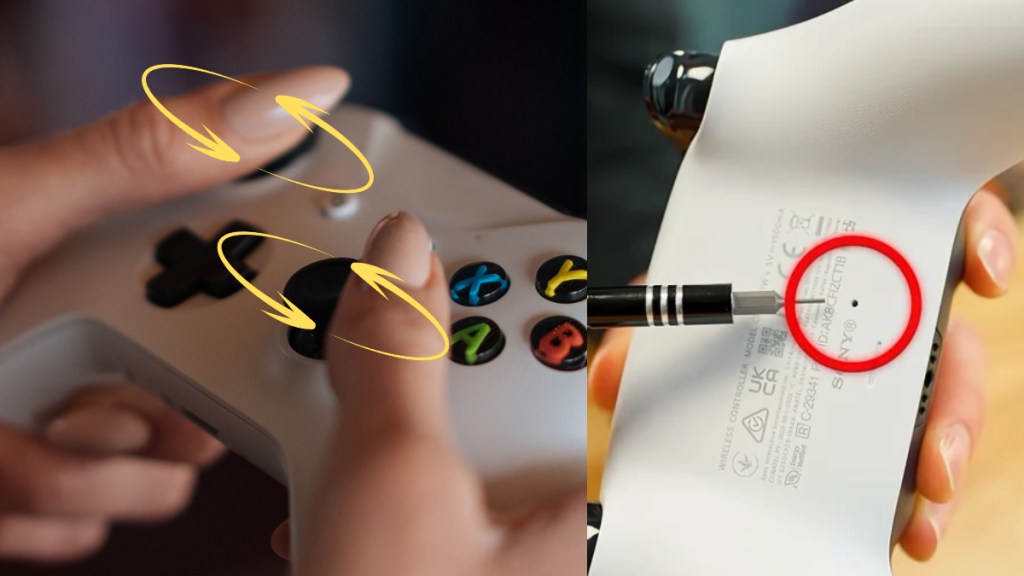
Do that while pressing down on the joysticks so you’re putting pressure on the analog stick’s mechanisms and unjamming any stuck springs due to dirt. Another method is to press the small Reset button, which is the tiny hole located at the back of a PlayStation 5 DualSense controller, like the GTA 6 limited-edition one.
When you press the button by inserting a pin inside the hole, the controller goes into factory reset mode, which means you’ll need to plug it with a cable to your PS5 console and update it and configure it once again. Resetting the controller removes any joystick calibration mapped to your sticks so they return back to their original state.
Using Calibration Software
If the 360-degree rotation technique does not work, you can fix stick drift by recalibrating your controller stick’s dead zone, which is the center of rotation for your thumbsticks. To do so, we recommend using a website called DualShock Tools, which configures a controller connected to your PC or laptop and recalibrates its stick center and stick range.
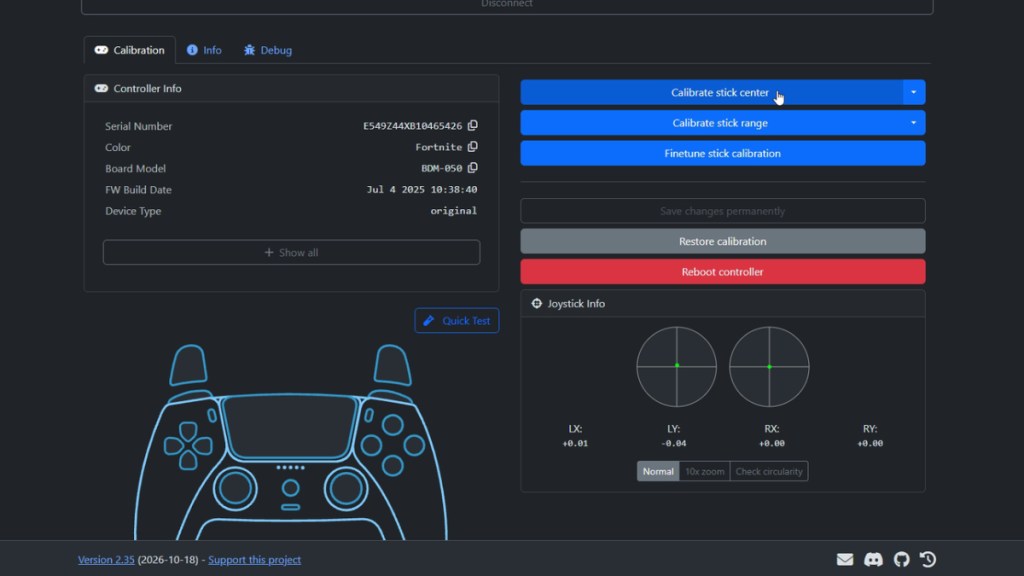
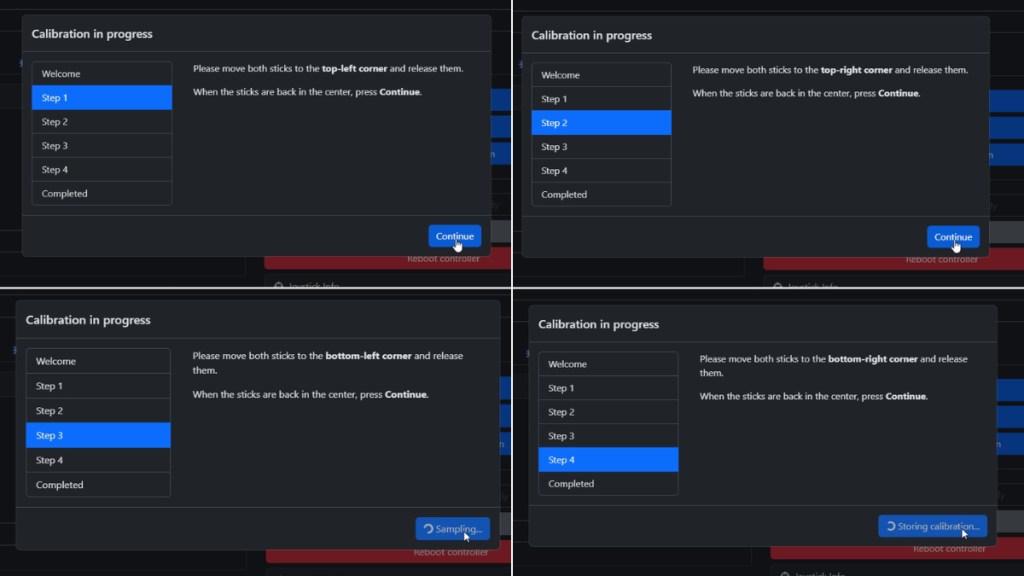
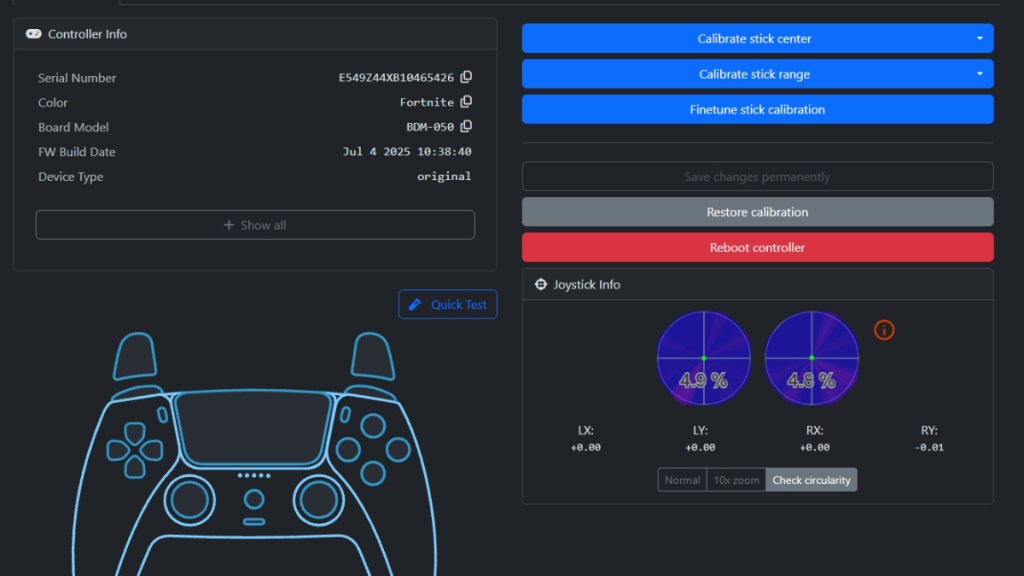
Launch the DualShock Tools website and connect your PS5 controller via USB to your PC. Once you’re connected, click on the Calibrate Stick Center button, and the tool will ask you to move both your analog sticks around four corners. Follow the instructions on screen, and your stick center will be calibrated.
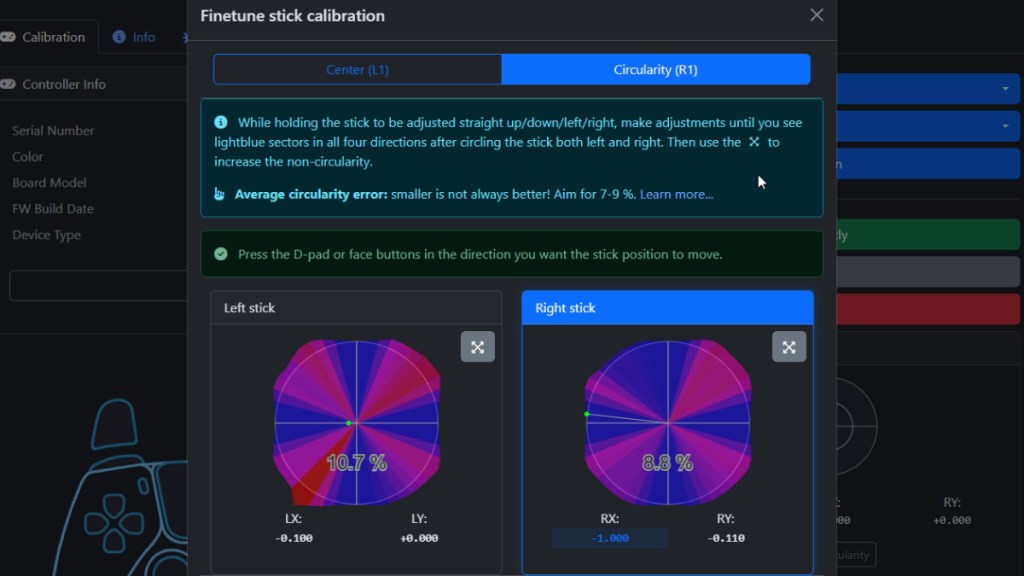
Next, click on Fine-tune Stick Calibration and go to Circularity, where you’ll see the error rate of your stick’s circular movement and notice how much drift your controller currently has. Follow the calibration process, and once you’re done, your stick drift will be fixed by reducing that error rate by up to 50%.
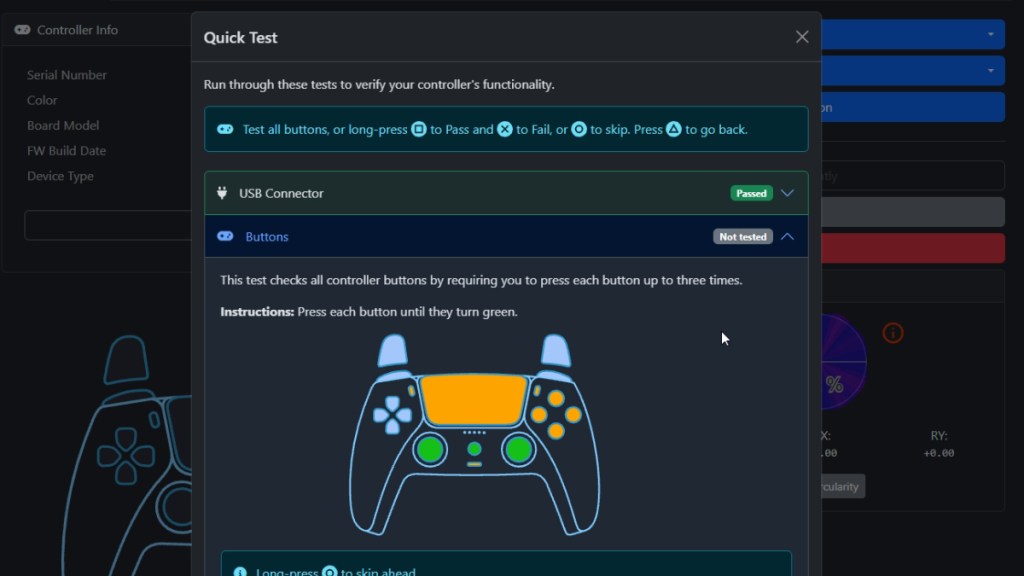
You can also use the Quick Setup option from the website to test all the buttons, triggers, vibration, sound, and haptic feedback of your DualSense controller.
Cleaning or Replacing Controller Parts
Lastly, if all else fails, try cleaning the inside of the controller by removing the panels with a screwdriver and using a cotton swab with acetone to wipe away the dirt from your analog sticks to fix stick drift. However, if that also does not work, it’s best to take it to a repair shop or an authorized service center for your controller’s brand.
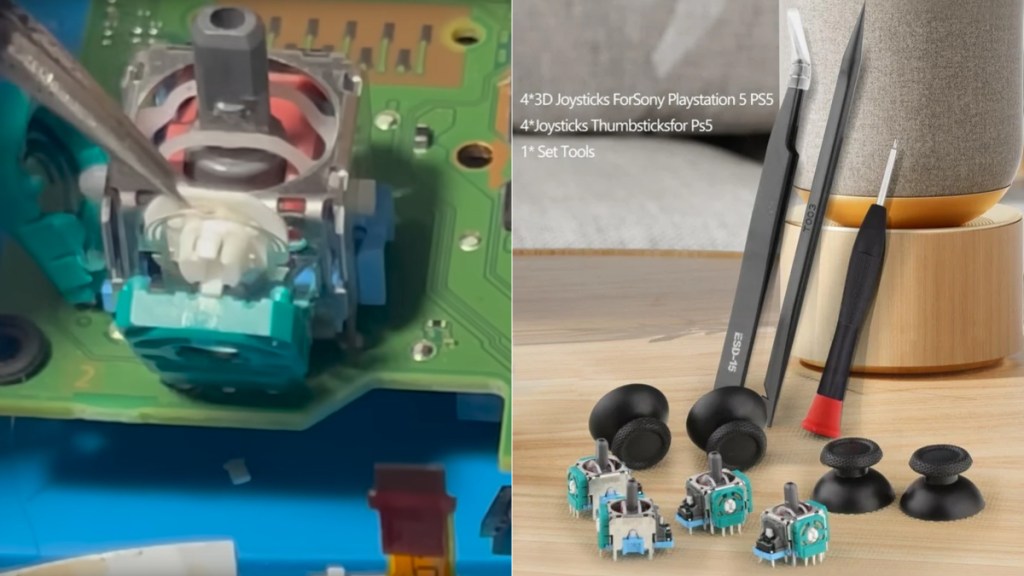
You can also self-service the controller by ordering replacement analog sticks and motors from Amazon (for around $20) and watch videos online to fix your controller drift.
That’s everything you need to know about how to fix stick drift on PS5 and Xbox controllers. Still facing issues after trying the above methods? Let us know in the comments below, and we’ll help.