There could be many reasons why you’d want to record audio on your iPhone and iPad. Whether you’re simply trying to record a lecture, or singing a song to send to your friends or loved ones. It could even just be to record a random thought that you want to keep a track of. Whatever your motivation, here is how you can record audio on iPhone and iPad easily.
3 Ways to Record Audio on iPhone and iPad (2022)
Both iOS and iPadOS come with a built-in audio recording app called “Voice Memos” that is more than capable to let you record decent quality audio. With Voice Memo’s folders as well as a handful of editing tools, the app allows you to organise and fine-tune your recordings.
For whatever reason, if Voice Memos doesn’t make the cut for you, there are other notable alternatives. To ensure you have more viable options to choose from, we have also brought some top-notch audio recording apps for iOS into the fray.
Use Voice Memos to Record Audio on iPhone and iPad
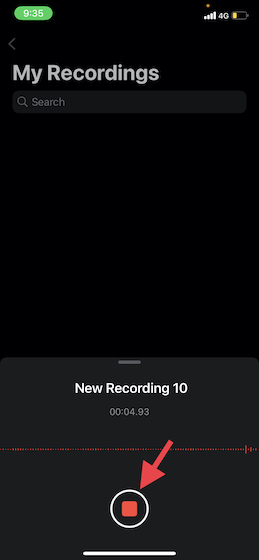
1. Open the Voice Memos app on your iPhone or iPad and then hit the record button to start recording the audio.
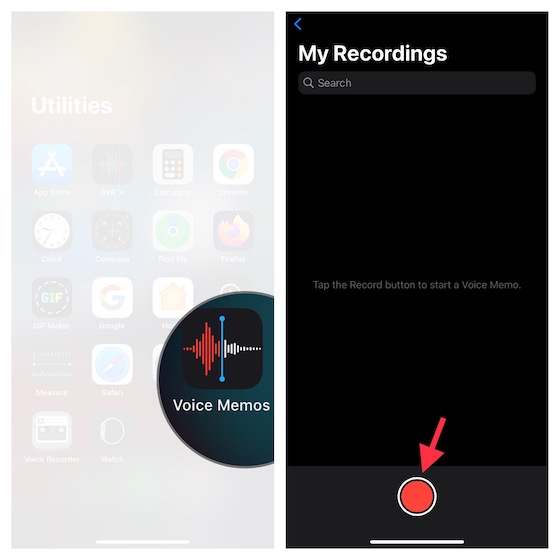
2. Once you have recorded the audio, tap the recording button to stop it. It’s as straightforward as it can ever get.
Note:
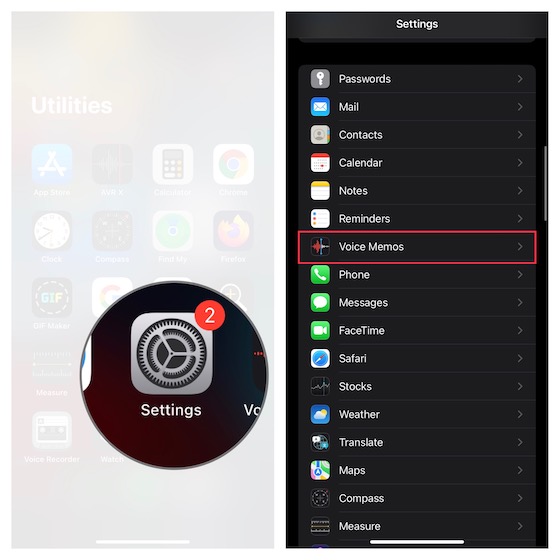
- Though Voice Memos names your audio recording based on your current location, you can choose to disable location-based naming. To do so, head into the Settings app -> Voice Memos -> turn off the toggle for Location-Based Naming. From now onwards, your memos will be named as “Recording 1, 2, 3” etc.
- Do note that all your recordings are available on every device that’s linked with the same Apple ID.
- If you want to enable/disable iCloud syncing for Voice Memos, head over Settings app -> profile -> iCloud -> and then turn off/on the toggle next to Voice Memos depending on your needs.
Use Voice Memos to Record Lossless Audio on iPhone and iPad
By default, the Voice Memos app records audio in a compressed format in order to save space on your iOS device. While this is a pretty neat feature from the storage management feature, it comes at the cost of recording quality. If you don’t mind offering more space to your recordings, I would recommend you switch to a lossless mode for maximum fidelity.
1. Navigate to the Settings app on your iDevice -> Voice Memos.
2. Now, tap Audio Quality and choose Lossless.
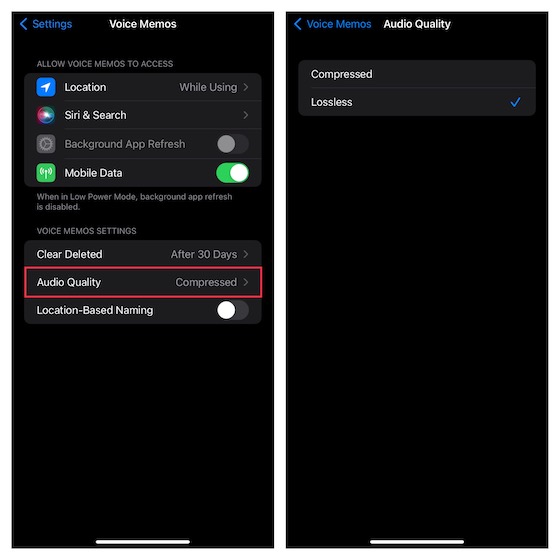
Going forward, the Voice Memos app will let you record lossless audio on your iPhone or iPad.
Note: Remember that recording in lossless quality will take up considerably more space on your iPhone, so only use this if you have plenty of storage to spare.
How to Edit Voice Memos on iPhone and iPad
Let’s also take a look at how you can edit and enhance voice memos on your iPhone and iPad.
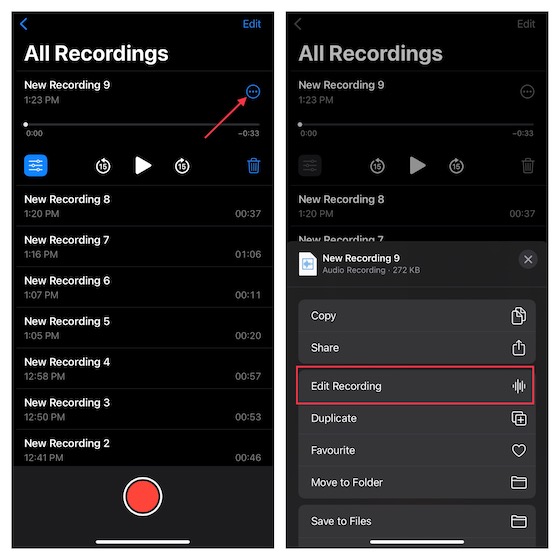
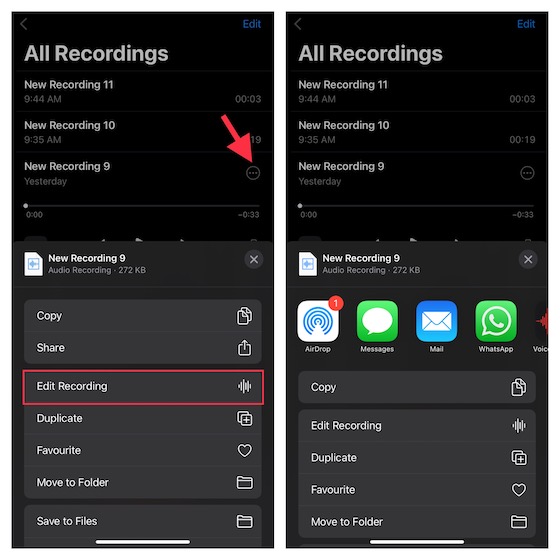
1. Launch Voice Memos app on iPhone or iPad -> head over to the recording you want to edit and select it -> tap the tiny circle right next to the recording and choose Edit Recording in the menu.
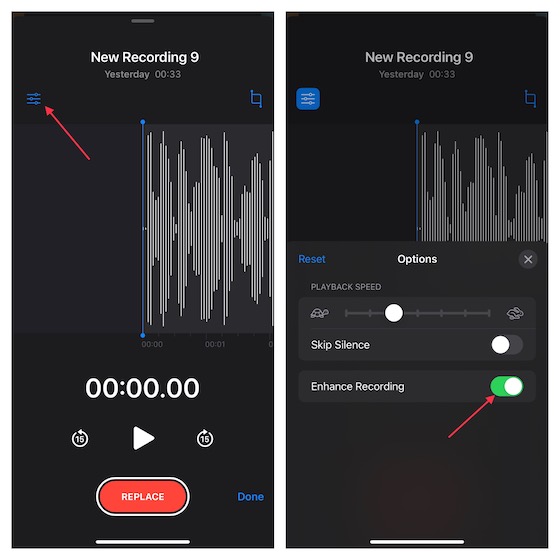
Enhance Your Recording
- If you want to improve the audio quality of your recording, tap on the menu button (three tiny horizontal lines) at the top left and then turn on the toggle for Enhance Recording.
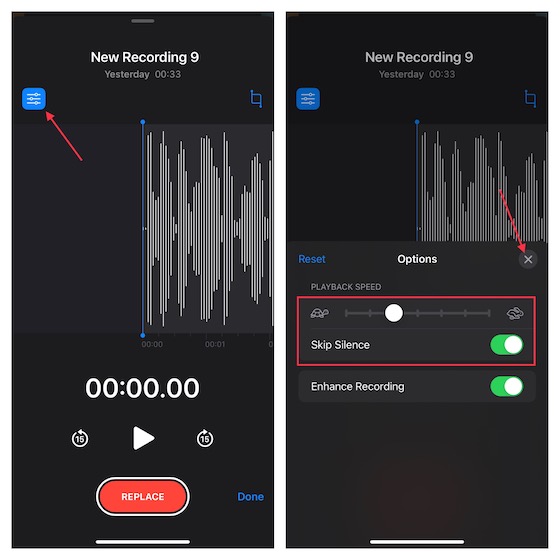
Adjust Playback Speed of Your Audio Recording
- Tap on the menu button at the top left and then drag the playback speed slider to fine-tune the speed of your audio recording. It’s worth pointing out that you also have the option to skip silence. If you want to get rid of silence, make sure that the toggle next to Skip Silence is turned on. When you are pleased with the result, tap the “X” button to hide the editing menu.
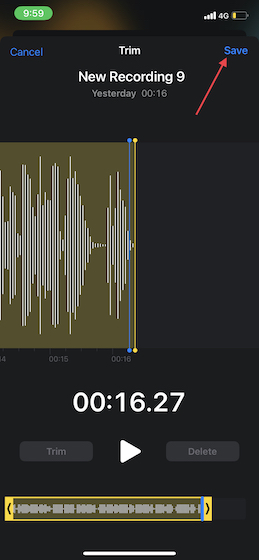
Remove Unwanted Part from Your Recording
- Tap on the crop button and then use the handle to select the portion you want to keep. Then, hit Trim to get rid of the unwanted part.
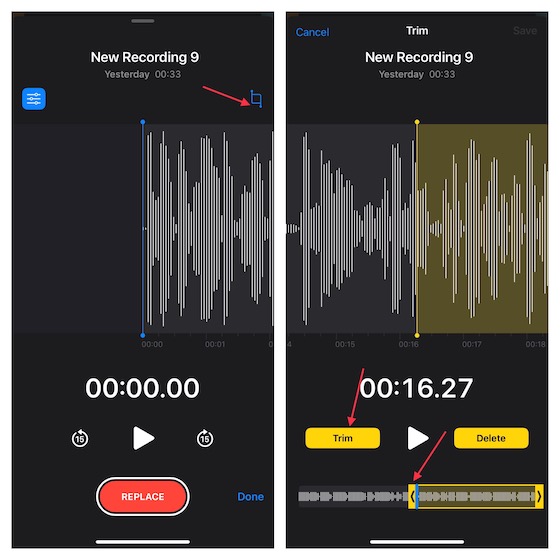
2. In the end, make sure to tap on Save to confirm the changes.
Share Voice Recording from iPhone and iPad
Sharing voice recordings from iPhone and iPad is quite straightforward.
1. Open the Voice Memos app on your iPhone or iPad and head over to the recording that you want to share.
2. Now, select the recording and then tap on the circle with three dots. After that, tap Share in the menu and then choose the preferred medium to share the recording in the share sheet.
Record Audio on iPhone and iPad with Screen Recorder
Times when you may want to guide anyone through a video, the native screen recorder can come in super handy. Apart from letting you record the screen, it also offers the flexibility to record the audio. You can take advantage of this useful tool to create nifty tutorials to share or attach to your presentation.
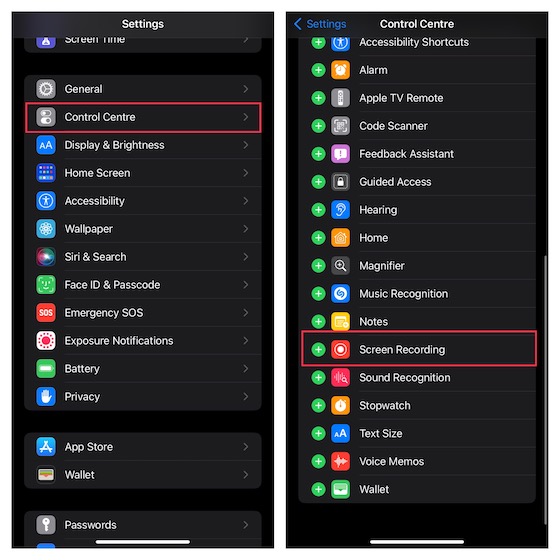
1. Go to the Settings app on your iPhone/iPad -> Control Center. Now, tap the “+” button to the left of the Screen Recording icon to add it to the control center.
2. Now, swipe down from the top right corner of the screen (on iPhone/iPad without home button) or swipe up from the bottom edge of the screen (on iPhone/iPad with home button). After that, touch and hold the screen recording icon and tap the Microphone icon to turn it on. Then, hit Start Recording in the menu.
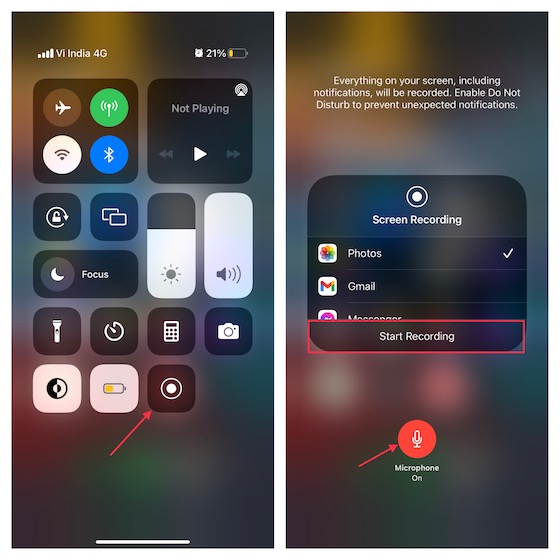
3. Once you have recorded the screen, tap the red button at the top left corner of the screen and hit Stop in the popup menu to confirm.
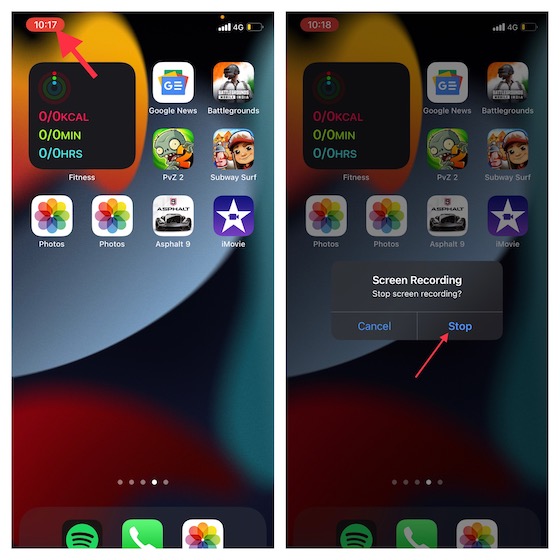
Your screen recording will be saved in the Photos app.
Best Third-Party Audio Recorders for iPhone and iPad
If you need more capable audio recording apps for your iOS device, we’ve got you covered with the three best alternatives. These apps are easy-to-use and come with efficient editing tools to let you improve the audio quality. Moreover, they also allow you to manage your recordings and share them with ease.
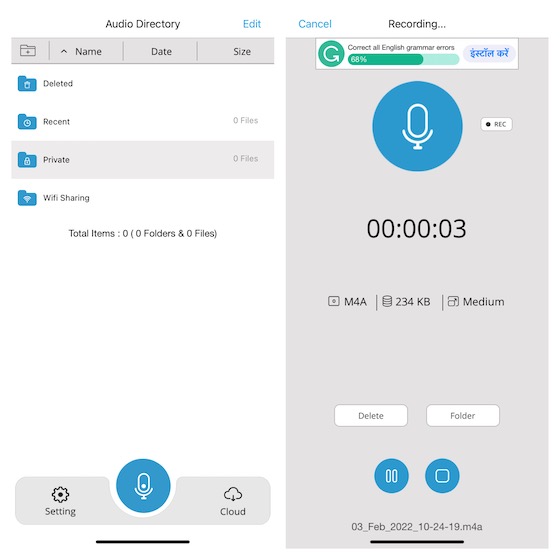
1. Audio Recorder HD & Voice Memos
If you are looking for an audio recorder that can let you record audio in several formats including WAV, M4A, AAC, MP4, CAF, and MP3, this one could be worth checking out. The app features an intuitive interface and allows you to record audio in three different qualities such as low, medium, and high. What’s more, it’s integrated with many cloud services like Box, Dropbox, Google Drive, and more to let you import and export audio to your preferred cloud service with ease.
Install: (free, full-version is available for $5)
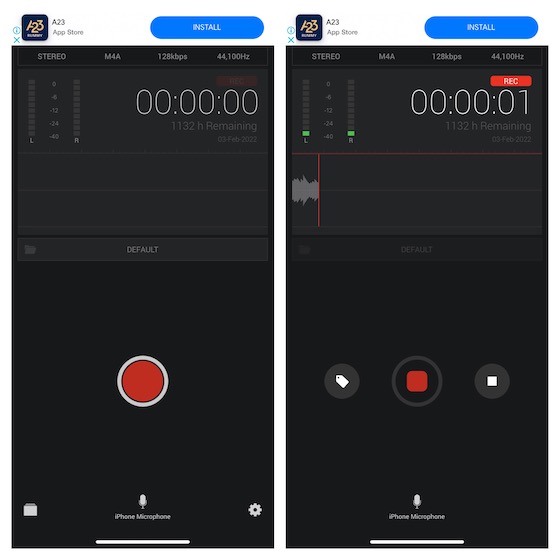
2. AVR X – Voice Recorder
AVR X is a pro-grade audio recording app that you can use to record audio in multiple formats such as MP3, WAV, and M4A. Moreover, it also supports various audio quality options and comes with a bunch of proficient audio editing tools to let you enhance your audio. Combine that with user-friendly features like folder management, audio visualization as well as smooth file-sharing functionality and AVR X seems to be very hard to beat. In a nutshell, it’s one of the best free audio recording apps for iPhone and iPad.
Install: (free)
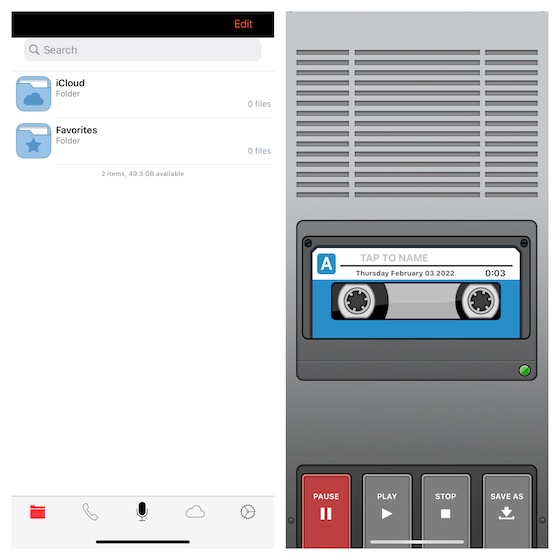
3. Voice Recorder & Audio Recorder
Last but not least, “Voice Recorder & Audio Recorder” is up to the mark for high-quality audio recording. With all the essential editing tools, The app also lets you edit your audio so that it can sound better. The integration with several cloud services such as iCloud Drive, Google Drive, and OneDrive allows you to securely back up your recordings and keep them accessible across devices. Once you have enhanced your recording, you can share it through email, WhatsApp, Facebook, Twitter, and Snapchat. On top of all, it also allows you to transcribe recordings using text-to-speech technology and record calls (requires in-app purchases)
Install: (free, TapMediaPro is available for $2/month)
Multiple Ways to Record Audio on iPhone and iPad
That’s all there is to it! I hope you have found the right audio recorder for your iOS/iPadOS device. As I said above, the stock audio recording app is very capable to live up to the task. However, if you need to record audio in multiple formats and want to edit it with better control, the above-mentioned third-party apps can do the job for you. By the way, do you have any questions to ask or feedback to share? If yes, send it across via the comments section below.