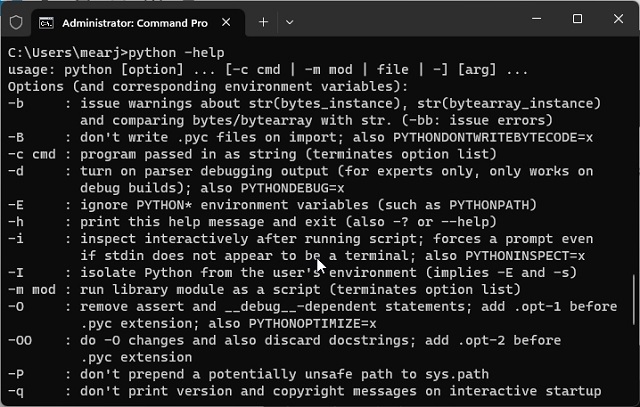
Recently, we wrote a detailed tutorial on how to build your own AI chatbot with ChatGPT API. And for that project, we used Python and Pip to run several essential libraries. So if you are also getting started with Python for a project, make sure to install Pip on your Windows PC. You will be able to download many of the dependencies and libraries in a few seconds. On that note, let’s go ahead and learn how to install Pip on Windows 11 and 10.
What is Pip?

Pip is the package manager for Python. In simple terms, it basically allows you to install and manage millions of Python packages and libraries from the command line. It connects to the Python Package Index (PyPI) repository where you can find thousands of projects, apps, software development kits, clients, and more. If you are developing a project, and if you need some dependencies which are not part of the standard Python distribution, Pip can add them for you effortlessly. Simply put, Pip is an integral part of Python and to get started, you must install both of them.
Check If Pip Is Already Installed on Windows
If you have installed Python, you may already have Pip installed on your system. So before you move to the installation steps, let’s check if Pip is already installed on Windows or not.
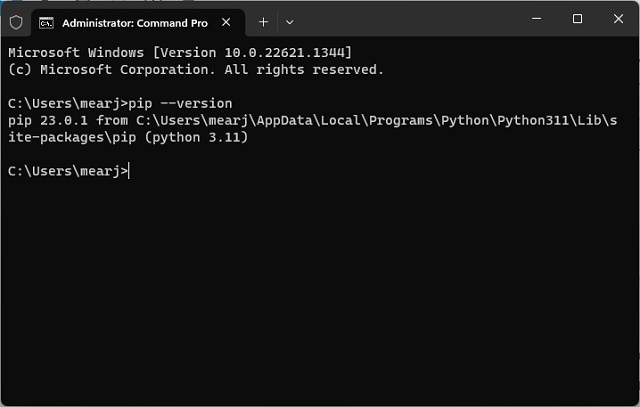
1. Open Command Prompt or Windows Terminal. After that, run the below command. If you get the Pip version as the output, it means Pip is already installed on your PC. You can scroll down and learn how to upgrade Pip to the latest version on Windows.
pip --version
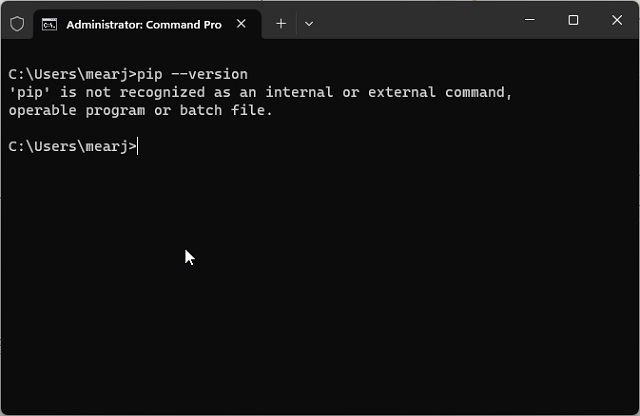
2. In case, you get errors like “Command not found” or “‘Pip’ is not recognized as an internal or external command, operable program or batch file.”, it means that Pip is not properly installed on your PC. Follow the below steps to install Pip and configure its path as well.
How to Install Pip on Windows PCs
Install Pip with Python
To install Pip on Windows, you need to install Python only. When you install Python using the desktop setup file, Pip is also sideloaded on Windows. Here is how you can set up Pip on Windows.
1. First and foremost, move to this link and download the latest version of Python for Windows.
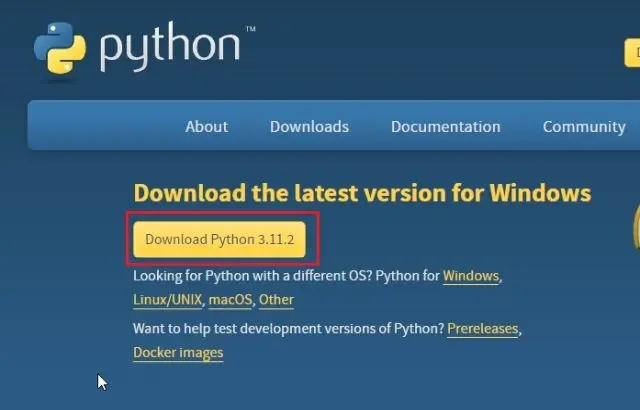
2. After that, double-click on the setup file. Once the installer appears, make sure to enable the checkbox next to “Add Python.exe to PATH“.
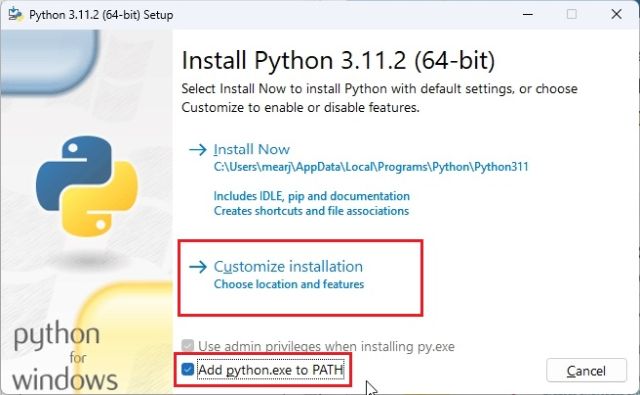
2. After that, click on “Customize installation” and make sure “pip” is enabled along with other options. Click on “Next” and then “Install”.
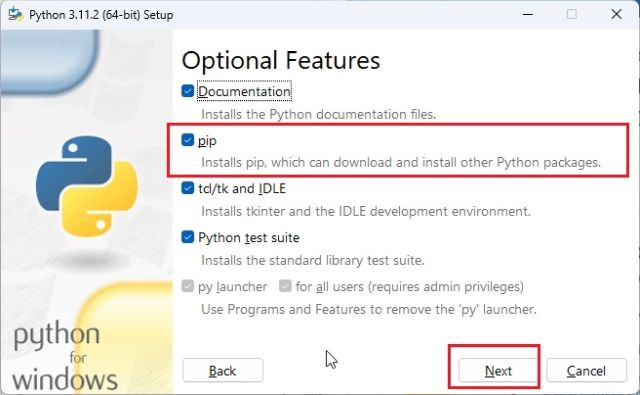
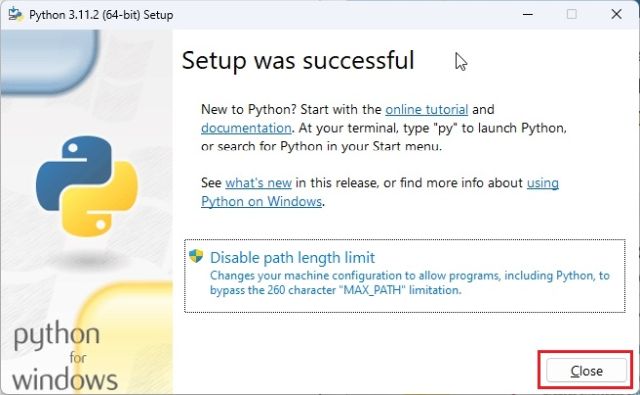
3. Now, Python along with Pip, both will get installed on your Windows PC.
Install Pip via Command Line
You can also manually install Pip on Windows from the command line either using CMD or Windows Terminal. Follow the steps below.
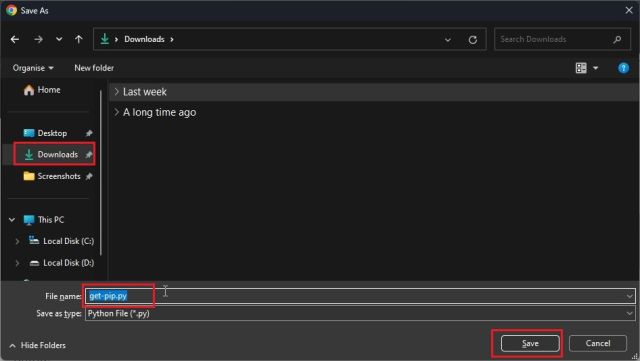
1. Right-click on this link and then choose “Save link as…”.
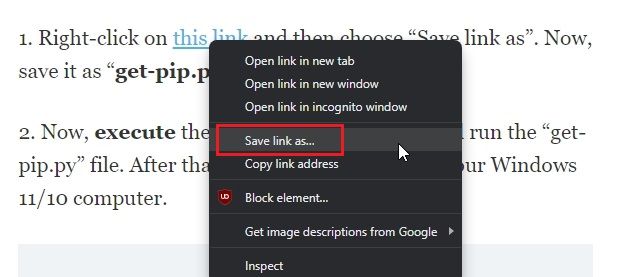
2. Now, save it as “get-pip.py” file in the “Downloads” folder.
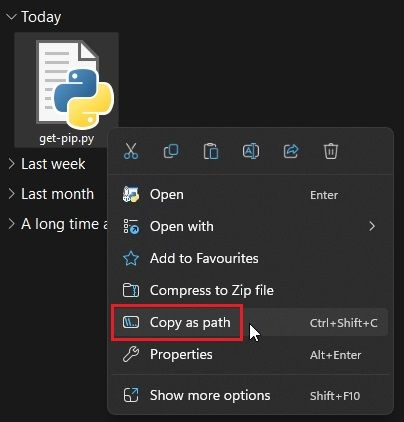
3. Next, right-click on the “get-pip.py” file and choose “Copy as path”.
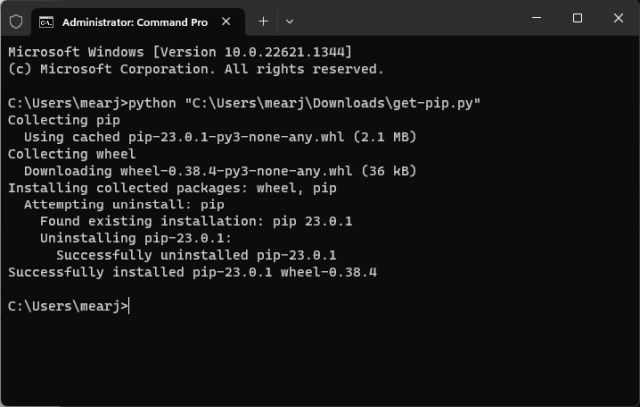
4. Finally, open the Terminal and execute it in the below fashion. Enter python, add a space, and then paste the path. After that, hit Enter and Pip will be installed on your Windows 11/10 computer.
python "C:\Users\mearj\Downloads\get-pip.py"
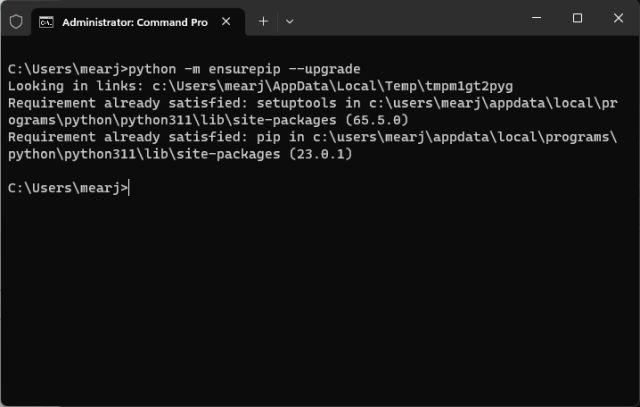
5. Apart from that, you can also run this command to download and install Pip on a Windows PC using the “ensurepip” module.
python -m ensurepip --upgrade
Verify Pip Installation
1. To check if everything went right, open Windows Terminal or Command Prompt and run the below commands. If the installation was successful, the first command will display the Python version, and the second command will show the Pip version currently installed on your PC.
python --version
pip --version
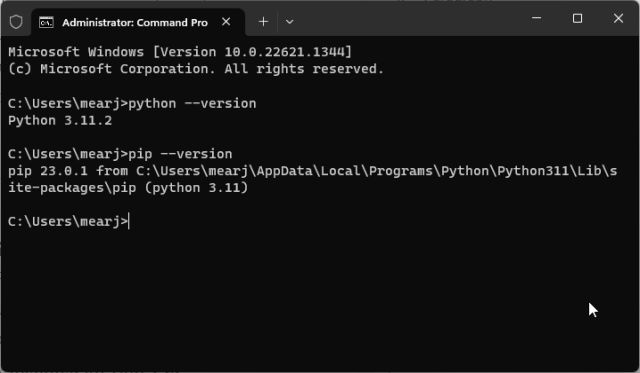
2. You can also type the below command to find all the commands pip takes as an argument. If it returns a long list of command options, you are good to go.
python --help
pip --help
Upgrade or Downgrade Pip on Windows
1. After installation, run the below command in the Terminal to upgrade Pip to the latest version on Windows. Here’s what the syntax looks like:
python -m pip install -U pip
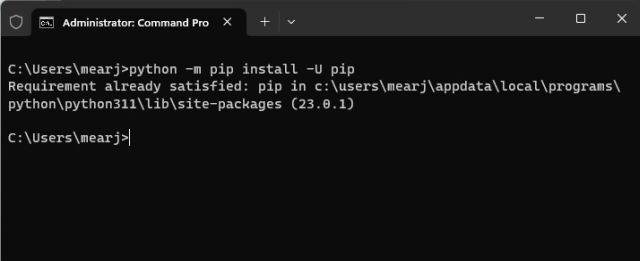
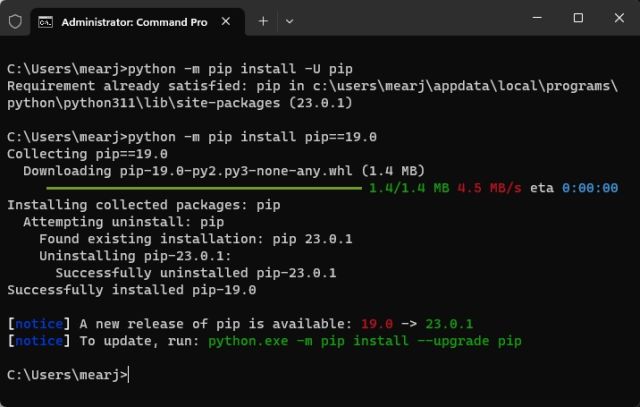
2. In case you want to downgrade Pip to a specific version, run the below command:
python -m pip install pip==19.0
How to Add Python and Pip to PATH on Windows 11 and 10
After installing and running the Python or Pip command on Windows if you get errors such as “Pip is not recognized as an internal or external command,” or “Python is not recognized as an internal or external command,” or simply “Python not found”, do not worry. It means that Python or Pip may have been installed on your Windows PC, but their paths have not been configured correctly. We need to add their directories as a global Windows environment variable. Here is how to do it.
1. First of all, press “Windows + R” to open the Run prompt and paste the below path, and hit Enter.
%localappdata%\Programs\Python
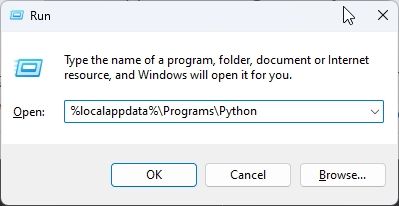
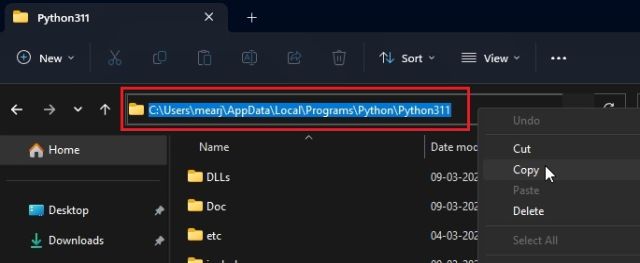
2. After that, open another “Python3XX” folder. Now, copy the whole path from the address bar. This is Python’s path you need to add as an environment variable.
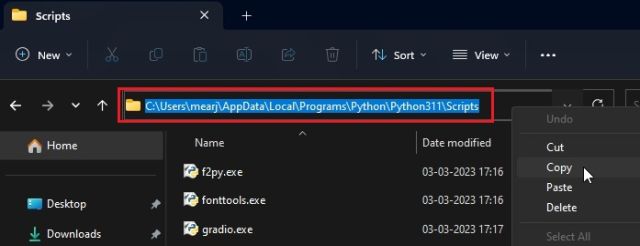
3. Next, move to the “Scripts” folder and click on the “Address bar”. Now, copy the whole path again. This is Pip’s path you need to add as an environment variable.
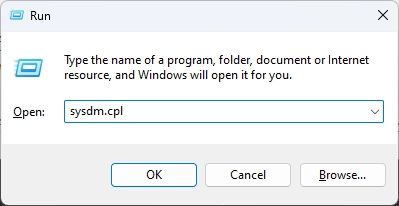
4. After you get paths for both Python and Pip, open the Run prompt again by pressing “Windows + R”. Here, type sysdm.cpl and hit Enter. This will directly open the Advanced System Settings.
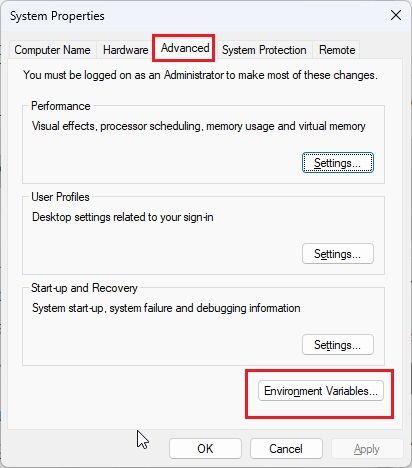
5. Move to the “Advanced” tab, and click on “Environment Variables” at the bottom.
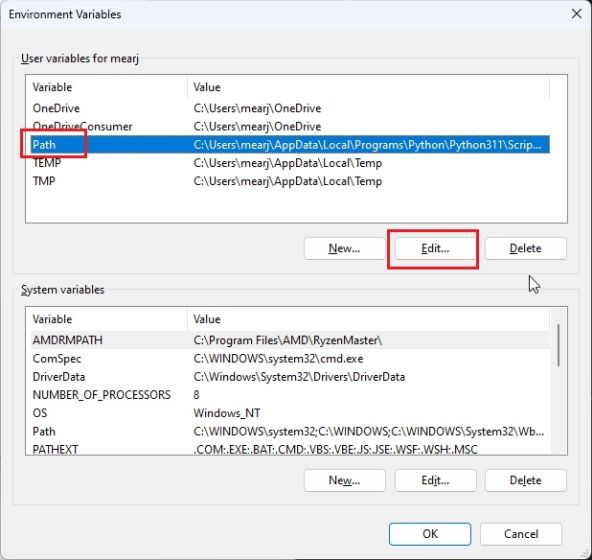
6. Next, under the “User variables for …” section, select “Path” and click on the “Edit…” button.
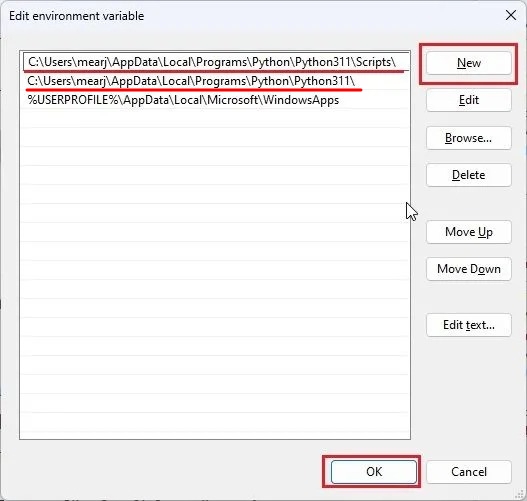
7. Here, click on “New” and add both the paths you copied above on the left side. Now, click on “OK”. Keep in mind, the paths will be different for each PC. This will add python and pip as global environment variables on your PC.
7. Finally, open Command Prompt or Windows Terminal and run a Python/ Pip command. For example – You can use the pip command to install the OpenAPI on your Windows PC, and it won’t display an error.
python --version
pip install openai
So this is how you can download and install Pip on Windows 11 or 10. I would suggest downloading the official installer from Python’s website and installing it to steer clear of any errors. It works for me 100% of the time. Anyway, that is all from us. If you want to learn how to install Python in Ubuntu Linux, head to our guide for more details. And to find the best Python learning courses, we have a curated list ready for you. Finally, if you have any questions, let us know in the comment section below.
