
Despite all the UI changes and polish in Windows 11, there are some underlying issues that just don’t seem to leave Windows. For instance, some users recently reported that they were having audio issues on Windows 11, so we put together a guide to fix the ‘no sound’ issue on Windows 11. And now, we have stumbled upon reports of users facing random spikes in disk usage in Windows 11, with 100% disk usage even when the PC is sitting idle. So to resolve the problem, we have listed 12 easy ways to help bring down the high disk usage in Windows 11. On that note, let’s go ahead and learn how to fix 100% disk utilization in Windows 11.
Fix 100% Disk Usage in Windows 11 (2022)
In this guide, we have detailed the most effective methods to fix the 100% disk usage problem in Windows 11. We have included some user-reported solutions and some fixes issued by Microsoft itself. You can expand the table below and check out all these methods at your pace.
1. Disable SysMain (Superfetch) Service
SysMain, earlier known as Superfetch, is a service used by Windows 11/ 10 to preload apps into memory before you launch it. Microsoft has brought this feature to launch programs as quickly as possible. However, due to this feature, the disk usage sometimes gets high, as it’s engaged all the time while loading the program from disk to memory.
And from user reports so far, it seems the major reason behind 100% disk usage in Windows 11 is indeed the SysMain service. So to fix the high disk usage in Windows 11, we need to disable the SysMain service. Here are the steps you need to follow. Note that disabling the service will marginally slow down app opening time, but that’s about it.
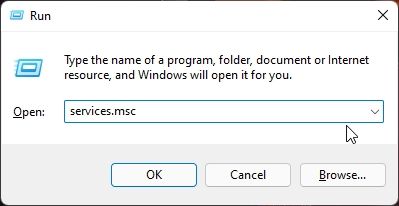
1. First, use the Windows 11 keyboard shortcut “Windows + R” to open the Run prompt. Here, type services.msc and hit Enter.

2. Next, scroll down and look for “SysMain” or “Superfetch”. Double click to open its properties window.


3. Here, change the Startup type to “Disabled” and click on “Stop” to immediately halt the service. Now, click on Apply -> OK.

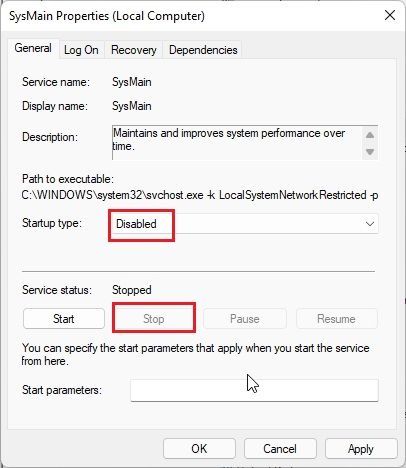
4. You will instantly notice that Disk usage is reduced to 10-15% in Windows 11. You can restart your PC and check whether Disk usage is still spiking or not.

2. Disable Connected User Experiences and Telemetry
Connected User Experiences and Telemetry is another service by Microsoft that runs under svchost.exe and is responsible for high disk usage in Windows 11. It basically tracks diagnostic data and sends it to Microsoft’s servers. Many users have reported that it’s one of the primary culprits behind 100% disk usage on Windows 11. So to disable it, follow the steps below.
1. Open the Run prompt by pressing the “Windows + R” shortcut. Here, type services.msc and press Enter.
2. Under the Services window, look for “Connected User Experiences and Telemetry” and double-click to open it. Then, set the Startup type to “Disabled” and stop the service right away. Click Apply -> OK to save the changes.

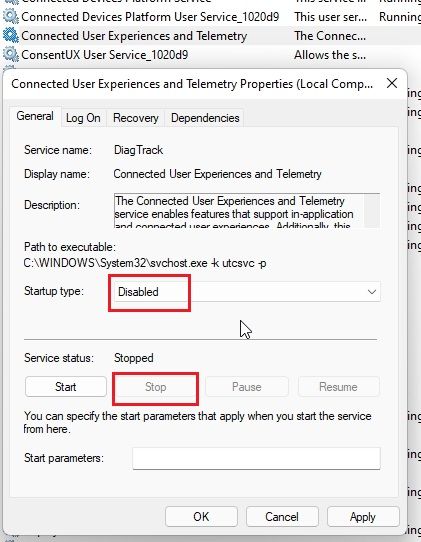
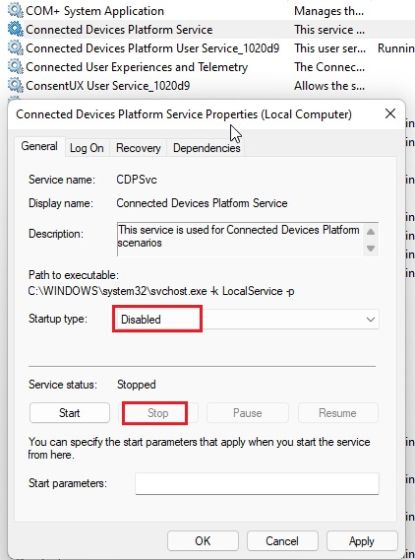
3. I will suggest you disable the “Connected Devices Platform Service” as well. Change the Startup type to “Disabled” and stop the service. Disabling both of these services should significantly bring down disk usage on your Windows 11 PC.

3. Disable Windows Search
Windows Search is also a prime suspect behind cranking up the disk usage in Windows 11. Disabling the Windows Search will do the job for most, but note that it will also affect files and folders search on your PC. So if you are not comfortable disabling this service, we suggest you skip this solution and move to the next step.
1. Bring up the Run window using the “Windows + R” keyboard shortcut and execute services.msc .
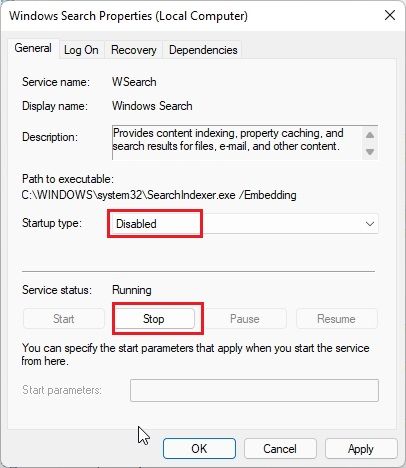
2. Then, look for “Windows Search” and double-click to open it. In the pop-up window, set the Startup type to “Disabled” and stop the service instantly. After that, click on Apply -> OK and restart the PC. You should notice low disk usage in Windows 11 after the reboot.
4. Disable Scheduled Defragmentation
Windows 11 periodically conducts defragmentation of the hard disk to improve performance. However, in that course, it increases the disk usage to 100%, thus, making the system laggy and unresponsive. So to disable the scheduled defragmentation on Windows 11, follow our instructions below.
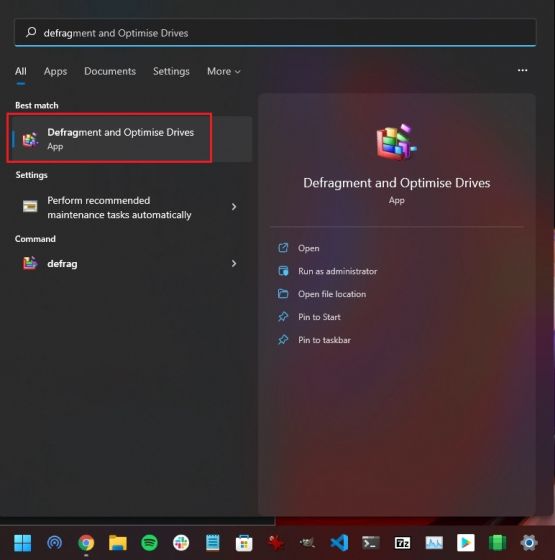
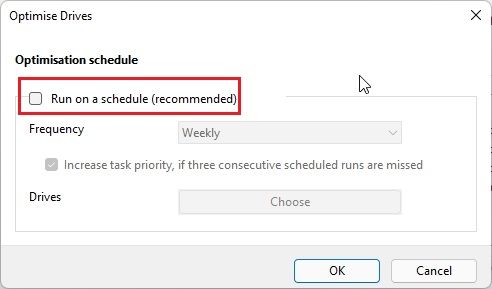
1. Press the Windows key once and search for “defragment“. Now, open “Defragment and Optimize Drives”.

2. Next, click on “Change settings“.

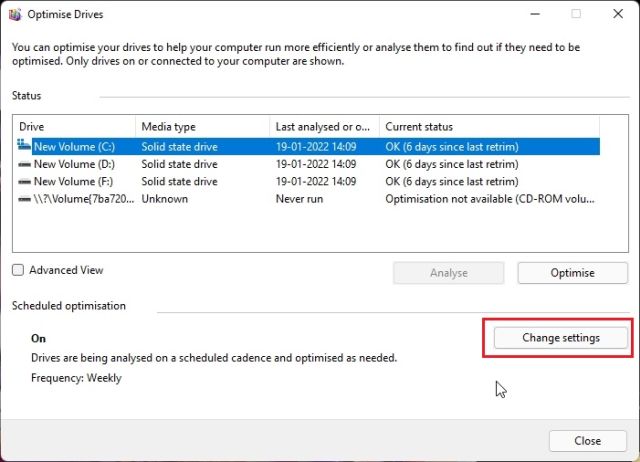
3. Here, untick the “Run on a schedule (recommended)” checkbox and click on “OK”. This will disable scheduled defragmentation on your Windows 11 PC, which, in turn, should reduce disk usage and prevent it from going up to 100% randomly.

5. Disable Startup Apps
Startup apps are programs that automatically start running in the background when you log in to your PC. These apps, although you may not actively use them, take a major share of disk usage and slow down your PC. So keep a check on what programs you allow to start up when you switch on your computer and disable the unnecessary ones right away. Learn how to do that right here:
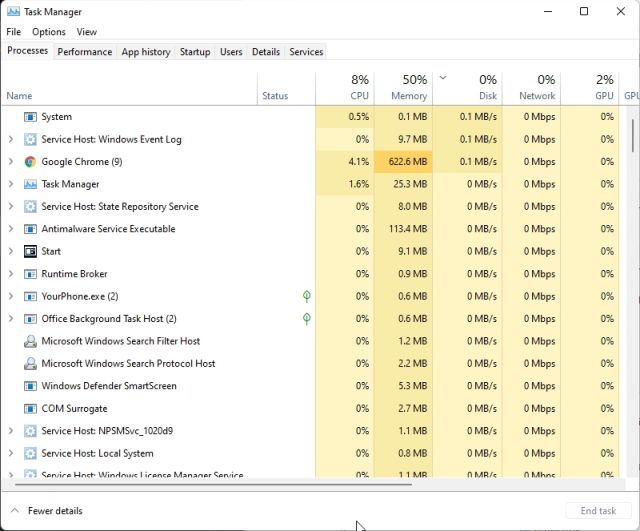
1. Use the Windows 11 keyboard shortcut “Ctrl + Shift + Esc” to open the Task Manager.

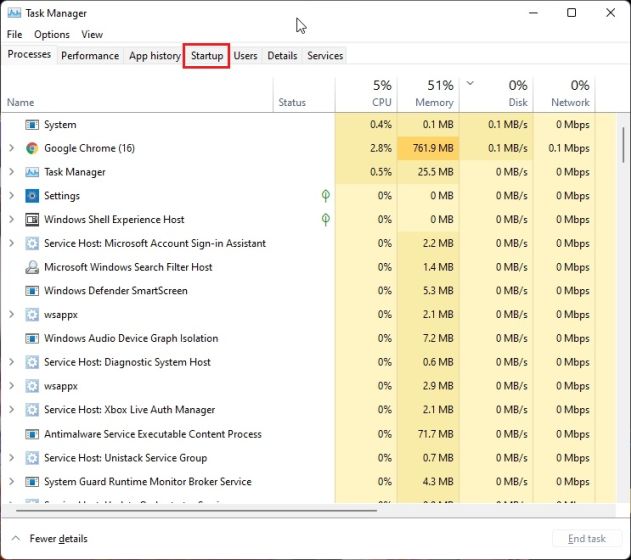
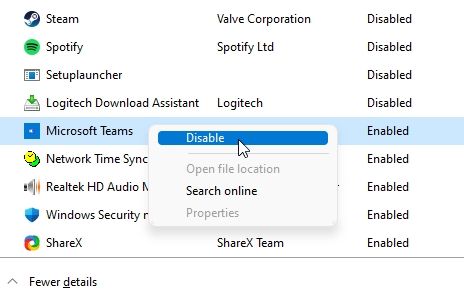
2. Then, move to the “Startup” tab and check out all the apps. If you see an app that you don’t use during startup and has the “Enabled” tag next to it, then right-click on it and disable it.
Note: Over time, as you install more apps, the Startup app list may grow bigger. You should keep a close check on the list and disable the unnecessary apps periodically to keep boot times in check and avoid 100% disk usage issue.

6. Disable MSI Mode
Some users report that they are still facing the 100% disk utilization issue in Windows 11 even after following all the methods listed above. Microsoft reported that, in some cases, high disk usage actually stems from Advanced Host Controller Interface PCI-Express (AHCI PCIe) controllers that have firmware incompatibility.
If your PC is using the “StorAHCI.sys” driver, you are most likely affected by this issue. Microsoft further states that if Message Signaled Interrupt (MSI) mode is disabled, disk usage can be reduced drastically. So we have added detailed steps below on how to disable the MSI mode in Windows 11.
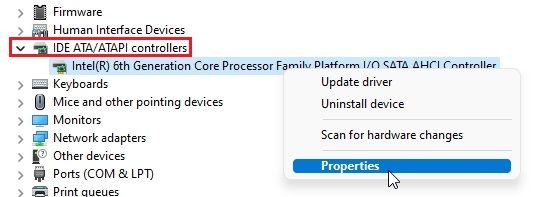
1. First, use the “Windows + X” keyboard shortcut to access the Quick Links menu and open Device Manager.


2. Next, expand “IDE ATA/ATAPI controllers” and right-click on the entry. Now, select “Properties” from the context menu.

3. From the Properties pop-up window, move to the “Driver” tab and click on “Driver Details“.

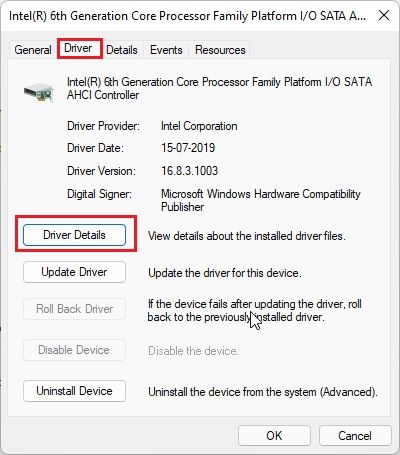
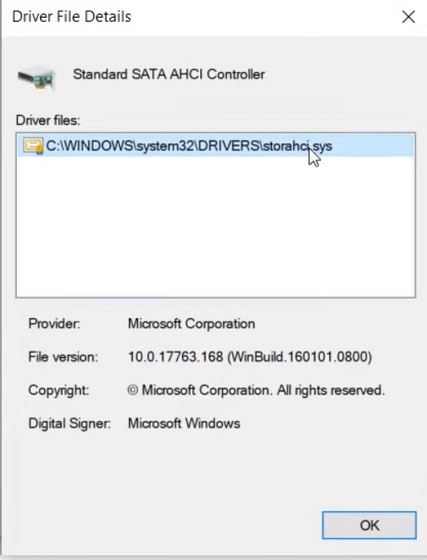
4. If you find “StorAHCI.sys” under the path, proceed to the next step. In case a different driver name appears on your PC, you don’t need to proceed ahead. This solution is not for you and won’t help you solve the 100% disk usage issue in Windows 11.

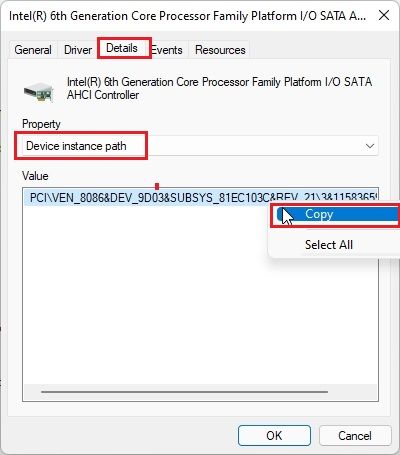
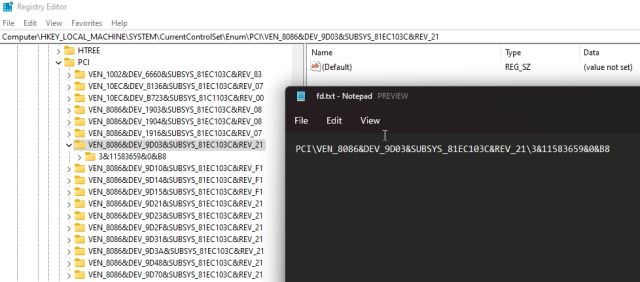
5. Next, go to the “Details” tab and change the Property to “Device instance path” from the drop-down menu. Now, right-click on the “Value” here and copy it.
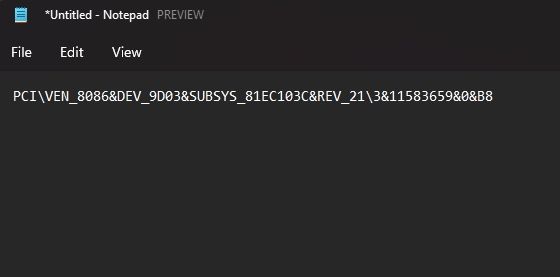
6. Paste the Value into a Notepad file as we will need it ahead.

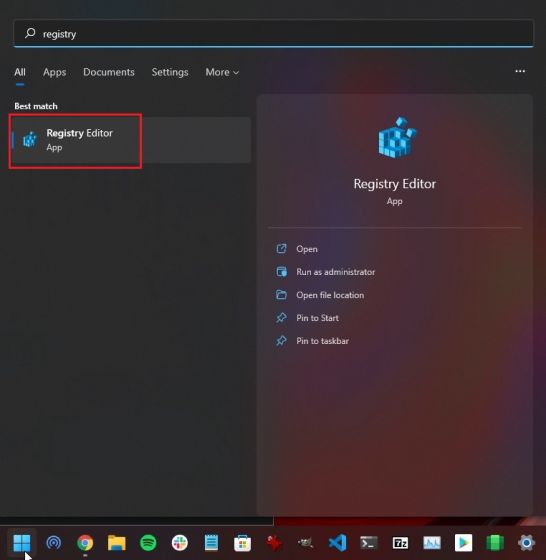
7. Now, close the Device Manager and open the Registry Editor. Press the Windows key and search for “registry“.

8. After that, move to the below path in the Registry Editor.
Computer\HKEY_LOCAL_MACHINE\System\CurrentControlSet\Enum\PCI\

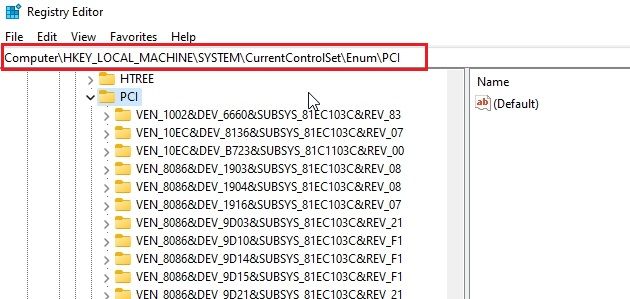
9. Now, match the entry with the one you pasted in the Notepad file and expand it.

10. Further, move to Device Parameters -> Interrupt Management -> MessageSignaledInterruptProperties.

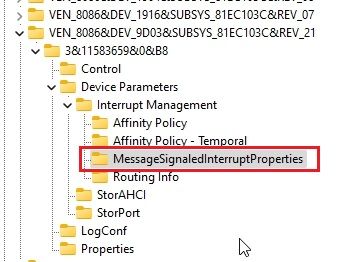
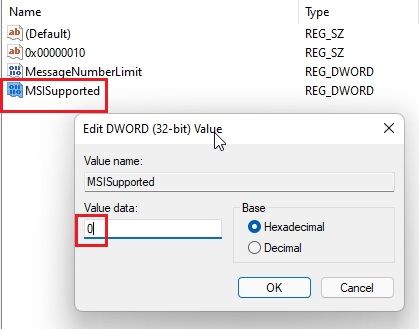
11. On the right pane, look for “MSISupported“. Open it and change the value data to 0.

12. Close the Registry Editor and restart your PC. Now onwards, you will find that your disk utilization does not go above the 10-20% mark. Thus, we have successfully solved the 100% disk usage issue on your Windows 11 PC.
7. Reset Virtual Memory
When your PC is short of RAM, it sometimes utilizes the hard disk memory as a swap to hold programs and files in memory. However, in some instances, the PC takes up major disk space, which could increase the disk usage considerably. To avoid such a scenario, we can reset virtual memory or increase it, so that the OS does not keep the hard disk engaged all the time. Here is how to do it.
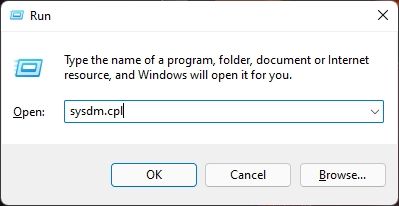
1. Open the Run window using the “Windows + R” keyboard shortcut, input sysdm.cpl, and hit enter. It will open the “System Properties” window directly.
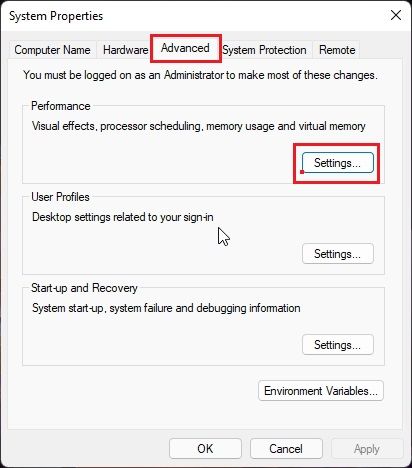
2. Here, move to the “Advanced” tab and click on “Settings” under Performance.

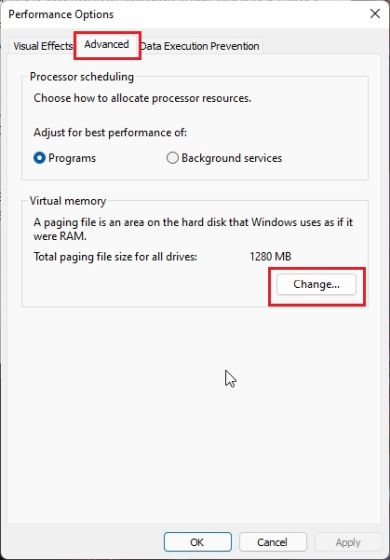
3. Again, under the “Performance Options” window, move to the “Advanced” tab and click on “Change”.

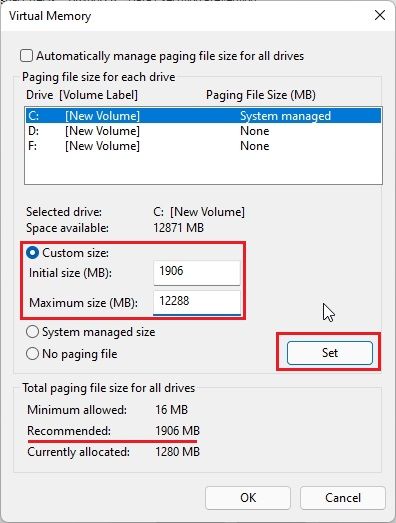
4. Here, untick the “Automatically manage paging file size for all drives” checkbox and choose “Custom size“.

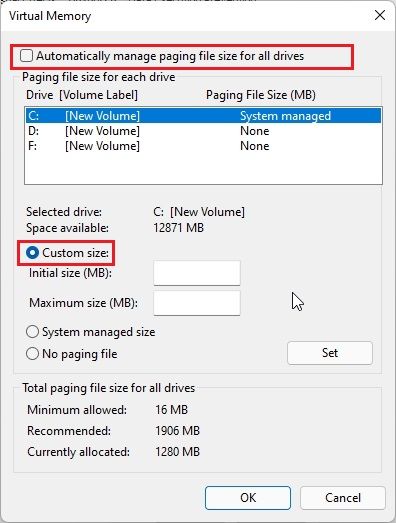
5. Now, enter the “Recommended” size (mentioned in the screenshot below) into the Initial size field. And in the Maximum size field, enter the amount (in MB) 1.5x times your RAM size. For example, my RAM is 8GB, so I have entered 1024 x 8 x 1.5 = 12288. Finally, click Set -> OK. Now, restart your PC, and the disk usage should be significantly reduced.
8. Perform a System Scan
If you still see a spike in disk usage on Windows 11 even after following all the steps above, I would suggest performing a system scan to look for malware or hidden rootkits. Sometimes, sophisticated malware hides behind the system folders and performs all sorts of actions, including crypto mining and malicious encryption.

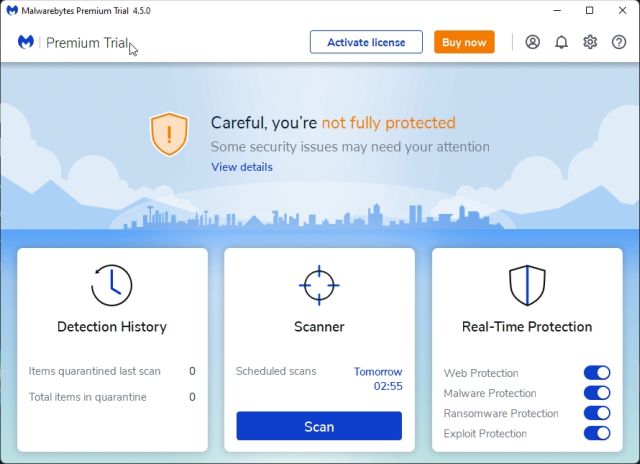
In such cases, it becomes necessary to look for the trojan horse and eliminate it to reduce your disk usage from 100% in Windows 11. You can go through our list of best malware removal tools for Windows 11, but I would suggest using Malwarebytes (Download) to perform a deep scan on your PC. If the antivirus finds anything suspicious, remove it and check if disk usage has gone down.
9. Disable Background Apps
In our tutorial on how to speed up Windows 11, we have mentioned that you should disable background apps to keep your PC snappy and responsive. Background apps might be one of the reasons you are seeing 100% disk usage on your Windows 11 computer. Here is how you can disable background apps like Cortana in Windows 11.
1. Open Windows Settings using the “Windows + I” keyboard shortcut and head to the “Accounts” section from the left pane. Here, select “Sign-in options“.


2. Now, disable the toggle for “Automatically save my restartable apps and restart them when I sign back in” on the next page.


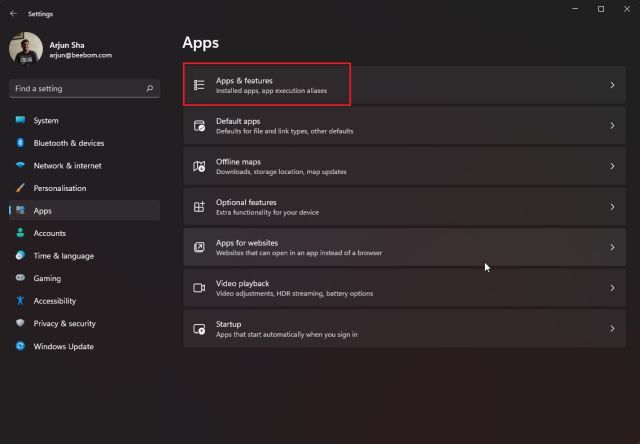
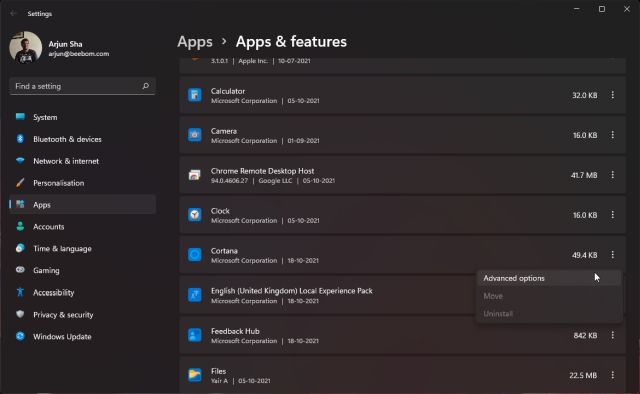
3. Next, move to the “Apps” section from the left pane and click on “Apps and Features” on the right pane.
4. Here, you will find a list of apps installed on your Windows 11 PC. Click the three-dot menu icon next to the apps you want to disable from running in the background.
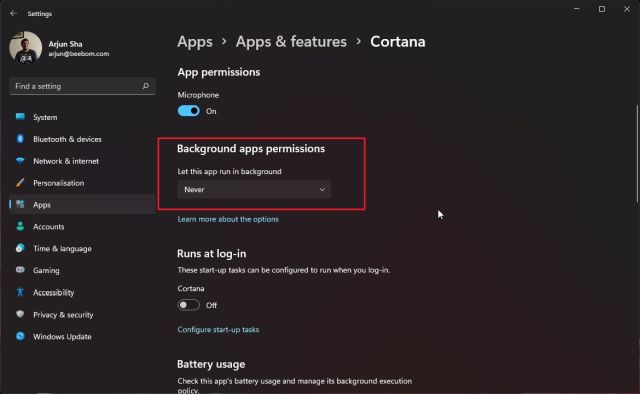
5. Select “Advanced options” from the context menu and scroll down to get to the “Background apps permissions” option on the next page. Select “Never” from the drop-down menu here to prevent the app from running in the background and hogging unnecessary disk usage. Do this for all the apps you don’t want to run in the background. This will offload a lot of resources from the disk.
10. Run Disk Check
At times, due to bad sectors or logical errors, the disk is unable to complete a given operation, and it continues to use the disk abnormally in an attempt to execute the action. And that leads to 100% spikes in disk usage on Windows 11 PCs. So we suggest you run Disk Check to resolve the issue.
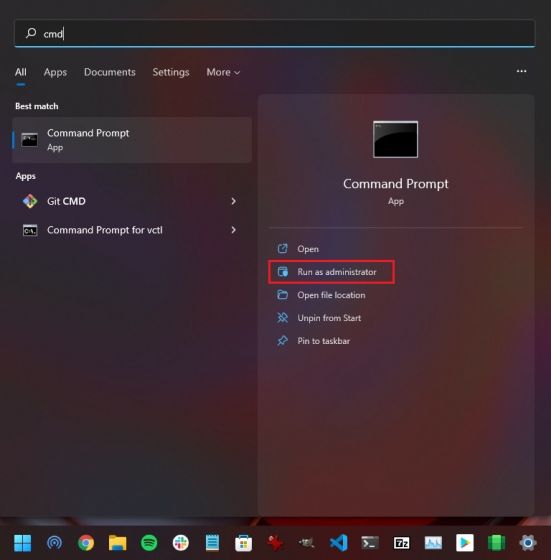
1. Press the Windows key once and type “cmd”. Now, click on “Run as administrator” on the right pane to open the Command Prompt window with admin privileges.

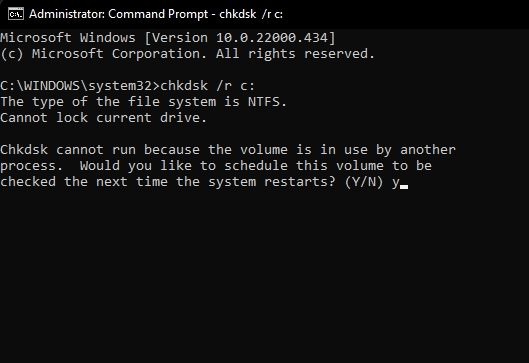
2. In the CMD window, run the below command. It will ask whether you want to perform a disk check the next time your PC restarts. Type Y and hit Enter. Now, restart your PC, and Windows 11 will check for all the bad sectors and logical errors and will fix them along the way. Once the computer boots, the high disk utilization issue should be gone.
chkdsk /r c:

11. Update Storage Drivers
As mentioned above, due to faulty storage drivers, the disk can be stuck in a memory loop and may perform an action repeatedly. It can increase disk usage and cause your Windows 11 PC to slow down. To solve this issue, you should try updating the storage drivers to the latest version. And here’s how you can do that:
1. Press the “Windows + X” keyboard shortcut to open the Quick Links menu and open “Device Manager“.


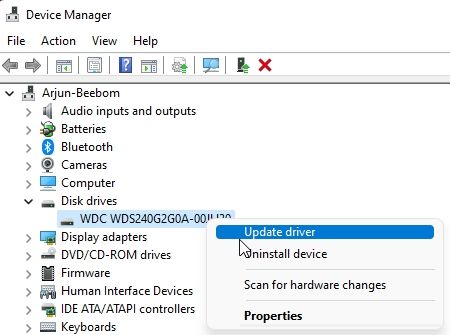
2. Here, expand the “Disk drives” section and right-click on your disk. From the context menu, click on “Update driver“.

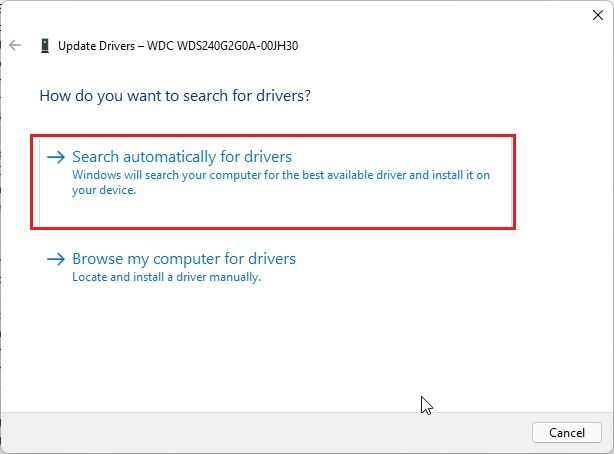
3. From the pop-up window that now appears, click “Search automatically for drivers“. If there is a new update available for your disk drive, Windows 11 will install it and ask you to restart the PC.

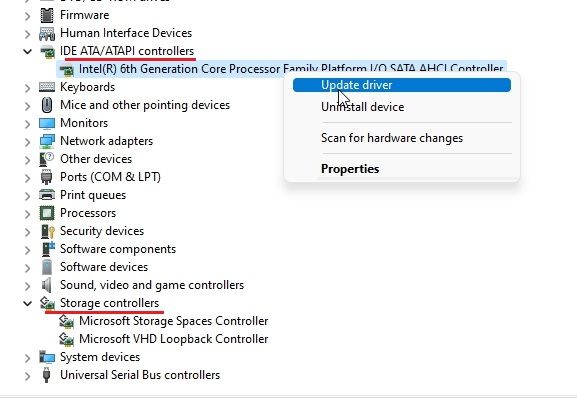
4. I will also suggest you do the same for the options under “IDE ATA/ATAPI controllers” and “Storage controllers“.

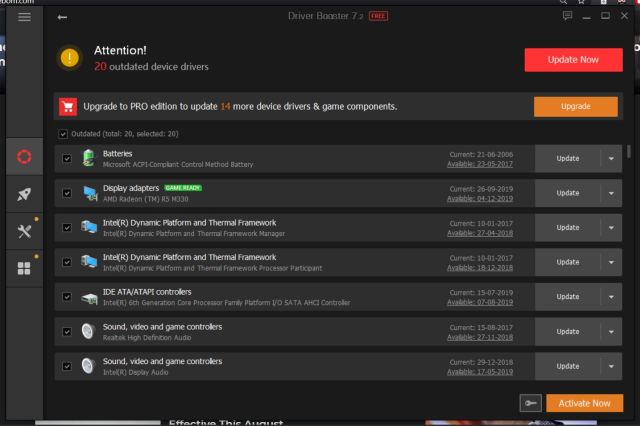
5. In case there is no update available with the Device Manager, try some third-party driver update tools for Windows 11. I use IObit Driver Booster to update all my drivers, and it works really well. You can use it to update all your storage-related drivers.

12. Update Windows 11 or Perform a Clean Install
If none of the above methods worked for you, and your PC is still unresponsive due to high disk usage, you should try updating Windows 11 to the latest version. Use the “Windows + I” shortcut to open Windows Settings, move to “Windows Update” from the left pane, and click on “Check for Updates” in the right pane.
Download and install all the pending updates and restart your PC. After that, check whether the 100% disk usage problem has been fixed or not. I would suggest you leave your PC idle for an hour after the update so that it applies all the changes.


In case it does not work, you need to perform a clean install of Windows 11. We have already written a detailed guide on how to clean install Windows 11 from USB, so follow the linked guide, and you will have a working PC with no disk usage issues in an hour. Don’t worry, none of your files from other drives will be erased, except for the C drive, so remember to back up all your valuable files. This method will most certainly fix 100% disk usage on Windows 11.
100% Disk Usage in Windows 11? Learn How to Fix It Right Now
So these are the different ways you can use to fix your Windows 11 PC if it’s facing high disk usage, even when sitting idle. Apart from the software tweaks, I would like to add that you should consider switching to an SSD if you are using a hard disk (HDD) on your Windows 11 desktop or laptop. An SSD will offer you faster loading speeds and much better performance. Switching to an SSD also seemingly fixes the 100% disk usage issue on Windows 11 PCs. Anyway, that is all from us. If you want to speed up your Windows 11 PC, follow our guide for detailed instructions. And if you have any questions, let us know in the comments section below.


