Are you doubtful that your monitor is not running at the correct refresh rate? In this guide, we will teach you how to check your monitor’s refresh rate on Windows 11 and 10. We already have a guide on how to change your monitor’s refresh rate, so follow that if you learn that your monitor is running at the wrong refresh rate. That said, let’s look at four simple methods to check the refresh rate of your monitor.
1. Find Monitor Refresh Rate on Windows 11 & 10 (Easiest Method)
- Start by pressing the Windows keyboard shortcut “Ctrl+R” to launch the Run command window.
- Type “dxdiag” in the Run command window and press Enter.
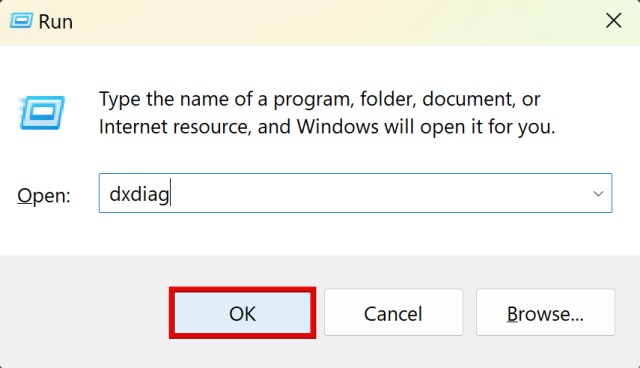
- Now, in the DirectX Diagnostic Tool, click on the “Display” tab. Under the device section, scroll down until you find the “Current Display Mode” text. Here, you will find your monitor’s resolution and refresh rate (highlighted in brackets).
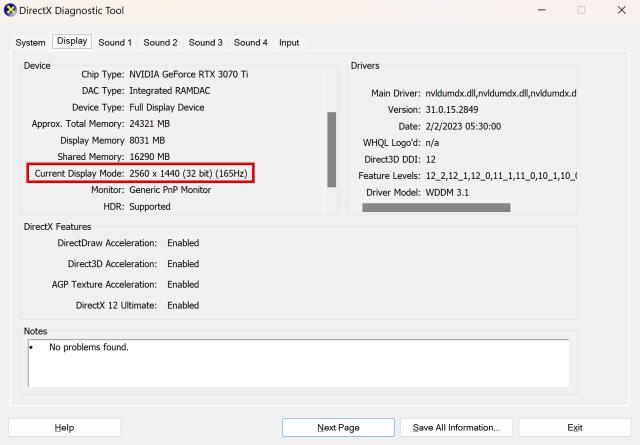
- Perfect! You have learned how to check the refresh rate through the DirectX Diagnostic Tool. Below you will find additional methods as well.
2. Check the Monitor Refresh Rate on Windows 11
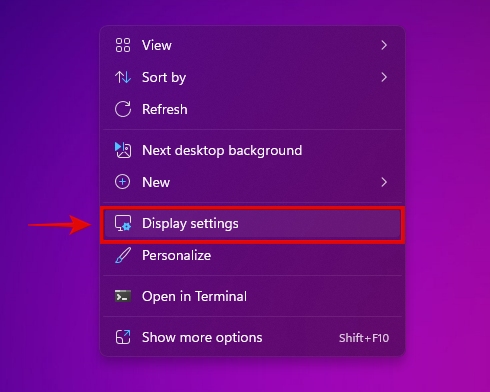
- On Windows 11, start by right-clicking on your desktop and selecting “Display settings” from the context menu.
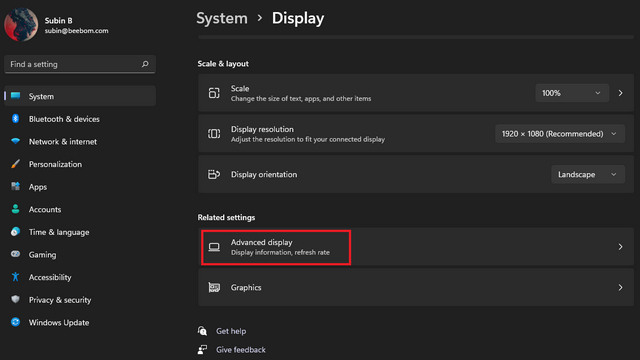
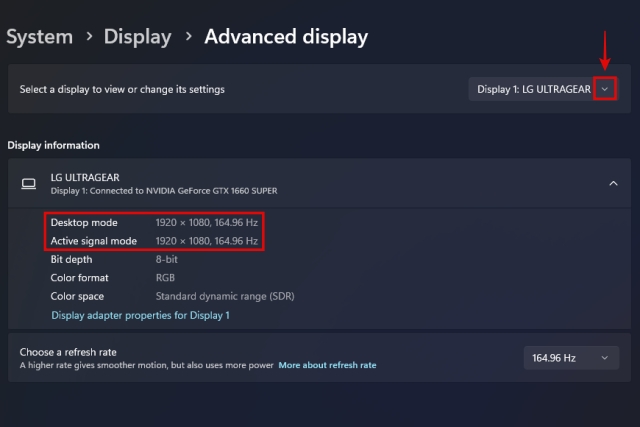
- Next, click on “Advanced display,” which is under the related settings section.
- Use the drop-down menu here to select which display you want to view the information for. Now, under “Display Information,” you will find the refresh rate your monitor is currently running at, next to your current resolution.
3. Check the Monitor Refresh Rate on Windows 10
- On Windows 10 PCs, you first need to right-click on your desktop. Then, click on “Display settings” in the context menu.
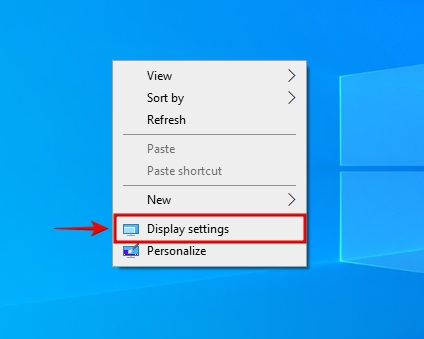
- Next, click on “Advanced display settings,” as shown below.

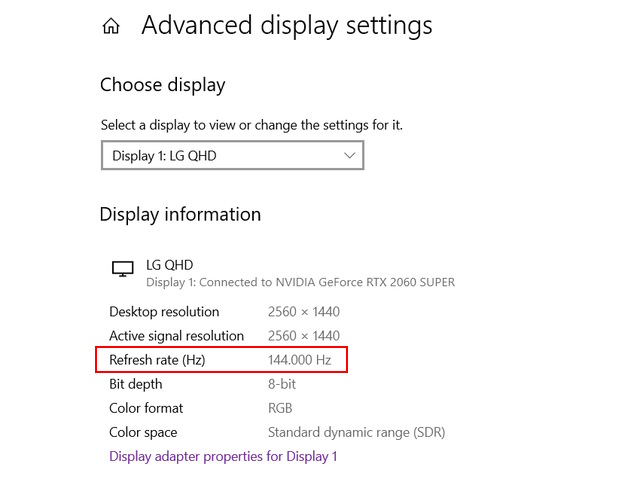
- Now, you can select your monitor using the drop-down menu under “Choose a display.” Right under that, you will find your display information, along with the current refresh rate next to “Refresh rate (Hz).“
4. Use a Third-Party Tool to Check Your Monitor’s Refresh Rate
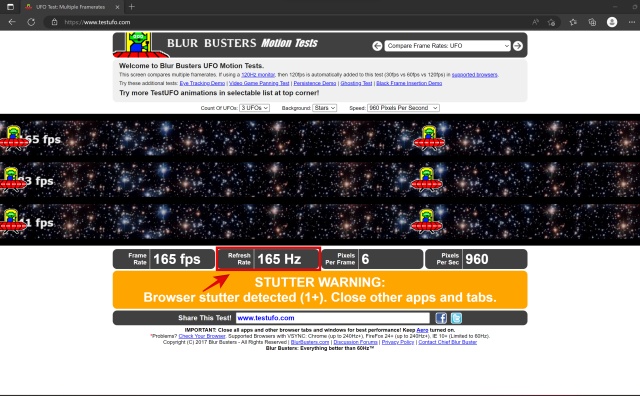
- Open your browser and go to this link to access Blur Buster’s UFO Test for motion blur testing. Using this tool, you can check how smooth your current refresh rate is in contrast to lower refresh rates. It also lets you check your refresh rate easily.
- Now, on the UFO test website, you can check what’s written next to Refresh Rate to know your monitor’s current refresh rate.
- Congrats! You have successfully learned how to check your refresh rate using a third-party website as well.
Frequently Asked Questions
You should be able to check your monitor’s maximum refresh rate using its manual, or by looking at its specifications. Also, check the current refresh rate under display settings on Windows 10 and 11.
60Hz is the current standard and is good enough for most use cases. Typically, a higher refresh rate offers the most advantages in gaming.
Some HDMI cables can run at 144Hz, so you will have to check if your PC’s port as well as your cable supports the desired refresh rate.
For gaming, 144Hz is much better than 60Hz. When your refresh rate is higher, the display looks much smoother.
HDMI 2.0 is required for up to 1440p at 144Hz. For running 144Hz refresh rate at 4K resolution though, you will require a HDMI 2.1 cable.


