The Black Ops 7 Zombies crew has jetted off to a new adventure, this time to a skull-shaped rock in the middle of nowhere for an experience named Astra Malorum. The new round-based map sees Treyarch embrace one of their wackiest ideas yet, as you’re allowed to roam free on Mars and complete a range of puzzles before taking on a grueling final boss. As always, the path to the main easter egg is pretty complicated and nearly impossible to complete without a few pointers.
So, if you’re looking for a comprehensive guide that breaks down exactly how you can do the quest, you’re in the right place. Here’s how to complete the Black Ops 7 Zombies Astra Malorum main easter egg quest.
Black Ops 7 Zombies Astra Malorum Main Easter Egg Quest Explained
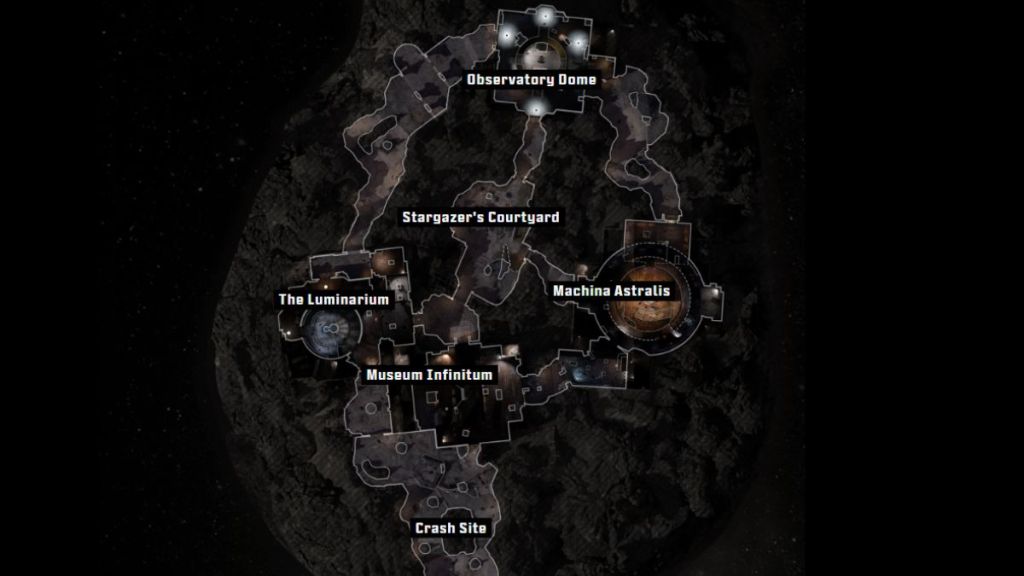
The BO7 Astra Malorum main quest has you exploring the mystical Lumanarium and extracting some involuntary help from a murderous robot before shooting off towards Mars to do battle with a menacing final boss. Throughout the way, you’ll need to complete a bunch of puzzles, and of course, survive the relentless undead. Before breaking every step of the main quest, here’s an overview of how to complete it:
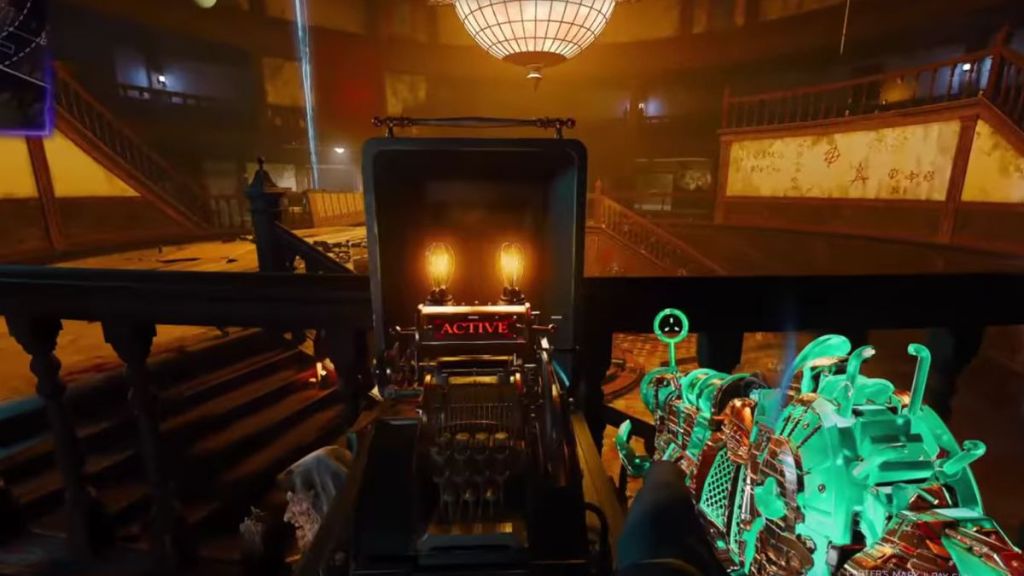
- Follow the directed steps to turn on the power and activate the Pack-A-Punch machine.
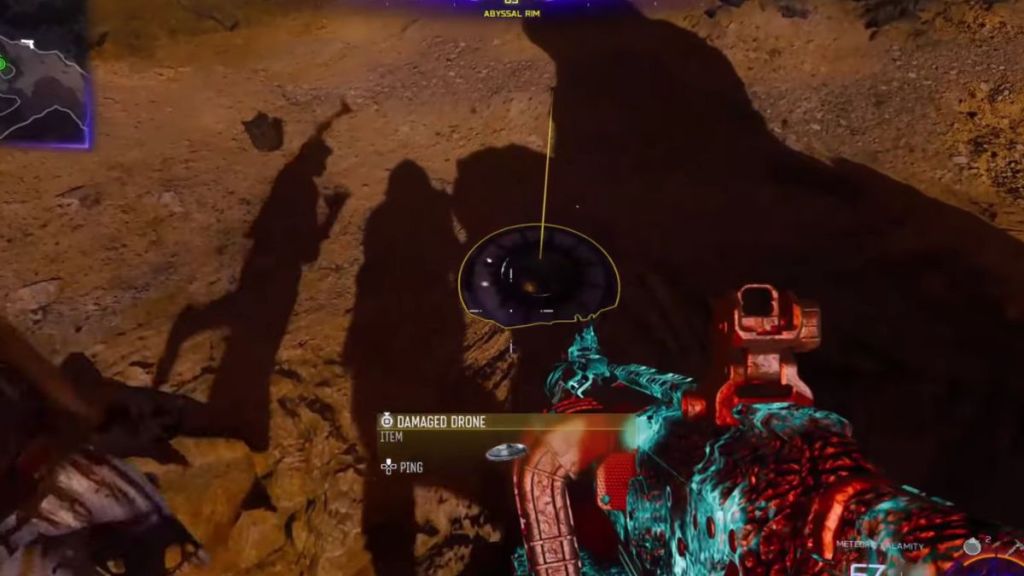
- Survive undead waves until the unmissable OSCAR enemy is spawned. Destroy one of his UFO projectiles to collect the Damage Drone item.
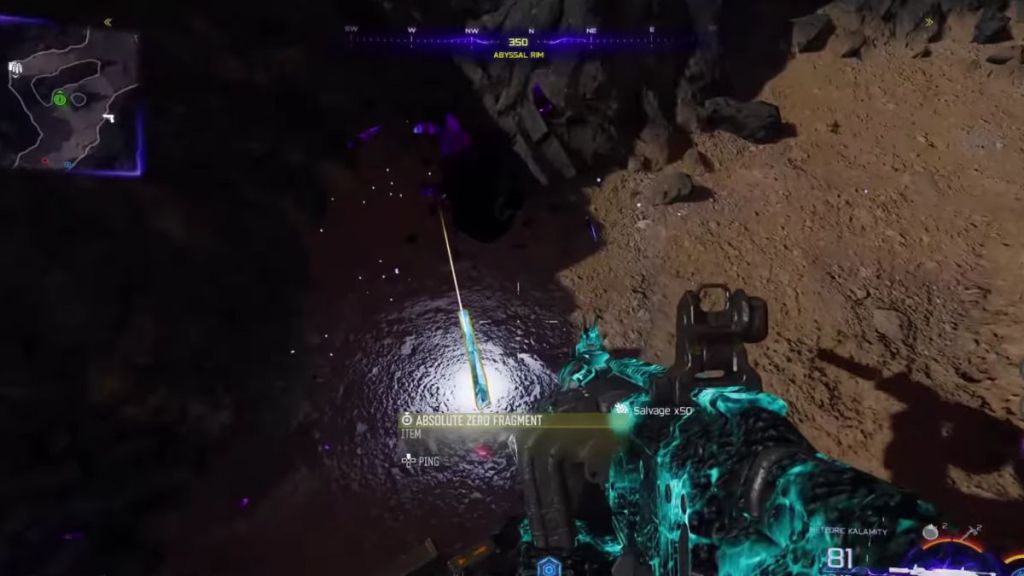
- Now, purchase the Cryo Freeze Ammo Mod and go around the map looking for three Dark Aether Crystals. Shoot them as you spot them, and collect three crystals.
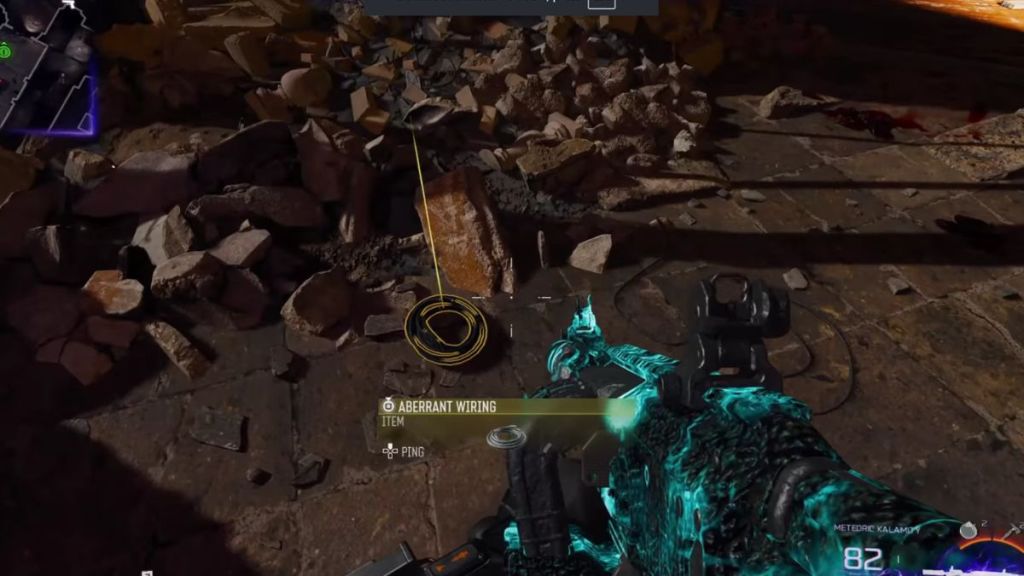
- Similarly, you’ll find a flickering lamp post somewhere on the map. Its location is randomized, but the light does stand out among the rest. Shoot it to obtain the Aberrant Wiring item.
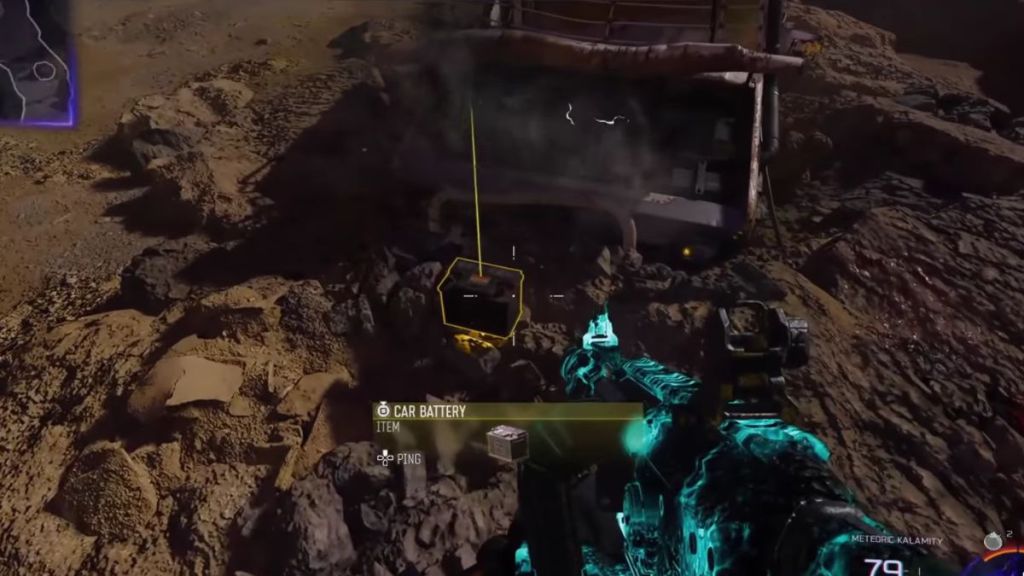
- Walk back to the Site and shoot Ol’ Tessie’s bonnet to get the Car Battery item.
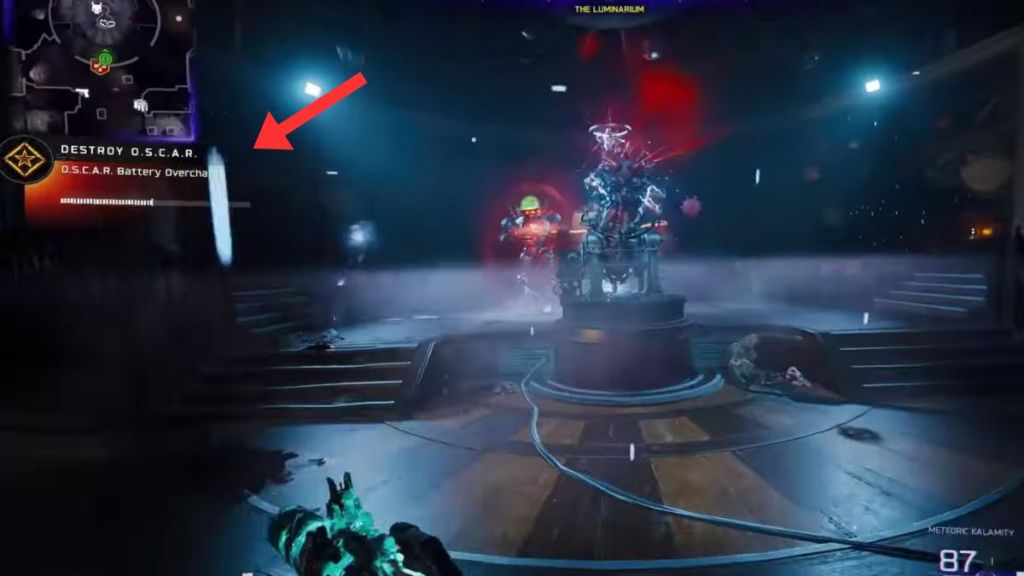
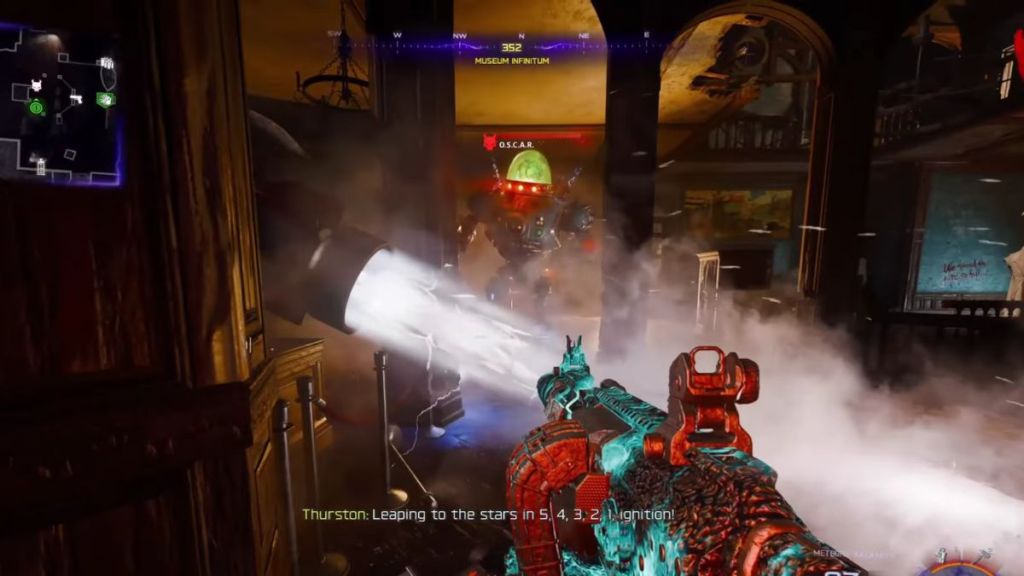
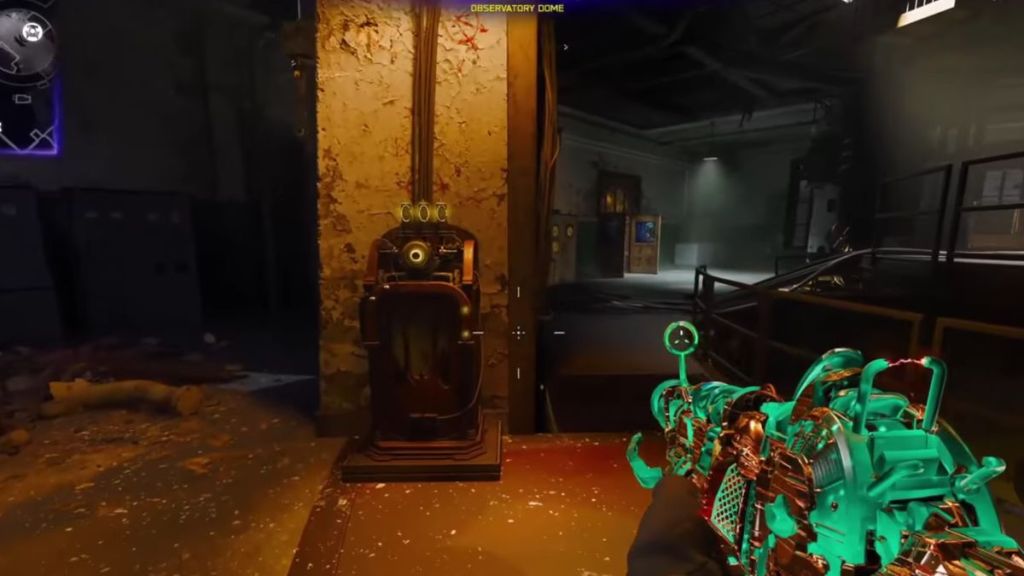
- You’ll now need to kill OSCAR in three different ways using three different traps on the map. These include the Electro-Volt Projector in the Luminarium, the Rocket Ignition in the Museum Infinitum, and the Planetary Telescope in the Observatory Dome.
- If done correctly, the robot will drop the LGM-1 Wonder Weapon.
- After tasting defeat three times, OSCAR will start roaming around the map. Narrow down his location and trail him closely (make sure he’s unaware of your presence).
- As you follow him, listen to his dialogue, and eventually, he’ll start playing Dr. Thurston’s audio logs. Make note of the three planets named by the Doctor.
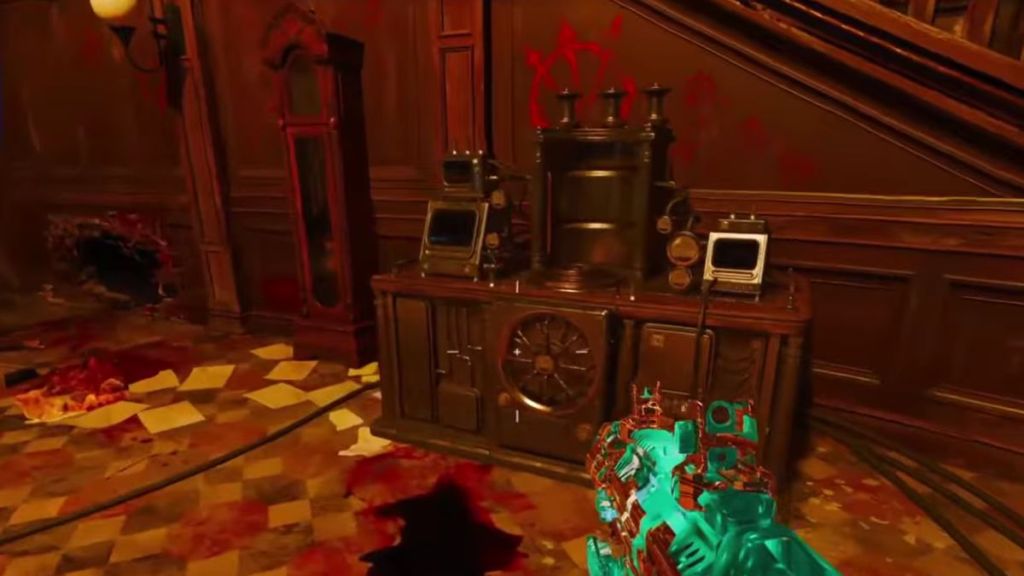
- Head to the Observatory Dome and interact with the code machine on the northwest pillar. Type in the planets in numbered order of closest to furthest from the sun, which translates to a three-digit code.
- If done correctly, you’ll be able to grab the Cryo Chamber Key.
- Go to the Museum Infinitum and destroy the display case in the Southwest corner to get the Rock Saw.
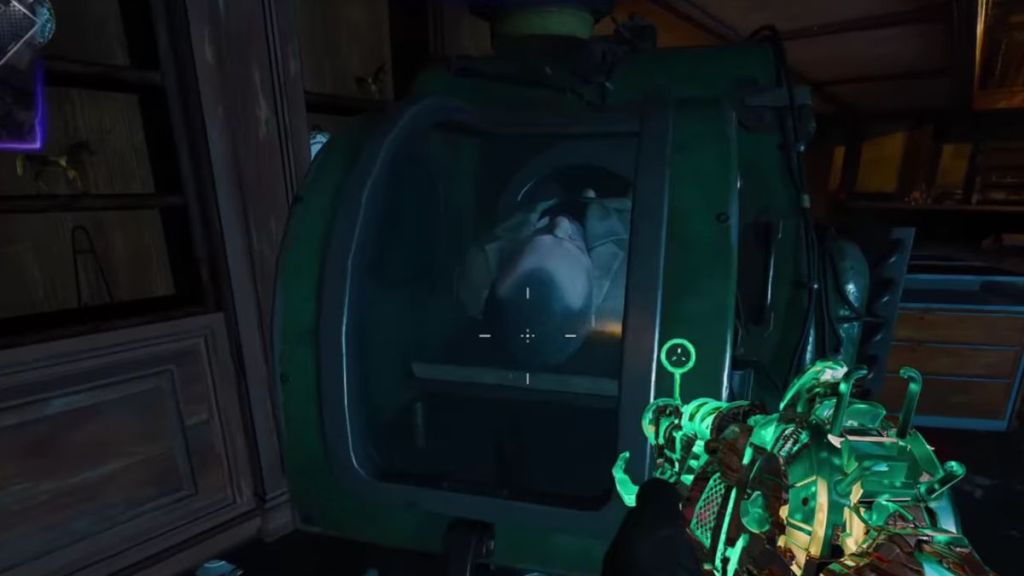
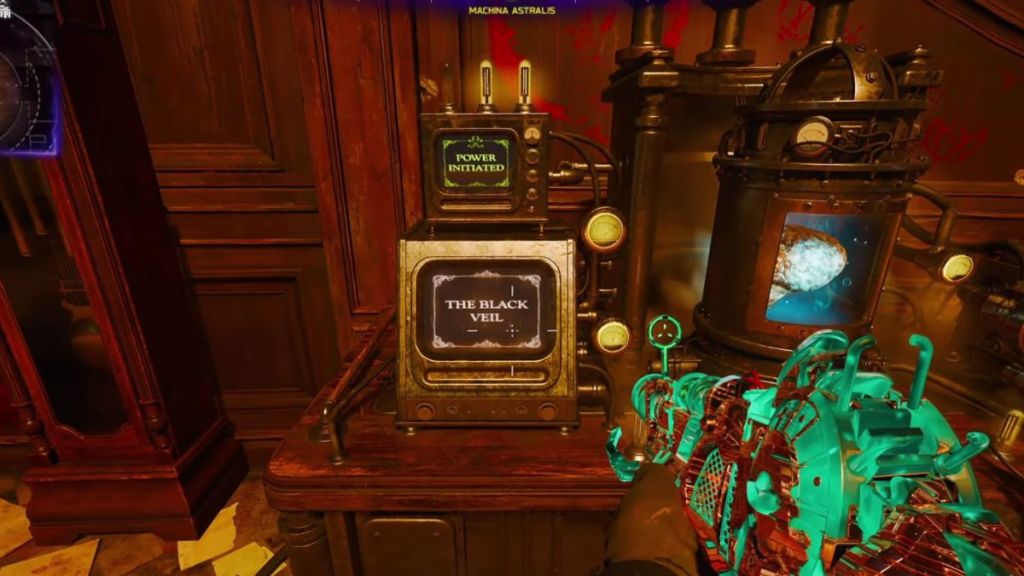
- Head to the Machina Astralis room and interact with the cryo pod using the Cryo Chamber Key. This will reveal Dr. Thurston’s corpse, and you can grab his brain by using the Rock Saw.
- Take the brain to the Luminarium, where you’ll find a brain canister that you can interact with twice to trigger a 60-second lockdown. Defend it during the lockdown and take the brain back to Machina Astralis.
- In this room, place the brain into the rusted Perfusion Machine. To the left of the machine, you’ll spot a monitor that flashes five book titles. Make a mental note and head to the Archive of Orbis, where you’ll need to pinpoint those books by interacting with the bookshelves.
- If done correctly, a trapdoor will open. Climb it to collect the Planet Neptune item.
- Head back to Machina Astralis and place Neptune into the empty planetarium slot.
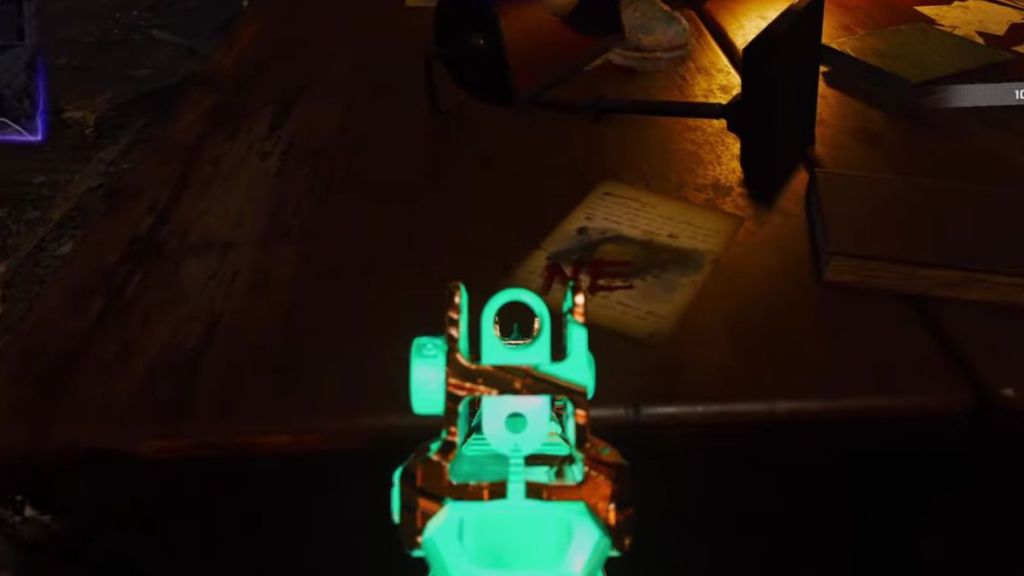
- Now, you’ll need to locate three pieces of paper, which can be found in the Machina Astralis’ main room, the Archive of Orbis, and the Luminarium. Note down the planet and directions mentioned in each paper.
- Venture back to Machina Astralis, and shoot the three planets into the accurate directions as mentioned in the papers.
- Once you’ve aligned all the planets accurately, interact with the brain machine to trigger another lockdown. Defend it while the portal charges up. After the lockdown ends, you’ll be transported to Mars.
- On the Red Planet, go towards the center and pick up the brain canister before bringing it right back to the starting area. Once here, place the brain into the machine nearby.
- This will trigger dialogue from Thurston, where he’ll direct your attention to a mysterious noise that sounds like an ethereal chime. You’ll hear this chime at the start of every new round, and it basically notifies you of the presence of the Artifact.
- The Artifact can be spotted flying around if you peer through a hole in the southeast corner of the starting area on Mars. Your goal is to shoot the four pylons its flying near, all of which emit the chime, and draw the Artifact closer to your location. After shooting the pylon that’s closest to you, quickly turn around and shoot the orb sitting on top of the central platform.
- This will cause the Artifact, named the Ascendant Eye, to drop nearby, ready to be picked up.
- Take the Ascendant Eye and place it inside a golden pillar in the south corner. This will cause new pillars to pop up in the area.
- It’s now time to head back to the Observatory Dome in Astra Malorum. Interact with the device on the right side of the piano, which will then display four symbols. Make sure to note them down.
- Now, head back to Mars and shoot the newly surfaced pillars using the LGM-1 Wonder Weapon. The symbols on the pillars will turn blue once you’ve shot them, and you’ll now need to interact with them by matching the symbols you noted down earlier. You’ll need to do this quickly, as taking too long will reset all the pillars, forcing you to wait for another round.
- If done correctly, the pillars will grow even bluer. Once all of them are charged up, you can interact with the brain to summon the final boss.
Activate Pack-A-Punch
As mentioned above, you simply need to follow the on-screen indicators to activate the Pack-A-Punch machine. This involves grabbing the Harmonic Component items at various locations on the map and then taking them to the piano in the Observatory Dome. This will trigger a lockdown that turns on the power at the end, and also grants you access to Pack-A-Punch.
Get Wonder Weapon Components
There are three Wonder Weapons Components that you’ll need to collect before you start tormenting and trapping OSCAR. Check them out below:
- Dark Aether Crystals: Use an Arsenal machine to purchase the Cryo Freeze Ammo Mod. Now, go around the map and shoot three Dark Aether Crystals to collect these items.
- Car Battery: Shoot Ol’ Tessie’s front bonnet to get the Car Battery.
- Aberrant Wiring: Find a flickering light post on the map. Its location is randomized, but you should be able to find it easily. Shoot the post to get the Aberrant Wiring.
- Damaged Drone: After spawning the OSCAR enemy, shoot the UFO projectiles revolving around it, and eventually, it’ll drop the Damaged Drone.
Trap OSCAR and Get LGM-1 Wonder Weapon

You’ll now need to trap OSCAR in three locations to kill him. These can be done in any order, and we’ve offered detailed explanations below:
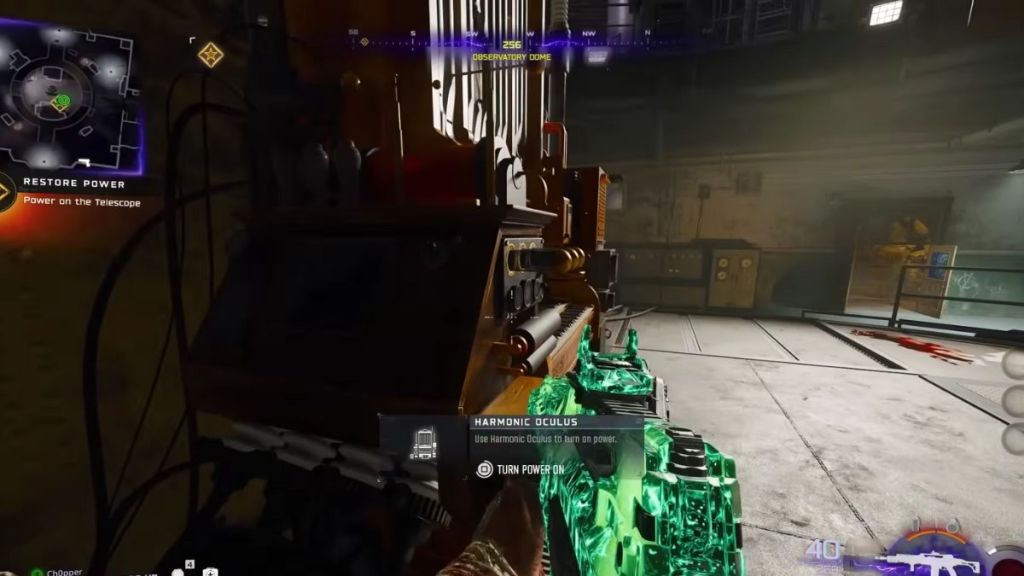
- Planetary Telescope Trap: Go to the Observatory Dome, where you’ll find a telescope attached to a piano sitting right in the middle on an elevated platform. Interact with the piano and listen for the hissing sounds of nearby steam vents. Follow the sounds and shoot all six vents to activate the Harmonic Oculus. Now, use the viewfinder of the map and point it towards the sun. This will cause a laser beam to start emitting from the Oculus. Lure OSCAR into it to kill the robot.
- Electro-Volt Trap: Go to the Luminarium and interact with the Electro-Volt to install the Car Battery, Aberrant Wiring, and the Drone. Now, activate the trap and lure OSCAR towards it. This will trigger a lockdown period, where OSCAR’s battery will slowly be overcharged. Survive until the bar is full to complete this step.
- Rocket Ignition Trap: Head to the Museum Infinitum, where you’ll find a rocket on display. Interact with it to insert the Crystals and trigger its ignition beams. Once again, lure OSCAR to the beams emitting from the rocket, make sure he’s there when the countdown hits zero. If done correctly, OSCAR will once again be defeated.
After trapping him for the third time, OSCAR will drop the LGM-1 Wonder Weapon.
Solve Planet Puzzle
For this next step, we highly recommend going into your settings and turning on subtitles. You’ll once again need to spawn OSCAR, but this time, you need to ensure that he doesn’t go into combat mode. Instead, follow him around and listen to dialogue until you hear audio logs from a character named Doctor Thurston. Eventually, the character will mention the names of three random planets. Make sure to note those down.
Once you’ve got the names, head to the Pack-A-Punch room, and you’ll find a code machine nearby. Your goal is to translate the names of the planets into a three-digit code. The number assigned to each planet is basically determined by its distance from the sun. For instance, I got the planets Venus, Earth, and Saturn, which means my code was 237. Using this cheat sheet to get your code:
- Mercury – 1
- Venus – 2
- Earth – 3
- Mars – 4
- Jupiter – 5
- Saturn – 6
- Uranus – 7
- Neptune – 8
If you input the right code, a platform will drop nearby that you can climb up to. Here, you’ll find a body that you can interact with to get the Cryo Chamber Key. Take this key to the Machina Astralis room (the room with the planetary display) and its southern corner, and you’ll discover a cryo pod. By using the rock star found in the display case at Museum Infinitum, you can interact with the body inside to get its brain.
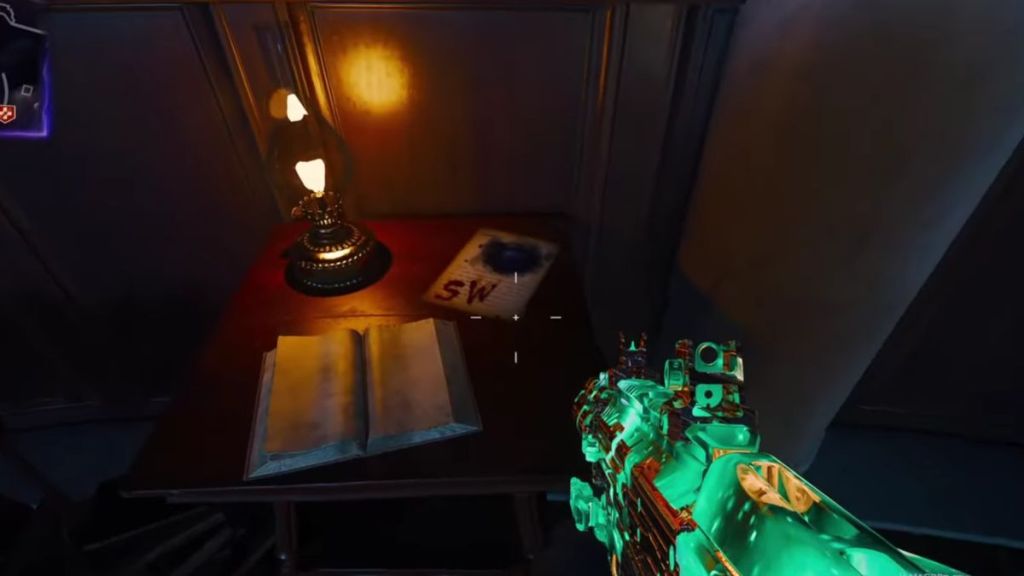
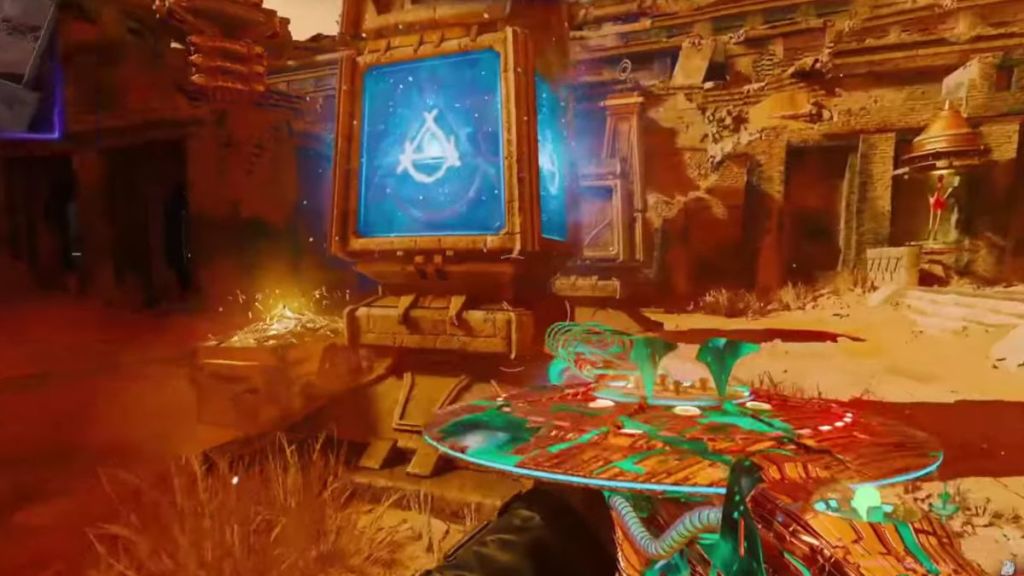
Set Up Thurston’s Brain
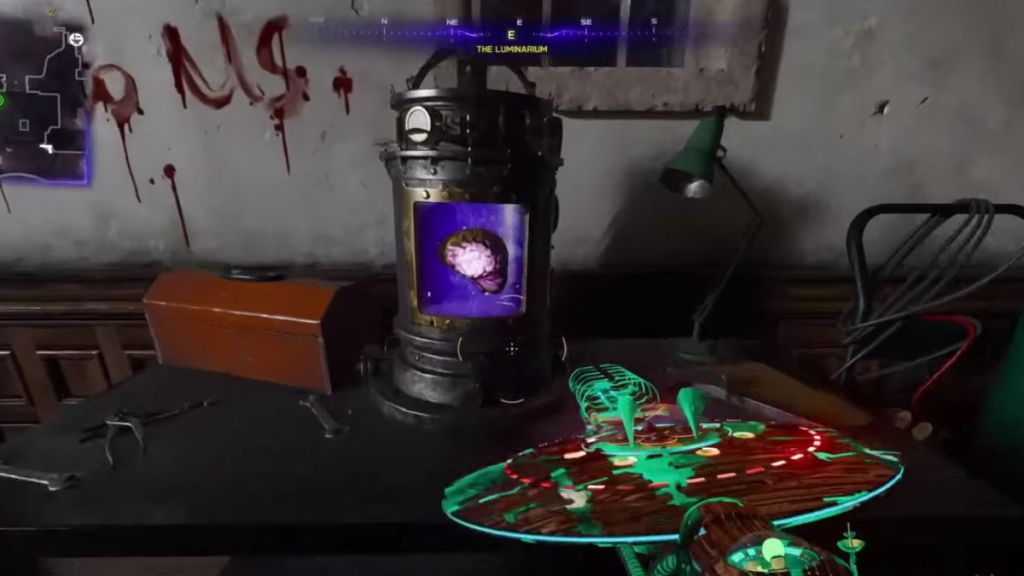
To get Thurston’s brain up and running, place it in the brain canister located in the Luminarium. Now, take it right back to the Astralis and put the canister in the Perfusion Machine as seen in the image above.
Solve Book Titles Puzzle
With the brain up and running, the monitor attached to the Perfusion Machine will flash the names of book titles. Note these down and go back to the Observatory Dome. Peek through the telescope once again, but this time, aim your crosshairs at Mars. In the bottom left corner of the screen, you’ll see four DEC numbers. Note these down as well.
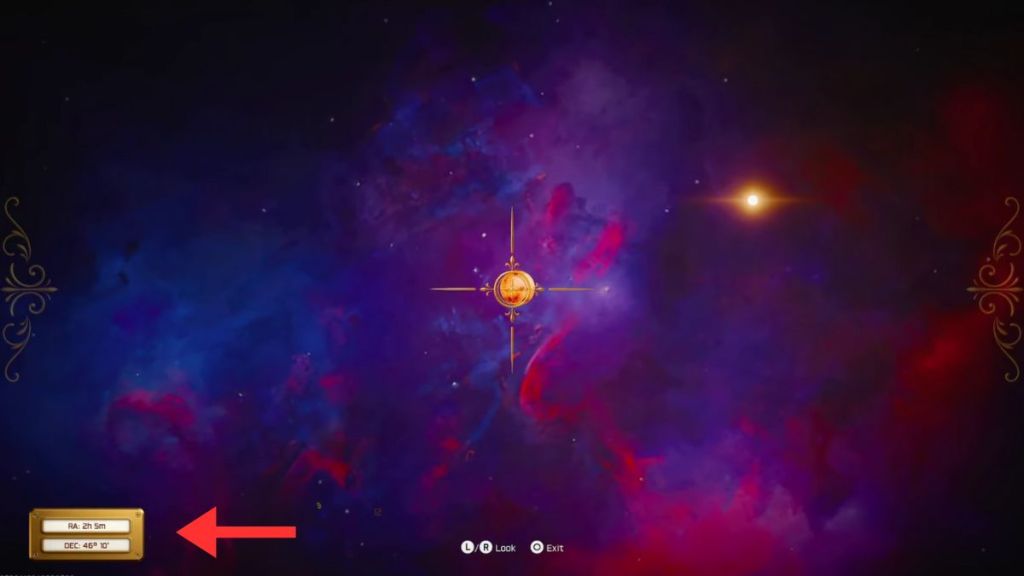
Run back to the Astralist room, climb the stairs sitting directly in front of the Perfusion Machine, and interact with the code machine sitting nearby. Enter the DEC numbers you noted down into it. That wraps up the first part of this puzzle.
Now, venture into the Archive of Orbis, where you’ll find multiple bookshelves, all arranged into three separate rows. Placed near each row is a bust, which you can turn by interacting with it. Your goal is to go through every bookshelf in each row, add up the number of relevant books they carry, and turn the busts accordingly. For example, I found three of the book titles I had noted down in the second row, with the first and third rows each carrying just one accurate book. So, this meant that I spun the first bust once, the second bust thrice, and the final bust just once again to complete the puzzle.
If done correctly, a trapdoor will open up nearby. Climb it, and you’ll be able to pick up the Planet Neptune item. This can be installed in the planetarium display back in the Astralis room.
Align Planets
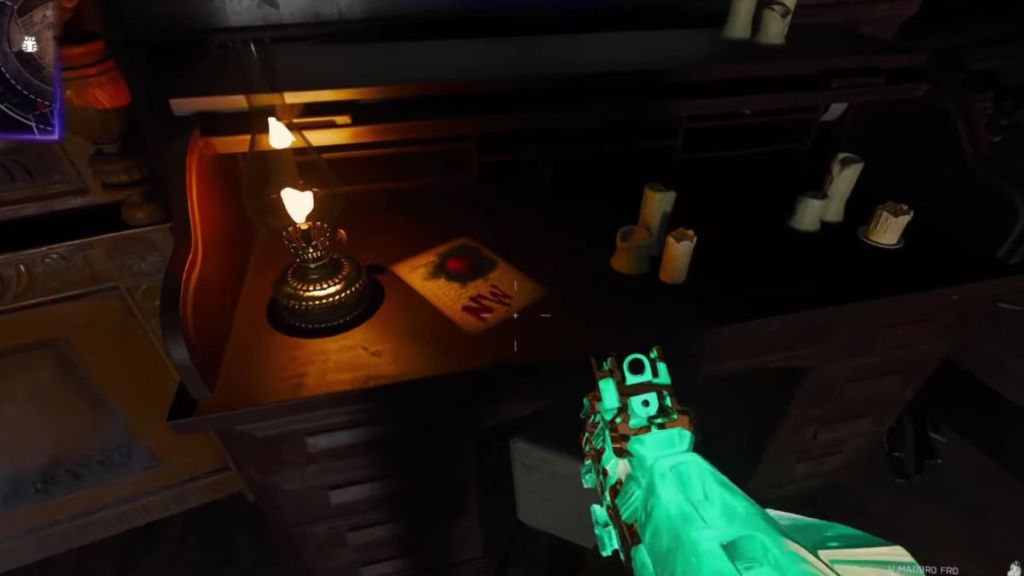
For this next step, you’re going to be looking for three pieces of paper and noting down the names of the planets and directions mentioned on them. The goal is to shoot the three planets into the respective directions as mentioned in the papers.
The first note can be found on a desk in the Astralis room itself. The second is sitting on a table right in the middle of the Archive of Orbis. And the final paper is on another table, this time in the Luminarium room.
Once you’ve noted down the details, head back to the Planetarium and stand directly underneath the sun chandelier, which also doubles as a compass. Use the directions marked on it to shoot the planets accurately. After this is done, head back to the Perfusion Machine and interact with it to trigger a lockdown.
OSCAR will instantly return to the action and start launching UFOs at the charging portal in the middle of the room. Make sure to shoot down these projectiles, and eventually, you’ll be sucked into the portal.
Use Pylons to Get the Ascendant Eye

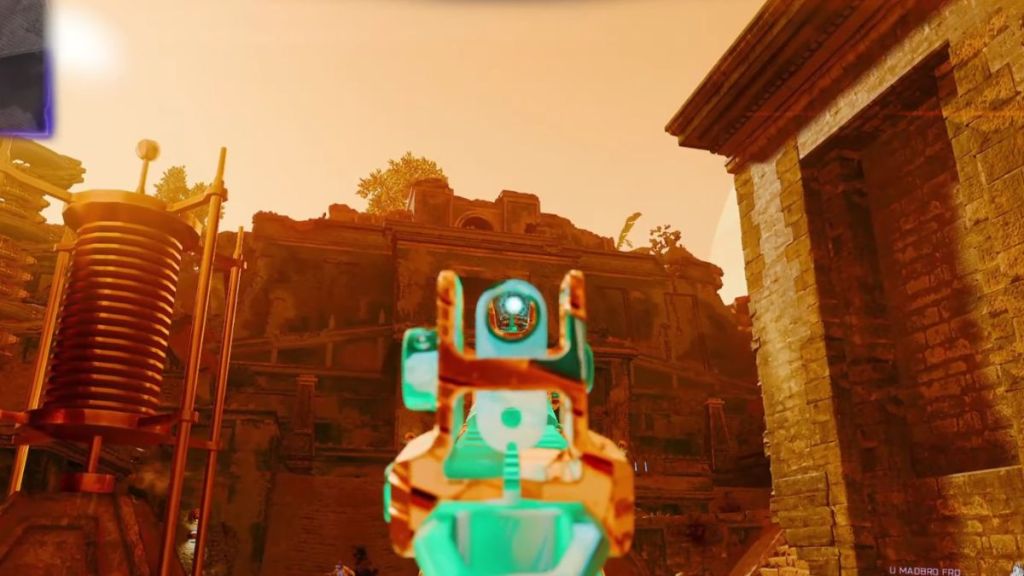
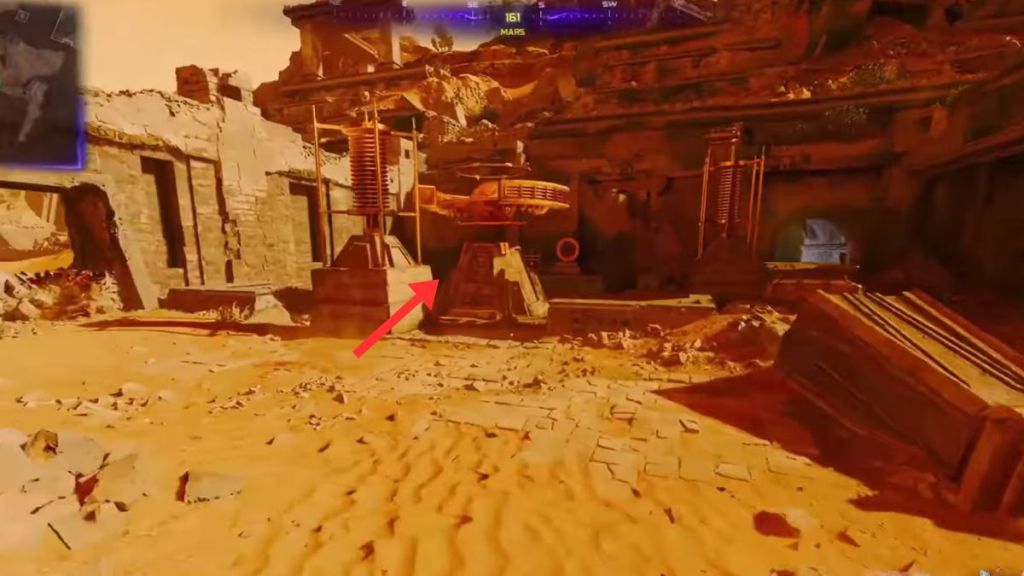
After the completion of the previous step, you and your crew will be transported to Mars. Right after spawning, you’ll see a brain canister fall directly in front of you. Pick it up, run right back to the platform you were previously standing on, and slot it into the contraption. This will trigger a dialogue sequence, where you’ll hear a mysterious chime. This sound signifies the presence of the Ascendant Eye, which can be seen by going to the hole in the southeast corner.
The Ascendant Eye will be flying near four Pylons, all of which emit the same chime if you shoot their topmost parts. Shoot these pylons in this order to bring it closer to your location: back right, back left, front right, front left. Once it gets to the front left pylon, quickly turn back and shoot the floating orb above the spawn area. Keep shooting the orb until low-gravity kicks in, where you can jump towards the flying bird and grab it.
Complete Pillars and Symbols Puzzle
In the final puzzle of the Astra Malorum main easter egg, you’ll need to first place the Ascendant Eye in the statue in the southeast part of the spawn room. Now, use the Portal nearby, go back to the Pack-A-Punch room, and interact with the piano. This time, it’ll display a series of symbols that match up with the pillars in the spawn room back on Mars. Note these down and go back to the Red Planet.
Once you’re back on alien soil, go up to each of the five pillars, look at the symbols displayed at their base, and match them up to the ones you saw back on Earth. Try and nail down the correct order that you’ll need to interact with them in because you’ll need to be really quick for this next step.
Start by equipping the LGM-1 Wonder Weapon and shooting the tops of all of the pillars. This will cause them to emit a blue light, which is your cue to run up to the pillars and their symbols in the correct order and interact with them. If you’re interacting with the correct symbols, they’ll get even bluer as you activate them. If you complete the puzzle in the correct sequence, the contraption on the platform will also begin emitting the blue light.
Fight Caltheris
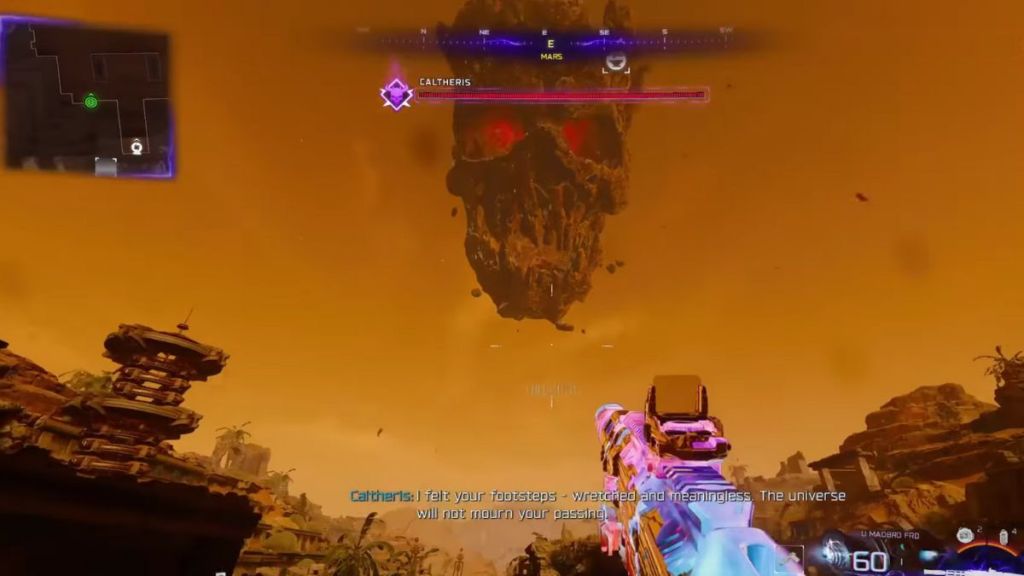
It’s boss fight time, so make sure to Pack-A-Punch your weapons, secure your GobbleGums, complete those side easter eggs, and top off on armor. To get things started, interact with the contraption and complete the voting procedure to summon Caltheris.
The boss itself is quite literally an ancient, floating skull that flies above the arena. As such, ranged weapons such as the M34 Novaline are highly recommended, ideally paired with the Shatterblast ammo mod. That said, your guns will do no damage to it in the first phase, as you’ll need to kill zombies to fill up the generators nearby with their souls. Once the generators are fully charged, you can interact with the contraption to fire a laser beam towards Caltheris that does a ton of damage.
Repeat this three times to empty out its first health bar, after which it’ll spawn on the ground a giant rock monster. Make sure to keep your distance as it chases you around the arena, and avoid the ground slam attack at all costs. Concentrate your fire on the glowing blue weak spots for the next two phases.
Caltheris’ final stage is similar in function, except it can now hurl purple rocks that can stun you. Whittling down its health, it’s definitely harder in this phase, but again, concentrate your fire on the weak spots to lower its armor, and eventually, you’ll be able to finish Caltheris off.
BO7 Astra Malorum Main Quest Rewards
Here are the rewards you’ll receive for completing the BO7 Astra Malorum main quest:
- ‘Bottled Up’ Nikolai Operator skin
- Astra Malorum-themed Calling Card
- 10,000 XP
And that wraps up our guide on the Astra Malorum egg in Black Ops 7 Zombies. What did you think of the new round-based map? Let us know in the comments.
Yes, the Black Ops 7 Astra Malorum easter egg can be completed solo, although it’ll be significantly more difficult compared to a team of four players.
By completing the Astra Malorum easter egg, players can earn the ‘Bottled Up’ Nikolai Operator skin, a special Calling Card, and 10,000 XP.


 Aryan Singh