- To set up Gmail Notifications, tap the hamburger menu > Settings > select your account > inbox notifications > tick the box for Notify for every message.
- You can also enable notifications per label from the Manage labels menu in Gmail settings.
- If you can't hear the sound of upcoming notifications then make changes from the Notification sounds menu in the app settings.
I can’t begin to tell you how many essential emails I’ve missed on my Android phone, despite correctly setting up my Gmail account. If you’re in the same boat as me and don’t want to miss any important Gmail notifications, this guide is for you. Here, I’ve covered several methods to set up Gmail notifications on Android.
Turn On Gmail Notifications on Android
For security reasons, Android now asks you to allow the app to show notifications. If you don’t allow it or ignore the pop-up, the app won’t notify you of any incoming messages or emails. This could be why you aren’t getting any notifications on Gmail. Here’s how you can enable it in Android settings.
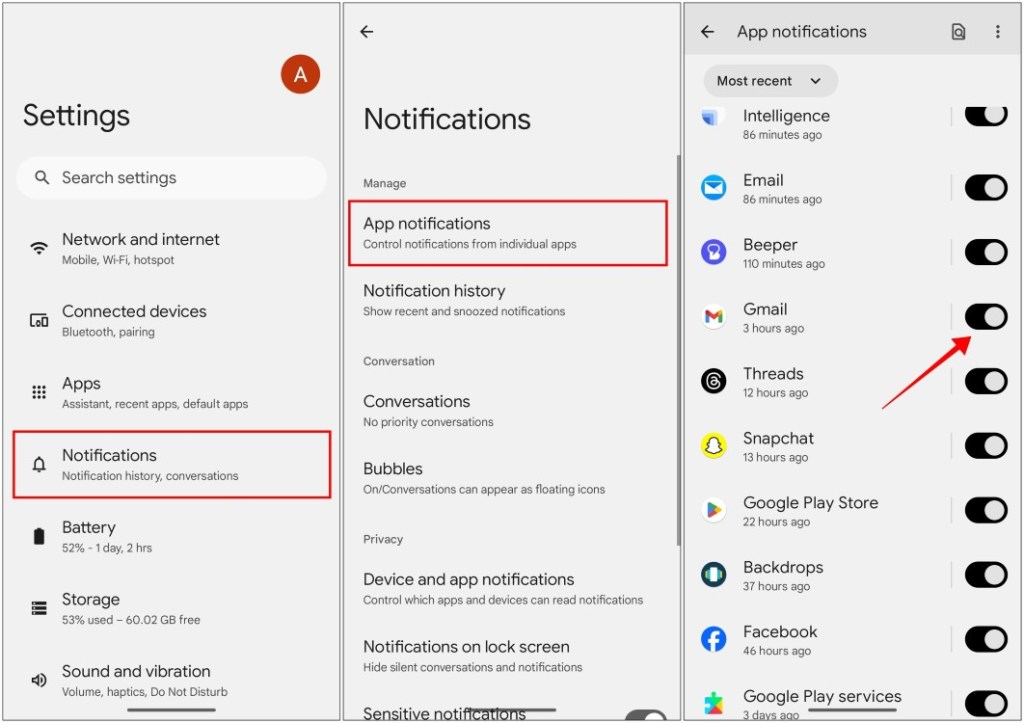
- On Android, go to Settings.
- Head to Notifications > App notifications.
- Now scroll down to Gmail and turn on the toggle next to it if disabled.
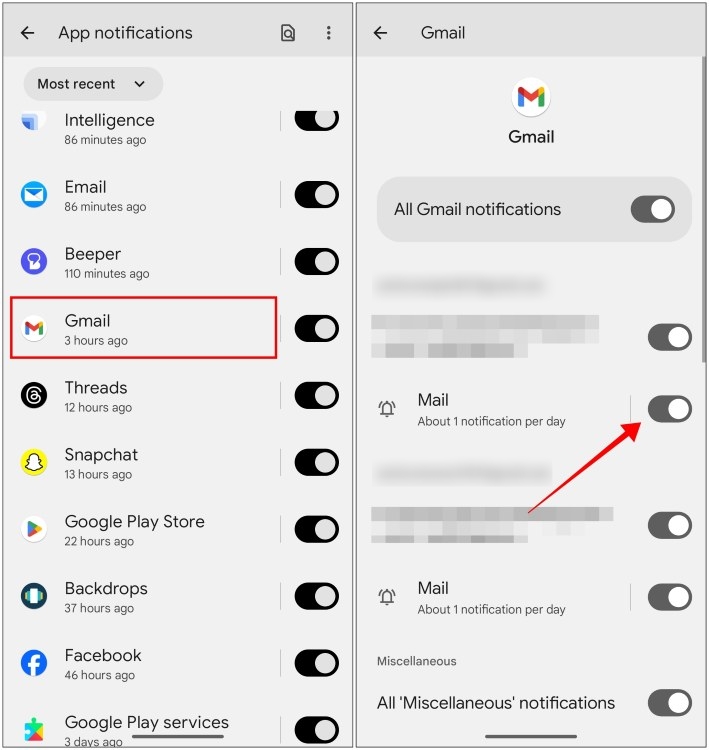
Now let’s say you want to get Gmail notifications for one account and turn them off for another. You can do so by tapping the Gmail option from the same menu. This will take you to Gmail’s notification categories. Here, turn on the toggle for the accounts you wish to receive alerts for.
Set Up Gmail App Notifications on Android
If you want to be up-to-date with every email that drops in your inbox, then you need to tweak the sync and notification settings for your inbox. Here is how you can do it through the Gmail app.
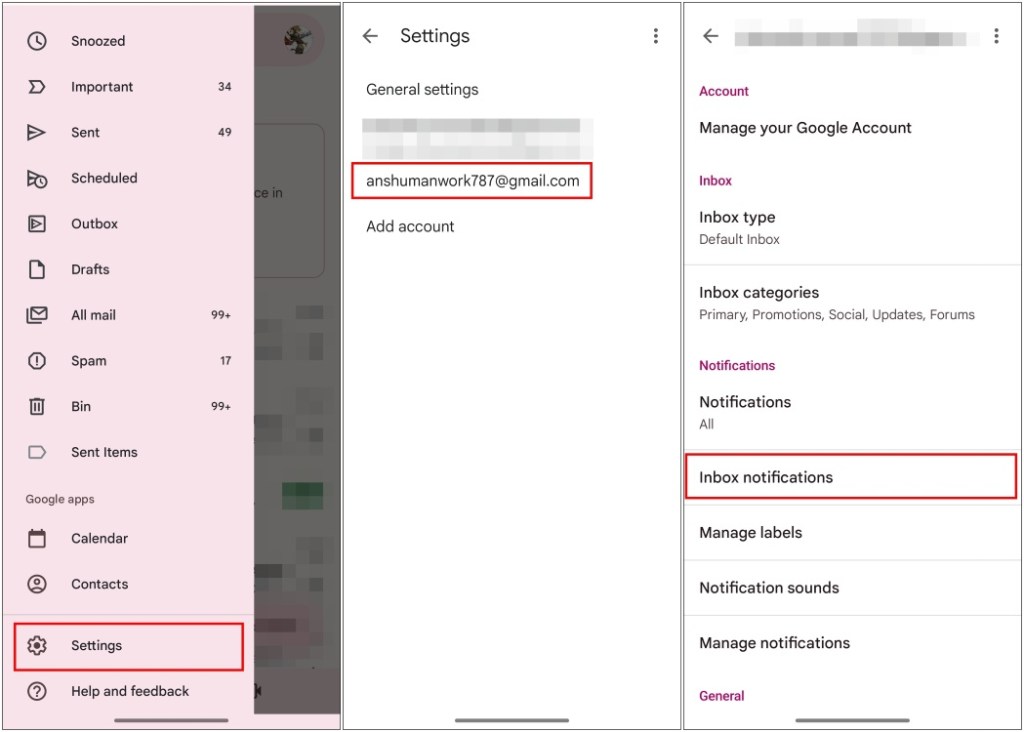
- Tap on the hamburger menu at the top left of the Gmail app.
- Now go to Settings and select your account.
- Here, go to Inbox notifications.
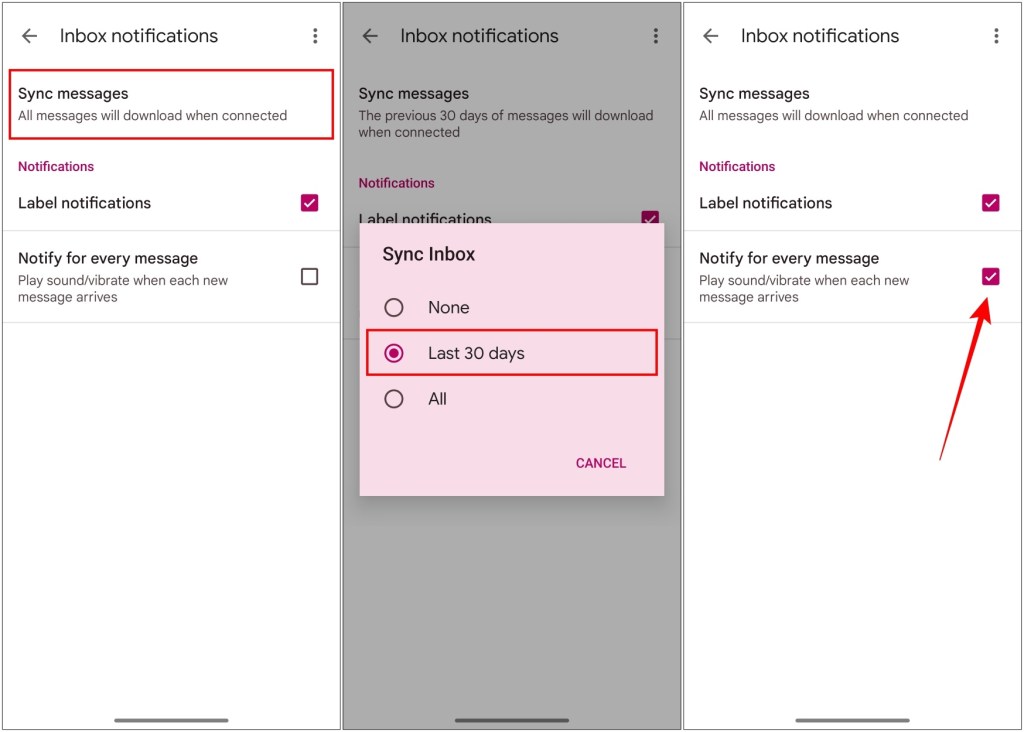
- Tap on Sync messages and select Last 30 days or All based on your preferences.
- Lastly, tick the Notify for every message box under “Notifications”.
Note
You will need to do this again for every other email account you have signed up with on your phone.
Enable Gmail Notifications for a Particular Label
Gmail sorts email into different groups called Labels. It helps to differentiate promotional, spam, and important mail. To turn on notifications for a specific label, follow these steps.
- Launch the Gmail app, and tap the hamburger menu at the top left.
- Head to Settings, then select the Gmail account for which you wish to set up mails.
- Go to Manage Labels under the Notifications category.
- Select the Primary label to be notified of important mail. You can also choose any custom labels that you have created.
- Tap on Sync messages and select your preferred option.
- Now, tick the Notify for every message box under “Notifications”.

Turn On Gmail Notification Sounds
Let’s say you went through the above steps, but still don’t get alerted for incoming mail till you open your phone. That’s because the notification sound was turned off. Use these steps to turn it back on.
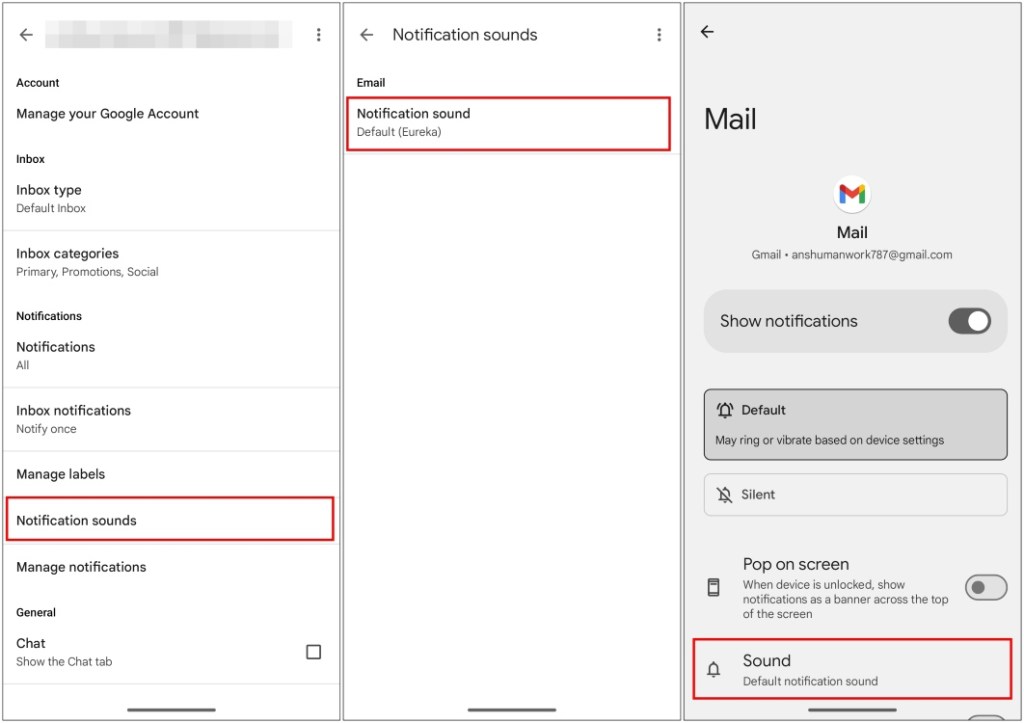
- Open Gmail Settings as shows in the methods earlier.
- Head over to Notification sounds > Notification sound.
- From the pop-up menu, tap on See more to go to notification settings on Android. Some interfaces might skip this step and take you directly to the notification settings page.
- Here, tap on Sound and change different options based on how you want email notifications to show up.
This is how you can set up and get notified of important emails on the Gmail app for Android. If you think that the above methods are not working out for you, then you can refer to this guide to help you fix notification settings on Android. Do reach out to us in case you have any queries related to this article or if it was able to help you out.