
Whether you are a YouTuber, an educator or a gaming aficionado, you may already be familiar with screen recording which comes in super handy for creating videos. Maybe you want to share a hands-on tutorial with your followers or grab the bragging rights about how well you have been crushing your opponents in battle royale games, the ability to record screen in Windows 10 is a must. Sadly, unlike macOS (thanks to QuickTime Player), Microsoft Windows hasn’t yet got a full-fledged screen recorder. But worry not, there are some workarounds that make it easier to record screen in Windows 10. And, that’s exactly what I’m going to talk about in this tutorial.
How to Screen Record Windows 10 PC (2022)
To ensure, you can get the task done with more efficiency, I’m going to demonstrate both the native solutions and the third-party Windows 10 screen recorder software that get the job done. If you wish to have a bit more control over your video, third-party apps are the way to go. However, if you just want to have a decent basic screen recording, then the built-in hacks can live up to the mark. Having said that, let’s find out how you can capture screen on your Windows 10 device!
Note: If you’re using Windows 11, you should head over to our dedicated article on how to screen record in Windows 11 instead.
1. Record Screen Using Xbox App on Windows 10
Though Xbox’s built-in screen recorder is primarily designed to let you capture the screen of your games, it can be tricked to record the screen of any app except desktop and some programs like File Explorer. Better still, it also offers you the option to adjust the output of your video. So, before getting started, fine-tune the Game DVR settings so that your recording is in line with your needs.
Adjust the Game DVR Settings
Depending on your needs, you will have to adjust the Game DVR settings so that your recorded video falls in line with your requirements.
1. To do so, click on the “Start menu” and choose “Settings”.

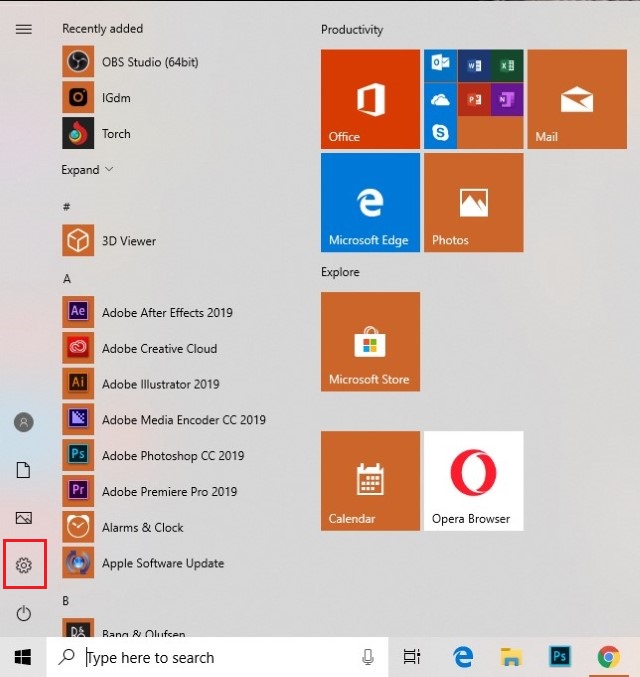
2. Now, click on the “Gaming” icon.

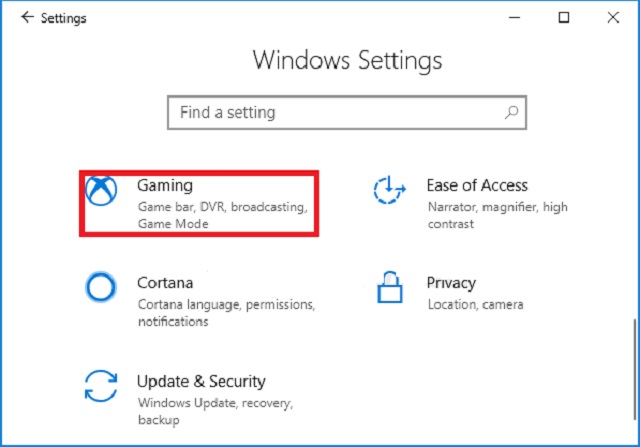
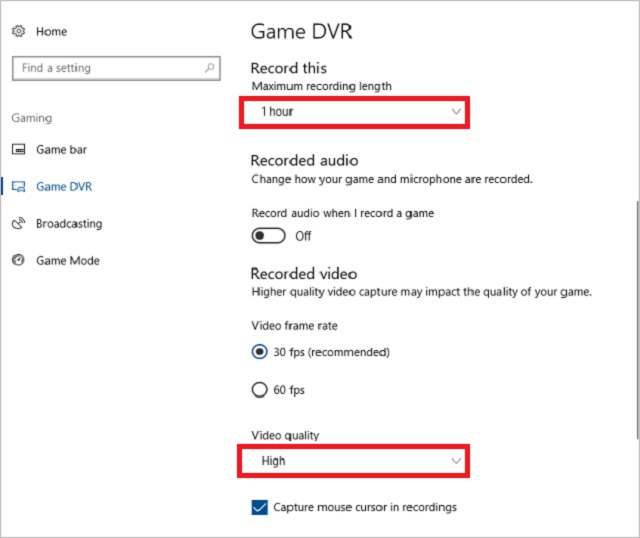
3. Next, select “Game DVR” and then adjust the settings. For instance, you have the option to choose how long you want to record the video, adjust microphone, select video frame rate (30fps/60fps) and also decide whether to record High-quality video or go with the standard one.

Start Windows 10 Screen Recording Using Game DVR
Now that you have adjusted the settings, let us see how you start Windows 10 screen recording using Game DVR.
1. To get started, open an app or a game where you want to record the screen.
2. Now, you need to press Windows+G keys at once.
3. Next, a popup may appear asking, “Do you want to open a Game bar?” You have to click on the box to the left of Yes, this is a game.


4. Next up, click the “Screen Recording” button to start recording (Win + Alt + R).


5. Up next, a tiny mini player will appear at the top right, showing the length of the video. You can use the Windows + Alt + T keys to show or hide the record timer.


6. Once you have recorded the video, click on the “Stop” button or use the Windows+Alt+R shortcut to end recording.
Now, a notification will appear, confirming that the clip has been recorded. You can click on the notification to open the recorded video in the UserProfile\Videos\Captures folder. Your recording will be saved as an mp4 file.
So, that’s how you can use the Game DVR to record screen on your Windows 10 computer.
2. Use PowerPoint to Record Screen on Windows 10
While many folks would be aware of Game DVR trick, not many users know that the PowerPoint app offers screen recording on Windows computer. Of course, it’s not a full-fledged feature but if you want to capture the video for5 your presentation, it would be worth taking a shot on.
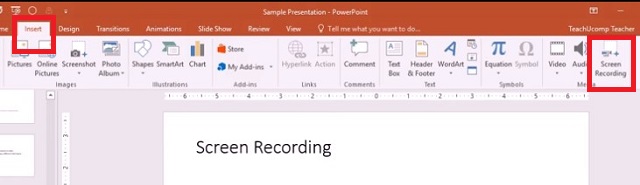
1. To start Windows 10 screen recorder using PowerPoint, open any slide and click on the “Insert” tab. Then, select “Screen Recording”.

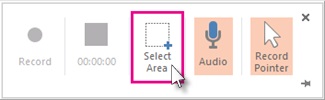
2. Now, a control dock will appear, asking you to select the area which you wish to record. You need to click on “Select Area” and then drag to choose the area. Just in case you want to record the entire screen, use the Windows key + Shift + F key. By default, it will record the audio and mouse pointer but you have the option to disable them using the control dock.

3 .After you have adjusted everything, click on the “Record” button. You can also use the Windows key+Shift+R shortcut to start/pause the recording.
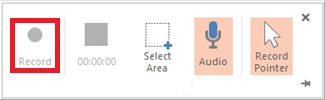
In the end, click on the stop button to finish. The video will now be embedded in your slide. However, you have the option to save it anywhere you want. Just right click on the video and choose “Save Media As”. Then rename it and select the preferred location.
3. Record Windows 10 Screen Using Third-Party Apps
While Xbox app and PowerPoint do get the job done, they aren’t ideal options. If you want to have much better control over graphics, quality, output formats and frame rates, you should try out third-party software. The one software that I’ve tried and found highly efficient is OBS Studio. Moreover, it’s available for free and offers plenty of customization.
Record Screen Using OBS Studio on Windows 10
1. First off, download OBS Studio software (free) on your computer and launch it.
2. Now, click on “Settings”.

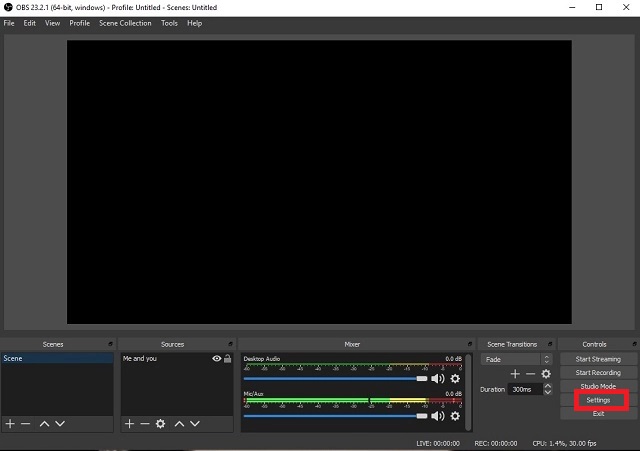
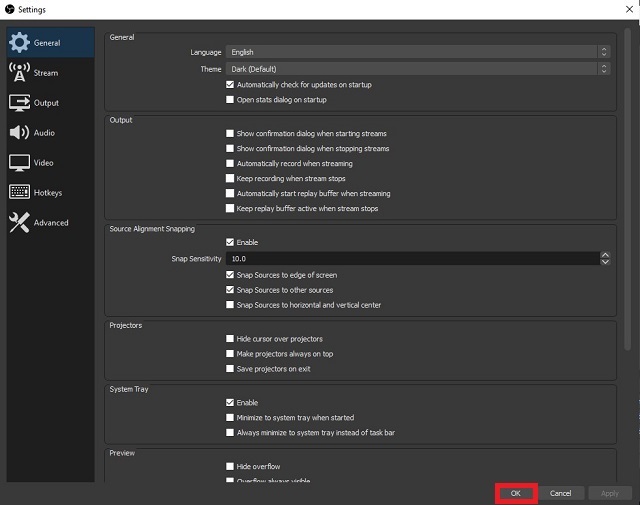
3. Here, you can fine-tune important elements such as resolution, bitrate, encoder, and streaming as per your need. Then, click on OK.

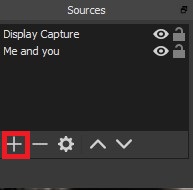
3. Next, you will need to add the preferred source. Click on the “+” button under the Sources section.

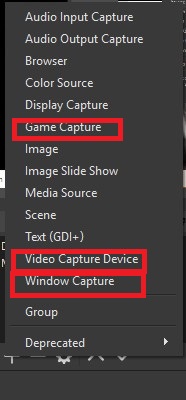
4. Up next, choose the desired source i.e. “Game Capture” when recording a game, “Window Capture” for an app and “Video Capture Device” for a webcam or capture card.

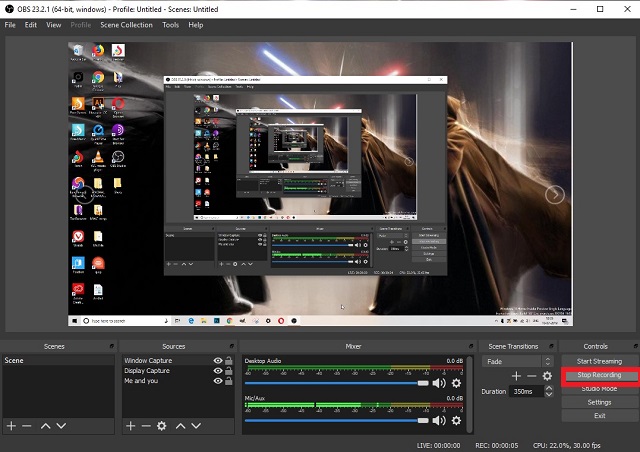
5. Now, before getting started, I would recommend you to have a glance at the entire settings again. Make sure to double-check the output format. Once you are all set, click on “Start Recording”.

5. Once you have recorded the screen, click on “Stop Recording”.

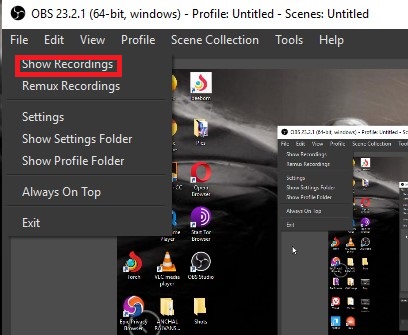
6. That’s pretty much it! You can now access your recordings from the File menu ->Show Recordings.

Other Screen Recorders for Windows 10
While OBS studio is a really good Windows 10 screen recorder app, some users might find it a little hard to learn. If that’s the case, you can take a look at other third-party screen recorder apps for windows 10 below.
1. Camtasia
Camtasia is a feature-packed screen recording app and comes with a range of screen recording and editing tools. The first thing that I love about Camtasia is its UI. The app makes it really easy to record your screen as all the tools are rightly labeled and easily accessible. Another good thing about Camtasia is that it also allows users to edit the recorded videos as it comes with a full-fledged video editor.

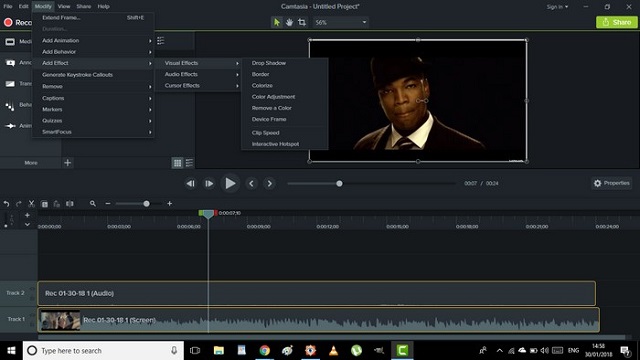
The editing tools include features like custom dimension, caption effects, cursor effects, timeline quizzes and more. You can also add zoom in, zoom out, and pan animations to your recording to give them pro touch. Besides, it allows you to save the recorded videos both locally or on Google Drive. Do keep in mind that Camtasia offers a limited free trial and its full version comes at $99.50, which is a bit expensive.
Install: Free trial (the full version is available for $99.50)
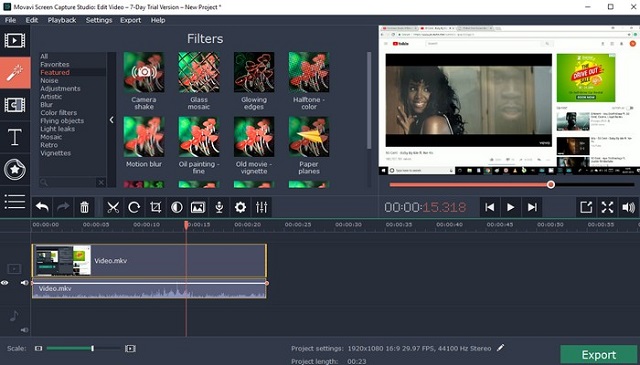
2. Movavi Screen Capture Studio
Another Windows screen recording software that’s got positive reviews both from experts and normal users is “Movavi Screen Capture Studio”. The app offers more flexibility, allowing you to capture the full screen or only selected area. You are also able to easily add suitable captions and voice-over comments with mic. Based on your needs, you can also split audio and video into several segments. Furthermore, it allows you to save the recording in multiple formats including MP4, MOV, GIFs, and more.

Install: Free trial (premium version starts at $18)
If you wish to explore more screen recording software for Windows 10, click on the link to head over to our dedicated article.
Easily Record Screen in Windows 10
So, that’s how you can capture the screen of your PC running Windows 10. Of course, it would have been better, had Microsoft offered a full-fledged screen recorder natively within Windows. However, the above-mentioned solutions along with the third-party offerings do get the job done efficiently. So, what do you usually record your PC screen for? And which method do you prefer using? Let us know in the comments below.


