After much hype, Microsoft has launched the first preview of Windows Copilot on the Windows 11 Dev channel with Build 23493. The Windows Copilot feature is said to bring deep and integrated AI experiences to Windows 11. You can simply chat with the Copilot in natural language to change settings, get help, and interact with your PC. Besides that, you can do all of the things that other chatbots like ChatGPT offer. So if you want to use Windows Copilot on your Windows 11 PC right now, follow our tutorial below.
Requirements to Use Windows Copilot
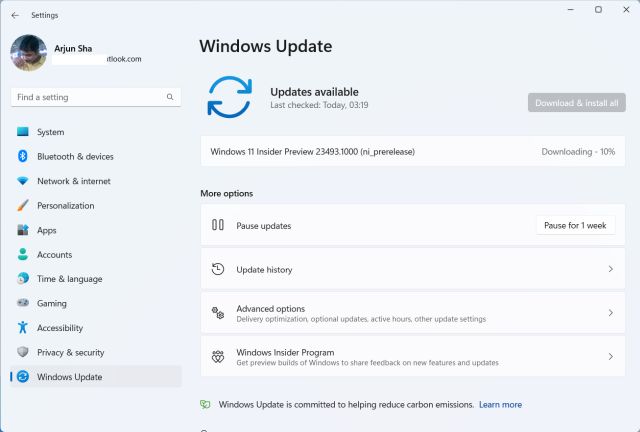
1. First, your PC needs to be enrolled in the Dev channel of the Windows 11 Insider program. The Windows Copilot feature is available on build 23493 (or later). So make sure you have updated your system to the latest Dev build.
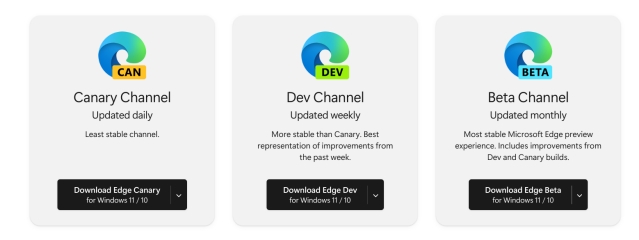
2. It’s recommended to have Microsoft Edge 115 installed on your PC. The 23493 build automatically installs the Beta version of Edge (version 115), so you don’t have to install it manually. However, if Copilot doesn’t appear on your system, make sure to install Edge from the Beta or Dev channel from the link here.
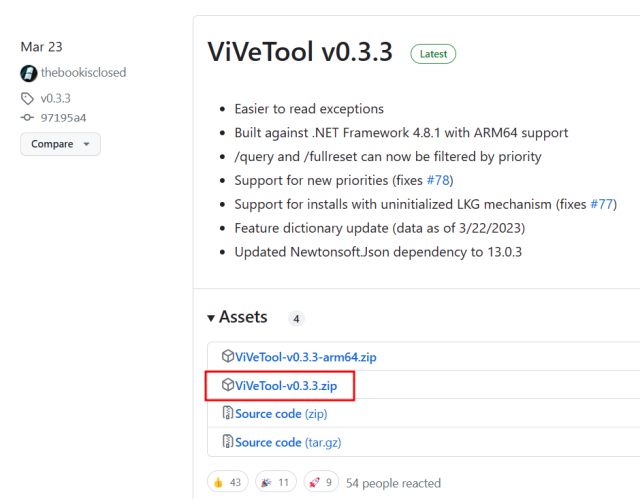
3. Windows Copilot is not enabled by default for all users and only a few have got the feature enabled out of the box. So you will likely need ViVeTool to enable the hidden Windows Copilot feature. You can download ViVeTool from here.
Check If Windows Copilot is Enabled on Windows 11
1. I am assuming you have updated your PC to the latest Windows 11 Dev Build (23493 or later). Now, let’s first check if Windows Copilot is already enabled on your system. If enabled, you will find the Copilot icon in the Taskbar.

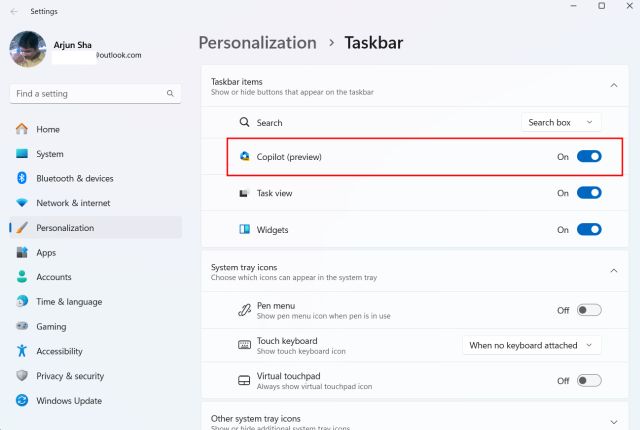
2. If not, right-click on the Taskbar and open “Taskbar settings.”
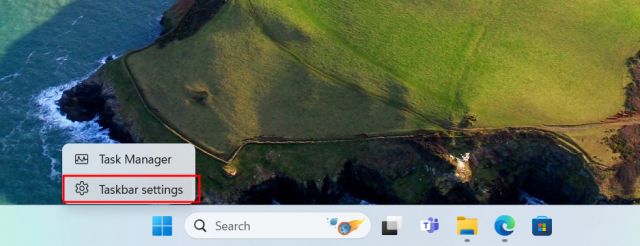
3. Here, you should find a Copilot (preview) toggle. Enable it. If Copilot is still not present, move to the next section to force enable Copilot on Windows 11.
How to Force Enable Windows Copilot on Windows 11
As mentioned above, not all Windows 11 users have Copilot enabled on the latest Dev build. In that case, you need to use ViVeTool to force enable it. Here’s how to about it.
1. First, go ahead and extract ViVeTool to a folder.
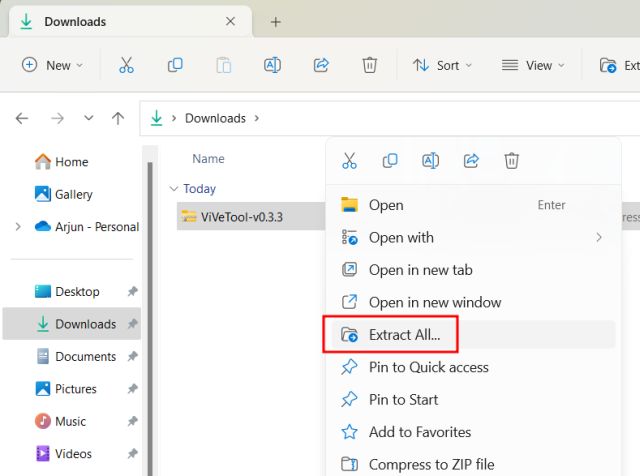
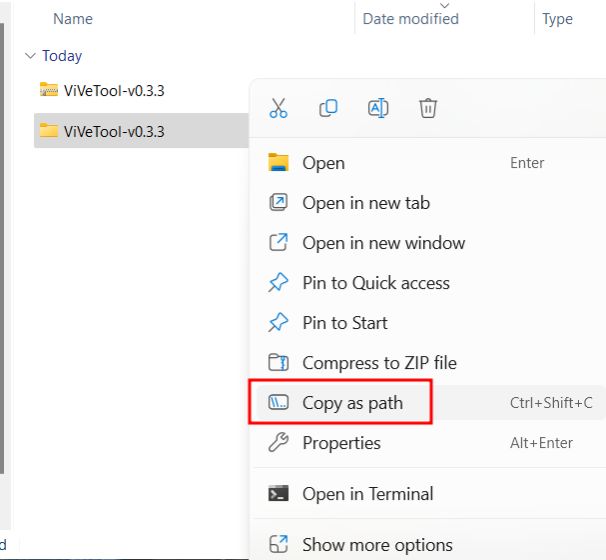
2. After that, right-click on the extracted folder, and select “Copy as path”.
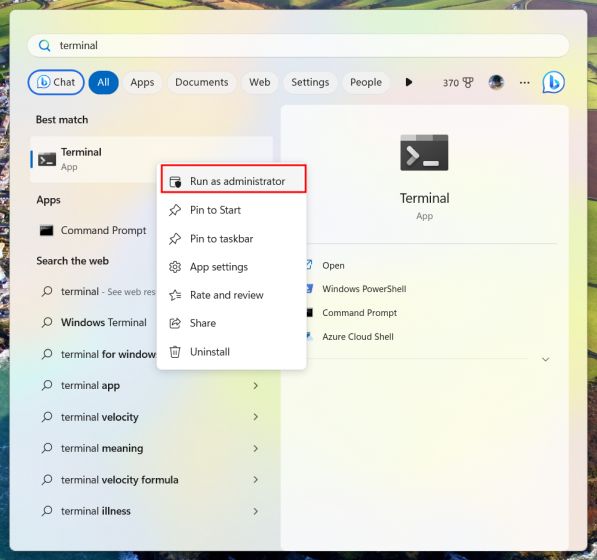
3. Next, open Command Prompt or Windows Terminal with Administrator privilege. You can search for “cmd” or “terminal” in Windows Search, right-click on it, and choose “Run as administrator.”
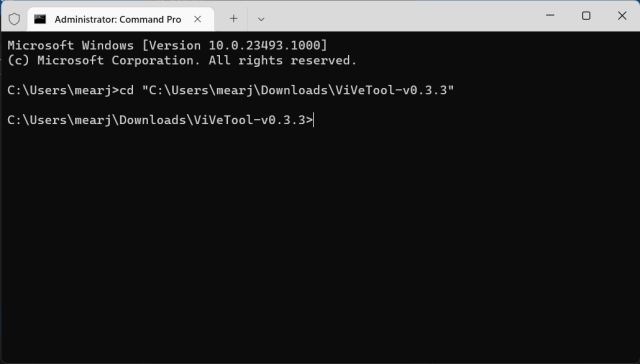
4. In the Command Prompt, type cd and paste the path you copied above. Keep in mind that the file path will be different for your PC.
cd "C:\Users\mearj\Downloads\ViVeTool-v0.3.3"
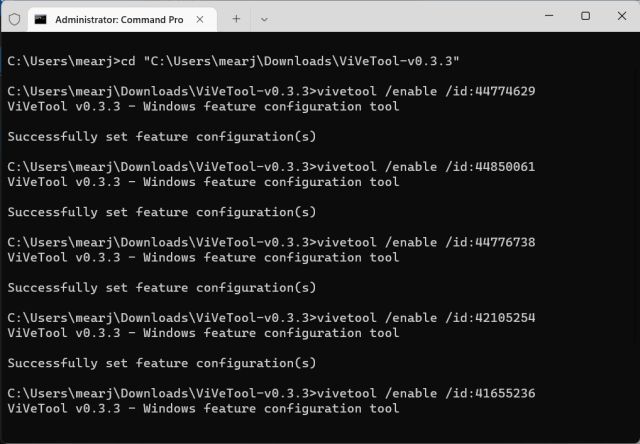
5. Once you are in the ViVeTool folder, run the below commands one by one. The ViVeTool IDs have been provided by Rafael on Twitter.
vivetool /enable /id:44774629
vivetool /enable /id:44850061
vivetool /enable /id:44776738
vivetool /enable /id:42105254
vivetool /enable /id:41655236
6. Restart your PC after running the commands listed above.
7. Finally, Windows Copilot will be enabled on your Windows 11 PC. Check the Taskbar and a Copilot icon should appear.

8. If the icon is still missing or clicking on it doesn’t do anything, open Taskbar settings and turn off/on the Copilot toggle.

9. Now, Windows Copilot should work fine from the Taskbar. You can also press “Windows + C” to open Copilot instantly. Keep in mind, you will need an active internet connection to use Copilot.
Windows Copilot on Windows 11: First Impressions
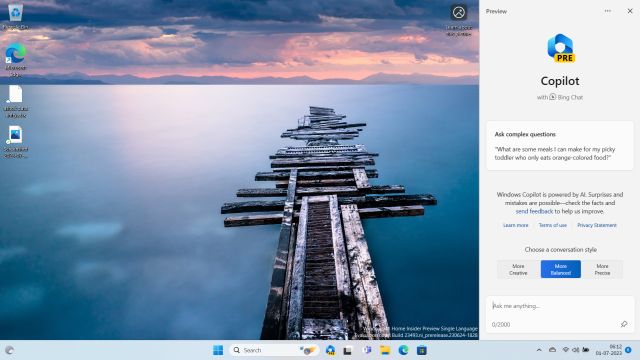
In my brief testing of Windows Copilot, in its current state, I found it to be very similar to the Bing Sidebar in Edge. However, it’s available system-wide, and you can interact with it anywhere in the OS, although both are powered by Edge’s Webview window.
It can also perform some local system actions like taking a screenshot, turning the dark mode on/off, turning do not disturb on/off, etc., using just natural language. And of course, you can ask it to write and generate text for a variety of use cases, including stories, poems, emails, etc. If you are a student, we also suggest you check out our guide on how to use AI in Google Docs to write content.
Note that, in some cases, Copilot does not perform local actions by itself. It returns the option, which you can click to change the setting then and there. Apart from that, I like the fact that it can read your current webpage and offer in-context answers instantly, just like Bing Sidebar. But it only works for Edge tabs and not Chrome or other browsers. It also does not work for PDF or text files opened using other programs. But you can upload documents to ChatGPT to ask questions.
Besides that, it would have been awesome if Microsoft integrated a voice button to interact with the Windows Copilot through voice. After all, it’s going to be the replacement for Cortana. So, in its current form, Windows Copilot is quite unimpressive. Nevertheless, it’s the first preview of Windows Copilot and things should definitely get better over time with more local actions and features.


