
- Windows updates are uninformed and can disrupt your work schedule.
- There are multiple ways to stop them temporarily and permanently.
- Some of them include using the Registry Editor, Group Policy Editor, and Windows Services.
Even three years after Windows 11’s release, Windows 10 is still relevant and one of the most widely used operating systems. Windows has improved over the years but is far from being perfect. One of the major complaints about Windows 10 is updates as users have no control over them or when they can update the operating system because Windows updates install automatically. Although there is no direct toggle to switch off automatic updates in Windows 10, there are other methods to stop or pause updates that we shall see in this article.
While updates bring security and stability to an operating system, Microsoft delivers them at the cost of convenience. At times, updates rolled out are downloaded and installed on your computer without any consent or notification.
You might be amidst an important call, and your Windows PC may abruptly begin installing a new update. As everything happens in the background, many updates that you otherwise wouldn’t have downloaded are also installed automatically. These may even change a setting or remove a feature that you use regularly.
Automatic updates have been an active point of criticism for which Microsoft eventually rolled out a few options that you can change to stop them. Sadly, these options are not available as easily and are deeply embedded in the Windows architecture. This makes it difficult to find them, but fortunately, you have us.
Method 1: Disable Windows Update Service
To stop Windows updates at once, you would need to stop Windows update services. To find out which one and how to stop it, read the steps mentioned below.
- Open Run by pressing Win + R on your keyboard. In the text box, type “services.msc” and click OK. Alternatively, you can search for “Services” in the Start Menu and click on the first search result.
- This will open the Windows Services window. From the list of services that appears, double-click on “Windows Update“.

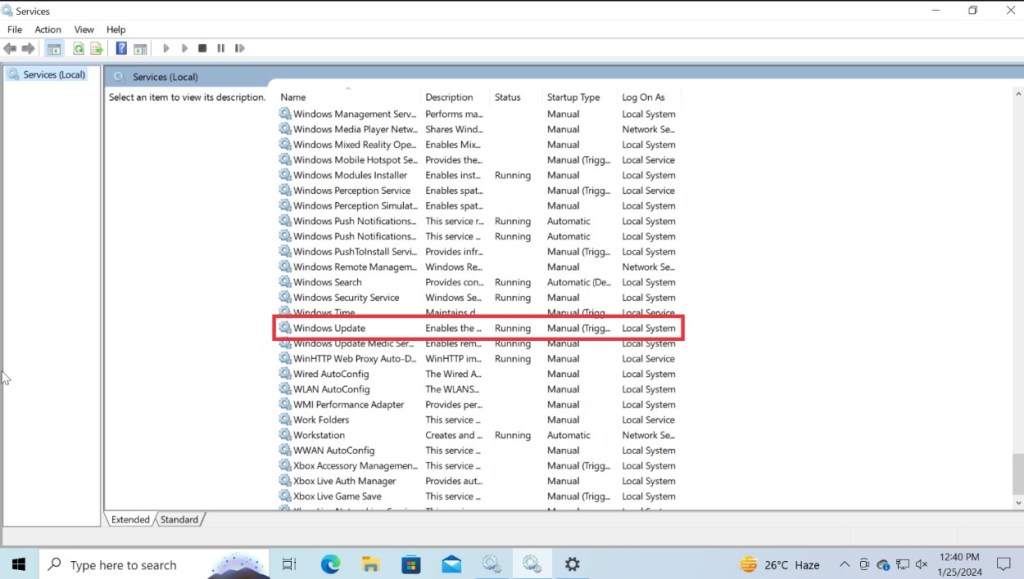
- You should now see its properties window pop-up. Here, in the drop-down menu of “Startup type”, select “Disabled”. Now you can click OK to save these changes.


As simple as this method was, you can experiment with the different options available. And in case you ever wish to update your Windows 10 PC, you can change the “Startup type” to “Automatic” at any time.
Method 2: Stop Windows 10 Updates Using Registry Editor
Registry Editor is similar to flags in chromeOS as it allows users to change most Windows settings and how the OS works. With a few Registry tweaks, you can take full control of the updates. Read the steps below to find out how.
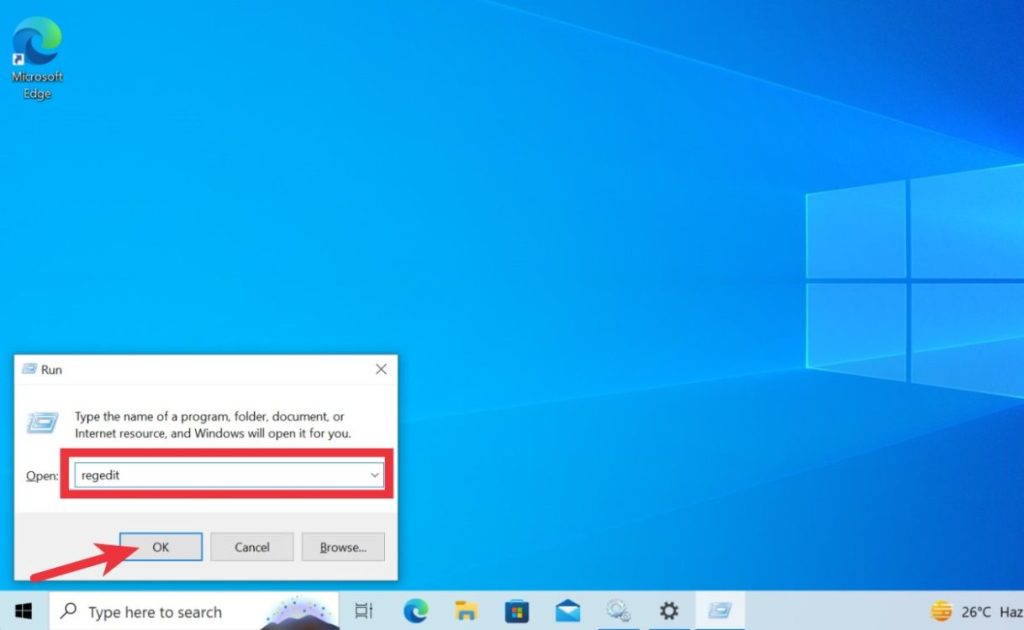
- Open Run by pressing the Win + R shortcut on your keyboard. Here, type “regedit” and hit the Enter key. Alternatively, you can type “Registry” in Windows search in the Start Menu and click the first search result.

- This opens up the Registry Editor. If you have an address bar enabled here, you can copy the path below, and if not, you’ll have to navigate there manually.
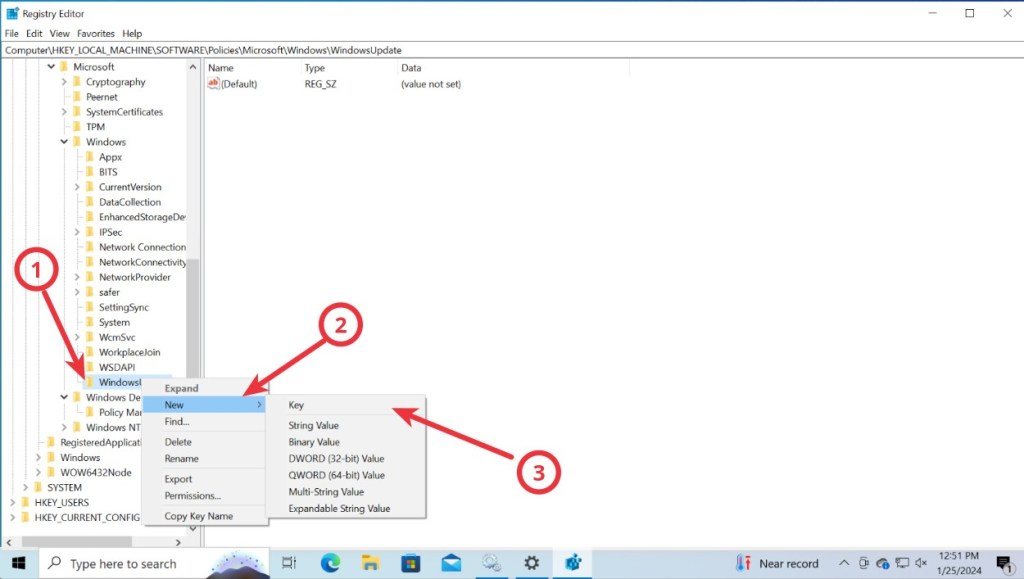
Computer\HKEY_LOCAL_MACHINE\SOFTWARE\Policies\Microsoft\Windows- In the left pane of the registry editor, right-click on “Windows”, hover over “New”, and select “Key” here.
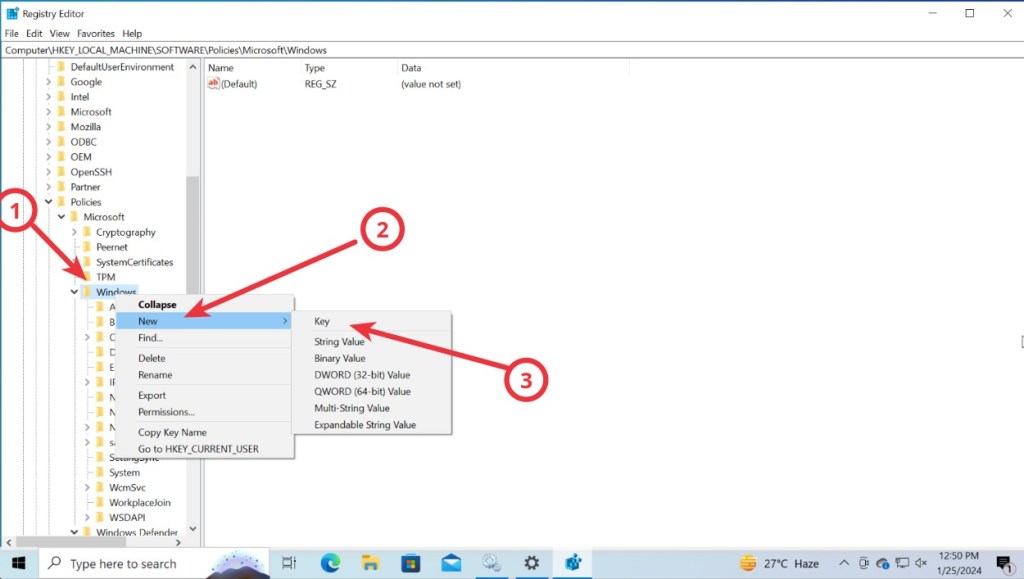
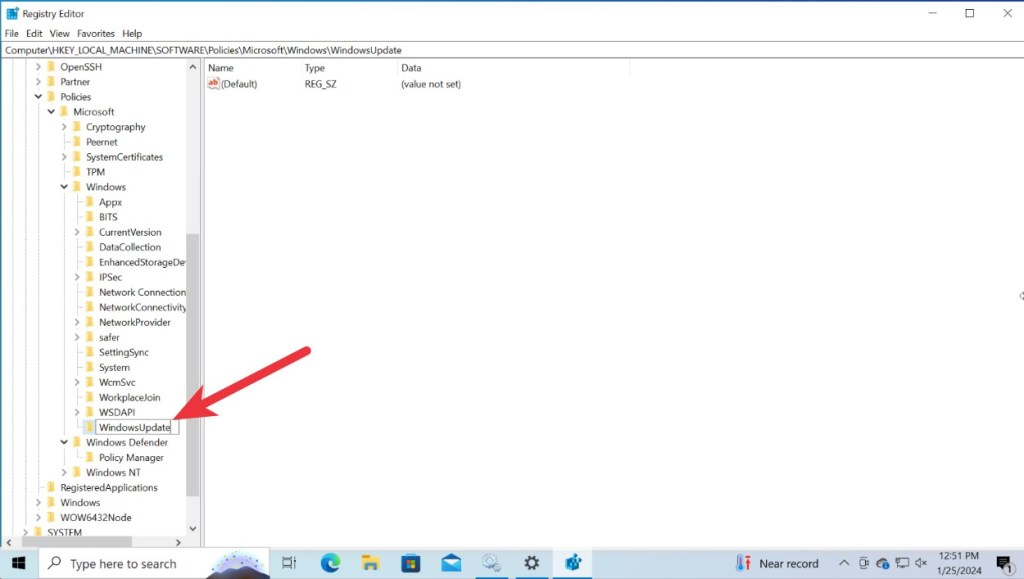
- This will create a new key. Rename it to “WindowsUpdate“.
- Once done, right-click on this key, hover over “New”, and click on “Key.”
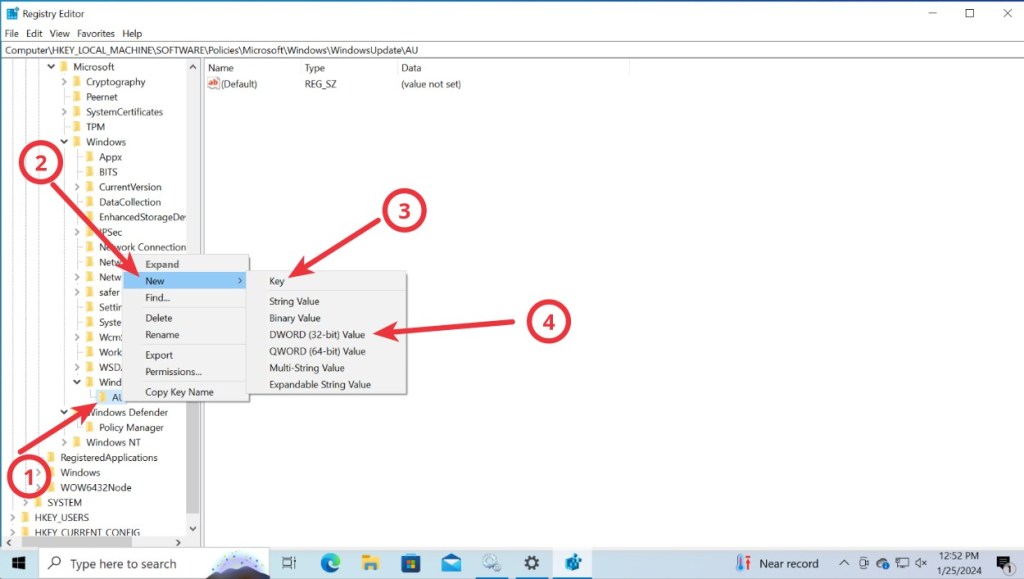
- This creates yet another key – this time under “WindowsUpdate”. Rename this key to “AU” in the Registry Editor.
- Double-click on it, and then right-click anywhere on the right pane. Now, hover to “New” and select “DWORD (32-bit) Value” here.
- Rename this key to “AUOptions,” and then double-click on it to edit it. Choose the base as “Hexadecimal”, enter the “Value data” from any of the ones mentioned below, and then click “OK”.
2: Notify for download and automatically install updates.
3: Automatically download and noify for installation of updates.
4: Automatically download and schedule installation of updates.
5: Allow the local admin to configure these settings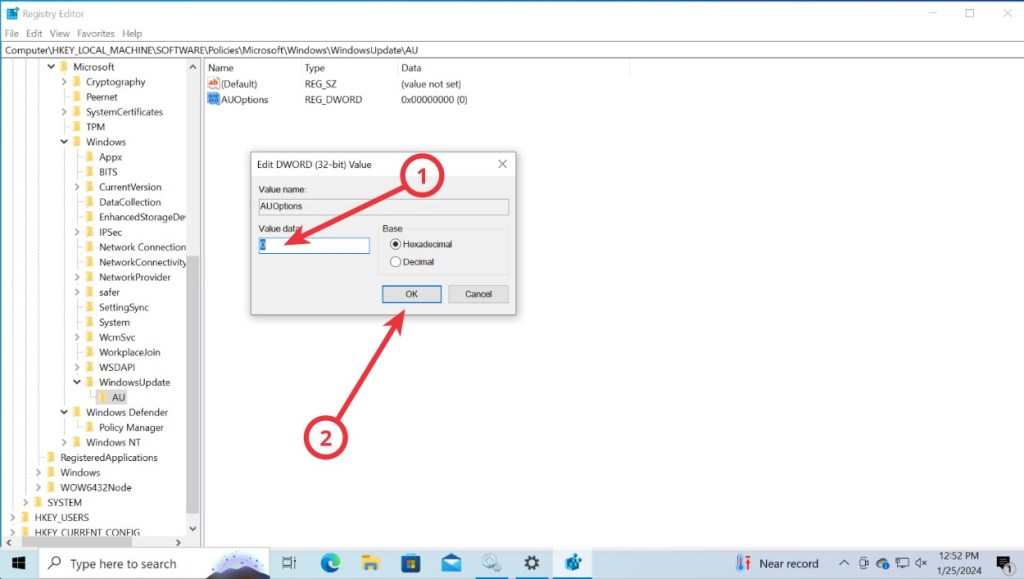
This method gives you control over Windows 10 updates. We recommend setting the “Value data” string to 2 since YOU want to decide what updates you want to download.
Method 3: Block Windows 10 Updates Using Local Group Policy Editor
Like Registry Editor, the Local Group Policy Editor gives you more than just a single way to manage the system updates. It is a lot easier than the former method, but can’t be implemented on Windows 10 Home edition as it does not come with the Local Group Policy Editor. Having said that, follow the steps below:
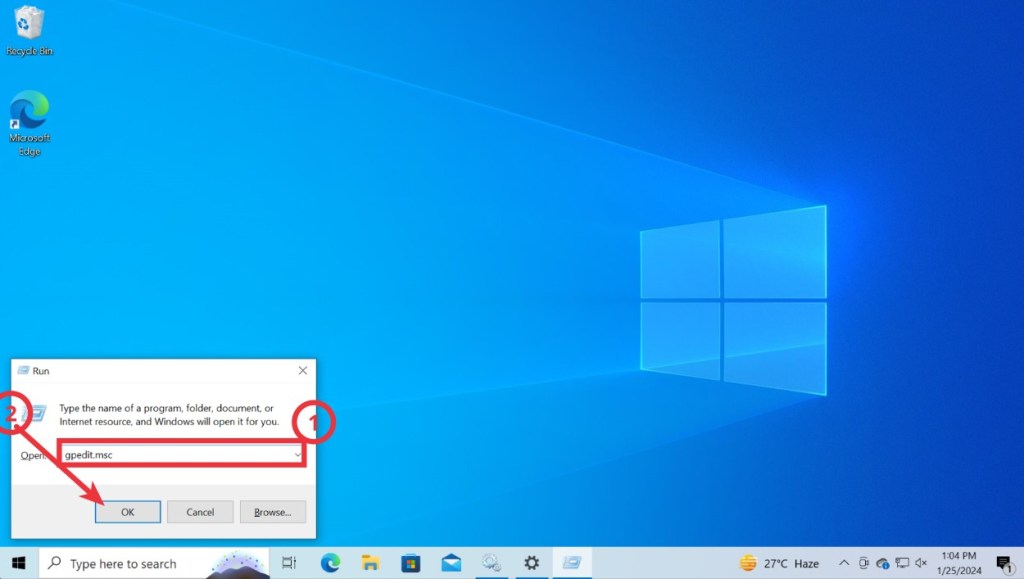
- Open Run by pressing Win + R on your keyboard -> type gpedit.msc -> click OK.
- In the Local Group Policy Editor, navigate to the path mentioned below.
Computer Configuration\Administrative Templates\Window Components\Windows Update- Under the list of settings you see, double-click the “Configure Automatic Updates.”
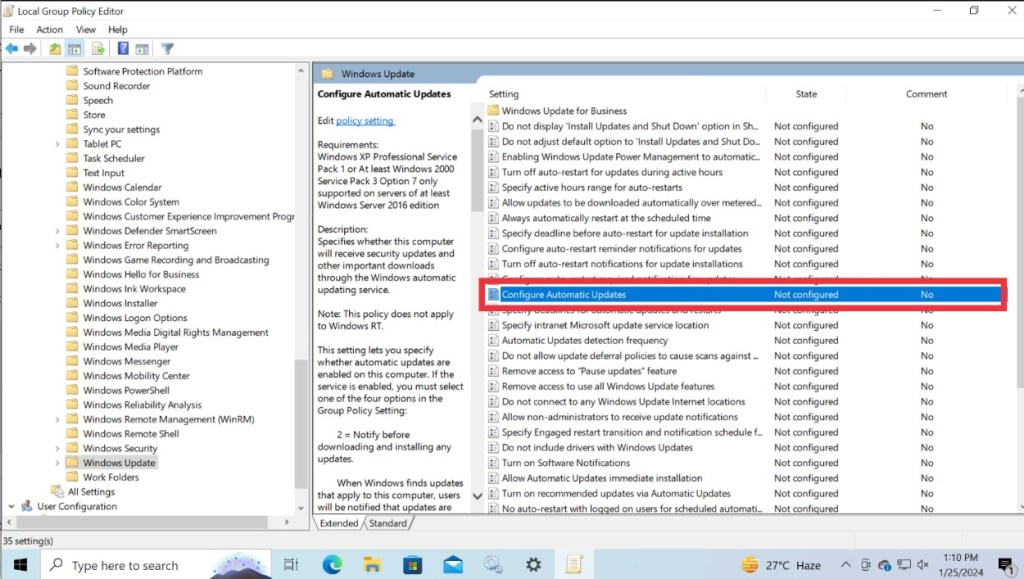
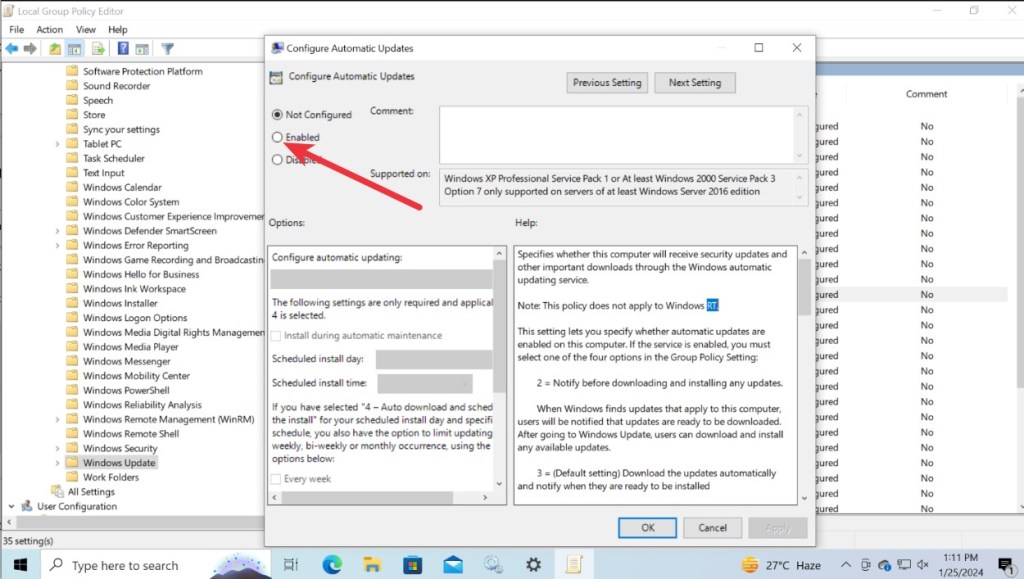
- A window should then pop out. Enable the setting and look for an option called “Configure automatic updating” with a drop-down menu.
- Select the option that says “2- Notify for download and auto-install,” and click OK.
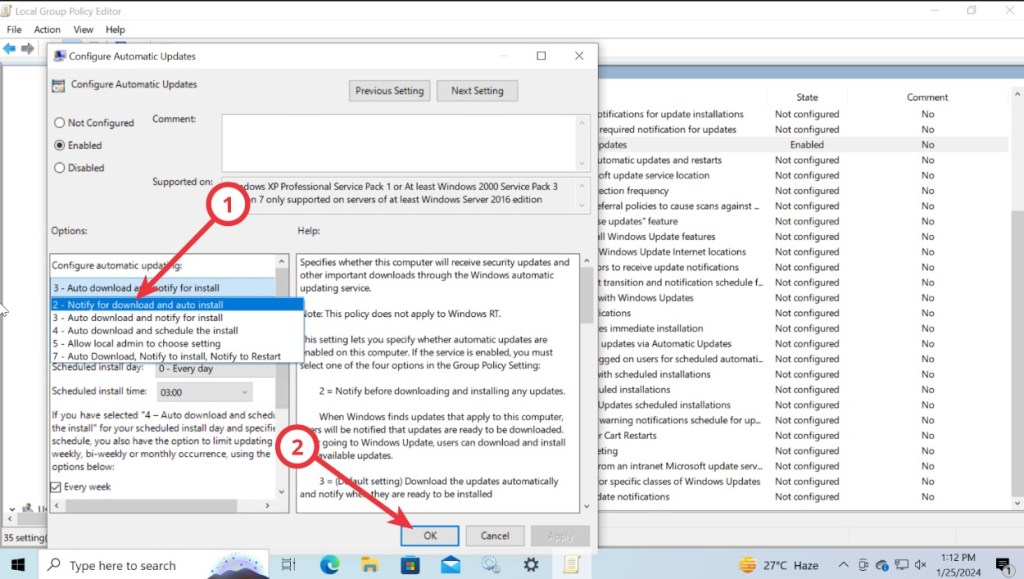
You can experiment with different options in the drop-down menu to best suit your needs. In case you ever wish to change it back to the default option, select “3- Auto download and notify for installation.”
Method 4: Workaround to Stop Windows 10 Updates
In this method, you will make Windows believe that your internet connection is a metered one, and it won’t automatically download all the updates over it. Note that some priority updates will still get downloaded regardless of using this method. If that is not a problem for you, read the steps below to implement this method.
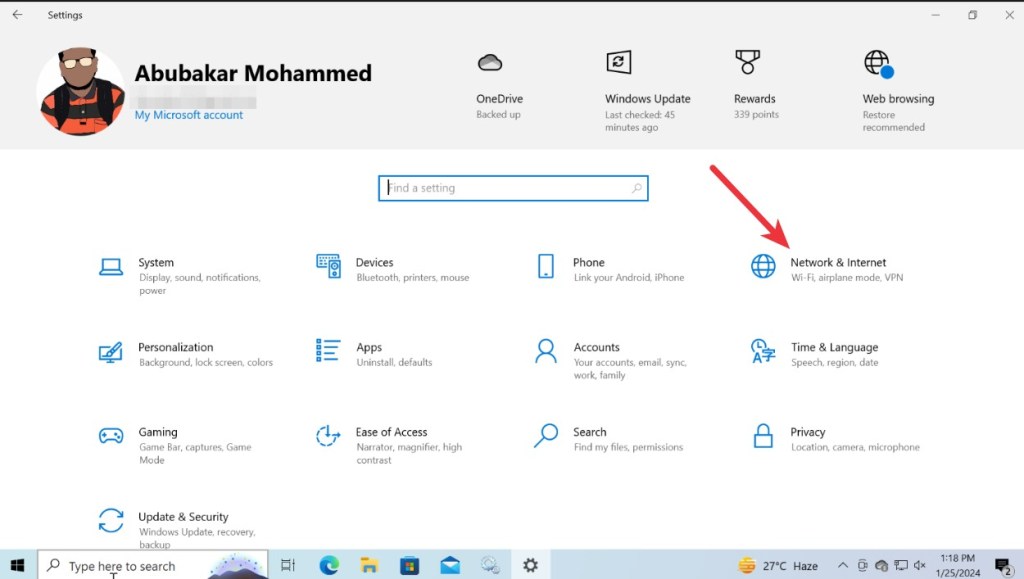
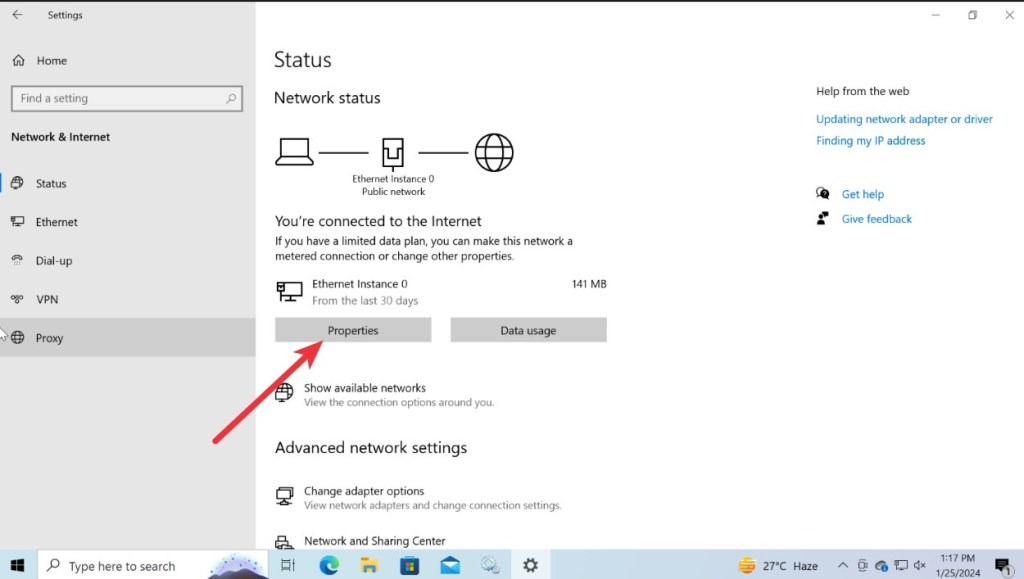
- Open your computer’s settings by pressing Windows + I. Then, click on Network & Internet.
- Under “Network & Internet”, go to Wi-Fi or click Ethernet.
- Then click on the name of the network you’re connected to and select Properties.
Note:
In case you want to do this for a different network, you can find the list of the networks your computer was previously connected to by clicking on “Manage known networks”. If you take this option, click on your desired network name and then click on Properties.
- Here, under Metered connection, you will find a toggle called “Set as metered connection.” Turn this on, and you’re done.
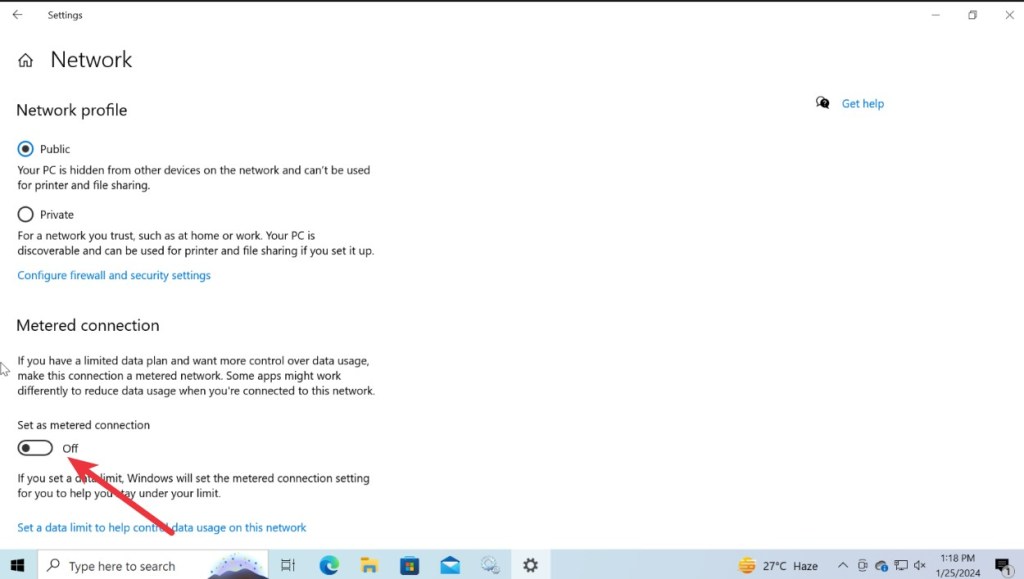
Windows 10 will now assume that you have a limited data plan on this network and won’t download all updates over it automatically.
Automatic updates in Windows 10 are a hassle but now you know more than one way to stop them. These are some simple methods you can use to take full control over your Windows system updates. Think we missed any other methods? Let us know in the comments section below.


