Scanning physical documents to create their digital copies seems like a daunting task. Thankfully, iPhones come with an in-built document scanning feature that makes the task easier. If you’re looking forward to scanning documents on iPhone or iPad, here’s a nifty guide for you. We have explained native methods to scan documents using iPhone as well as third-party apps that can help you. Navigate to the desired section with the table below.
How to Scan Documents on iPhone Using the Files App
We are sure many of you won’t know you can use the Files app to scan documents on your iPhone and iPad. While scanning documents on iPhone is easy, finding the feature is not. Below, we have detailed how to scan documents on iPhone and iPad using the native Files app –
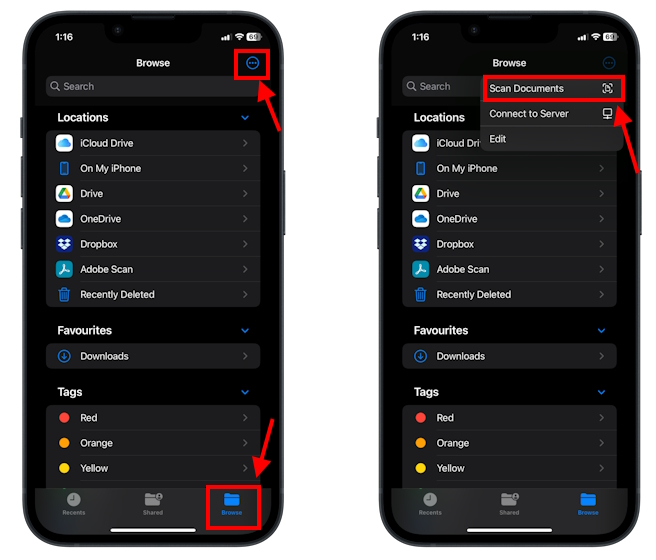
1. Open the “Files” app and tap the “Shared” or “Browse” tab.
2. Now, tap the “Three Dot” button at the top right corner, then tap the “Scan Documents” option from the drop-down menu.
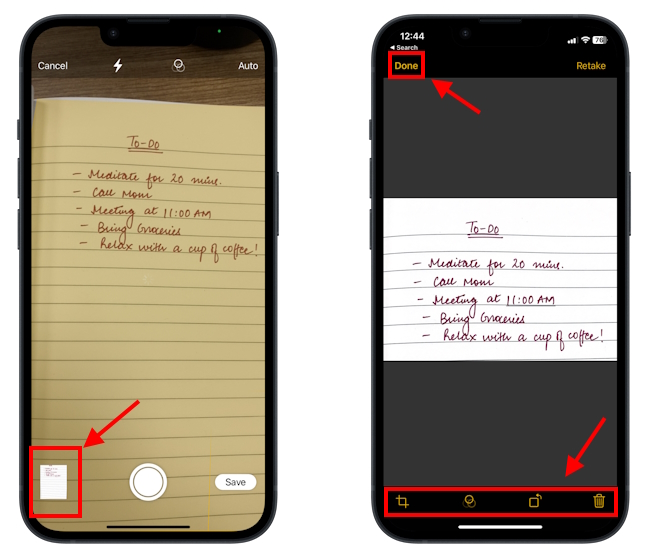
3. Now, position the document in the camera’s view and iPhone will automatically capture the document, or you can also tap the “Shutter” button.
4. Once the document is captured, make the necessary adjustments like crop, add filters, or rotate by using the menu at the bottom of the screen. After you’ve made the changes, tap the “Done” button.
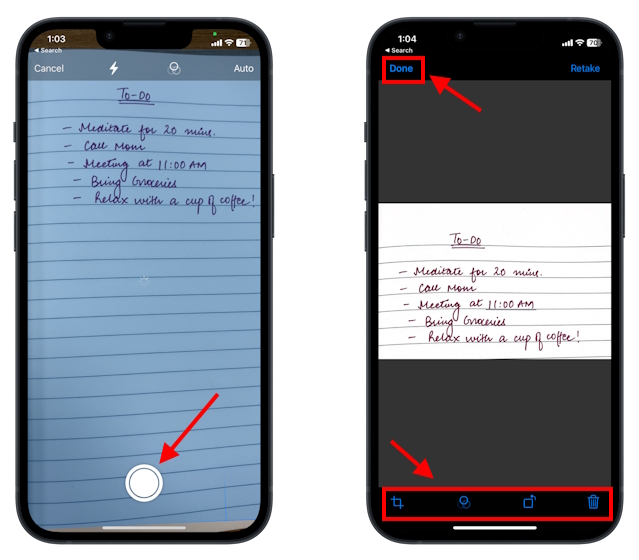
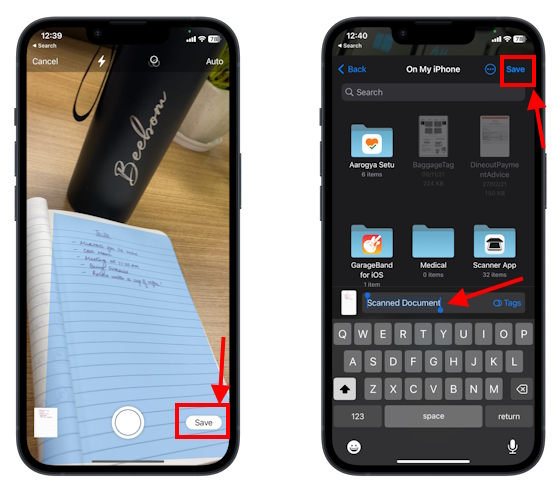
5. Now, tap “Save” at the bottom right corner.
6. Next up, choose a location to save the scanned document. You can also rename your document here. Once done, tap “Save” from the top-right corner.
How to Scan Documents on iPhone Using the Notes App
While the above-stated method does the job, you can also use the default Notes app to scan and share documents on your iPhone and iPad. Here’s how you can –
1. Open the “Notes” app on your iPhone or iPad.
2. Now, open an old note or create a new one and tap the “Camera” icon.
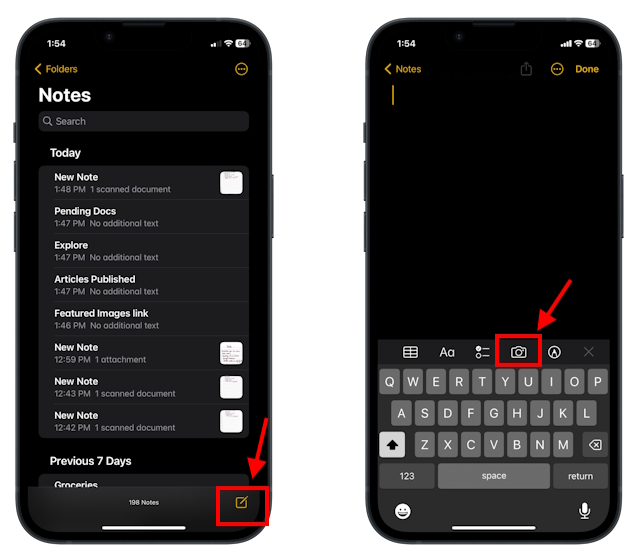
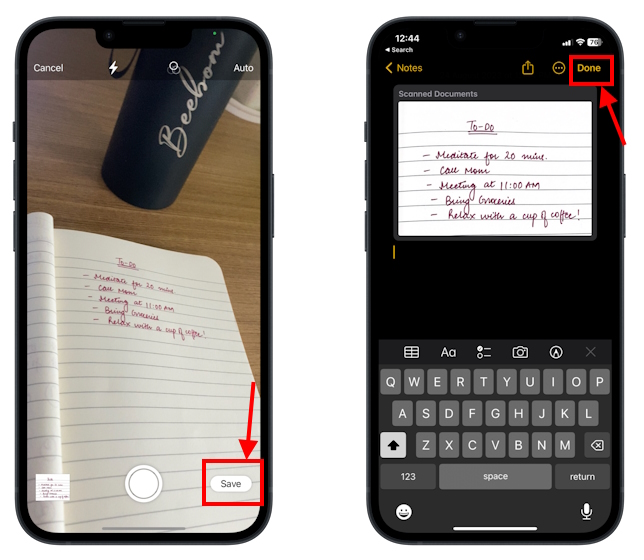
3. Here, tap the “Scan Documents” option and position the document in the camera’s view and tap the “Shutter” button.

5. Once done, tap on the Preview of the scanned document at the bottom left corner.
6. Make the necessary adjustments by using the menu at the bottom of the screen, then tap “Done.”
7. Now, tap “Save” at the bottom right corner to save the scanned document in a note, then tap “Done.”
Third-Party Apps to Scan Documents on iPhone
You can find many document-scanning apps on the App Store, like CamScanner, Microsoft Office Lens, Swift Scan, and our personal favorite Adobe Scanner. Below, we have detailed how to use a third-party app like Adobe Scanner to scan documents on iPhone and iPad –
1. Download and install the “Adobe Scan” app on your iPhone (Get, free).
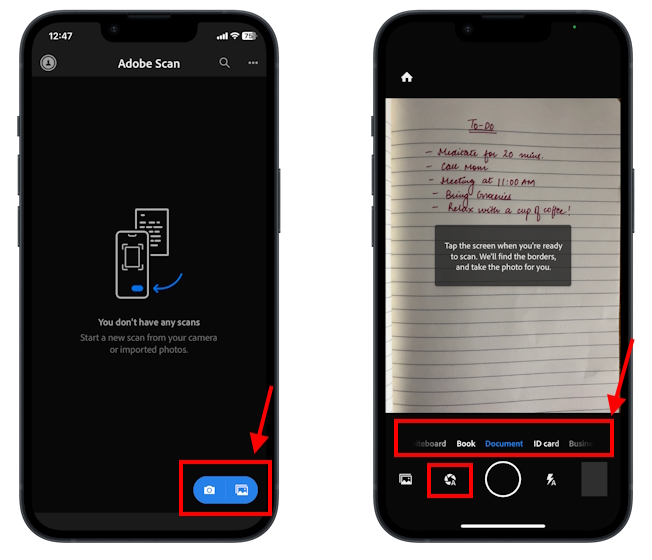
2. Open the app and tap on the camera icon if you wish to scan a new document. To use an existing image from the Photos app, tap on the Photos icon.
3. Then, using the slider menu above the capture button, choose the type of document you wish to scan.
4. Position the document in the camera’s view and tap the “Shutter” button. You can also enable the Auto-Capture (on the left to the Shutter button) to allow Adobe Scan to automatically detect the borders and take the photo for you. You just have to tap the screen when you’re ready to scan.
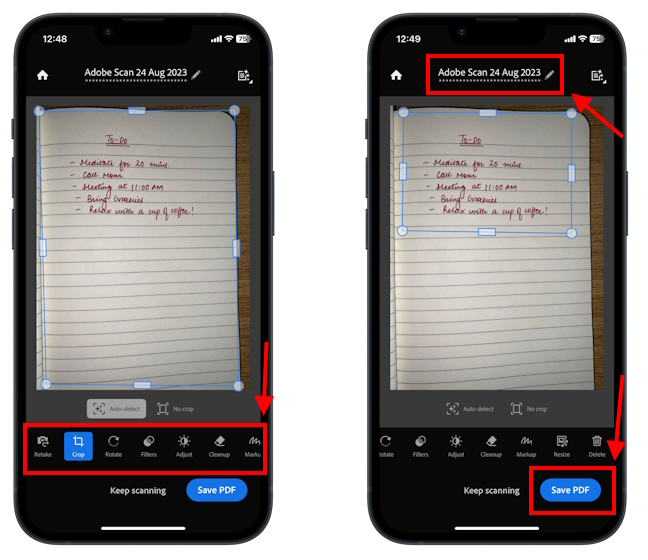
5. Now, you can make Adjustments to the scanned document like rotate, add filters, markup, and more.
6. You can also choose a name for your scanned document. One done, tap the “Save PDF” button at the top right corner.
How to Share Scanned Documents from iPhone
Now that you know how to scan documents with your iPhone, it is time to learn how to share the scanned documents from your iPhone. Like scanning, you can use the Files and Notes app to share documents from your iPhone. We have detailed both methods below –
Share Scanned Documents from Files App
1. Open the “Files” app and locate the “Scanned Document.”
2. Now, touch and hold the scanned document to bring up the drop-down menu and tap the “Share” option.
3. Then, choose the “App” through which you want to share the file using share sheet.

Share Scanned Documents from Notes App
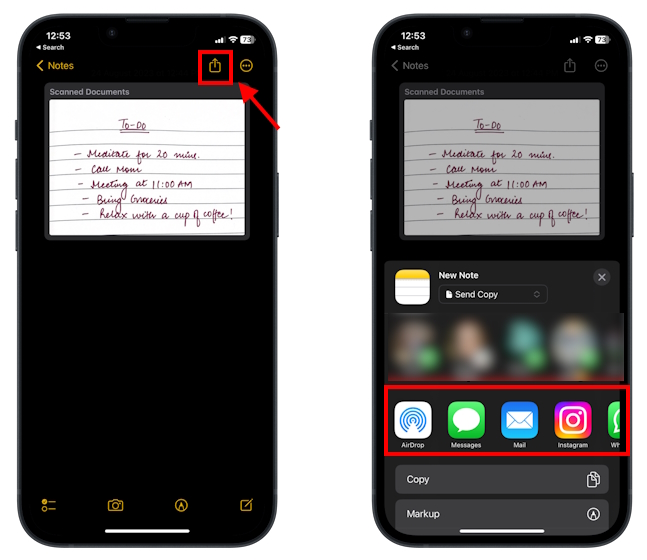
1. Launch the “Notes” app, open the “Scanned Note”, and tap the “Share” button at the top.
2. Alternatively, you can also Swipe left the document and tap on the Share icon.
2. Next up, choose the app through which you wish to share the Note.
How to Add Signature to Scanned Documents on iPhone and iPad
In addition to scanning a document natively, you can also add a digital signature to scanned documents on iPhone and iPad. Here are the steps to add a signature to scanned documents.
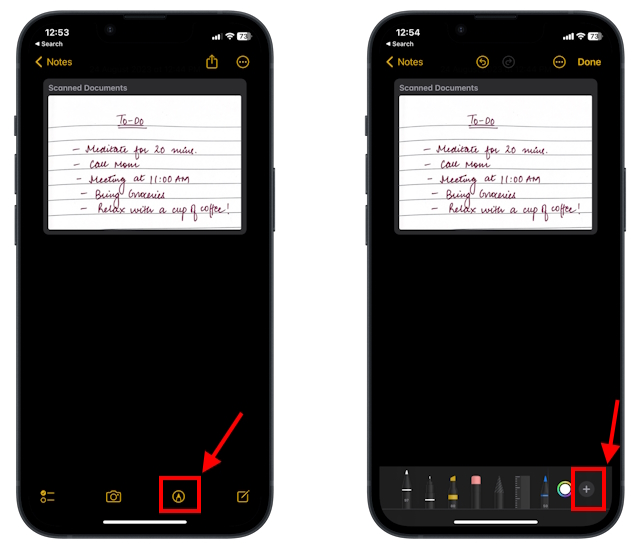
1. Open the “Notes” app, then tap the “Scanned Document” to open it.
2. Now, tap the “Markup” button from the tools available above the keyboard.
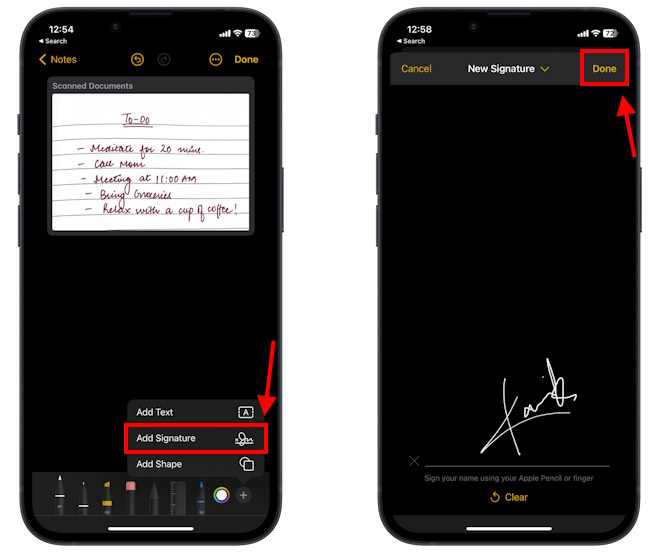
3. Here, tap the “+” button at the bottom right corner, then tap the “Add Signature” option.
4. Now, add a “Saved Signature” or create a “New Signature,” then tap “Done.”
And that’s it; this is how you can scan and share documents from iPhone and iPad.