- The crafting recipe for a shelf requires 6 pieces of matching stripped logs in Minecraft.
- Shelves can be used to store and display items both manually and automatically.
- When powered by Redstone, players can swap 3, 6, or all 9 items in the hotbar at once.
With Minecraft 1.21.9 ‘The Copper Age’ update, we have a brand-new way to store and display items on the wall. With the ability to store multiple items at once, item frames might be taking a back seat in the game. In addition, the shelves also work with redstone signals, thereby automating the storage task. So, let’s learn how to make a shelf in Minecraft and use it to store your items.
Items Required to Make a Shelf
The crafting recipe for the shelf requires only one material in Minecraft: six matching Stripped Logs (of any wood type).
If you don’t know how to get stripped logs in Minecraft, it’s simple. All you need to do is equip an axe, walk up to any tree, and right-click on it. This will turn the log of wood into stripped log. Just repeat the process for each block, and then collect the stripped log blocks by pressing the left mouse button. This way, you will be able to collect the stripped log of the respective wood type.
Apart from this, you will require a crafting table in Minecraft to make the shelf. Once you have collected all materials, move through the next section.
How to Craft a Shelf in Minecraft
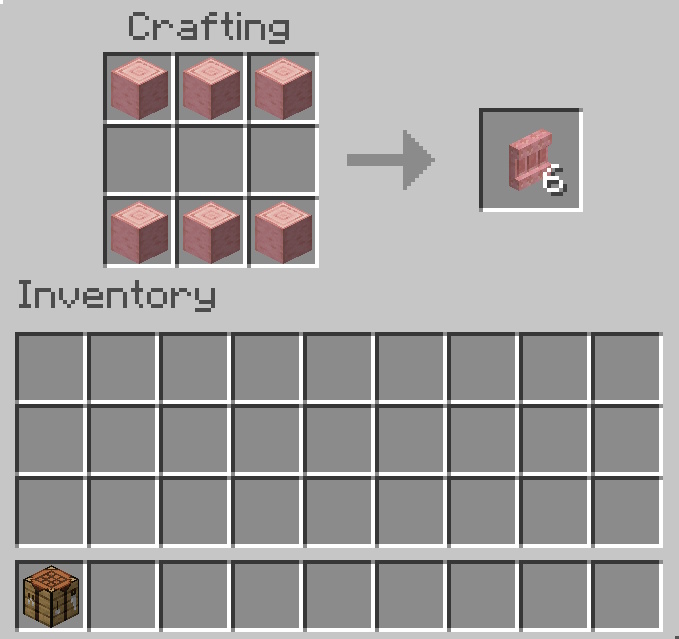
The crafting recipe for the shelf is straightforward, and you can follow the steps below:
- Place the crafting table on the ground and right-click to open up the UI.
- Fill up the first and the third row with three stripped logs of the same type.
- With this, you get 6 shelves on the right. Simply drag and move it to your inventory.
How to Use a Shelf in Minecraft
There are two ways to use shelves in Minecraft. Whether you want to place individual items yourself or power the shelf using redstone to automate the process, it’s all up to you.
1. Manually Swap Items
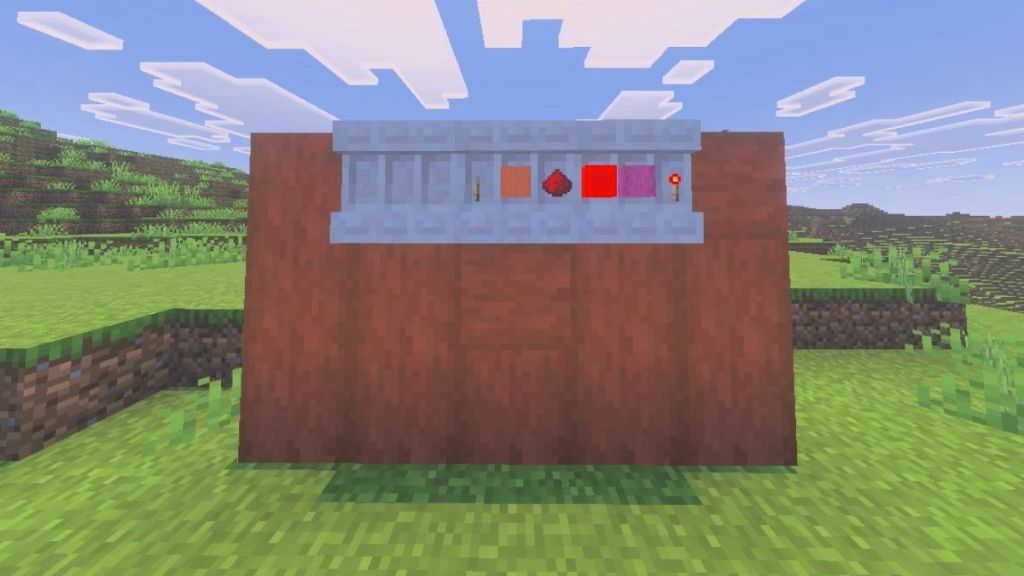
Simply placing the shelves on the walls of your base will allow you to use them. However, everything will be done manually. If you hold an item or block in your hand and click the right mouse button on the shelf, it will swap the items from the respective cell that you were pointing at.
Note that if the cell you were pointing at was empty, then the item in your main hand will be stored in the empty cell. This way, you can fill all three cells of the shelf by repeating this step. Additionally, interacting with the shelf will cause the complete stack of items in your hands to get swapped to the cell you were pointing at.
2. Activate Shelf with Redstone
The second way is to activate the shelves using a Redstone signal. This can be done by placing a lever on the adjacent blocks or by using a combination of Redstone powder and the Redstone torch. When activated, you will notice the shelves won’t have the distinct cells.
Moreover, placing two activated shelves right next to each other will combine them, and the two will work together. This can be done with a maximum of three shelves by powering up all of them with levers.

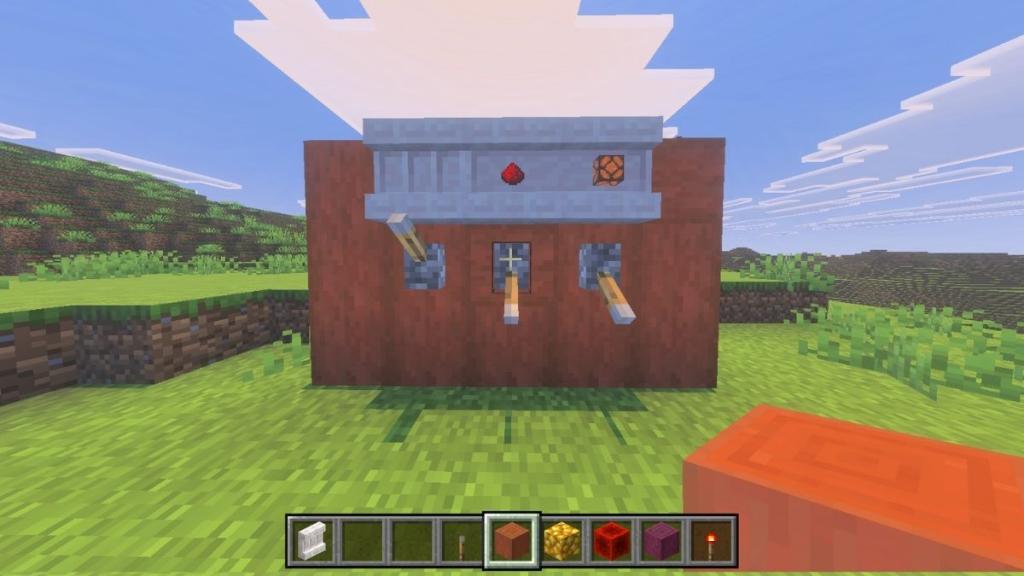
Once the setup is created, right-click on any of the activated shelves, and the rightmost items from your hotbar will be swapped with those present in the shelves. For each setup, the number of items getting swapped is shown below:
- 1 activated shelf: Swaps 3 rightmost items from your hotbar
- 2 activated shelves: Swaps 6 rightmost items from your hotbar
- 3 activated shelves: Swaps all 9 items from your hotbar
That’s everything you need to know about how shelves work in Minecraft, how they can be crafted, and how to use them. So, have you tested this feature yet? Let us know in the comments below.


 Rishabh Sabarwal
 Pranav Maytray