- To build an AI agent, beginners should use OpenAI Agent Builder. It's a visual tool that lets you easily create multi-agent systems.
- You can test, iterate, and develop AI agents and publish them as well.
- OpenAI's ChatKit and Agents SDK are two great ways to integrate your AI agent.
After AI chatbots, action-driven AI agents are transforming productivity workflows. It’s not enough to just use AI agents, but you should also know how to create an AI agent for your personal workflow. So in this tutorial, I have explained the steps to develop AI agents using OpenAI’s Agent Builder. It’s a visual way to easily build multi-agent AI systems. On that note, let’s begin.
Set Up OpenAI Agent Builder
We are going to use OpenAI Agent Builder to create our first AI agent. While it may look highly technical, general users can use the visual canvas to create their agentic systems. Here is how to get started.
- First off, go ahead and create a free account and sign in on platform.openai.com.
- Next, you will be asked to add at least $5 to your account. This will allow you to build and test the AI agent.
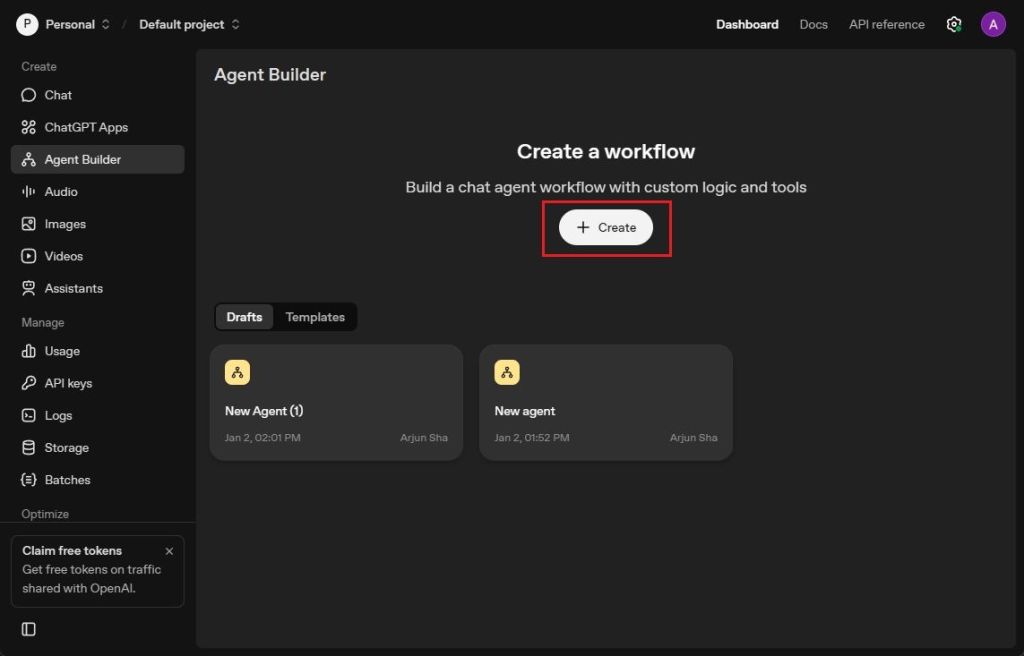
- Head to platform.openai.com/agent-builder and click on “Create”.
- Once you are here, you will see a visual canvas where you can easily create a multi-agent workflow.
Create Your First AI Agent with OpenAI Agent Builder
- As I am creating an AI agent to find the food menu or top restaurants in a particular area, I click on “My agent”.
- I name it “Classifier” and add instructions to classify the user query whether it’s about food menu or restaurant.
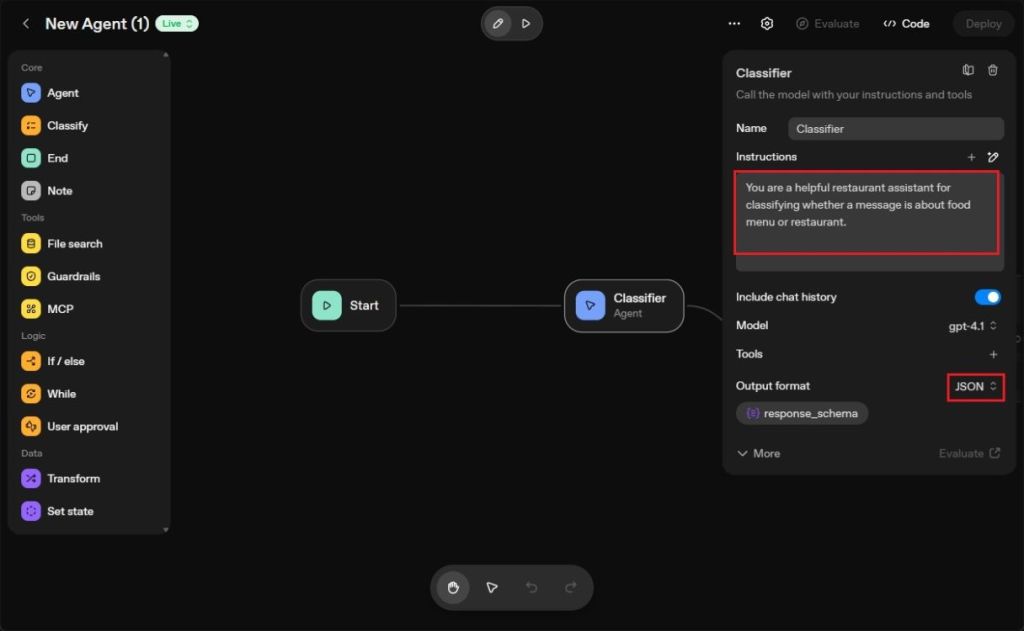
- Right below, I changed the Output format to JSON. By the way, I am using the GPT-4.1 model.
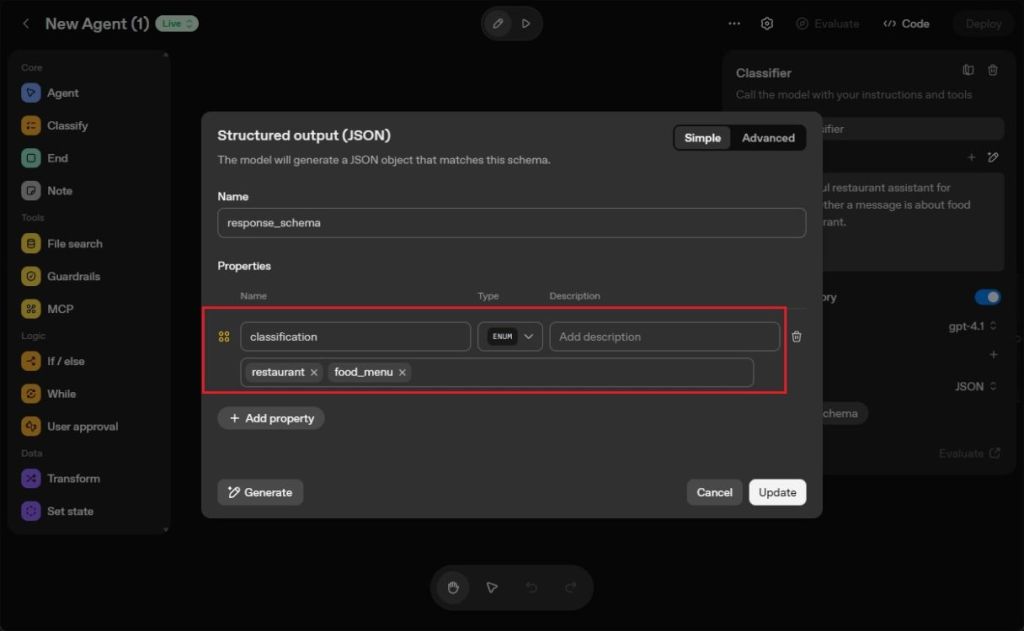
- Next, I have added a classification property with ENUM data type. Now, I have added
restaurantandfood_menuvalues.
- Once the Classifier AI agent is done, I visually move the node to create an “If/else” node. Select it from the left sidebar.

- Now, click on the conditional node, and define classifier’s result.
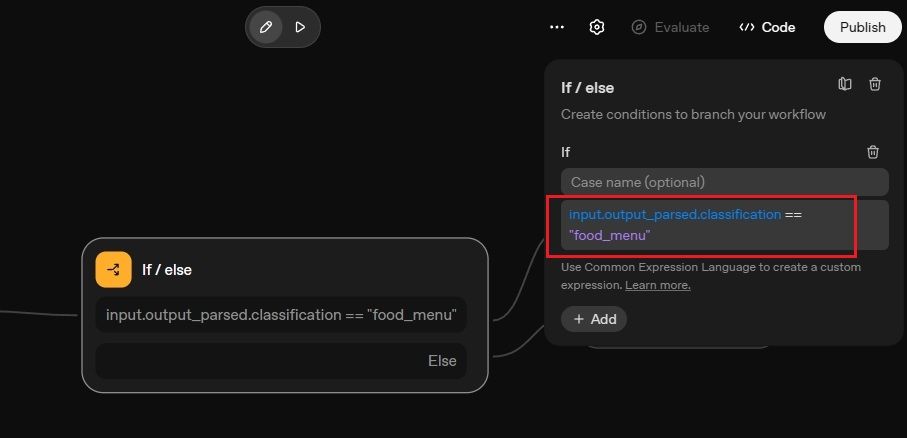
- For example, if it’s “food_menu”, it will go to the Food Menu Agent. Otherwise, it will be routed to the Restaurant Agent.
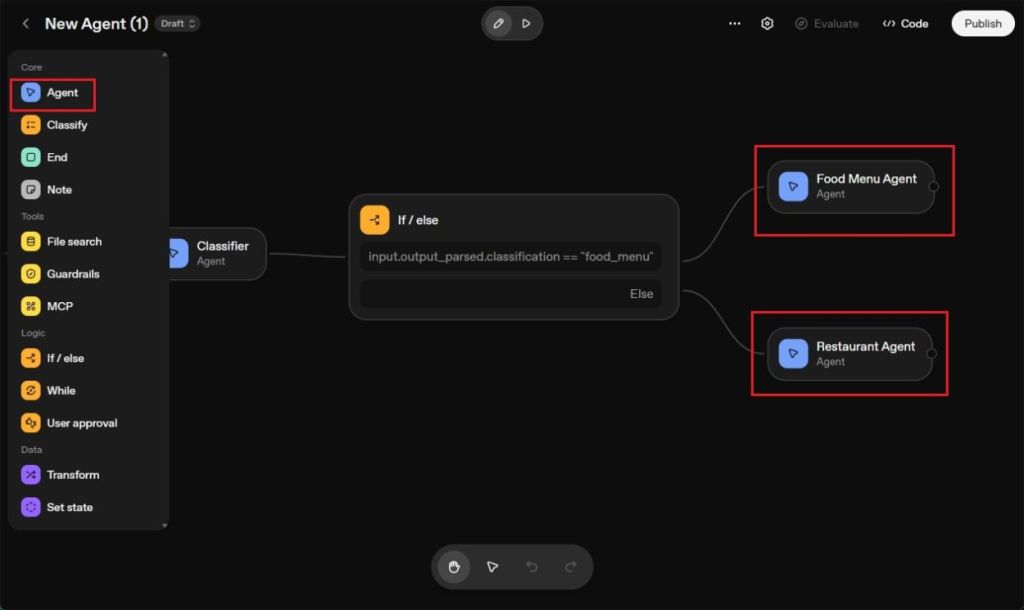
- Now, extend the node again from the “If/else” node and create a new AI agent from the left sidebar.
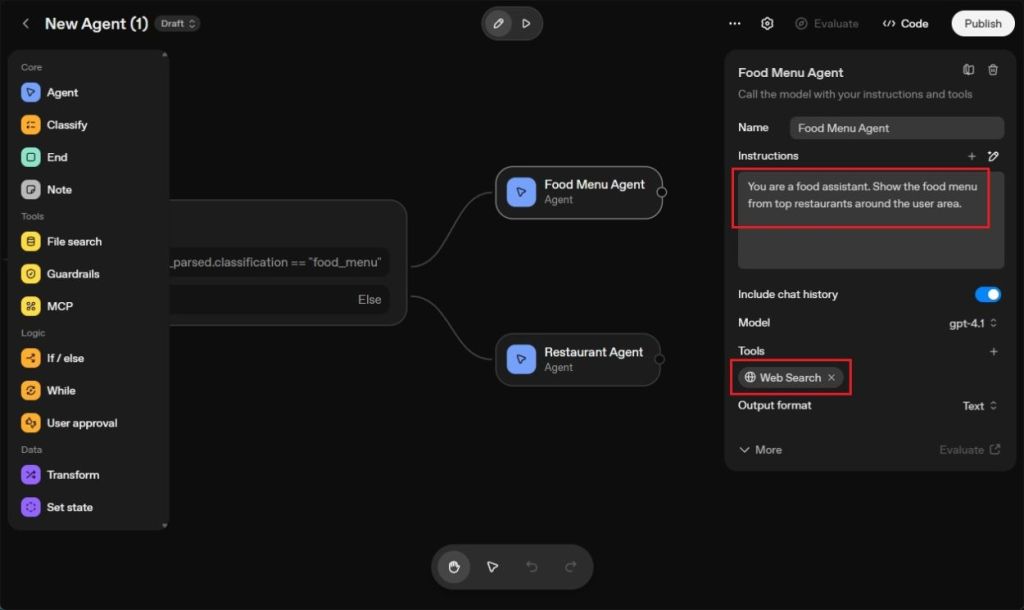
- Here, I have instructed the AI agent to find the food menu from top restaurants around the user area.
- On top of that, I have also added the “Web Search” tool so the AI agent can access the web and find the latest information.
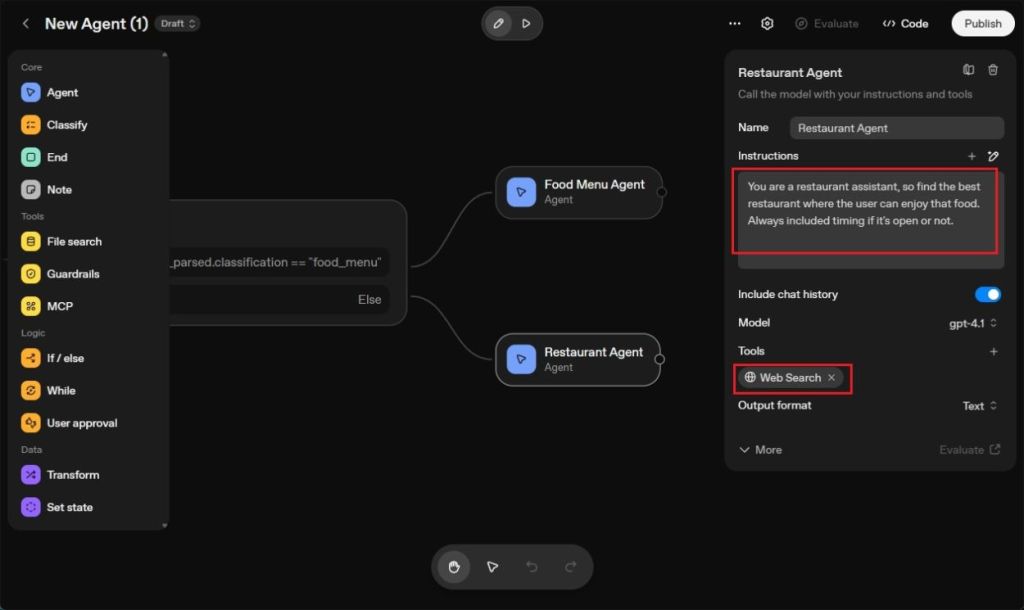
- In another Else node, I added a Restaurant Agent and instructed it to find the best restaurant where the user can find that food with timing. Again, I have granted Web Search access.
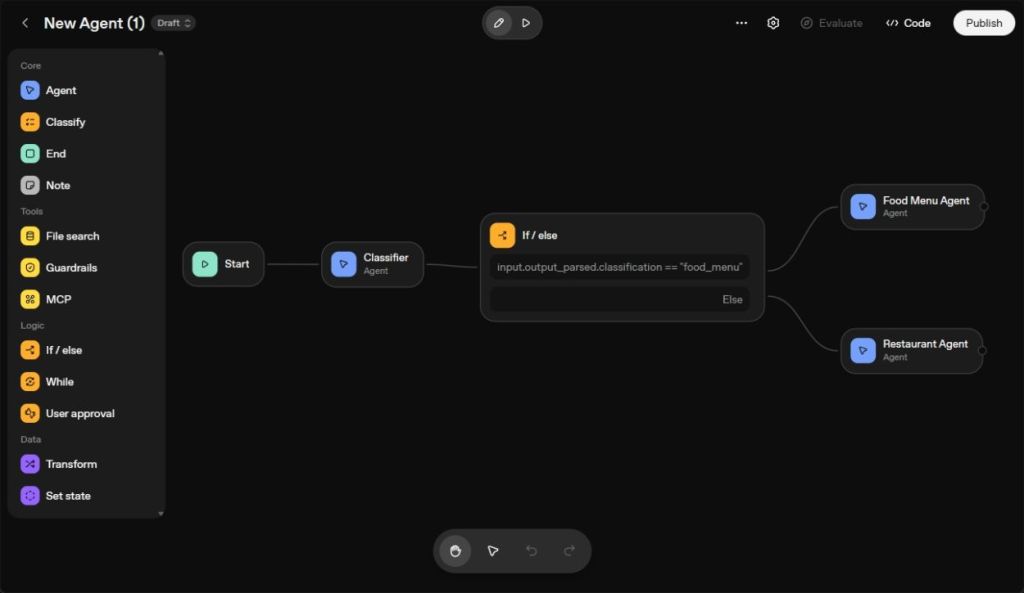
- Once the multi-agent setup is done, this is how my first AI agent looks like.
Test and Publish the AI Agent
- Now, it’s time to run the AI agent. Click on the “Play” button and a chatbot will open up.
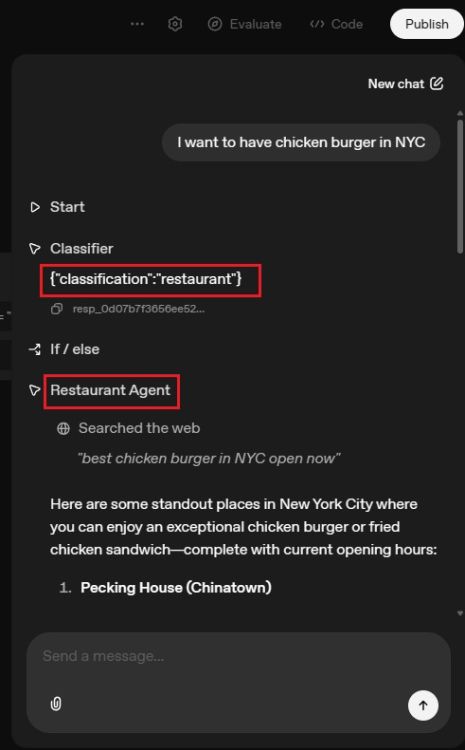
- I simply write, “I want to have chicken burger in NYC” and the query goes through the Classifier agent.
- It finds the intent that I am looking for a restaurant and triggers the Restaurant agent. It lists down all the top restaurants where I can enjoy the best chicken burger in NYC.
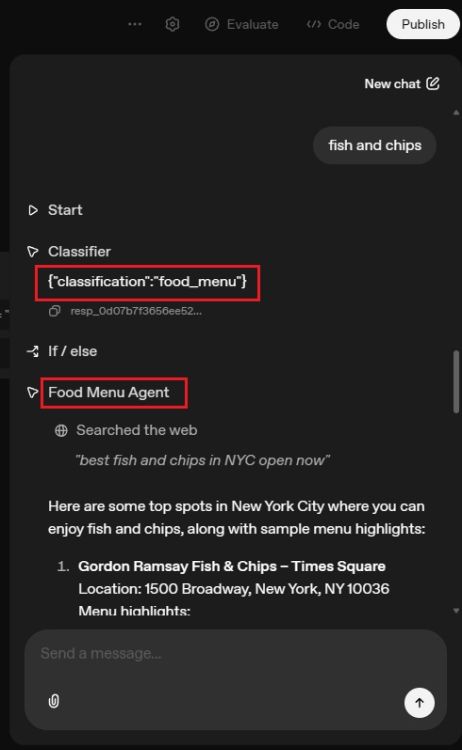
- Next, I just write, “fish and chips” and the Classifier agent detects the intent that I am looking for the food menu.
- It activates the Food Menu Agent and I get a detailed menu from top places where I can enjoy fish and chips in New York City.
- As you can notice, the multi-agent workflow works pretty well and it includes three different AI agents.
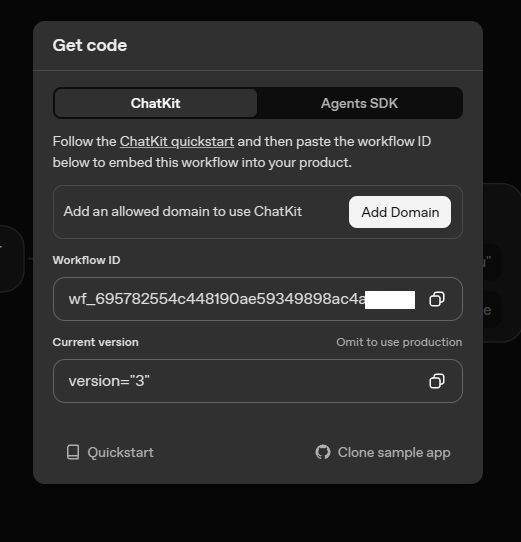
- You can now click on the “Publish” button and use the AI agent in your app or website.
- You can use OpenAI’s ChatKit to easily integrate the AI agent. Here is a template to get started. Other than that, you can also use OpenAI’s Agents SDK to use the AI agent.
And that is how you can create an AI agent. I like that OpenAI has made it easier to build AI agents using a visual canvas. You can create as many nodes as you want and build a multi-agent AI system. You can also follow our tutorial and learn how to create an AI app from scratch. Finally, if you are facing any issue, let us know in the comments below.