
- The timer function within the iPhone camera allows you to delay capturing a photo after tapping the shutter button.
- This delay allows you to ensure everything is in place before the iPhone camera captures the photo at the end of the countdown.
- You can choose between a 3-second and 10-second timer delay between tapping the shutter button and when the photo is captured.
Ever felt the need for a few extra seconds to compose that perfect shot on your iPhone? or wished someone to be there to capture your group photos so that no one has to miss being in the photo? Well, not anymore; the built-in timer in your iPhone camera settings (no matter if it’s iPhone 15 Pro max or an older model) allows you to set a delay before the photo is taken. It’s useful for group photos, self-portraits, or capturing a perfect shot without needing to press the shutter button physically. Keep reading to learn how to set up a timer on iPhone camera.
Setting Up iPhone Camera Timer
Hidden within the camera settings on your iPhone, the timer function offers a momentary delay between hitting the shutter button and capturing the shot. Yes, you can also use your Apple Watch camera app to do so, but that can sometimes disrupt the composition. Here’s how you set up a timer on your iPhone camera:
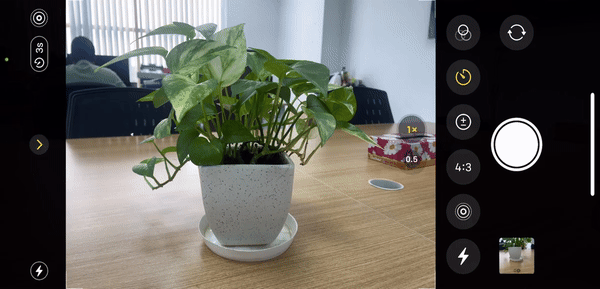
- Open the Camera app on your iPhone, and tap the Upward Arrow button at the top center.
- Now, locate and tap the Timer button in the menu that appears above the Shutter button.
- Here, select the timer duration, you can either set the timer for 3 Seconds or 10 Seconds. In our case, we set the timer for 3 seconds.


- After setting the timer duration, position your iPhone on a stable surface or a tripod for a steady shot. Alternatively, hold the iPhone firmly, framing your shot as desired.
- Once done with the composition, tap the Camera Shutter button to start the timer.
- The timer will commence its countdown, indicated by a visual display.
- Once the timer gets to “1”, the shutter will automatically get triggered, and the photo will get captured.

Benefits of Using a Timer in iPhone Camera
Group Harmony: The iPhone camera is a boon when you need to capture a group photo, as it will ensure that everyone gets enough time to be ready for the shot. It also ensures no one misses being in the photo, giving you enough time to get into position before the camera clicks.
Stability & Clarity: Setting your iPhone on a stable surface or tripod while using the timer helps reduce shake, thus resulting in clearer and sharper photos. This stability significantly enhances the overall quality of the photo, especially in low-light conditions or when capturing long exposures.
Better Selfies: Taking selfies becomes an art form with the timer. Instead of hastily snapping a picture, the iPhone camera timer allows you to set up the shot, find the perfect angle, and pose comfortably. This leads to more natural and flattering self-portraits.
Creative Freedom: The timer feature grants you the freedom to experiment with creative compositions, providing a moment to fine-tune the frame, incorporate unique elements into your photos, or even capture candid moments without the need to rush behind the camera.
And that’s it; this is how you set up and use the timer on the iPhone camera. Use this feature to take control of your shots, allowing you to compose, frame, and capture moments with precision.


