
No matter how much storage one has in their iPhone, it still feels less to most people. And while buying a new higher storage variant iPhone is always an option, optimizing your iPhone storage to save space is always smart. From offloading unused apps to transferring large photos and videos to cloud storage are some effective methods to save up space on your iPhone. Keep reading to learn how to check and manage storage space on your iPhone and make it last longer.
How to Check Available Storage on Your iPhone
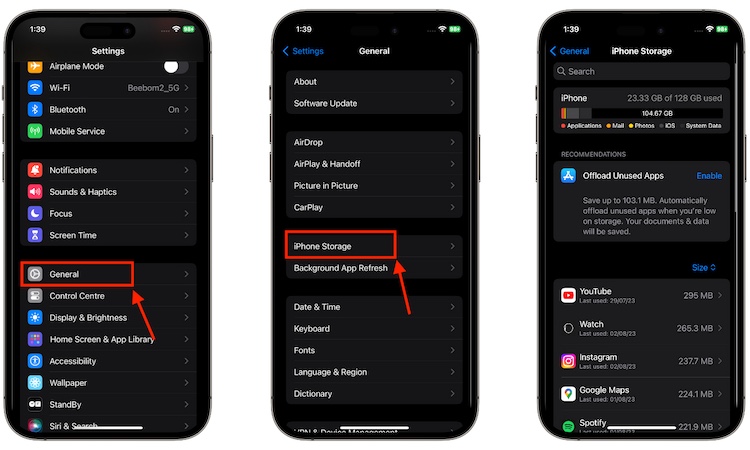
This is the first and foremost step you should follow if you are looking to save storage space on your iPhone. Determining what data is eating the most space and how much storage remains is crucial to optimizing your iPhone storage. Here’s how:
1. Go to the General in the Settings app on your iPhone.
2. Locate and tap the iPhone Storage option.
3. Now wait while your iPhone calculates the available storage.

How to Free Up Storage Space on iPhone
Managing your iPhone storage is a big task regardless of whether it is a normal or pro model, as nowadays, it is easy to accumulate many photos, files, and apps that easily fill up your iPhone storage. And if you have encountered a “There is not enough available storage” pop-up message like me, here are some tips to free up space on your iPhone:
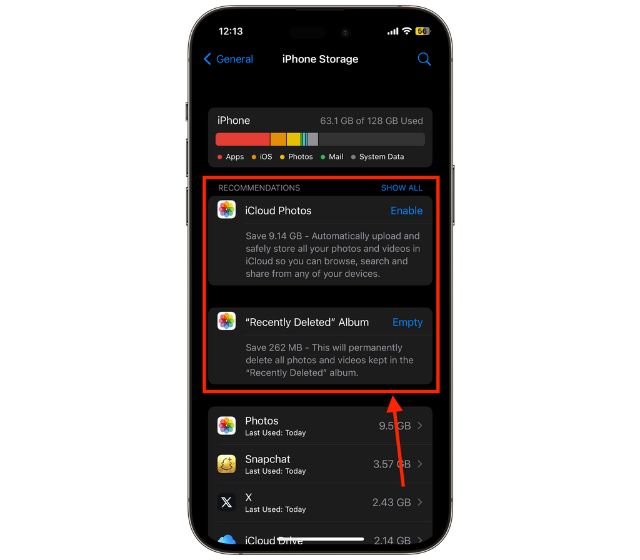
Check Apple’s Recommendation
Apple has added a smart feature in all its iPhones to help you optimize storage by suggesting certain recommendations.
Once you are inside your iPhone’s storage, you can view the Recommendations section under the color-coded storage bar, which as per Apple, can help you save up space on your iPhone. Accepting or rejecting these recommendations is totally up to you.

Delete or Offload Unused App
On the device storage, you can see the complete list of all the apps installed on your iPhone. While you use many apps regularly, there may be certain apps that you have not used for a long time or there are apps that you use rarely. In that case, you can completely delete those apps or offload them from your iPhone.
While deleting the app will wipe all its settings from your iPhone, offloading an app will only remove the app from your device without deleting its settings, like when you have to free up space to install an iOS update, Apple lets you offload them. The offloaded apps will remain on your home screen, but you will need to re-download them to use them.
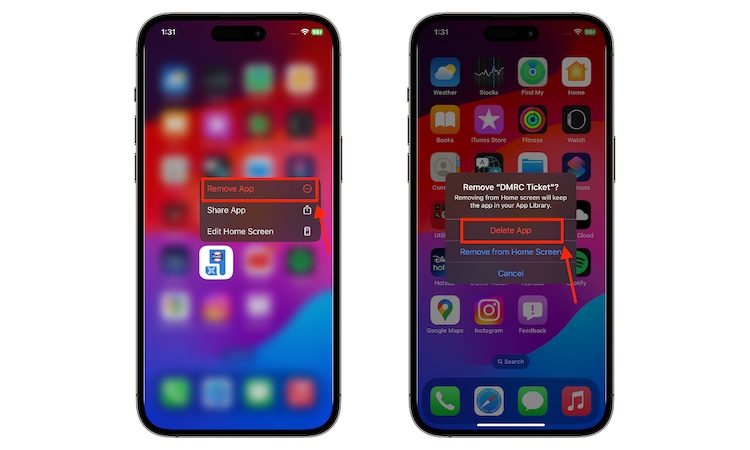
To Delete an app from your iPhone:
1. Press and hold the app on the home screen.
2. Tap the Remove App option in the drop down menu.
3. Tap Delete App.
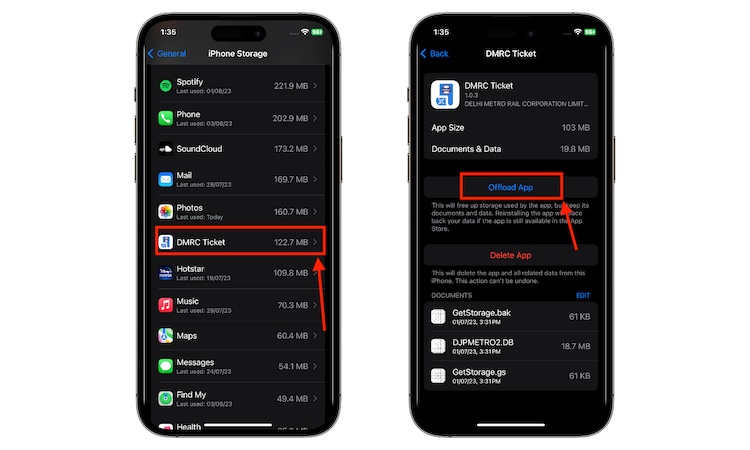
To Offload an app from your iPhone:
1. Go to the iPhone Storage list, locate & tap the app.
2. Tap the Offload App option.
Upload Photos and Videos to a Cloud Storage
In today’s world, most of us use our iPhones to capture breathtaking photos and videos to cherish those moments later. And as a result of this, the Photos app ends up using much of the iPhone’s storage. So, removing those large photos and videos is the ideal solution to free up space on your iPhone, but before deleting them from your iPhone, it is important to upload them to cloud storage so you don’t lose access to them.
Apple offers every user 5GB of free iCloud storage, but 5GB is way too little as it gets filled easily. While you can pay to get extra iCloud storage, you can also use the 15GB of free cloud storage you get with your Gmail account to upload all your large photos and videos.
And if you don’t want to use Gmail cloud storage, here are the Best free cloud storage services for data backup.
Delete Unnecessary Photos and Large Video Files
Once you upload all your important photos and videos to the cloud storage, you can delete them from your iPhone to save storage. Here’s how you can:
1. Open the Photos app and select the photos and video you wish to delete.
2. Tap the Bin icon at the bottom right.
3. Tap the Delete tab.
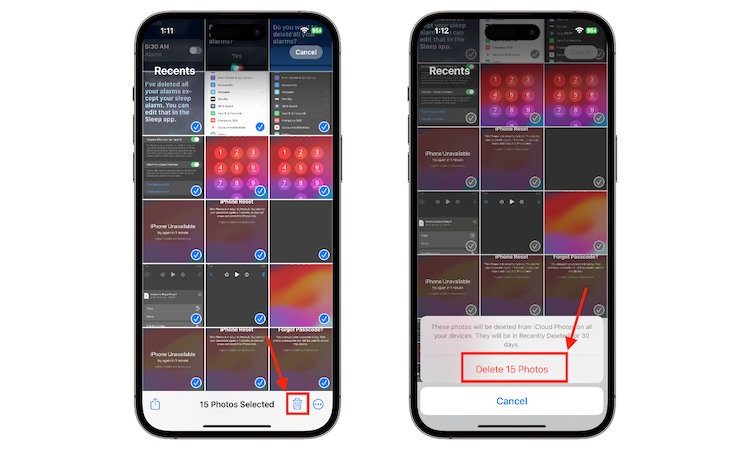
4. Now, tap the Album tab at the bottom left.
5. Scroll down and tap the Recently Deleted option to open all the recently deleted photos.
6. Here, select all the photos and videos that you wish to delete permanently and tap the Three Dot icon at the bottom left, and finally tap Delete.
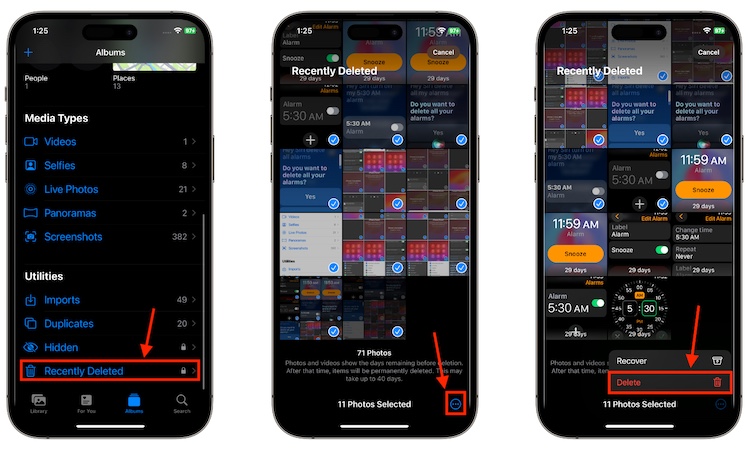
The last step is very important as every time you delete a photo or video from your iPhone, it goes into the Recently Deleted album and stays there for 30 days. This way, even if you delete photos from your library you won’t save any space, as your iPhone will hang on to deleted photos for 30 days.
Clear Browser’s Cache
Another pile of junk that you should regularly wipe off your iPhone is the browser cache. And this may feel insignificant; all these temporary internet files eat up a lot of storage on your iPhone. But before you clear your browser’s cache, remember that you will be logged out of every website you are signed into, and all your cookies will be deleted.
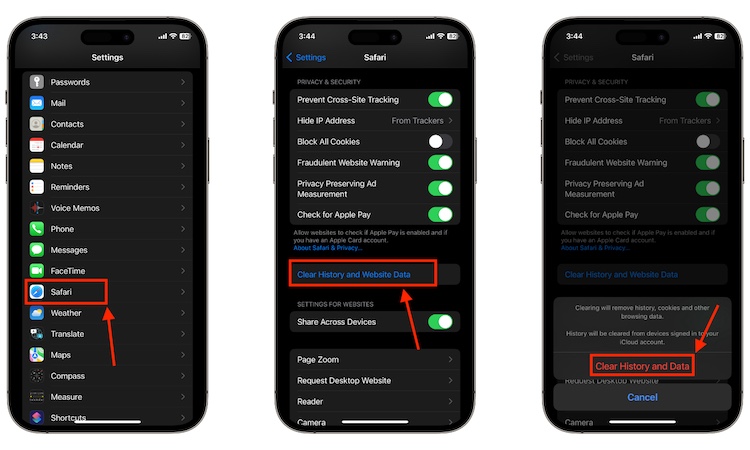
Here’s how you can delete Safari browser’s cache files:
1. Open the Settings app on your iPhone, scroll down & tap on Safari.
2. Here, locate and tap the Clear History and Website Data option.
3. Now, tap the Clear History and Data option in the pop-up menu.
Delete Unwanted Message Conversations
Let’s be honest, we often forget about unnecessary texts or promotional messages in the Messages app and leave them unchecked, only to let them pile up as junk eating the iPhone’s storage space. So, if you are not holding onto older conversations for sentimental or legal reasons, I would highly suggest getting rid of those messages, and you will free up a lot of space on your iPhone.
While you can individually delete each conversation, you can also set messages to auto-delete themselves after a certain period. Here’s how:
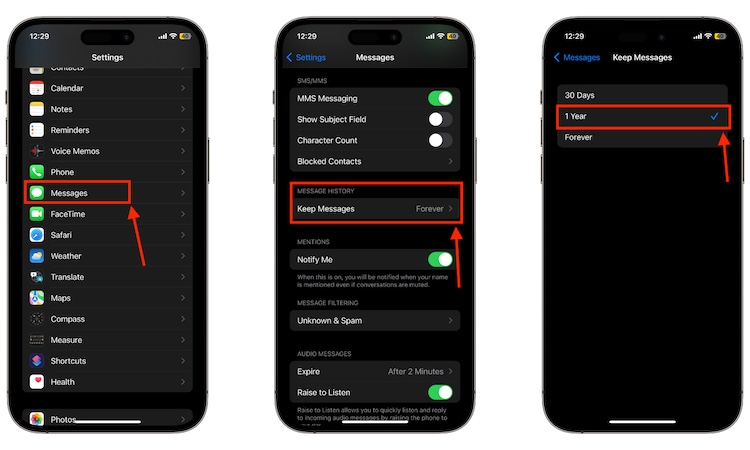
1. Open the Settings app on your iPhone.
2. Locate and tap the Messages tab.
3. Tap the keep Messages tab under the Message History section.
4. Now, choose an option from the available choices. You can choose from 3 options – 30 days, 1 year and Forever.
And in case, you delete an important conversation by mistake, you can also Recover deleted messages on iPhone.
In iOS 17, Apple has introduced a new feature that will automatically delete verification codes received in messages on iPhone. Here’s how you can use this feature to automatically delete verification codes on iPhone.
Always Keep Your iPhone Updated
Keeping your iPhone updated with the latest firmware (iOS) available is always suggested, as it is crucial for security and storage optimization. New software updates enhance performance and fix bugs that can, many times, help free up space on iPhone and improve overall efficiency.


