Over the years, Apple added a bunch of accessibility features to help users with any sort of disability and also extend the number of ways in which a person can use his iPhone. Besides the ability to set up and use personal voice on an iPhone, you can also use your head to trigger specific actions on your iPhone or iPad. Yes, you’ve heard it right. Apple lets you control your iPhone with head movements using the Switch Control feature. Although it’s an accessibility feature, it doesn’t mean you can’t use it to show off and look as if you would fit right inside a Star Trek movie. To use this feature, you’ll have to set up head tracking and configure your head movements. Although the process is a tad lengthy, we’ve broken it down into simple steps that you can understand and follow easily. So, let’s get started and learn how to control your iPhone with head movements.
How to Set Up Head Tracking on an iPhone
Note: To use Switch Control, you need an iPhone 8 or later model. While this feature is available with all iOS versions, we recommend updating to the latest iOS 17 version to enjoy any new additions and improvements.
First things first: do not blame me if you look silly in public, or if your date leaves because you kept shaking your head all through dinner.
Now that we have gotten that out of the way, let’s focus on the task at hand. The steps to follow, in order to enable head gestures on an iPhone, are outlined below:
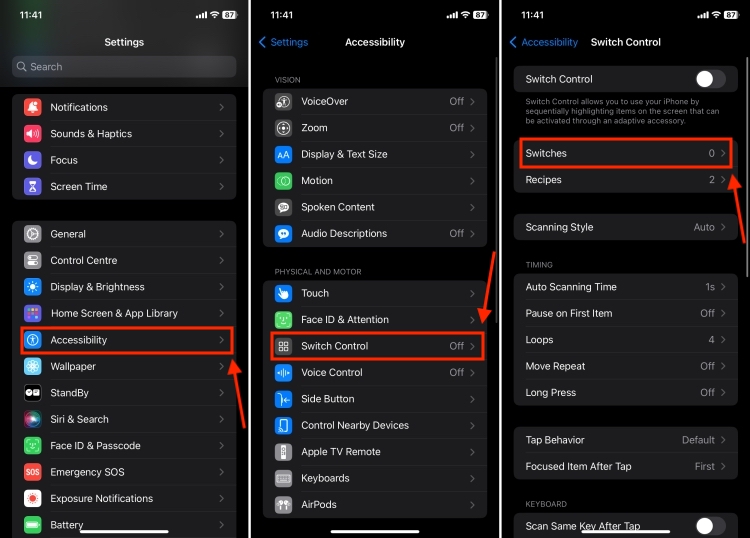
- Open the Settings app on your iPhone. Now, scroll down a little and tap on Accessibility.
- Here, tap on Switch Control and navigate to the Switches option.
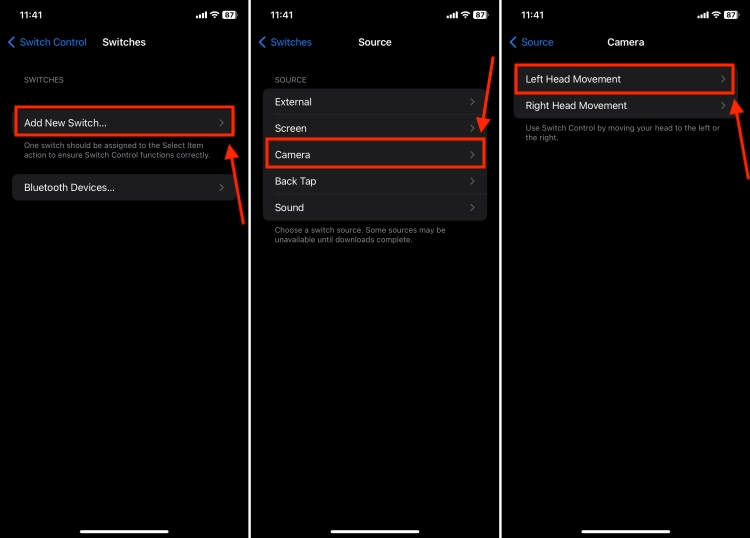
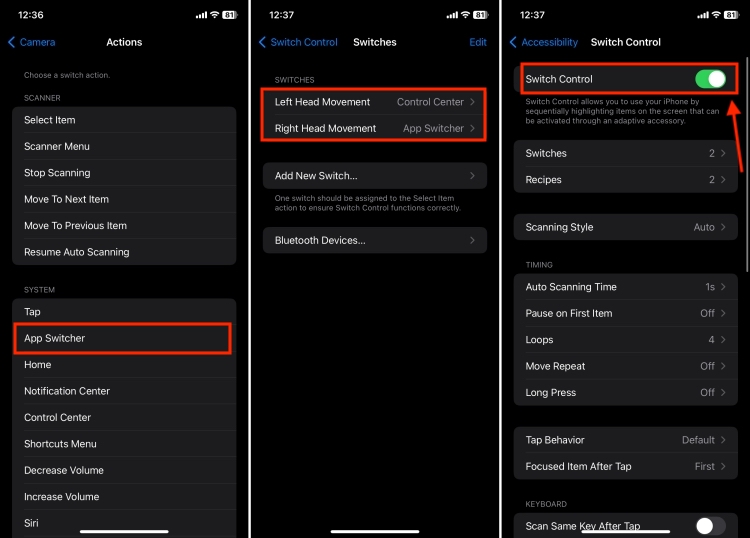
- Now, tap on Add New Switch, choose Camera as the source, and select “Left Head Movement”.
- Next, choose a switch action you want to assign to it.
- On this page, you’ll see two sections. One is a Scanner section that lets you choose whether you want to select an item, stop scanning, or move to the next item when you move your head right (or left). The second one is the System section which has actions for different activities or features on your device like opening the Control Center or accessing the App switcher.
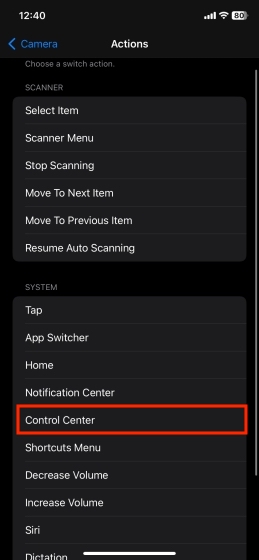
- I’ve chosen the Control Center in the System actions. You can choose whatever function you want to assign.
- Again, tap on Add New Switch -> Camera and choose Right Head Movement. Now, choose an action you want to assign to it.
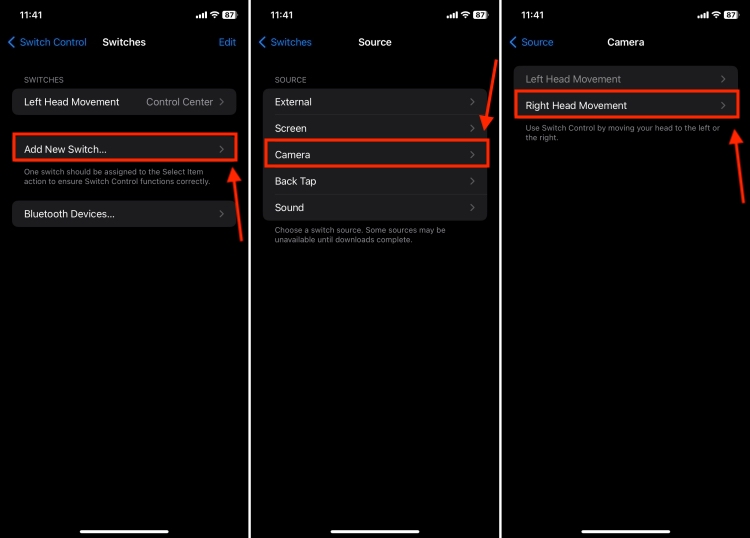
- I’ve chosen App Switcher here. You can choose the desired action that you want your iPhone to perform when you move your head to the right.
- Now navigate back to the main “Switch Control” screen. It can be found at Settings -> General -> Accessibility -> Switch Control.
- Once you’re there, turn on the toggle for Switch Control.
- That’s it! Head gestures are now enabled on your iPhone.
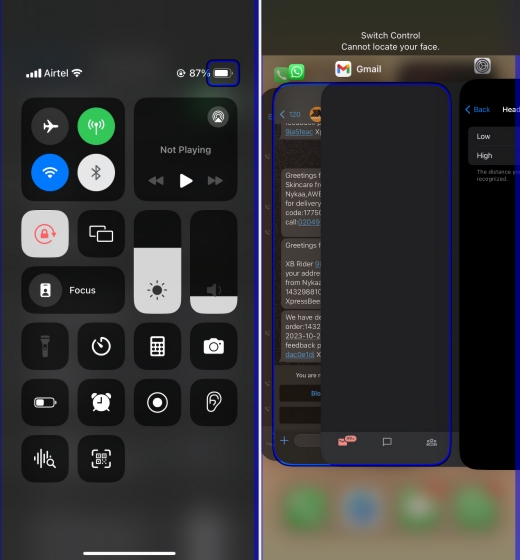
- Now, move your head left, and the phone will carry out the functions you have assigned to the left and right head movements.
Note: You can set the head movement gestures to actions such as “Tap” to completely use your iPhone with head gestures. However, this is very slow and not at all fun.
How to Improve Sensitivity for Easier Head Tracking on iPhone
Once you’ve successfully set up head tracking on your iPhone, it is time to tweak it to your preference. You might have noticed that you need to move your head (left or right) very obviously in order for your iPhone to trigger the switch action. Fortunately, the sensitivity of head movements can be changed, albeit to a very low level of control. If the feature works fine for you by default; great! If not, then follow the instructions below to increase the gesture sensitivity of your iPhone.
- From the Settings app, visit the Accessibility section and tap on Switch Control.
- Under the Switch Stabilization section, you’ll find a couple of options that you can tweak according to your preferences.

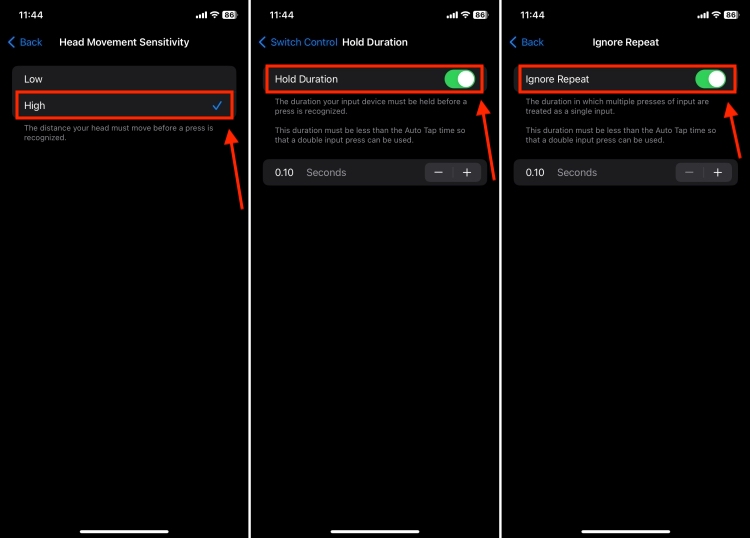
- Let’s adjust the “Head Movement Sensitivity” first. Tap on the Head Movement Sensitivity option and change the sensitivity from “Low” to “High”.
- Now, go back to the previous screen and tap on “Hold Duration”. Turn it on, and leave it at the default value of 0.10 seconds.
- If you want to treat multiple presses of input as a single input, go back, tap on Ignore Repeat, and turn the toggle ON. You can now set a duration for which you want your device to ignore repeated inputs.
Go ahead and try out the “Switch Control” now, it should work with smaller head movements to trigger the corresponding actions.
This feature might feel gimmicky, but it has a lot of potential. Even with only two head movements, you have the ability to launch apps or control your phone with gestures. There is a lot more to explore and tweak in the iPhone’s Accessibility section. Go ahead, play around with other features, and let us know about your experience in the comments below.


