For quite some time, we have been talking about how Chromebook is slowly getting desktop features. This time, we bring you the most sought-after feature on Chromebooks — Clipboard History. Hidden behind a Chrome flag, it allows you to access multiple copied items with just a keyboard shortcut on Chromebook. Not just texts, you can also copy multiple images and paste it anywhere you want. Also, now you don’t need to use any paid extensions like Clipboard History Pro to access all your copied items. So on that note, let’s go ahead and find how to enable Clipboard History on a Chromebook.
Enable Clipboard History on a Chromebook
Before we begin, let me tell you I am using Chrome OS 87.0.4280.24 beta build and I am sure the feature is also available on Chrome OS 86 stable channel. Apart from that, the process is pretty straightforward and the feature is available on both school-issued and regular Chromebooks. With that out of the way, let’s jump to the steps.
1. First of all, open chrome://flags on Chrome and search for “clipboard”. You will find “Productivity Experiment: Enable Enhanced Clipboard“. No, go ahead and enable it.

2. Next, click on the “Restart” button at the bottom right corner.

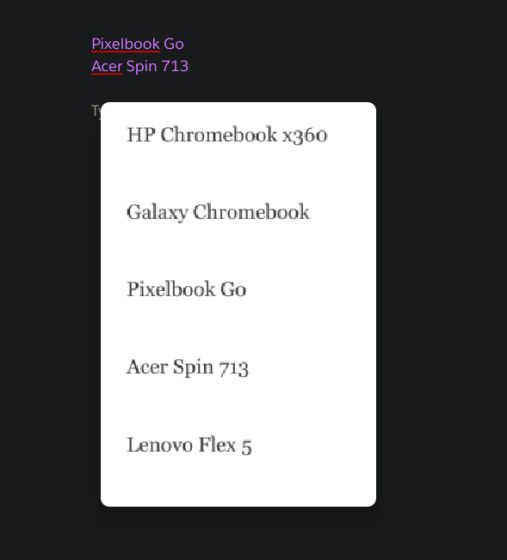
3. After Chrome restarts, Clipboard History will be enabled on your Chromebook. Now, press Search + V on the keyboard to bring up Clipboard History under any text-input field. It’s very similar to the native Clipboard Manager on Windows 10.

4. You can also right-click on a text field and open “Clipboard” to open the Clipboard History manually.

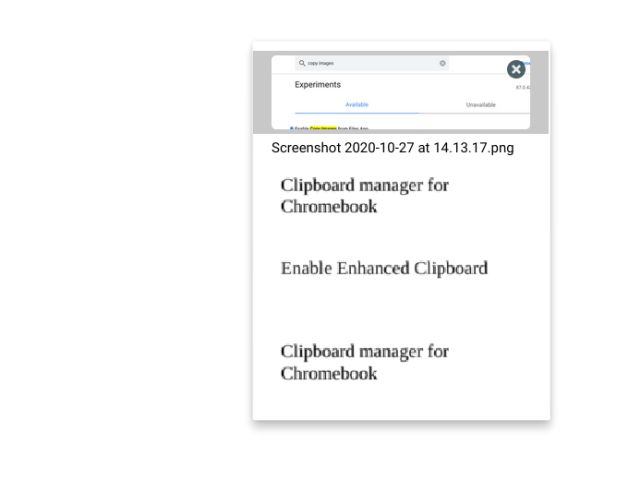
5. If you want a full-fledged Clipboard manager for Chromebook with image support then you should enable one more flag. Go ahead and enable “Enable Copy Images from Files App” under Chrome Flags.

6. Now you can copy images and it will show up in Clipboard History too. You can go ahead and select the image and hit enter to paste the image.

7. There is one more feature that I am sure you will find useful: Clipboard Sharing. Open Chrome Flags and turn on “Enable shared clipboard feature signals to be handled”.

8. Now, select any text on your Chromebook and right-click on it. After that, choose “Copy to your Android Phone“. It will then instantly send the copied item to your Android smartphone. This way, you can easily share the clipboard between your Chromebook and your Android smartphone.

9. Having said all of that, there are some limitations. Currently, Clipboard History on Chromebook only supports clipboard data of the last five copied items. Other than that, once in a while, you will find a bug where the Clipboard History parses the text in a weird manner. That said, Clipboard History works without any issues.
Copy and Paste Multiple Items on a Chromebook
So that is how you can enable the hidden clipboard manager on a Chromebook. As we can see, the work is in progress and we might get a full-fledged clipboard manager with more clipboard data support in the future. Anyway, that is all from us. If you want to learn more such Chrome OS tips and tricks then go through our linked article. And if you are interested in buying a Chrome OS machine then you can find the best Chromebooks to buy in 2020 from our updated list.


