If you are one of the low-end PC gamers and still want to experience Minecraft with shaders, you have arrived at the perfect place. We have collected some of the best shaders for low-end PCs that can deliver improved graphics while maintaining your FPS.
Top Minecraft Shaders for Low-End PCs
Shaders are mods that help in changing the usual pixelated and blocky graphics of Minecraft. You can experience a beautiful sunrise or sunset due to the amazing light shadow interplay, overhaul surroundings to make them brighter and colorful, and even change in-game mobs and items.
But remember, you will first need to install Optifine in Minecraft to use shaders. That said, here are the best Minecraft shaders for low-end PCs.
| Shader Name | Features | Pros and Cons |
|---|---|---|
| Cyanide Shaders | – Modifies environment based on time – You have a different gameplay experience each time | – Made with one of the fewest lines of code and is highly optimized – Only con is that you won’t find a highly enhanced graphical quality |
| Nostalgia Shaders | – Takes you back to playing old Minecraft – Has soft shadows and volumetric cuboidal clouds – Find other lens effects like vignette, lens flares, and more | – You can play Minecraft from your childhood point of view – Get some quality environments – The only con is that it can only be played on Windows/ Linux with a graphics card supporting OpenGL 4.3 and newer versions |
| Sildur’s Basic Shaders | – Get the option to change blur and depth of field – Has waving objects like water, vines, grass, and more – Has the Anti-aliasing function | – For players with low-end specs, it provides a little depth to your world – The only con is that it still looks pretty pixelated |
| Tea Shaders | – Has custom-made fog and underwater reflections – Grasses, leaves, and water bodies move when winds blow – Each biome feels different due to its unique effects | – Supports a huge bunch of mods even when this shader is installed – Cons are the pixelated graphics that are still noticeable – Minor change to the environment |
| DrDestens MCShaders | – Has the option to set depth of field and motion blur – Light shadow interplay and reflections introduced – Custom sky color changing with time | – Highly optimized and introduces a huge set of custom features that overhauls the environment – Highly recommended for players with low-end PCs, as there aren’t many issues with it |
| Spooklementary | – Environment grows dark and thick fog surrounds the world – Eyes can appear randomly, and spooky things like blood moons, screen shakes, and more rarely happen | – One of the best choices for making Minecraft scarier to enjoy with friends – The highly dense fog can limit the field of view |
| MakeUP – Ultra Fast | – Provides all sorts of optical lens features like motion blur, optical bloom, depth, and more – Shadows are well generated – Water reflections seem real | – Modifiable to meet your needs – Choose color scheme as per your liking + more customization options – The only con is that it only works on Windows and Linux |
| Photon Shaders | – Sky is completely changed with realistic clouds and lightning – Water looks crystal clear with glass-like reflections – Shadows are soft, fog is custom-made, and has several optical effects | – Completely changes your view on pixelated Minecraft by introducing amazing graphics – Con is that you must have GPUs like Nvidia, AMD, or Intel. It’s not compatible with Apple GPUs |
| Complimentary Shaders – Reimagined | – Smoother and softer version of the Complimentary Shaders – Keeps the originality of Minecraft graphics with better lighting, shadows, reflections, and more | – This shader runs smoothly on all systems and only requires Optifine or Iris mods to be installed as a requirement |
| BSL Shaders | – Better lighting, overhauled Nether, End dimension, and Overworld – Shadows, skies, fog, and rain are all changed to keep things realistic with the change in time | – Can run on any system and only requires Optifine or Iris mods to be installed as a requirement |
10. Cyanide Shaders
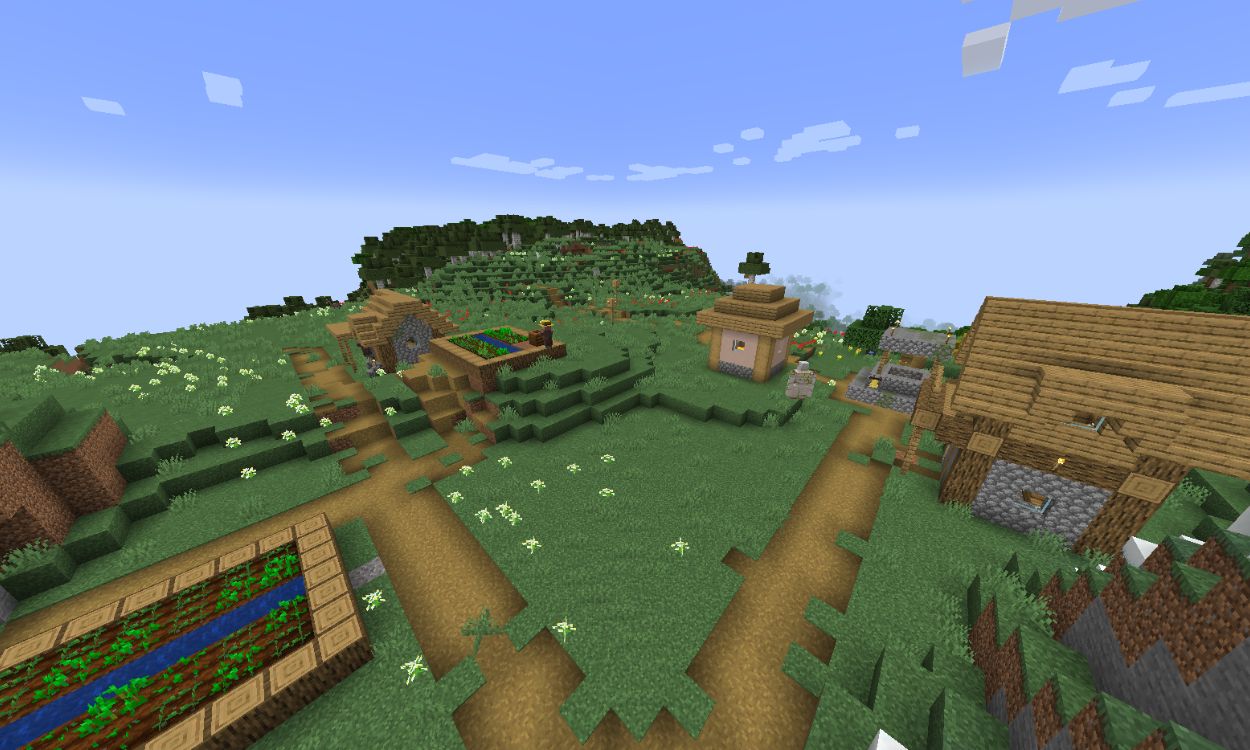
Cyanide is one of the simplest shader packs for Minecraft users with low-end PCs. Unless you are a regular player, you might not even notice the differences it brings to the game. It removes unnecessary animations from the game and makes most of the textures vibrant and more contrasting. Such changes are quite advantageous on Minecraft PvP servers and mini-games.


In terms of features, it provides tone mapping to smoothen textures, general bloom effect, and very basic lighting details. The world looks mystical during sunset and sunrise and stays overtly lit during the rest of the day. You can explore all of the Minecraft biomes without witnessing anything out of place in the overworld, Nether, and End dimensions.
9. Nostalgia Shader
Nostalgia Shaders is for all the crafters who are longing for a glimpse of the early days of Minecraft. This will be a perfect throwback and is designed to replicate the same style back in those days. With this pack you can get a visual upgrade with soft shadows and volumetric fog.
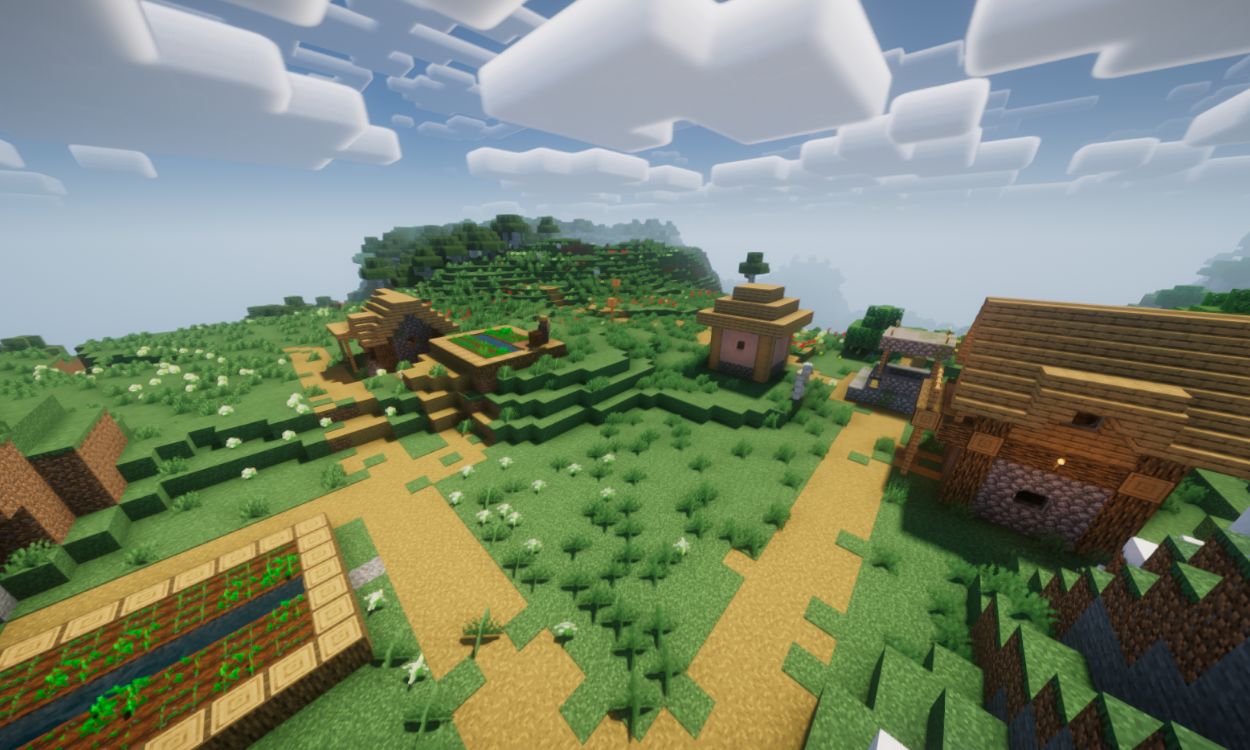
Apart from that, you get features like anti-aliasing, optional screening path tracing, and customizable lens effect. So, if you want the cozy retro Minecraft feel along with a modern polish, install this Nostalgia shader right now and bring your friends as well.
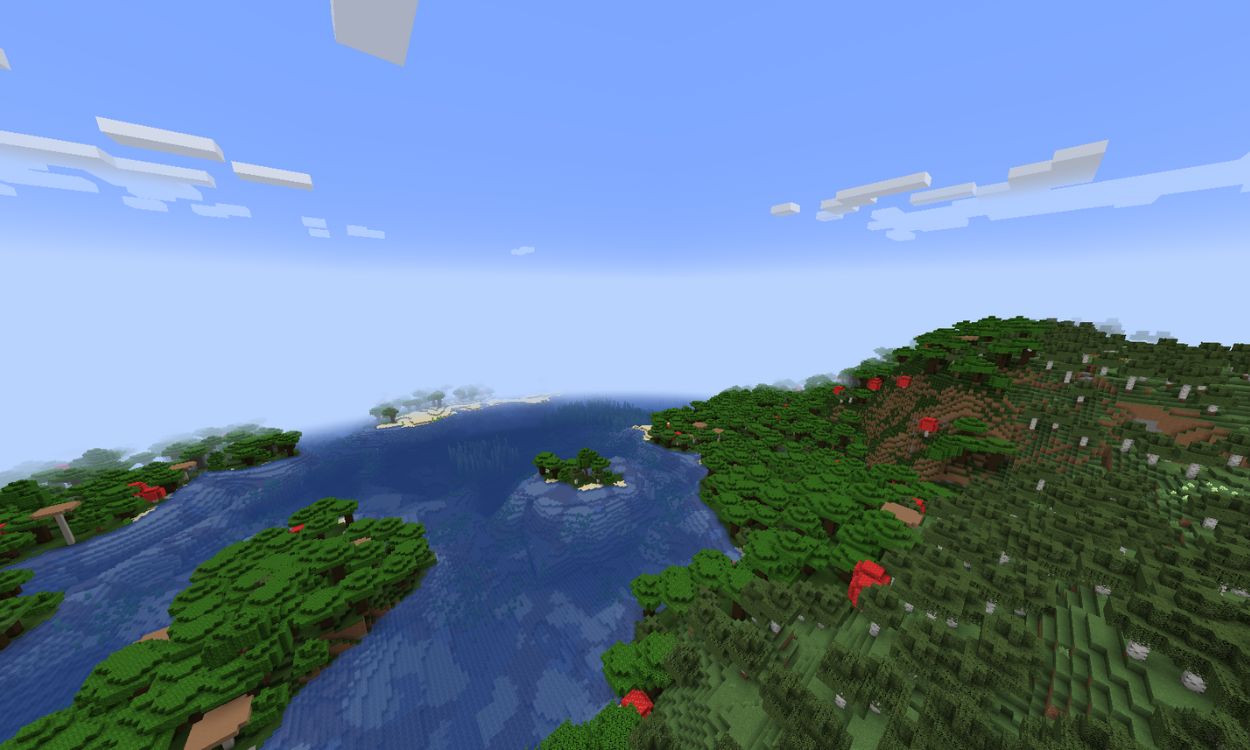
8. Sildur’s Basic Shaders
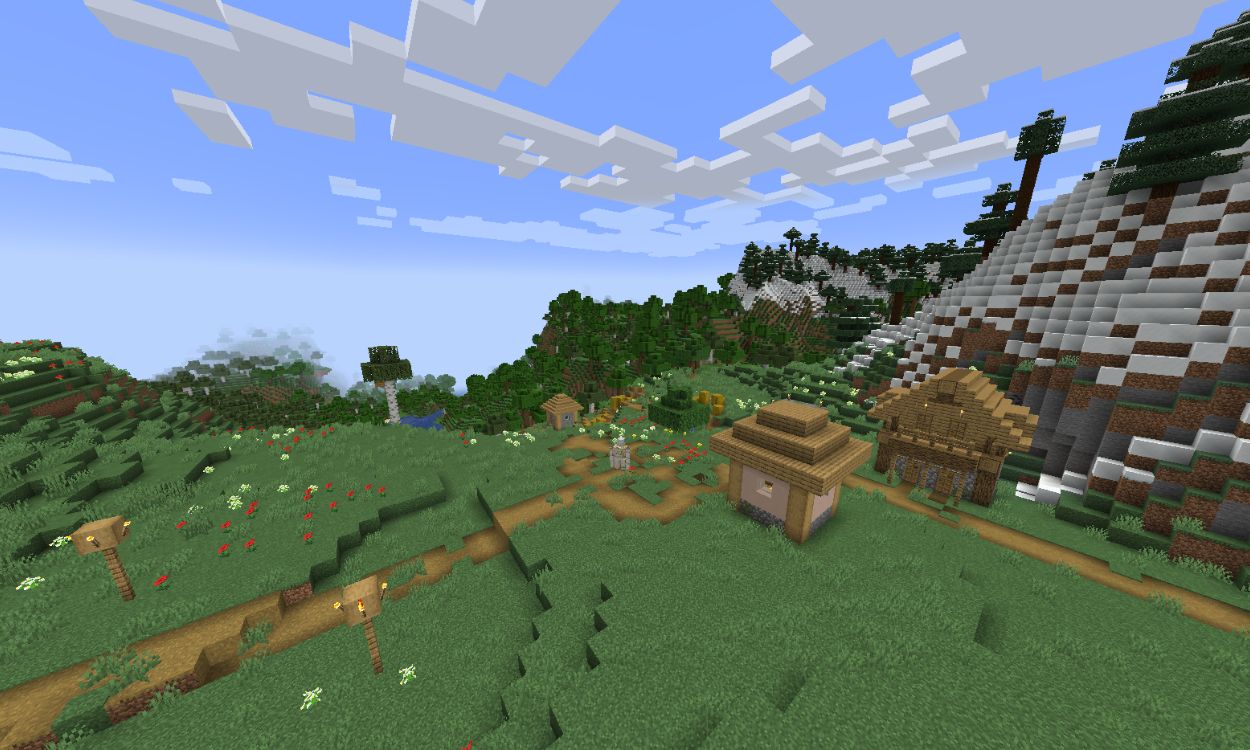
Sildrur’s basic shaders is a pretty lightweight and fast Minecraft shader pack, which is perfect for a low-end PC. It provides a yellowish tint to the environment, thus making it seem warmer. It also brightens the darker spots fairly well, making contrast less obvious. Thanks to various customizations, this shader pack can be further modified to suit your needs.


It supports the following options: antialiasing, sharpening, ambient occlusion, celshading, color boost, color filter, custom emissive lightmaps, custom sun/moon angle, tone mapping, depth of field, motion blur, bump and parallax mapping, as well as wavy features.
During the night, besides the fact that every block seems a bit orange, the dark spots are not as dark in vanilla. Particles don’t stand out too much, and the world is generally very pleasant to look at.
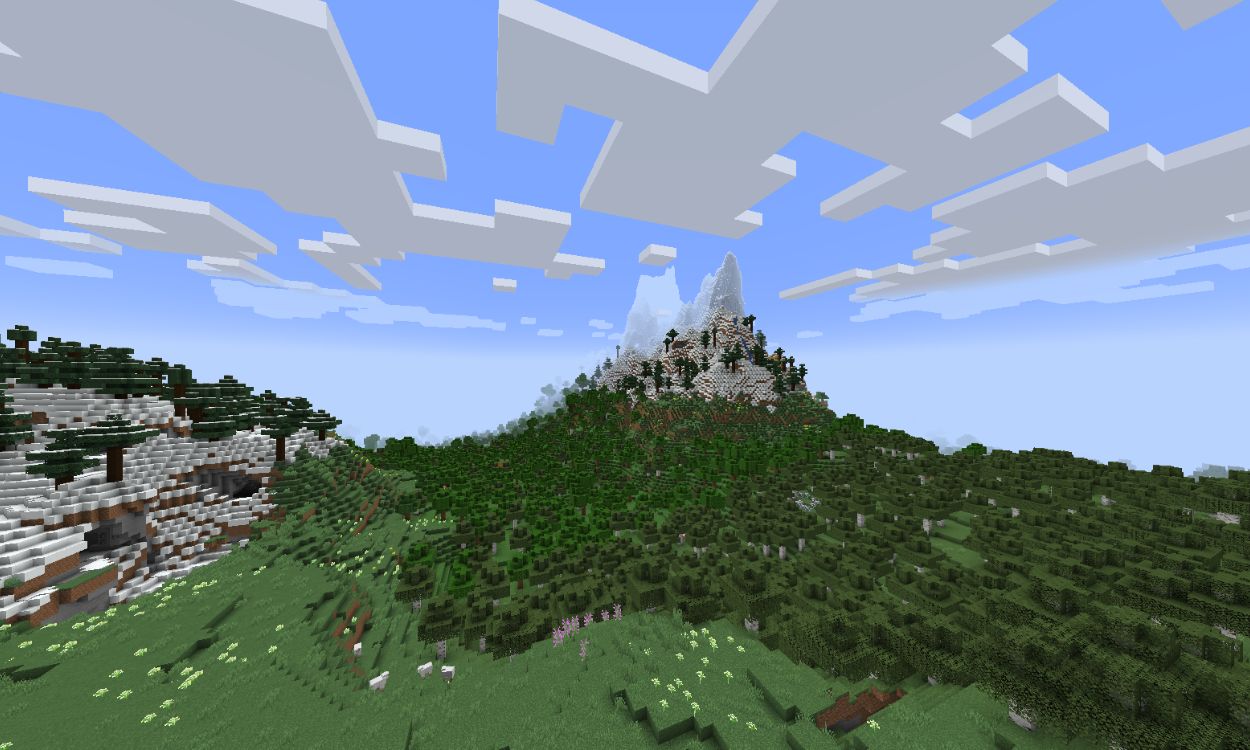
7. Tea Shaders
Unlike the previous shader pack, Tea shaders don’t focus on bumping the brightness, nor adding too much tint to the existing textures, but they make the world clearer and more atmospheric. The fog is much more prominent shadows are not as dark as in the vanilla game. The water is darker and less transparent.

The current features include waving grass, leaves, and water, customizable watercolor with three settings for texture and biome effects, custom swamp biome effect, customizable fog, Nether heat refraction effect, and so many more.
Tea shaders make the world significantly darker during the night, which can make spotting the hostile mobs a bit more difficult. Moreover, due to the pitch black night sky, the stars stand out a lot, which makes for some pretty breathtaking nighttime adventures.
6. DrDestens MCShaders
The DrDestens MCShaders provide simple but fairly beautiful features. First of all, the water has changed quite drastically. It becomes reflective and more realistic. Moreover, because of the “water fog”, it also seems darker and it’s not possible to see too deep, which would be scary if you played with mods that add underwater monsters.

The whole world seems a lot brighter, and contrast is not emphasized. The fog isn’t as important as in the Tea Shaders but does play a greater role than in the vanilla game. Some of the many features DrDestens MCShaders provide are anti-aliasing, physically based rendering, various water effects, bloom, and more.
The nighttime with these shaders looks nothing less than gorgeous. The water is a lot darker, but the surface is not. The light emitted from light source blocks is more vibrant, which creates distinctive contrast points. The sky is not pitch black, but stars still manage to catch your eye so easily. There is a lot to this shader pack than meets the eye at first, so check it out if you’re interested.
5. Spooklementary
If you’re looking for some chilling horror fun in Minecraft with your friends, Spooklementary shaders is the one you must try right now. With this mod, the visuals of the game get completely desaturated and an eerie aesthetic covers up the environment.
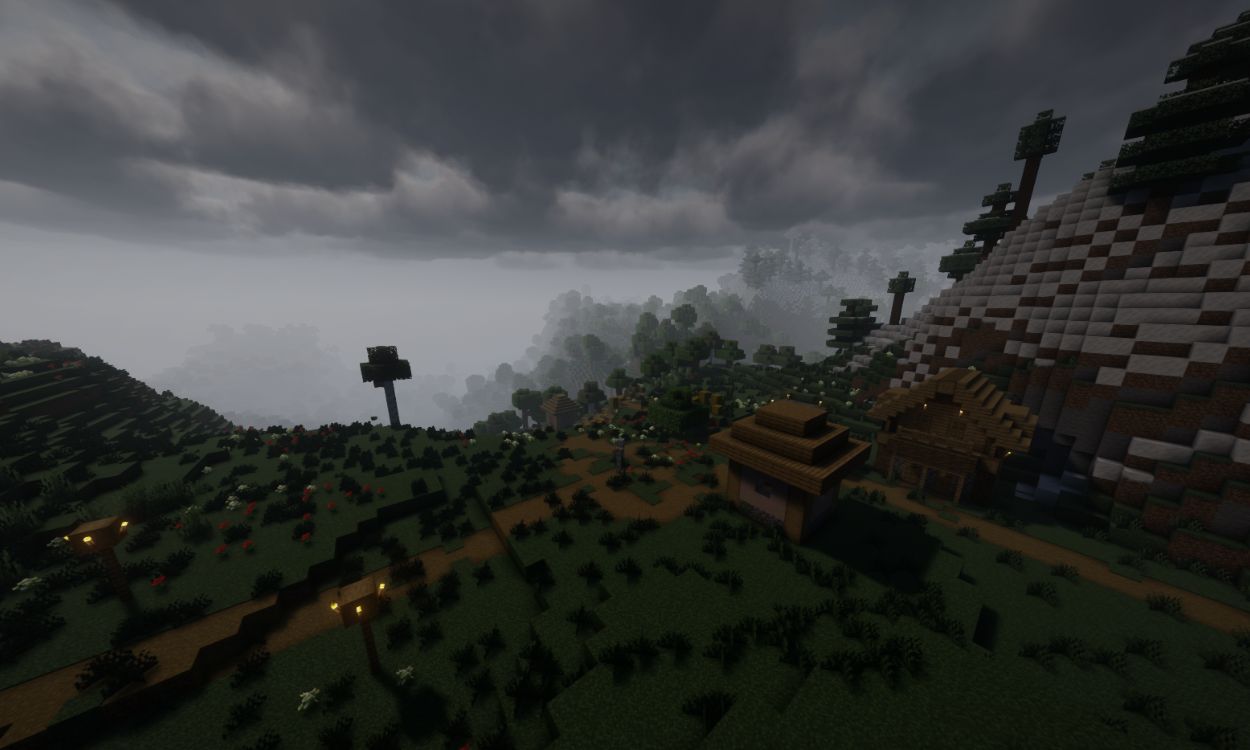
Apart from these, your surrounding is filled with dense fog and are a lot darker than the vanilla experience. If you stay long enough, you might even experience an ominous blood moon appear in the sky.
Don’t get scared if you suddenly notice some rare and unsettling experiences like flickering lights, leaves vanishing randomly, static noises, and your screen shaking, because all of these are a part of the shader’s features. So, bring your friends and install this shader in your world.
4. MakeUp – Ultra Fast
MakeUp – Ultra Fast shaders are my first choice whenever I can’t decide which shader to use within the game. It provides good in-game performance and significant graphical upgrades. You can also expect anti-aliasing, ambient occlusion, motion blur, volumetric sky, waving plants, realistic reflections, and more in this shader pack.

The best part about this shader pack isn’t the features provided here, but instead, it’s the ability to turn them off as per our preference. You get to choose which part of your game should stay vanilla and which aspect should look realistic. Such space for experimentation allows you to find the settings that look good and also work well according to your PC’s limits.
Finally, when it comes to dark areas, this shader can turn your cave exploration into nightmares due to extremely low brightness. You can reduce the darkness slightly in the shader’s settings, but we’d suggest you carry a lot of torches anyway.
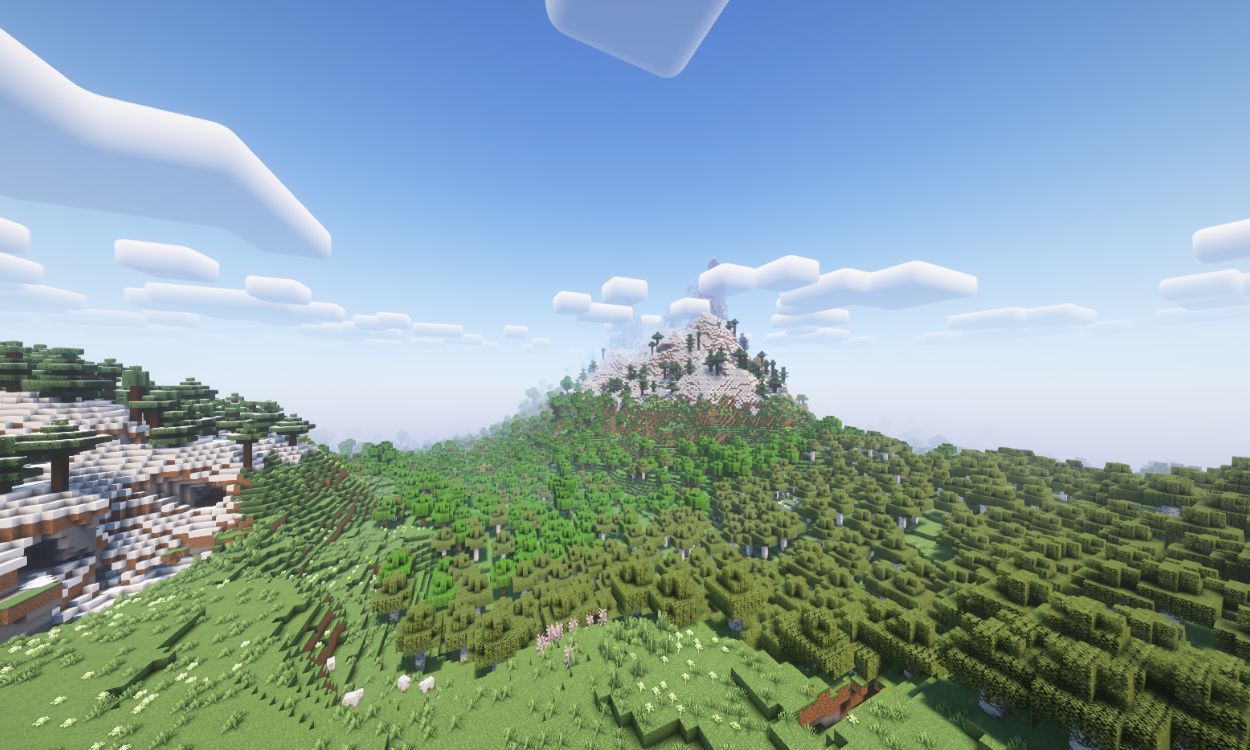
3. Photon Shaders
Transforming your blocky Minecraft world into a cinematic experience can be made possible using the Photon Shaders. It comes with some of the richest features and upgrades to the usual vanilla graphics including the complete overhaul of the sky and bringing a fabulous light shadow interplay.
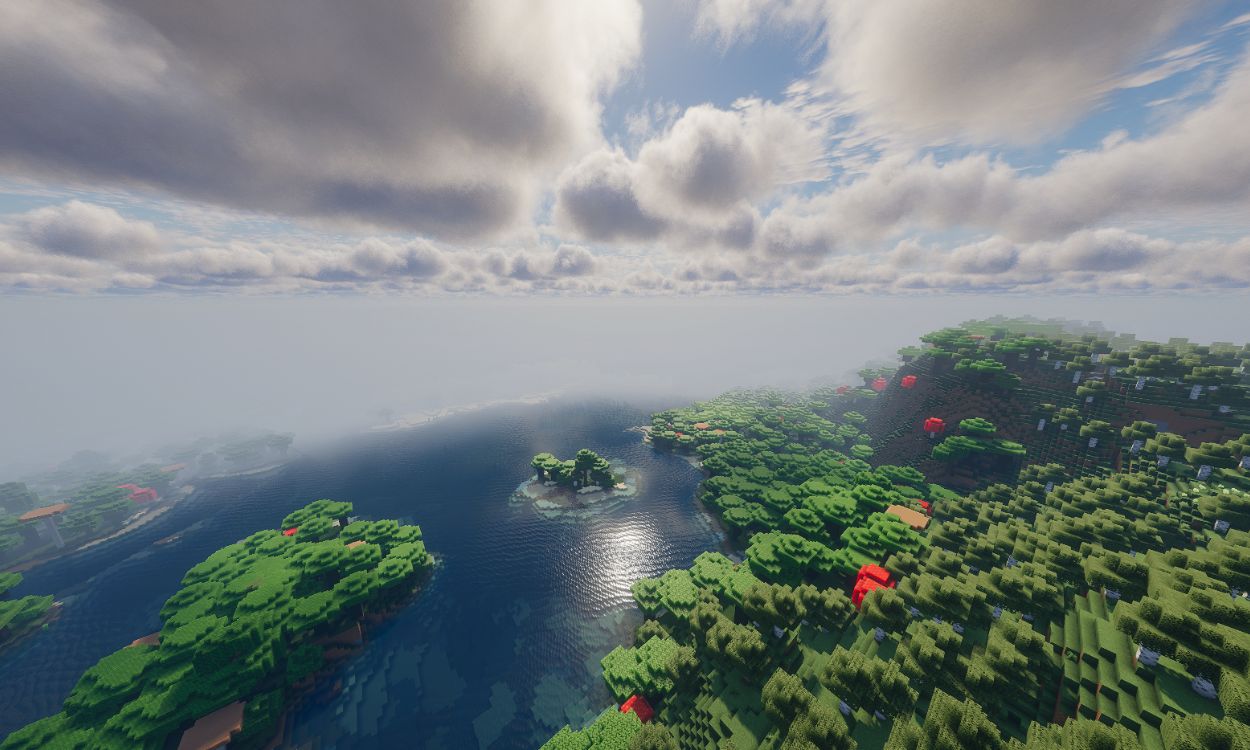
Not just that, each day in the world will feel different once you install this shader for Minecraft due to the volumetric clouds and a responsive atmospheric system. Furthermore, if you enhance the graphics by turning on the Ultra profile in Iris, it will unlock colored lighting effects.
Choose features of the usual Minecraft blocky clouds or a glowing night sky, a hard ocean surface, or a shimmering water body; the choice is yours. Toggle on the motion blur in this shader to bring more depth to your world.
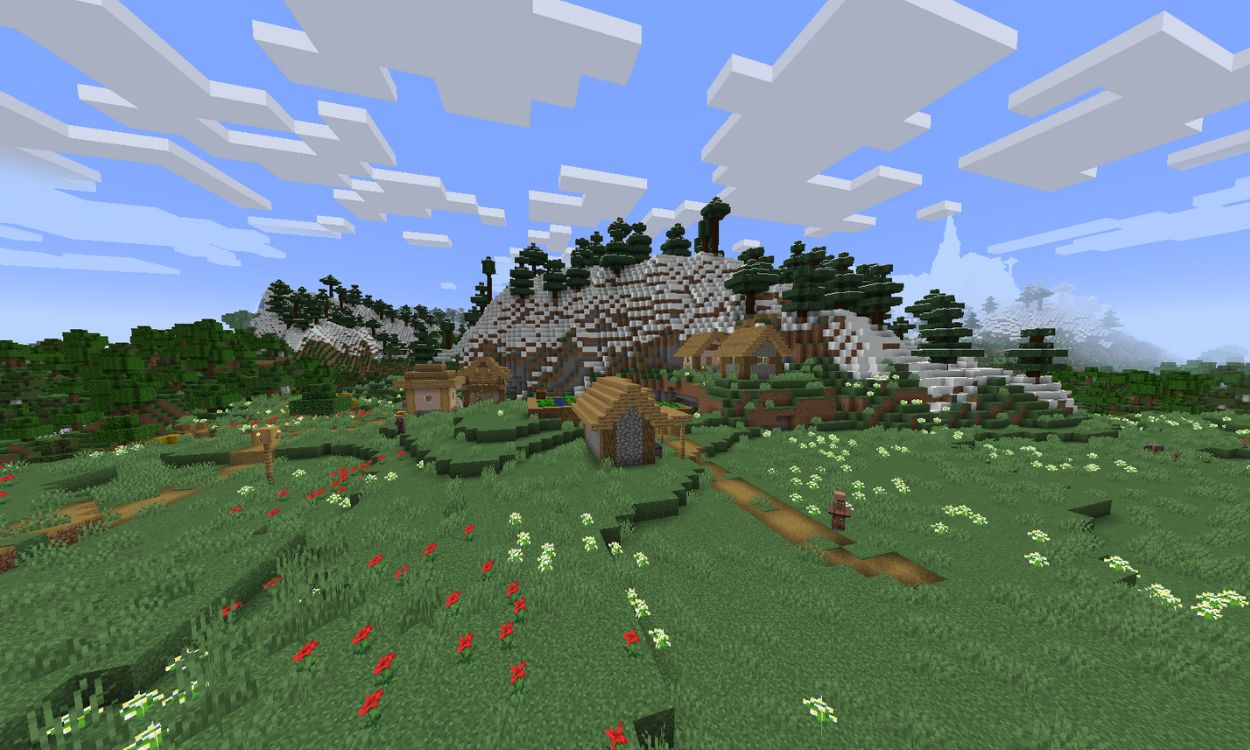
2. Complimentary Shaders – Reimagined
Complimentary Shaders Reimagined is for those crafters who want to introduce stunning visuals to their Minecraft world while preserving the vanilla style at the same time. Notice that, unlike the original Complimentary shaders that completely change the clouds, rivers, trees, and leaves, the Reimagined version keeps them blocky but somewhat feels realistic as well.
So, whether you have a high-performance setup or a low-end PC, this shader will work on most of them. Moreover, you can personalize the settings, ranging from Potato low graphics to ultra-high settings, depending on your PC’s performance.
With realistic lighting, immersive visuals, along a realistic aesthetic, this Minecraft shader offers a range of customizations to choose from. Now, you can keep your world as a naturally generated one, or feel like a fantasy world with the Complimentary Reimagined shaders.
1. BSL Shaders
BSL shaders for Minecraft blend reality with the vibrant graphics, introducing warm lighting, life-like shadows, and beautiful reflections. One of the main highlights in this shader is the realistic water, which blends quite naturally with Minecraft’s blocky world.
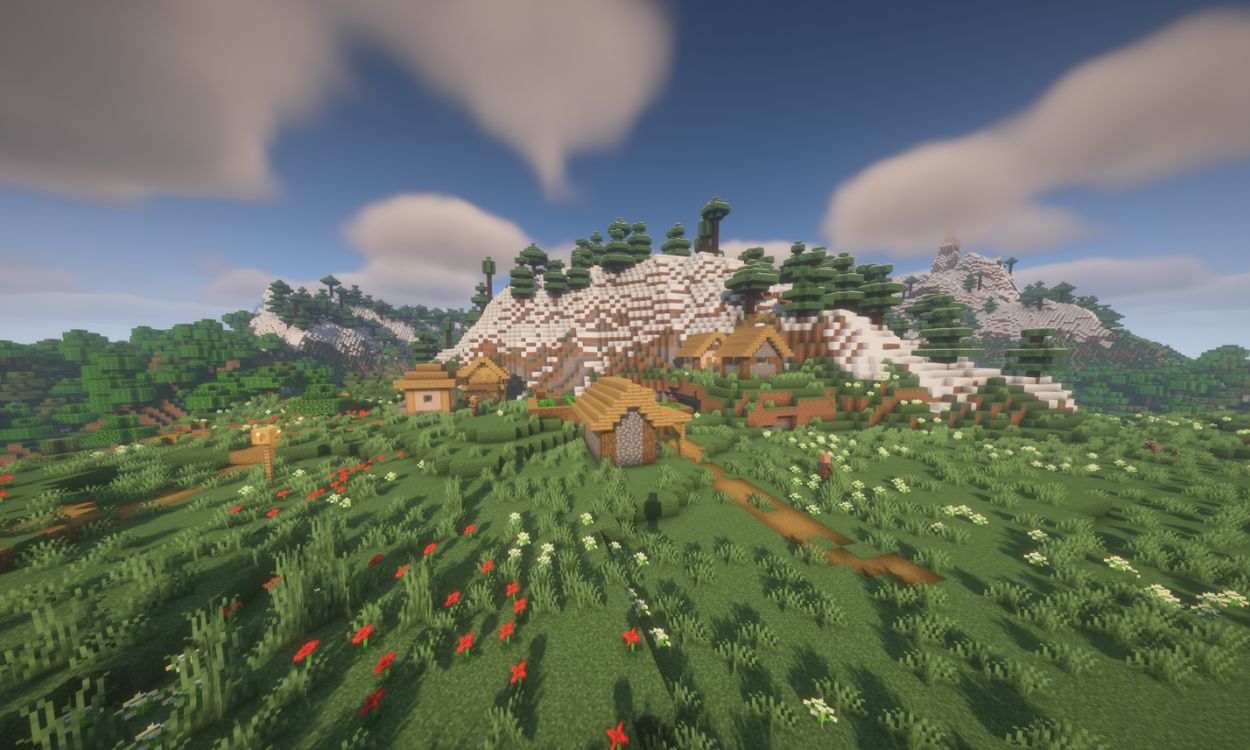
Even with all these enhanced visuals, you won’t face any performance issues on low-end setups as well. So, no need for high-tech graphics cards that include RTX and whatnot because BSL shaders have the power to make the world feel a lot more alive than ever.
How to Install Minecraft Shaders
Installing the shaders for Minecraft and running them in-game is quite easy, and all you need is a mod that improves the performance of the game, like Optifine or Iris. The only thing you must keep in mind is to check the version of the mod you’re installing to make sure it’s the same as the shader you want to use. Now, you can follow the given steps to install the shader in Minecraft:
- Click on any of the Shader links above and download the ZIP file from the dedicated page.
- Check the downloads folder on your PC to ensure the ZIP file has been downloaded properly.
- Now start the Minecraft version that has the performance mod installed.
- Create a new world or launch a previously existing world.
- Go to the pause menu by pressing the Escape key and click on the Options button.
- Click on Video Settings, and click on the Shaders button.
- Click on the Shaders Folder button to open it.
- Then, drag and drop the shaders zip file from your Downloads folder to this location and close the window.
- Now select the shaders file in the Minecraft window, wait for a few seconds for the game to load, and finally go back. This will change the visuals of your Minecraft world.
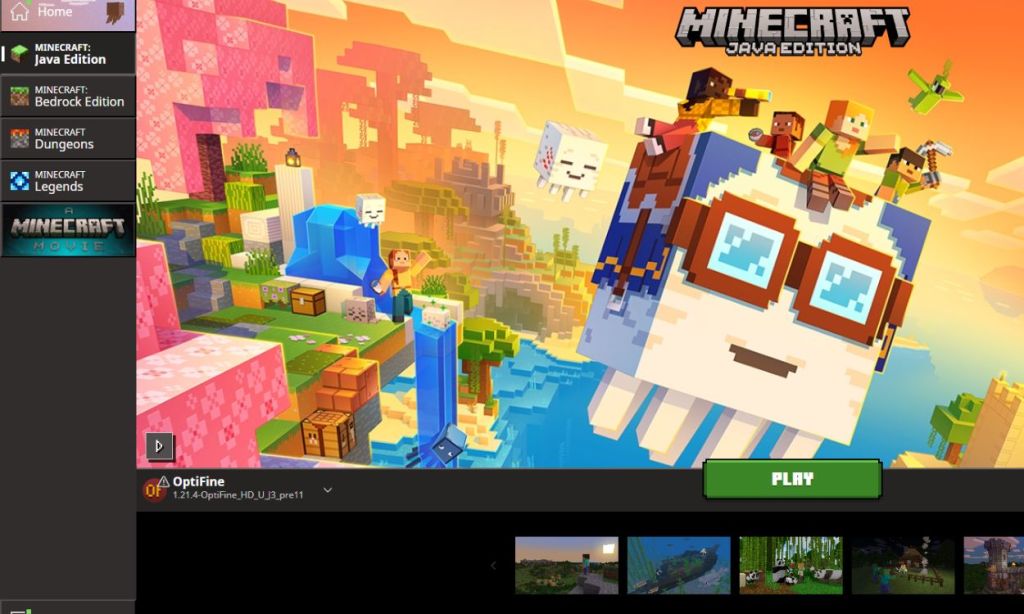
Image Credit: Minecraft/Mojang (Screenshot by Radojka Travar/ Beebom) 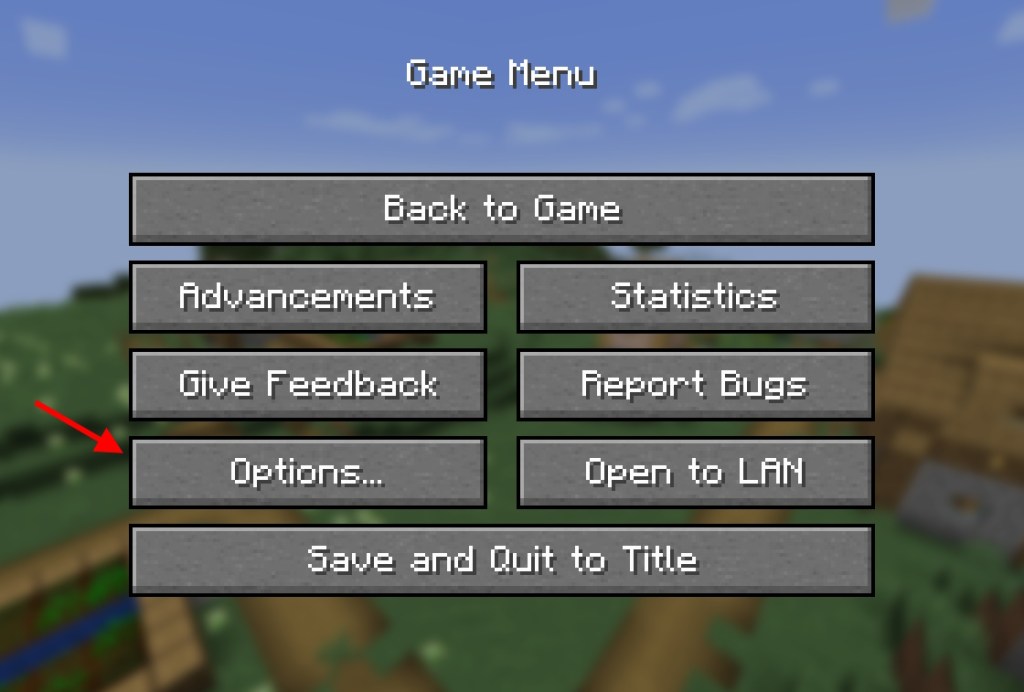
Image Credit: Minecraft/Mojang (Screenshot by Radojka Travar/ Beebom) 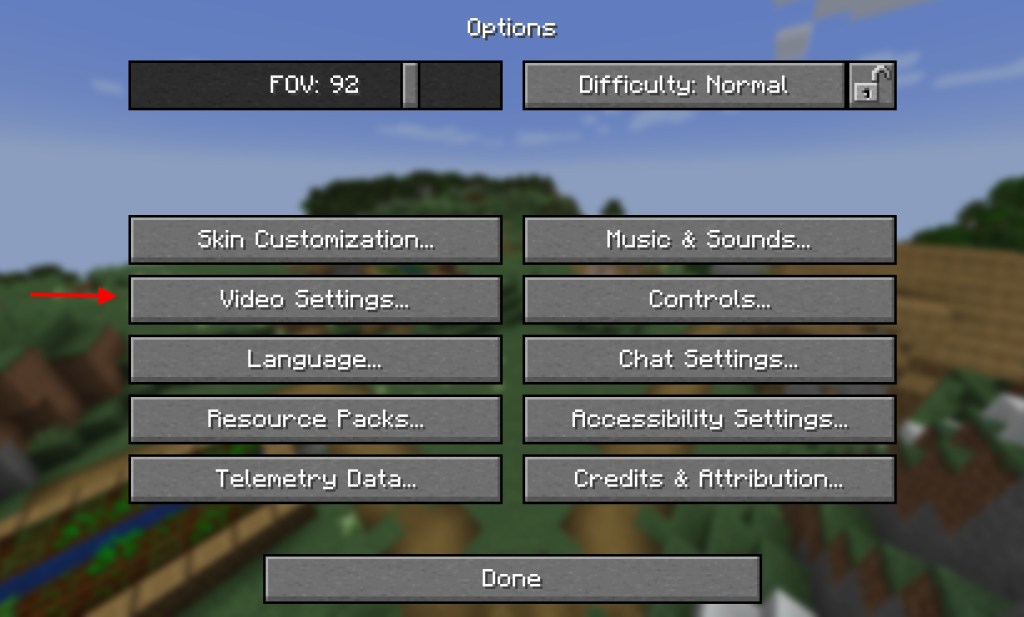
Image Credit: Minecraft/Mojang (Screenshot by Radojka Travar/ Beebom) 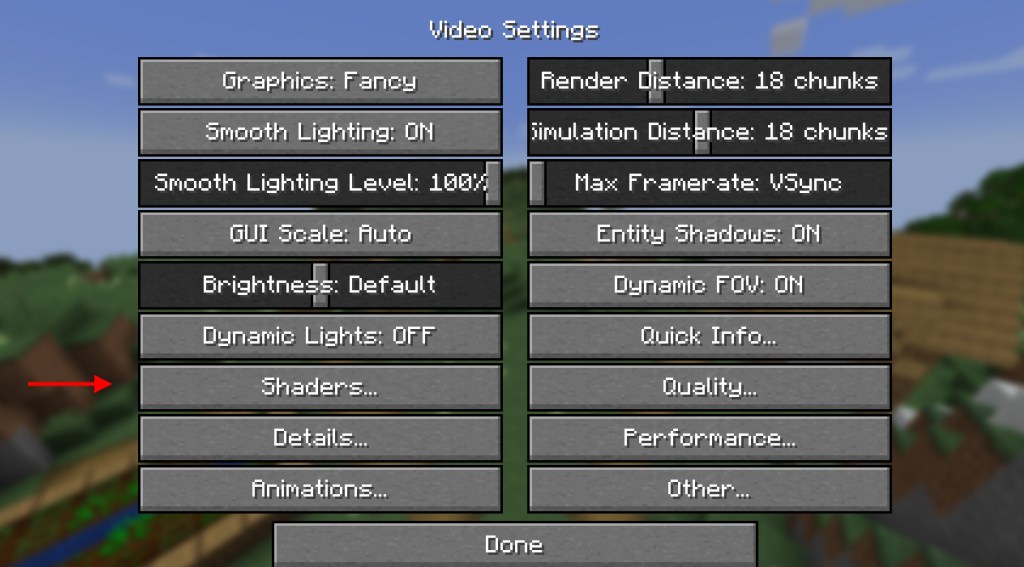
Image Credit: Minecraft/Mojang (Screenshot by Radojka Travar/ Beebom) 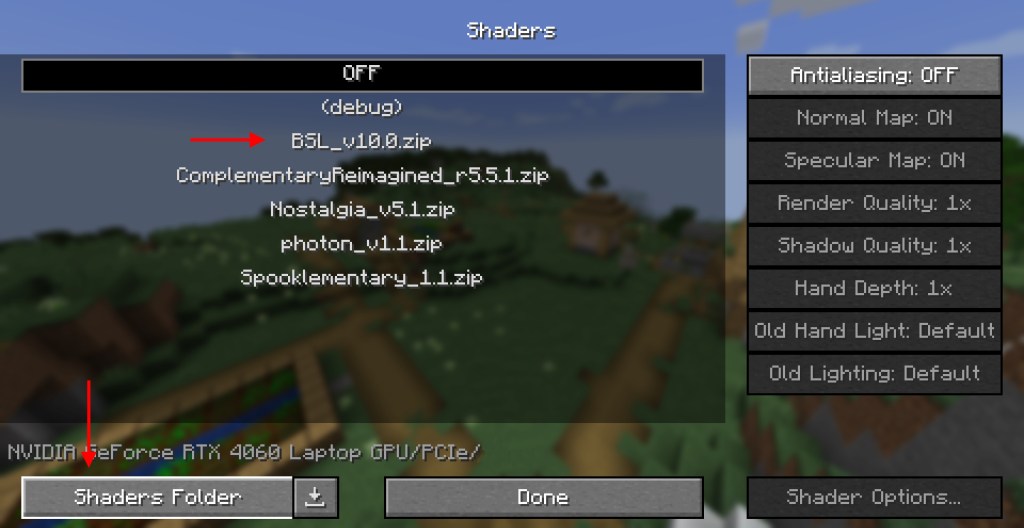
Image Credit: Minecraft/Mojang (Screenshot by Radojka Travar/ Beebom)
That completes the list of top Minecraft shaders that you can install to make your world feel more life-like. So, which is your favorite shader for Minecraft apart from the ones named above? Let us know in the comments below, and we will try to add more to this list.
The BSL shader is the best shader for Minecraft as it can run on all sorts of setups, ranging from low-end PCs to high-end devices, along with providing exceptional visuals for the game.
Most Minecraft shaders might cause a slight lag in the game and decrease the FPS, resulting in a bad experience, and hence, you must use performance boosting mods like Optifine, Iris, or Sodium.
The Complimentary shaders are the best choice for achieving the highest level of performance in Minecraft.