Linux is renowned for being a powerful and reliable operating system that offers unparalleled security, stability, and flexibility. In order to maintain the integrity and safety of the system, Linux implements specific settings in the form of “Permissions.” These permissions control who can access, modify, or execute the files and directories. Whether you are a new Linux user or a seasoned veteran, understanding Linux permissions is extremely important for a safe and secure system. In this article, we will dive deep into what Linux permissions are and how to keep your files and directories secured in the best way.
Understanding Linux Permissions
Linux file permissions are specific settings that allow users to control who can have access to their files. In Linux, each file or directory has a set of permissions that are distributed over three levels of system users:
- User: This refers to the owner of the file or directory. Generally, the user who creates the file/directory is the owner.
- Group: A group is a collection of multiple users with the same set of permissions for a file or directory.
- Others: Every other user who is neither the owner nor a member of a group falls under this category.
Each of these users has three types of file permissions that determine different types of actions that users can perform:
- Read (r): allows the users to view the contents of a file or directory. For a file, read permission means users can print and copy the contents of the file. In the case of directories, with read permission, users can view and copy the files inside the directory.
- Write (w): allows the users to modify the contents of the file/directory. When the write permission is set for a user, that user can add, remove or even rename the file or directory.
- Execute (x): allows the users to execute the file or access a directory. This is in sharp contrast to what we see on Windows, where executable files have a “.exe” extension and users can simply execute it. But in Linux, if the file has executable permissions for a user, only then the user can execute it.
- Dash (-): It means no permission is set or an absence of permission.
How to View File Permissions in Linux
Now that you know what all file permissions exist in Linux, let us see how you can view the permissions granted to files. Viewing the file permissions is pretty easy, and you just need to use this command:
ls -l
Once you execute this command, you will see a list of all files and directories in the current location. Your output will look similar to the below screenshot:
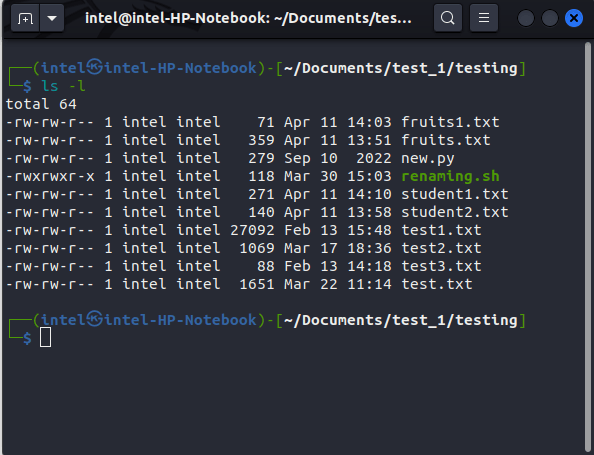
Seems confusing? Let’s try to understand this with a sample example:
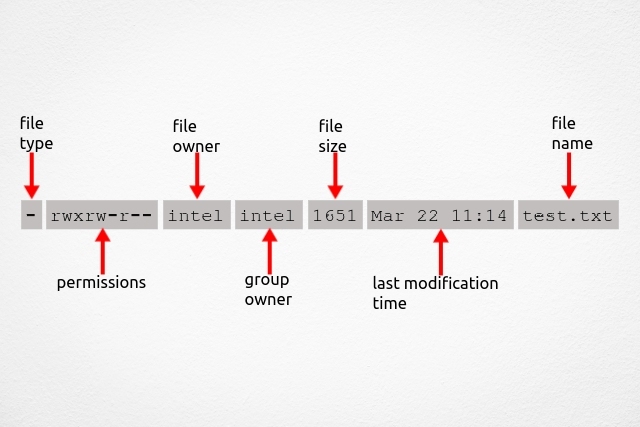
In the above example:
- The first character (-) indicates file type; ‘
-‘ means the item is a file and ‘d‘ means a directory. - The next nine characters specify the permission set for the entry (more on it later).
- The next digit shows the number of links the file has. By default, the item will have 1.
- The next column shows the name of the file owner.
- The next column shows which group has access to the file.
- The next column shows the file size.
- The next column shows the latest modification time of the file.
- And, the final column shows the name of the file/directory.
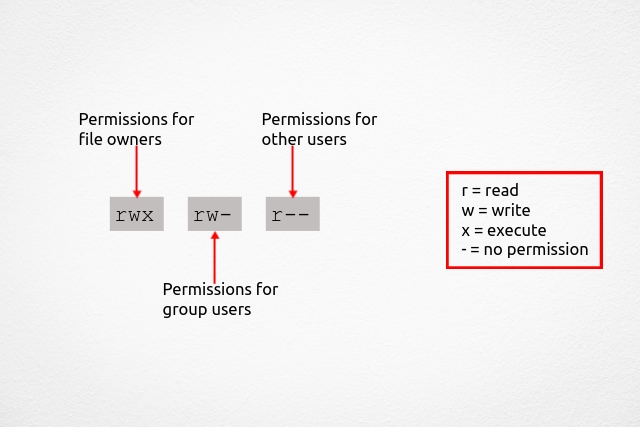
After simplifying the output of ls-l command, let’s expand on the permissions part with a sample permission set “rwxr-xr--“:
- Here, the first 3 characters, ‘
rwx‘ signifies that the file owner has read (r), write (w), and executable (x) permission. - The next 3 characters, ‘
r-x‘ shows that the group users have both read (r) and executable (x) permissions but no write permission (-). - The last 3 characters, ‘
r--‘ signifies that all other users have only read (r) permissions. The two dashes at the end show the absence of permission (in this case no write and execute permissions).
So, to sum up, the first 3 characters signify the permissions for the file owner; the second 3 characters signify the permissions for the users in a group and the last 3 characters signify the permissions for other users.
How to Change File Permissions in Linux
To change the file permission in Linux, we use the chmod command, which stands for “change mode”. The basic syntax to use the chmod command is:
chmod <options> <permissions> <filename>
Some of the command options that you can pair with chmod are:
| Option | Description |
|---|---|
-v | Shows a diagnostic message for every file processed |
-c | Works like -v except it only shows a diagnostic message if any changes are made. |
-f | Used to suppress most error messages. |
-R | Used to change files and directories recursively. |
For the <permissions> part, you can use either of the two methods:
- Absolute Mode
- Symbolic Mode
Absolute Mode in chmod
In this mode, the permissions are specified with a combination of 3-digit numbers from 1 to 7 (also known as octal numbers). Here, the first digit corresponds to the file owner, the second to the group users and the third corresponds to the other users. The basic syntax to specify permissions in absolute mode is:
chmod <options> <permission_combination> <file_name>
The different combinations of numbers you can use for permissions are:
| Permission Type | Number |
|---|---|
| No permission | 0 |
| Execute | 1 |
| Write | 2 |
| Write + Execute | 3 (i.e. 2+1) |
| Read | 4 |
| Read + Execute | 5 (i.e. 4+1) |
| Read + Write | 6 (i.e. 4+2) |
| Read + Write + Execute | 7 (i.e. 4+2+1) |
Let’s see an example to make this easier to understand. Say, you want to set read, write, and execute permissions for all users for the file “test.txt”, then use this command:
chmod -v 777 test.txt
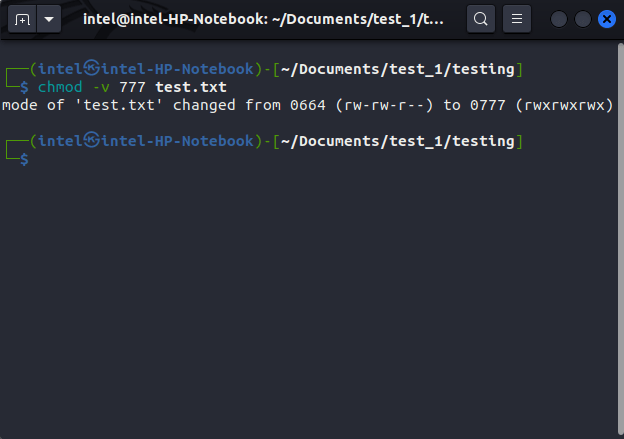
This is a quite frequently used command in Linux systems, therefore, we have prepared an elaborate guide on what chmod 777 means in Linux.
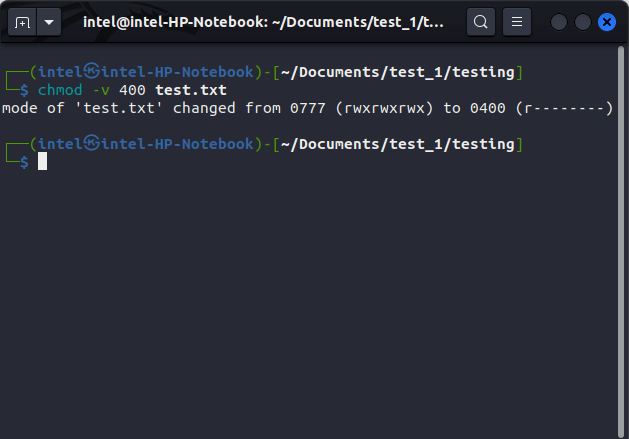
2. If you want to set read-only permission for the file owner and no permission for group and other users, you can use this command:
chmod -v 400 test.txt
Symbolic Mode in chmod
The main problem with the absolute mode is you always have to provide the permission set for all users even if you need to change for one user.
This is where the symbolic mode comes into play. The symbolic mode is the more commonly used as it uses alphabets instead of numbers, which most users find difficult to understand. In addition to being easy for users, you can also set permissions only for a specific user using the symbolic mode, unlike the absolute mode. The basic syntax to change file permission using symbolic mode in chmod is:
chmod <options> <user_type><symbol><permission_set> <file_name>
In the above syntax:
- <user_type> specifies the type of user you want to set permissions for.
- <symbol> refers to ‘-‘, ‘+’, and ‘=’ which means ‘remove’, ‘add’, and ‘equals’ respectively.
- <permission_set> refers to the permission you want to set for the user.
In symbolic mode, you can specify the <user_types> as:
- file owner as ‘u’
- group users as ‘g’
- other users as ‘o’
- all users (combination of all three) as ‘a’ or ‘ugo’
For the <permission_set> part, you can use either of the following combinations:
| Permission Type | Symbol |
|---|---|
| No permission | — |
| Execute | -x |
| Write | -w- |
| Write + Execute | -wx |
| Read | r- |
| Read + Execute | r-x |
| Read + Write | rw- |
| Read + Write + Execute | rwx |
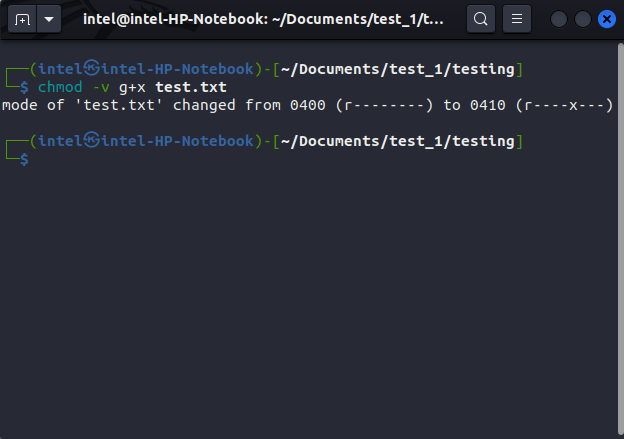
Let us now see some examples of how we can set permissions in Linux using symbolic mode. Suppose you want to set execute permission for the group, then use this command:
chmod -v g+x test.txt
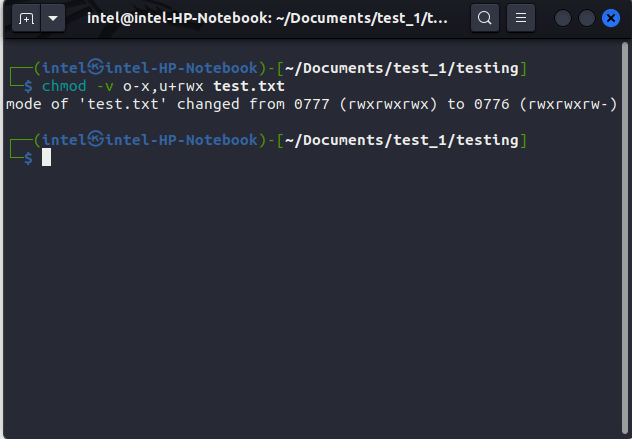
You can even set multiple permissions for different user types. Say you want to remove execute permissions from the other user types and add read, write, and execute permissions for the file owner:
chmod o-x,u+rwx test.txt
Change File/Directory Owner and Group in Linux
Suppose you need to have all the permissions but do not want to share the permissions with the group users. In such a case you can use the chown (Change Owner) command to change the file owner. The syntax to change the owner is pretty straightforward:
chown <new_user_name> <filename_or_directory_name>
For example, if you want to change the owner to root for the file test.py, you can use this command:
sudo chown root test.py
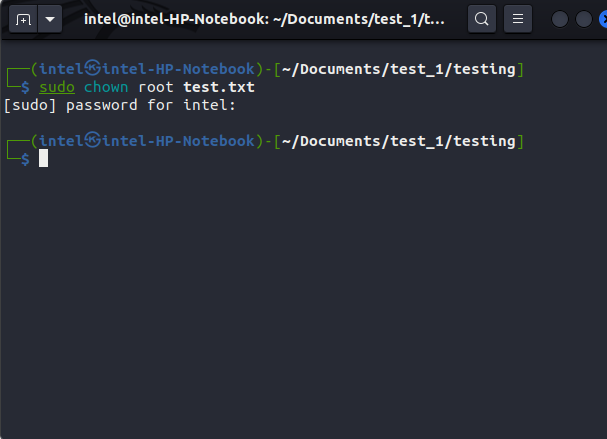
Note: In order to change the file owner, you need to have root privilege. If you do not have root privilege then simply use the “sudo” command to get root permissions.
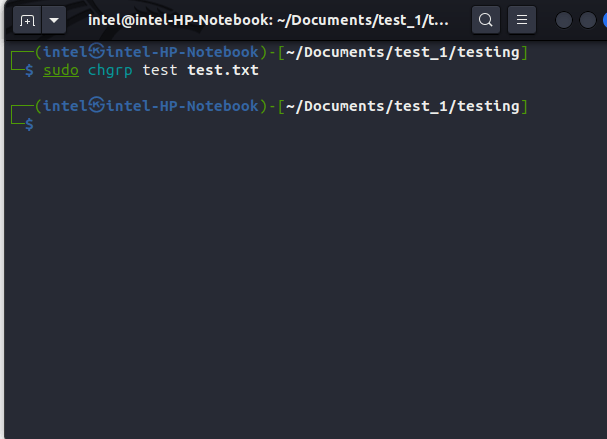
If you need to change the group for a file, use the chgrp command:
chgrp <new_group_name> <filename_or_directory_name>
For example, if you want to change the group to test, use the chgrp command:
sudo chgrp test test.txt
Note: No two groups can be the owners of the same file/directory. If you want to know how you can add a new user to a group, check out our guide on how to add a new user to a group.
Managing file permissions is of utmost importance, especially in a multi-user environment. By regularly reviewing file permissions on your Linux system, you can ensure that your sensitive files stay safe and secure from prying eyes. We hope this article helps you understand this basic concept, and do let us know in the comments if you have any doubts.


