- Most Android devices come with native screen recorders; so you don't need a third-party app to record something.
- To start recording, swipe down to access the Quick Settings panel and tap on the Screen recording or Record screen tile.
- Alternatively, you can use third-party apps like XRecorder or tools like Scrcpy to record your Android phone's screen.
Gone are the days when you would have to solely rely on a third-party app to screen record on an Android device. Screen recording on Android has been a breeze since Android 11. Whether you’re new to Android or bought a different Android device, this guide will have you recording the Android screen in no time. Let’s dive in!
How to Screen Record on Android
You can record the screen on an Android device – using your phone’s screen recorder, the Scrcpy tool on Windows/Mac, Android’s Game Dashboard, or with a third-party app.
Method 1: Using Native Android Recorder
The native Android screen recorder is easy to access. Moreover, it won’t matter which smartphone brand you are using, as it is similar on every Android device. All you have to make sure is that your device is running on Android 11 or above, and you’re good to go. For this guide, we’ll be using the OnePlus 11R running Android 15.
- Swipe down from the top twice to bring up the extended Quick Settings.
- Swipe to find the Screen recording tile and tap on it.
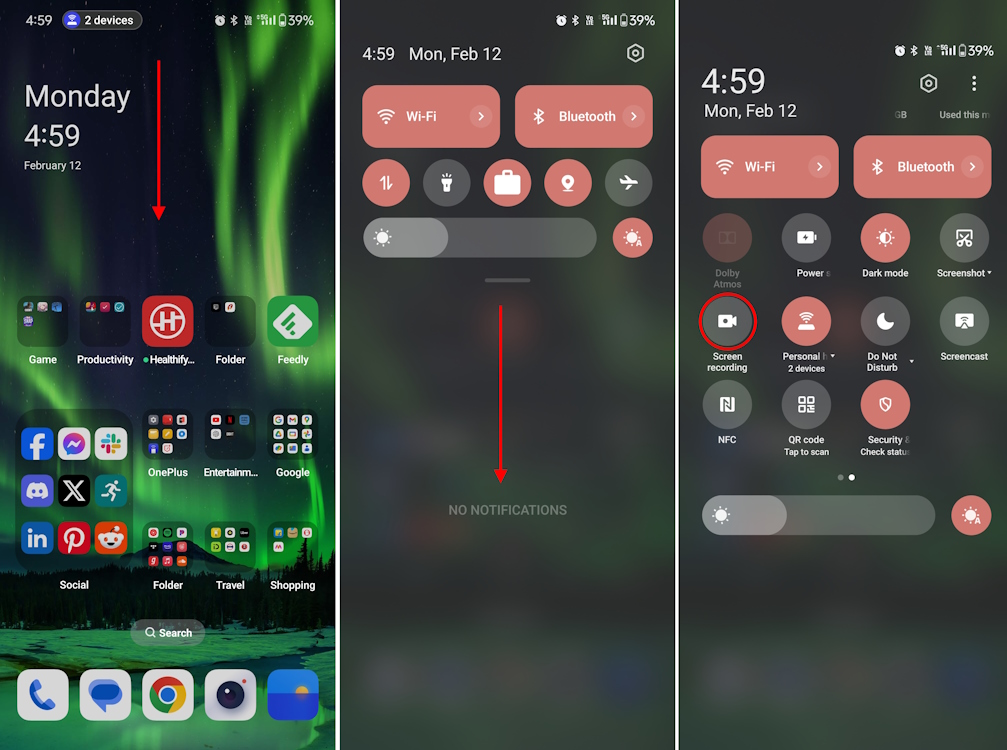
- A screen menu should pop up, check the required options, and tap Start recording.

- If the screen recorder tile isn’t visible, edit the Quick Settings panel and tap on the Screen Recorder tile to add it.
- If you want to stop the recording, tap the pill or notch at the top and tap on the Stop button.

You can also long-press on the tile to head over to the native screen recorder settings. Here, you can tweak the recording quality, Frame rate, video coding format, and more. This works in third-party UIs, but not on Google Pixels.
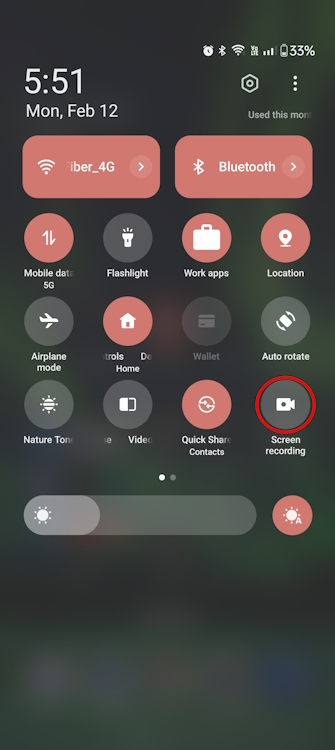
Of course, devices from different brands will have minor differences on the interface level. If you have a device that’s not OnePlus, we’ve curated a gallery of screenshots that depict how the Screen recorder tile looks across different Android skins:
Method 2: Record Screen While Gaming
Most UI’s, including the Pixel UI, come with a gaming mode that turns on when you fire up a game. Among the options, you should find a screen recording option that makes it more accessible. The option is straightforward to find on most UIs, so we won’t be digging deeper.
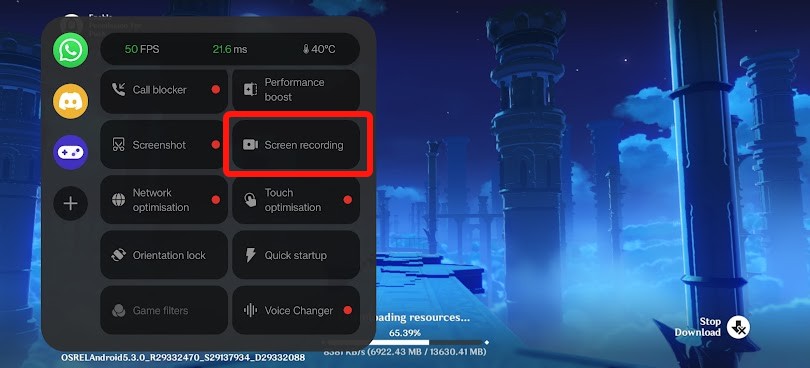
- Fire up your favorite game to activate your phone’s Game Dashboard.
- Tap on the Controller icon or in the case of OnePlus, OPPO, or Realme, swipe down from the edges of the top to bring up the Game mode.
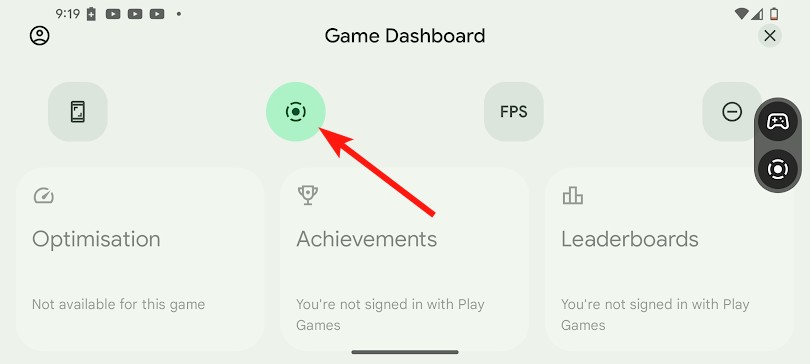
- From here, tap on Screen Recording to start recording your gaming session.
Method 3: Record Android Screen from a Desktop Using Scrcpy
Scrcpy is an amazing open-source tool primarily used to mirror screens. However, it can also be used to screen record, and here’s how to do it. It does require you to know about ADB and USB debugging, and how to connect your device using the same.
- Download Scrcpy (free) for Windows, Linux, or macOS from its official repository.
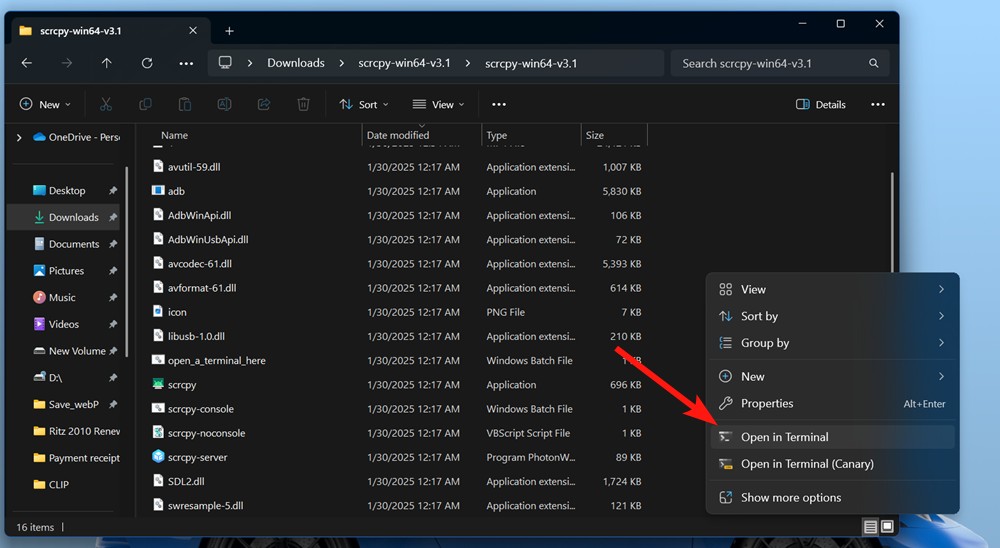
- Extract the Zip file, and open the extracted folder.
- Now, right-click on the Windows Batch File and select Open in Terminal.
- Connect your device using wired/wireless USB debugging via ADB.
- Once connected, type the following code, and hit Enter to start recording.
.\scrcpy -r file.mp4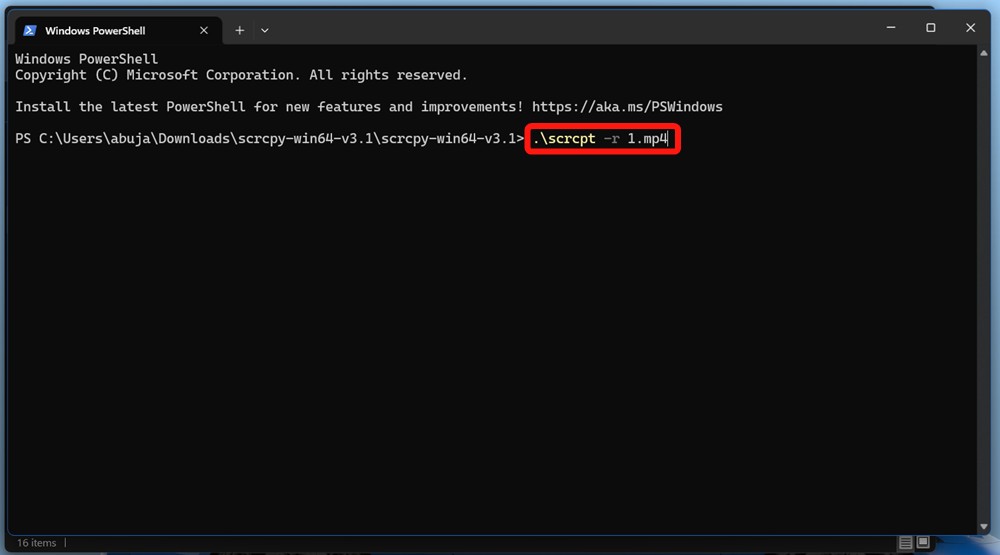
- A new window mirroring your smartphone screen should instantly pop up and Scrcpy should start recording

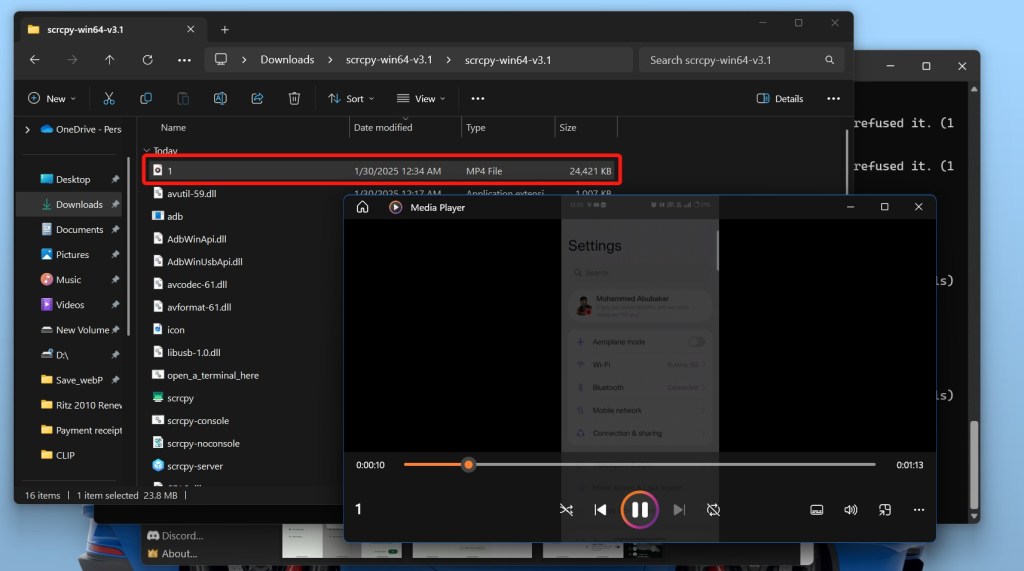
- The recording will stop when you close the window and will be saved in the Scrcpy folder.
Method 4: Record Android Screen Using a Third-Party App
While there are tons of third-party screen recorders, we’d recommend sticking to Android’s built-in screen recorder. However, if you’re running an older Android version, there’s no other way but to install a third-party recorder. We’ve got a list of decent Android screen recording apps, but one that stands out is XRecorder.
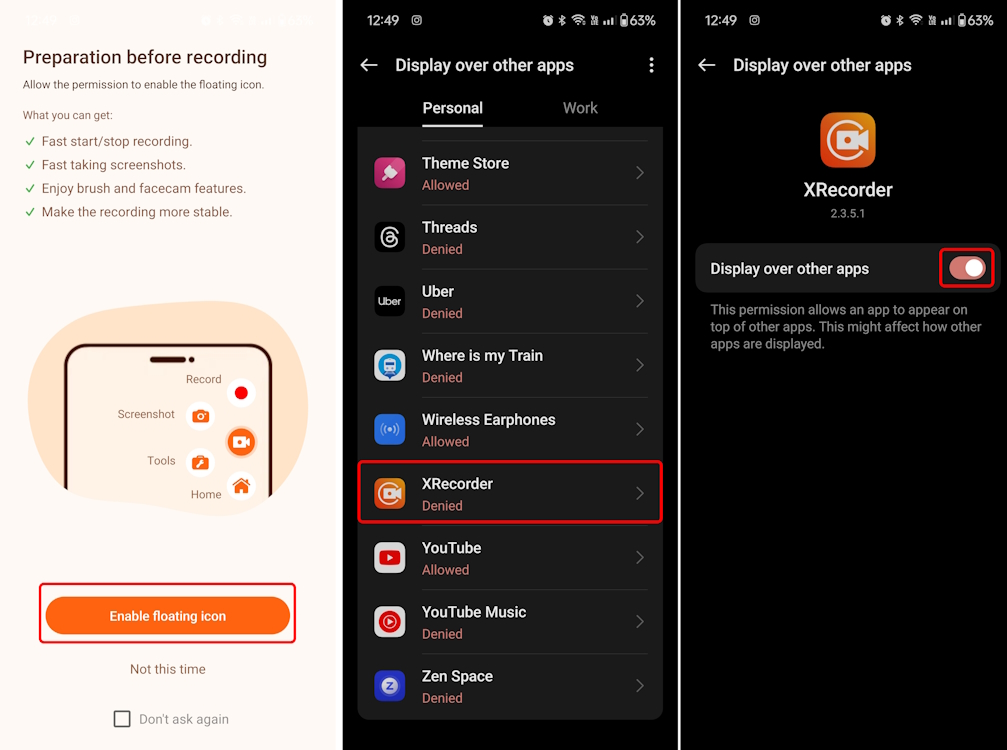
- Install the XRecorder (Free) app on your device from the Google Play Store.
- Launch the XRecorder app and turn on the Display over other apps toggle to grant access.
- Once done, go back to the app and allow a few more permissions like Gallery access and notifications.
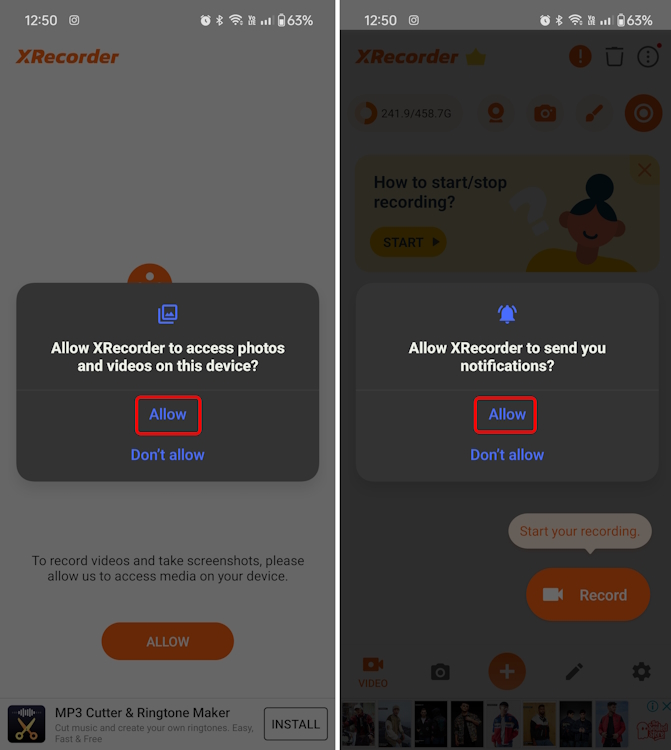
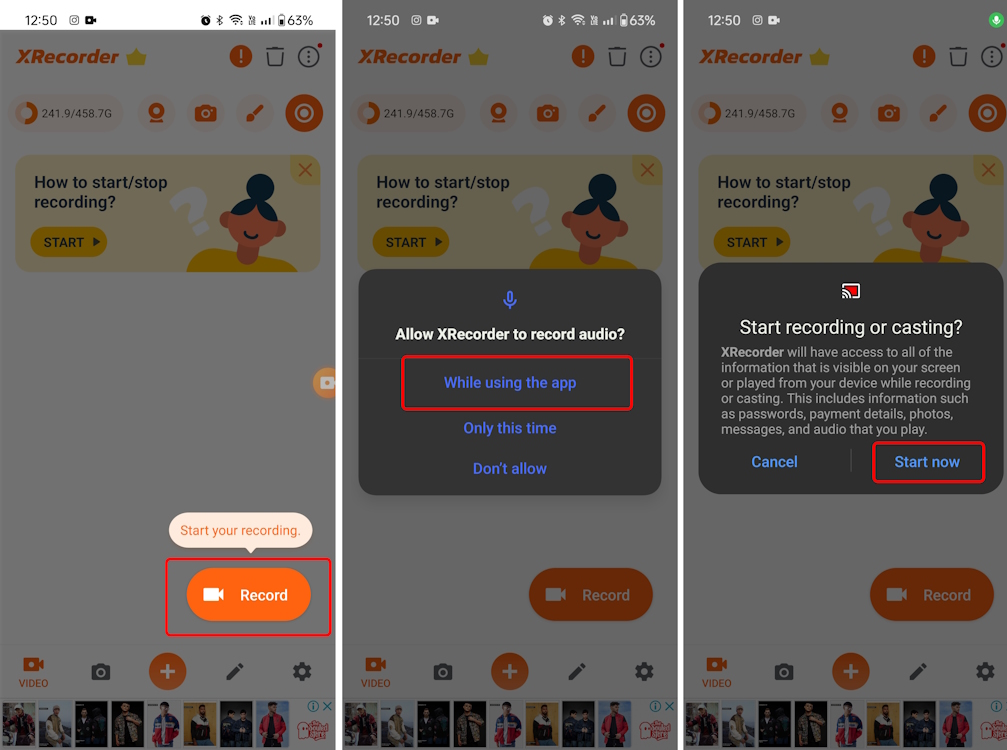
- Finally, tap on the Record button at the bottom right. Grant the app access to your phone’s microphone when prompted.
- In the Android casting popup, tap Start now to start recording.
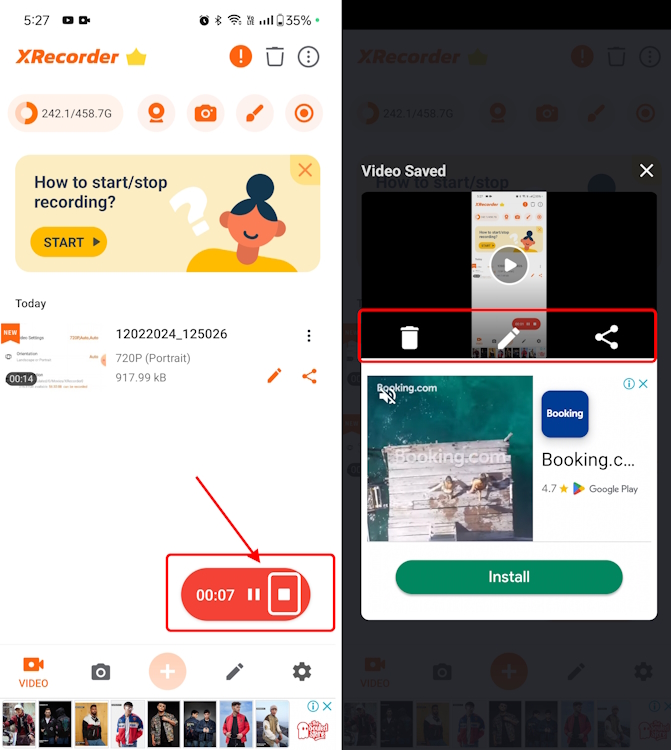
- Once done recording, tap the floating Stop button to end the recording.
- All your recordings will be displayed on the next screen, which you can then edit.
- To get rid of the floating icon, long-press and drag and drop it on the cross mark.
With that, we hope you now know how to screen record on your Android device like a pro. Now, if you’re using an iPhone instead, you can check our how to screen record on iOS guide instead. However, if you do run into any issues, feel free to comment down below.


