Launched alongside iOS 16, iPadOS 16, and watchOS 9 at WWDC 2022, macOS Ventura boasts several interesting new features, including a redesigned Settings app, Stage Manager, FaceTime hand-off, and more. And well, if you have a registered Apple developer account, you can install the macOS 13 Ventura beta on your Mac without any issue. Well, even if you do not have a developer account, you’re not out of luck. Yeah, you heard that right! You can download and install macOS 13 Ventura beta without a developer account as well. Let me walk you through the process in this detailed guide.
Install macOS 13 Ventura Beta Without Developer Account (2022)
Backup Your Data Before Installing macOS 13 Beta
As macOS 13 is still a work in progress and will undergo rigorous beta testing before its official release in the fall, you should be prepared to deal with a plethora of bugs and issues. Problems such as unexpected battery drain, overheating, and random rebooting are quite common in pre-release software. Not to mention, dreaded issues like bricking and data loss could plague your device if you don’t carefully follow the instructions. Therefore, we suggest backing up your Mac device before moving forward.
Fortunately, there are multiple ways to back up your personal data and information on Mac devices.
Back Up Your Mac with Time Machine
Thanks to Time Machine, the built-in backup feature in macOS, you can back up your apps, photos, music, documents, and other personal data automatically.
1. First, connect an external storage device such as a USB or Thunderbolt device to your Mac.
2. Then, click the Apple menu at the top-left corner of the screen and navigate to System Preferences -> Time Machine.
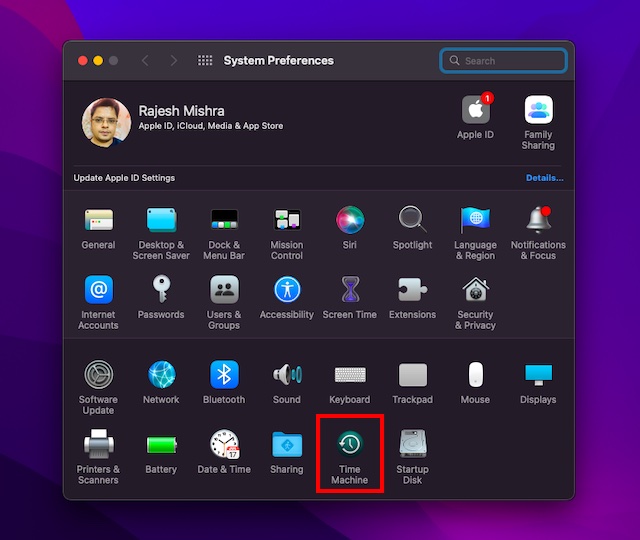
3. Click on “Select Backup Disk“.
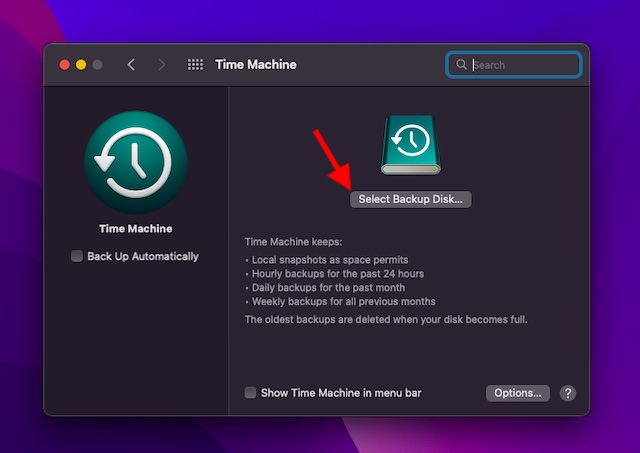
4. Select the name of your disk and then click the “Use Disk” option. That’s all! Time Machine will now make a backup of your Mac device.
Back Up Your Desktop and Document Files with iCloud Drive
macOS allows you to store your desktop and document files in iCloud Drive. You should choose this option to not only add an extra layer of safeguard against data loss but also make the files accessible across devices.
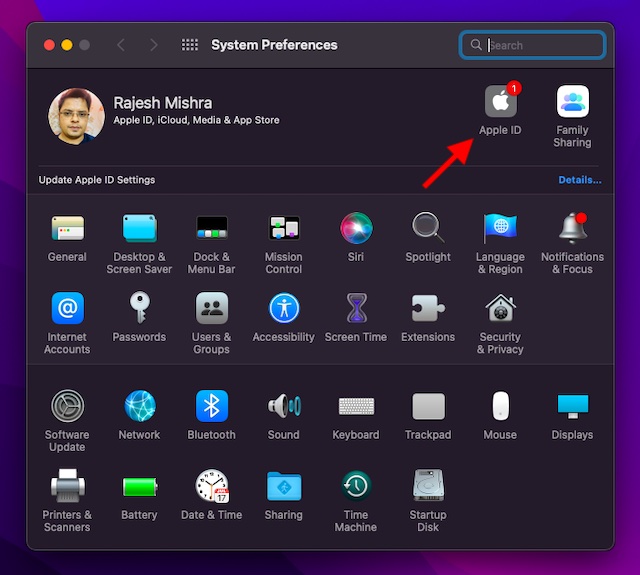
1. To get started, click on the Apple menu at the upper-left corner of the screen and select “System Preferences“.

2. Now, click the Apple ID icon that shows in the upper-right corner of the window.
3. Next, click on “iCloud” in the left sidebar.
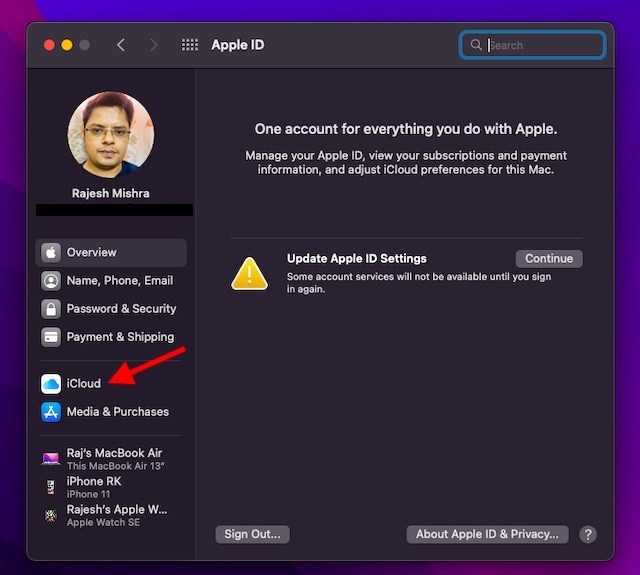
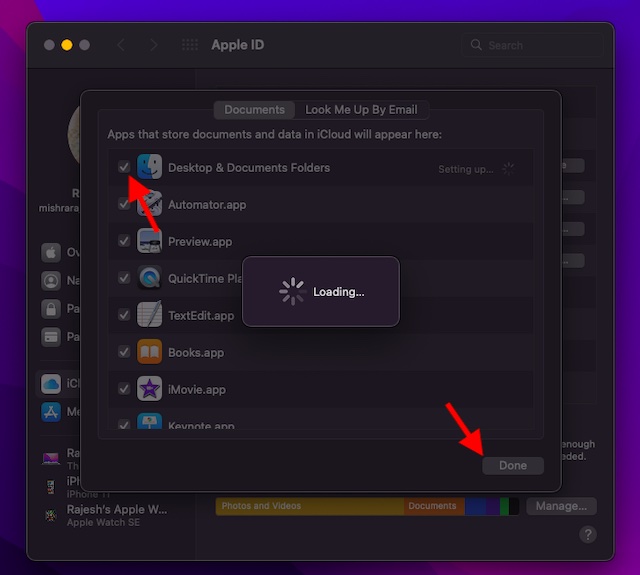
4. Next, make sure that the iCloud Drive checkbox is enabled. Then, click the “Options” button that appear next to iCloud Drive.

5. Check the box for Desktop & Documents Folders and click “Done” to finish.
Ensure That Your Mac Device Supports macOS 13
If you were hoping that your older Macs like MacBook Air 2017 would support macOS 13 Ventura, you would be disappointed to know that they have been left out. Therefore, make sure to check if your device has support for macOS Ventura or not.
Download macOS 13 Ventura Developer Beta Profile
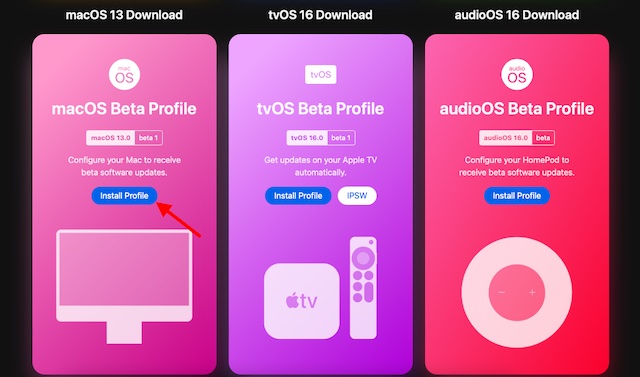
1. First, launch Safari and go to betaprofiles.com.
2. Now, scroll down to find the macOS Beta Profile section and tap on “Install Profile“.
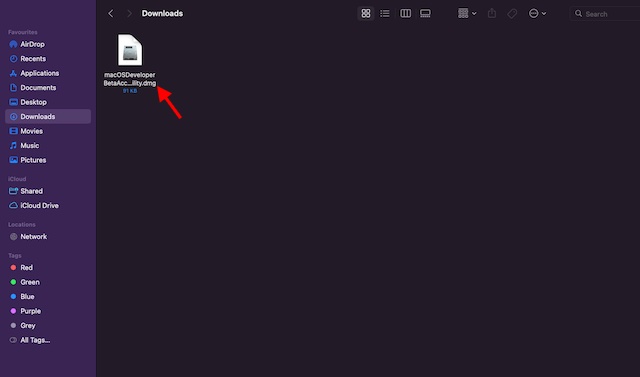
3. Once your browser has downloaded the macOS 13 beta DMG profile, double-click the file to open it.
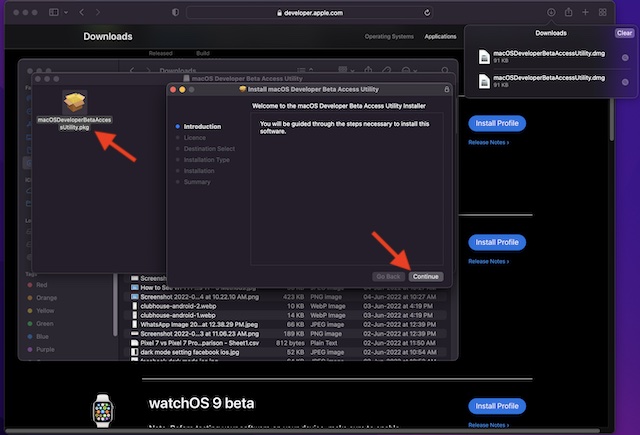
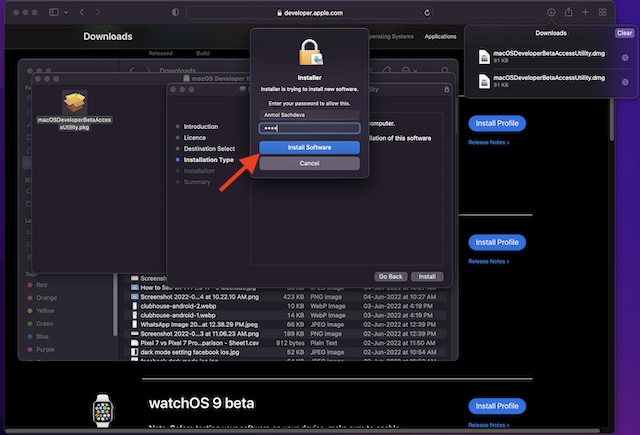
4. Next, double-click on the macOSDeveloperBetaAccessUtility.pkg file in the pop-up window to open the installer. Now, follow the on-screen instructions to complete the installation.
- After the installer has been successfully downloaded on your Mac, System Preferences will begin to check for an update to macOS. After that, click on Update to download and install the macOS 13 developer beta software.
- Just in case the macOS 13 developer beta software doesn’t appear up in the Updates list, reboot your Mac (Apple menu -> Restart). Next, launch the Mac App Store and click the Updates tab.
- As to how much time the macOS developer beta update may take to finish downloading, it entirely depends on the file size and your Wi-Fi connection.
Install macOS 13 Ventura Developer Beta on Your Mac
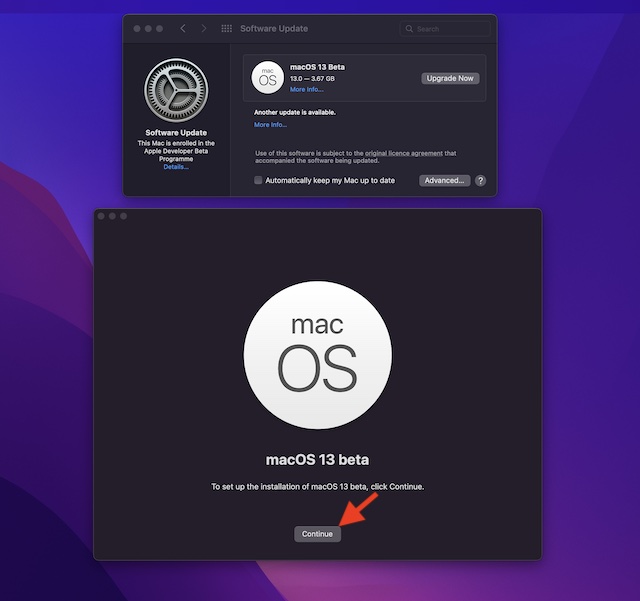
Once the macOS 13 beta software has been downloaded, a prompt to install macOS Ventura developer beta will appear on the screen. Just follow these steps after that:
1. Click Continue in the prompt that appears on the screen.
2. Then, agree to Apple’s Terms and Conditions.
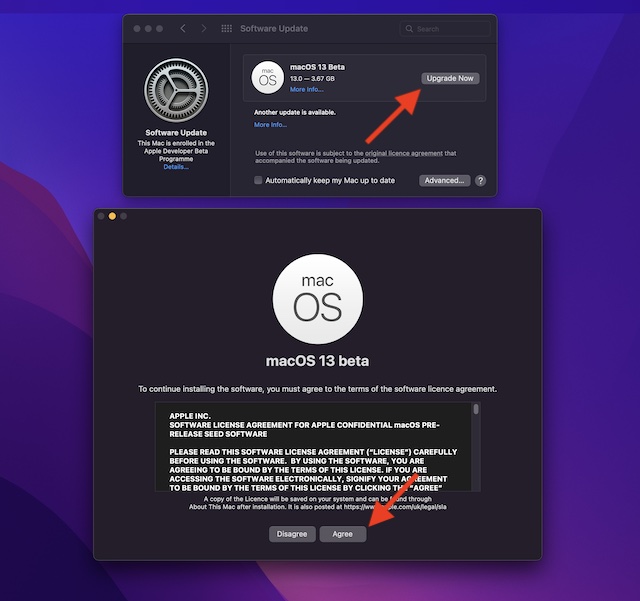
3. Finally, click “Install” and then hit “Restart” to apply the changes.
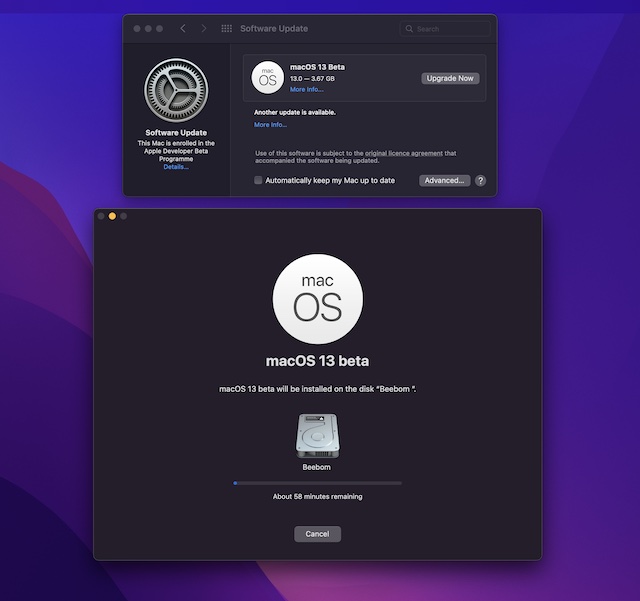
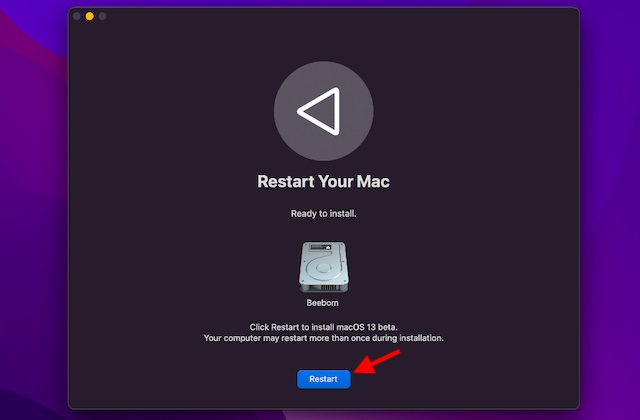
Bear in mind that your Mac device may reboot multiple times during installation. And you will see a black screen with the Apple logo and a progress bar to track the installation process. Since the installation will take some time, better grab a cup of tea and wait patiently.
How to Get Started with macOS 13 Developer Beta
When your Mac restarts, the all-new macOS 13 Ventura lock screen will be waiting for you. Now, log in to your Mac as usual and set it up in accordance with your preferences.

Install and Test Out macOS Ventura Right Now!
Hopefully, you have gone through the macOS Ventura installation process without any hiccups. Having installed the developer beta on your Mac, it’s time to try all the new features and find some nifty hidden settings. We have also started testing the macOS developer beta build at our offices and bring you exhaustive guides on some of the new features. So, stay tuned for more macOS Ventura goodness over the coming weeks. As always, if you also come across any exciting features, do not forget to share them with our readers in the comments section.