
Microsoft recently released a new Windows Insider build with a slew of features, including Start menu app folders, new touch gestures, and much more. Of the newly added features, one practical feature that went under the radar is live captions. Yes, you read that right. Windows 11 now has live captions, a popular feature on Android smartphones (also available in Google Chrome). The feature works offline, and voice data is processed on your device without cloud intervention. With that said, here’s how you can set up and use live captions on Windows 11.
Use Live Captions on Windows 11 (2022)
At the time of writing this article, the live captions feature is available only on Windows 11 Insider build 22557 and newer. Hence, you won’t see the feature if you’re using Windows 11 in the stable channel. That said, the feature is expected to make its way to the stable version sometime in the future. If you are running a compatible build on your PC, follow the steps below to get started with live captions on Windows 11.
What is Live Captions in Windows 11?

As the name tells, Live Captions is an accessibility feature that converts audio you play on your PC to text. The feature works without an active internet connection, and voice data processing is done directly on your Windows 11 machine. At the moment, the live captions feature is available only in English (United States), with more languages expected to come soon.
Enable Live Captions on Windows 11 From Settings
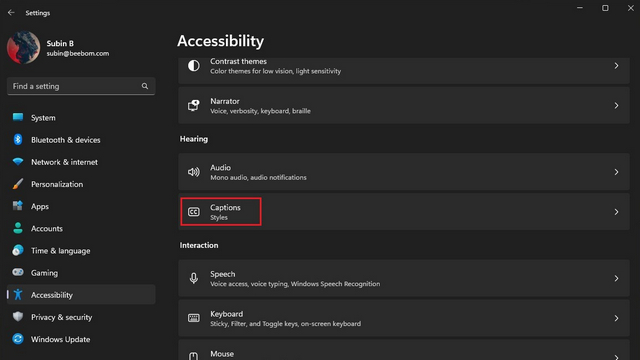
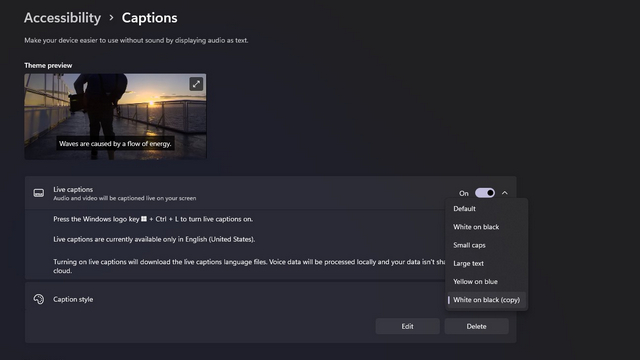
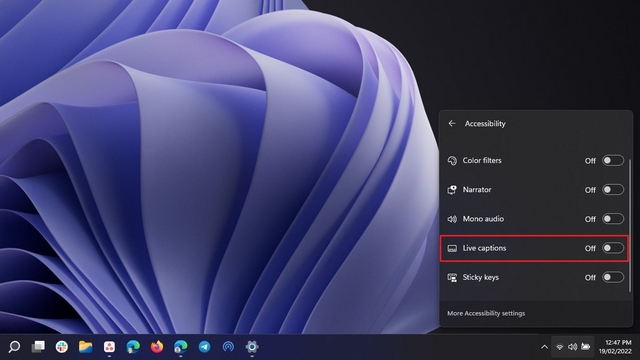
1. Open the Settings app and switch to the “Accessibility” tab from the left sidebar. Under the “Hearing” section, click on “Captions”.
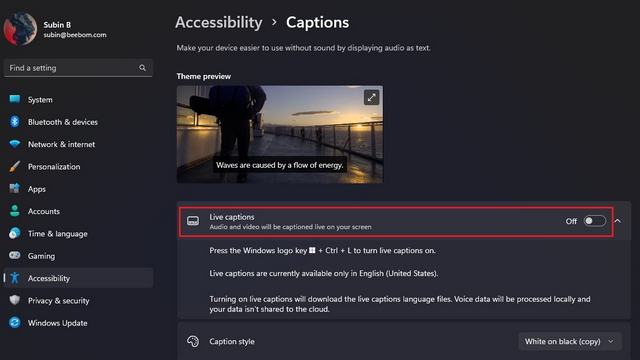
2. Now, enable the new “Live captions” toggle to get live captions on your PC. You can alternatively use the Windows 11 keyboard shortcut ‘Win+Ctrl+L’ to turn on live captions. As mentioned earlier, Windows currently supports Live captions only in English (United States) language.
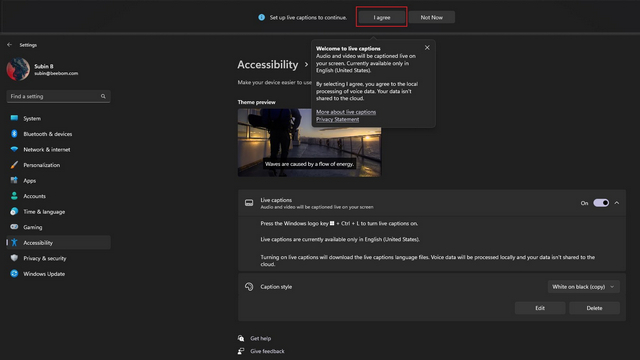
3. From the pop-up that appears at the top of the screen, click “I agree” to acknowledge the local processing of your voice data. Microsoft says your data isn’t shared to the cloud.
Customize Live Captions on Windows 11
Now that you have set up live captions, you can choose to customize a few aspects of the interface, namely caption box position, filter profanity, allow microphone audio, and change caption style. Here’s how to tweak them:
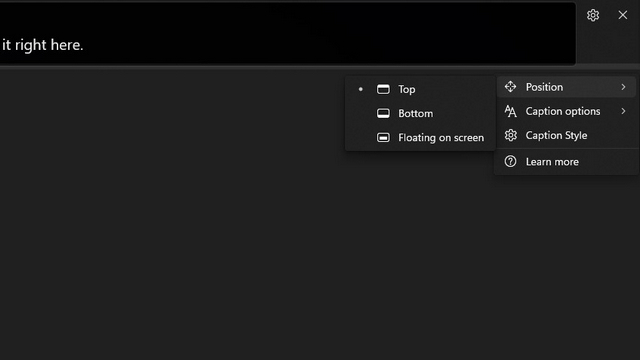
1. Click on the Settings icon at the top-right corner of the captions box and click on “Position”. Now, you can choose to place the captions box at the top, bottom, or let it float anywhere on the screen.
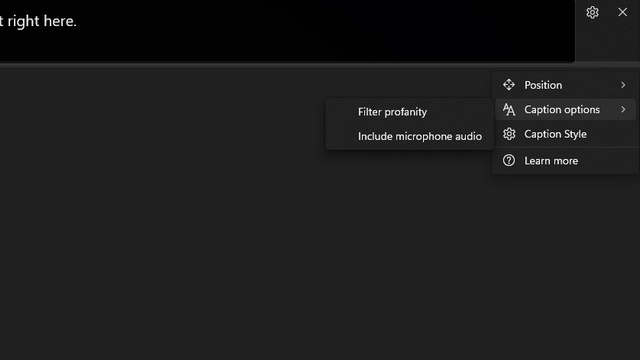
2. Also available is the option to filter profanity and include your microphone’s audio in the captions. You can click the Settings icon again and choose “Caption options” to control these settings.
3. Up next, we have the option to change the caption style. The available options include white on black, small caps, large text, and yellow on blue. It’s also possible to customize the color and opacity of the text, background, and the captions window. You can check out how the caption style would look in the theme preview window.
Add Live Captions Shortcut to Quick Settings
After you’ve set up live captions, you can enable or disable the feature right from Windows’ Quick Settings tiles. Here’s how to access live captions on Quick Settings:
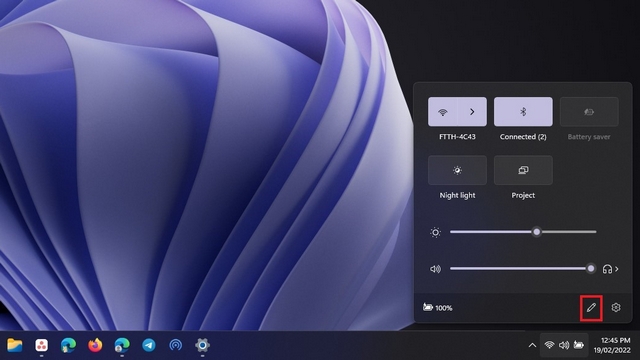
1. You will need the “Accessibility” Quick Settings tile to access Live Captions. In case you don’t have it already, click the pencil icon to add it to the Quick Settings tray.
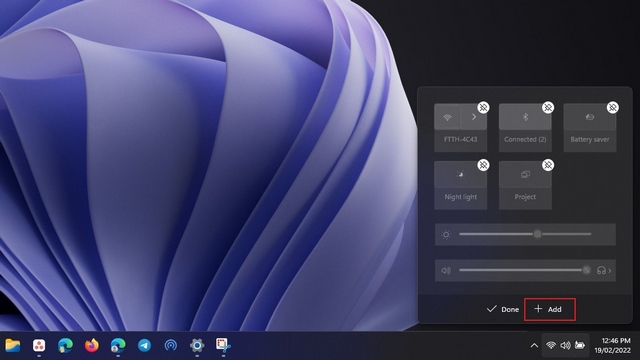
2. Click on “Add” to view the list of available tiles.
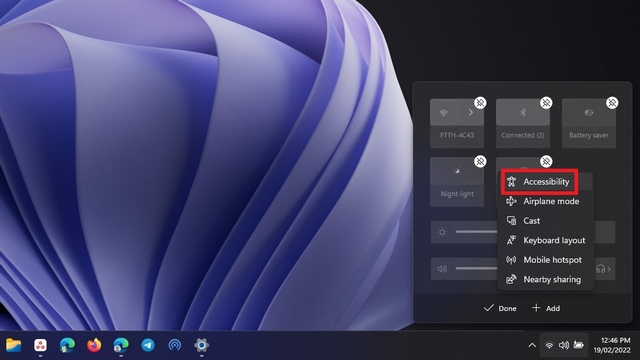
3. Choose “Accessibility” from the list of available tiles. While you’re at it, you can also choose to add other tiles if you find them useful.
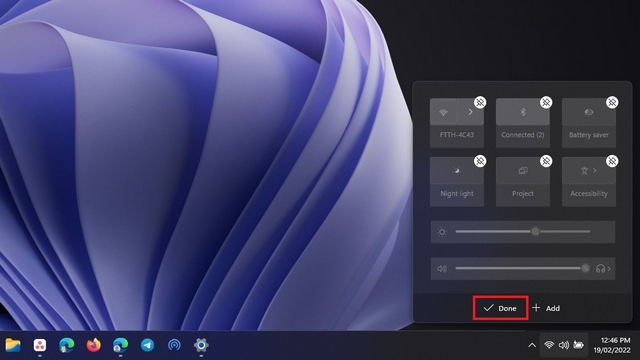
4. Once you’ve picked the tiles, click “Done” to apply the changes.
5. Now, click on the Accessibility tile you just added.
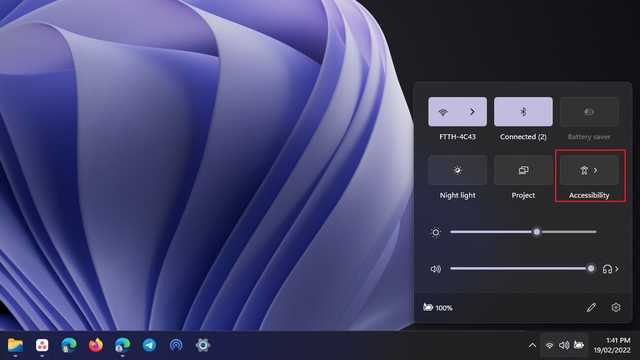
6. From the list of options that show up, enable the “Live captions” toggle to activate the feature. You can follow the same steps to deactivate live captions later.
Live Captions on Windows 11: Initial Impressions
The live captions feature works surprisingly well on Windows 11. Barring the occasional quirks that most speech-to-text services face, the feature seems reliable enough to use every day. We also like the fact that it gets punctuations right too. In case you want to see the feature in action, check out the brief sample video below:

Try Live Captions on Windows 11
So, that’s how you can enable and use live captions on Windows 11. Another Windows 11 accessibility feature we recommend you check out is voice access. We have a dedicated article explaining what is voice access in Windows 11, and you can go through it using the attached link. Meanwhile, if your Windows PC has been slowing down lately, do not miss out on our guide that details how to speed up Windows 11 and improve performance.

