- WhatsApp Communities has a new feature that lets you create and schedule events directly within a community group.
- To create an event, open the community group on WhatsApp and go to attachment icon > Event > fill out necessary event details > Send button.
- Once created, all community members will be notified and can view event details in the Community info section.
Communities on WhatsApp bring together people who share similar interests in the topic the community is based on. Whether it is about a particular game, TV show, pop star, or even online classes. However, given the size of these communities, it can be difficult to manage or create events. The good thing is that WhatsApp now lets you create and schedule events within communities right from the app. So in this article, we will discuss more this feature and show you how it works.
How Does the Event Feature in WhatsApp Communities Work?
WhatsApp has been working on the event feature, as far back as the October of last year. Back then it seemed to be limited to groups but has since become available for communities. It lets you create events on a particular date and members of the community can choose whether they will be attending or not.
The feature is accessible from the attachment menu along with Polls, Contacts, and Audio. When you create an event, you can add a name, description for the event, date, and time with an option to include location. There is also a toggle to create a WhatsApp voice or video call. Once you create an event, all members of the community will be notified. Event details will also be accessible from the Community info page.
How to Set Up Events in WhatsApp Communities
Now that we have taken a brief look at how events work in WhatsApp, let us walk you through the process of setting up and creating events within communities.
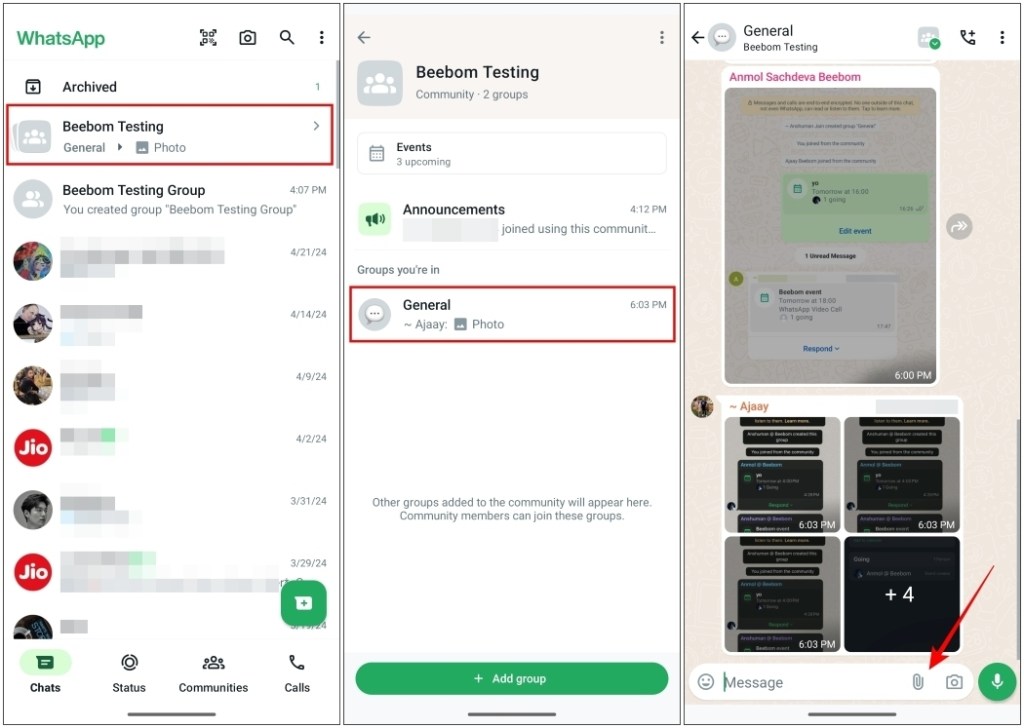
- Head over to the WhatsApp group within the community where you want to create an event. If you can’t find the group on the Chats screen, you can find it inside Communities tab.
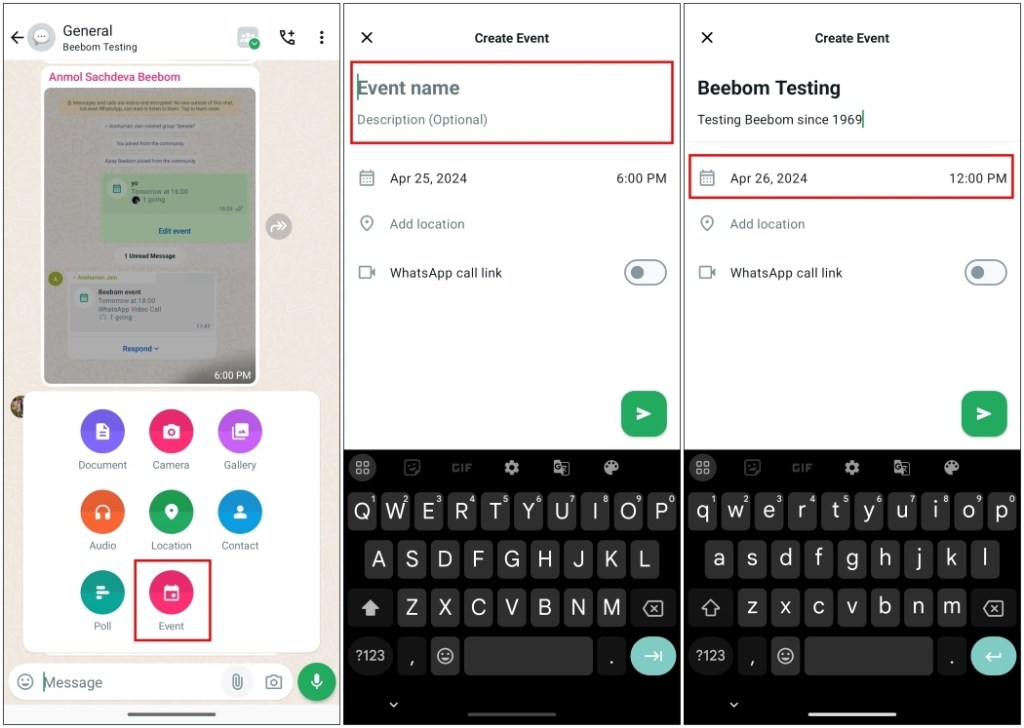
- When the community group opens, tap on the attachment icon from the bottom.

- Then choose the Event option.
- Here, enter the event name, and description, and choose the date and time.

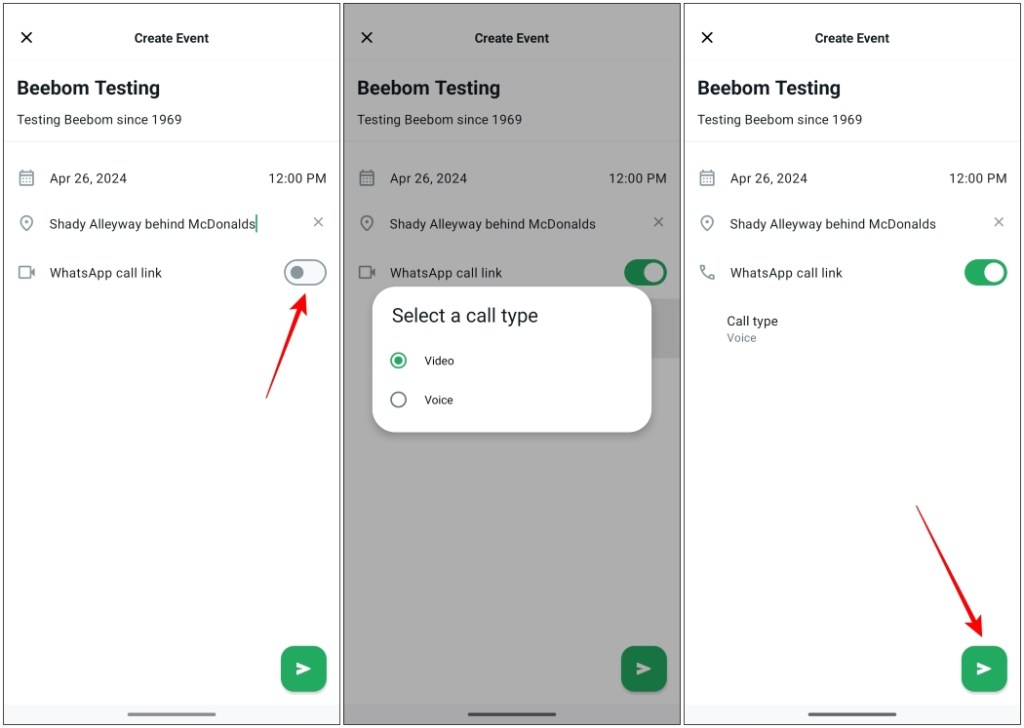
- Optionally, you can also enter the location of the event.
- You can also turn on the toggle for the WhatsApp call link and choose Call type between Voice and Video.
- After you have added the required details, tap on the send icon and the event will be created.

How to Respond to a WhatsApp Communities Event
Once an event has been created, other members will be notified about it. They can then reply and mention whether they will be attending or not. Here’s how.
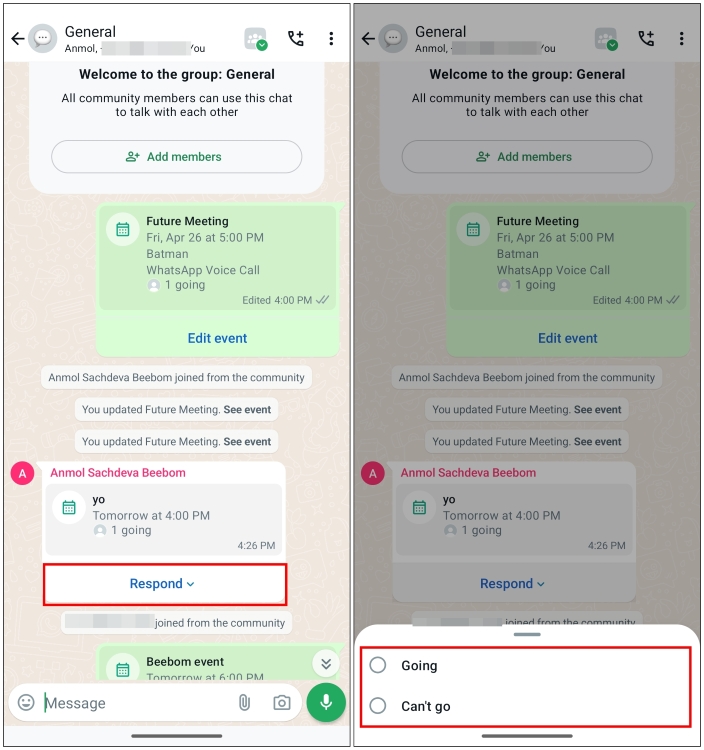
- To reply to an event, tap on the Respond option that shows up underneath the Event message inside the WhatsApp community group.
- You can now choose Going or Can’t go to mark your availability.

This alerts the creator of the events and makes it easy to manage the attendees. If you select Going, you will receive further updates and changes regarding the event.
This is how you can easily create and schedule events on WhatsApp. The feature is currently rolling out to users who have enrolled in the Beta program for the app on the Google Play Store. It will be available for the stable users in the coming months.
Overall, it is quite a useful feature especially if you host meetings or online classes on the app. Not only does it help you keep track of attendees but also alerts them if any changes are made. While it is only available for communities as of now, I hope it soon makes its way to group chats as well. What do you think about this new Events feature? Have you had the chance to try it out? Let us know in the comments down below.


