There may be times when you need to download some important files or transfer some photos to your Linux system, but face a problem of insufficient disk space. You head over to your file manager to delete the large files which you no longer require, but you have no clue which of them are occupying most of your disk space. In this article, we will show some easy methods to check disk usage in Linux from both the terminal and the GUI application.
Check Disk Space Using the df Command
In Linux, there are many commands to check disk usage, the most common being the df command. The df stands for “Disk Filesystem” in the command, which is a handy way to check the current disk usage and the available disk space in Linux. The syntax for the df command in Linux is as follows:
df <options> <file_system>
The options to use with the df command are:
| Options | Description |
|---|---|
-a | Show information about all file systems including pseudo, duplicate and inaccessible file systems |
-h | Display the sizes in human-readable format i.e in powers of 1024 |
-t | Display the disk usage of only the file system of a particular type |
-x | Display the disk usage excluding a particular file type |
Display Disk Usage in Human Readable Format
The df command shows the sizes in bytes, which may be hard for some people to read. To see file sizes in a human-readable format such as megabytes, gigabytes, etc., then use the -h flag.Here’s what the syntax looks like:
df -h

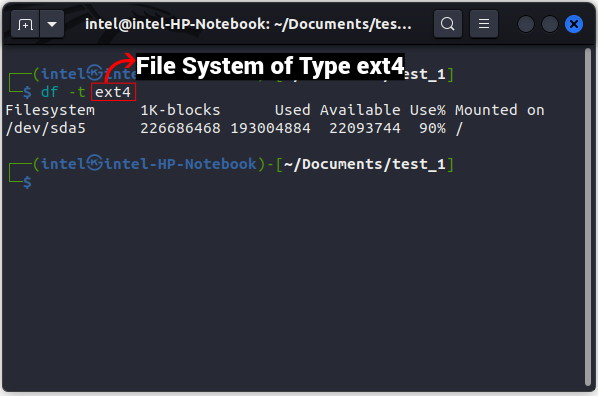
Display Disk Occupancy of a Particular Type
You can also view the disk usage of a particular file system type using the -t flag as shown below:
df -t <file_system_type>
Check Disk Usage using the du Command
The df command only shows the disk usage for the entire file system and not for individual files and directories. To view the disk usage for individual files and directories, use the du command. Here, du stands for “disk usage“. The syntax to use the du command is:
du <option> <file>
The options to use with the du command are:
| Options | Description |
|---|---|
-a | Shows details of all files |
-h | Shows the file sizes in human-readable format |
-s | Displays the size of a particular directory |
-c | Shows the total usage of the entire directory |
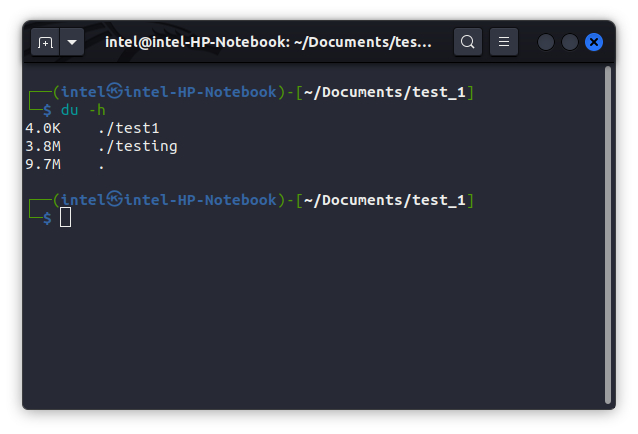
Display Disk Usage in Human Readable Format
To display the sizes in human readable format like in megabytes, gigabytes, etc. instead of bytes, use the -h flag via the command syntax below:
du -h
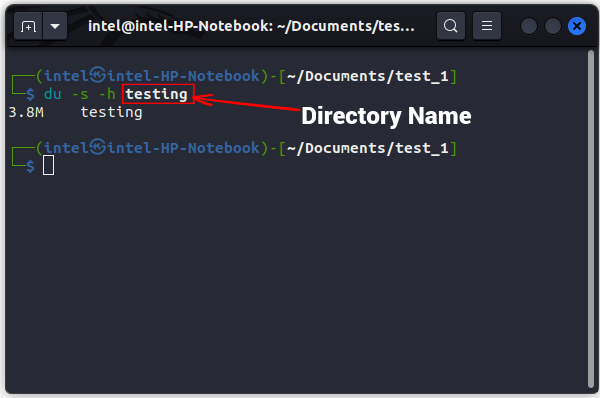
Display Disk Usage for a Particular Directory
The du command shows the disk usage for all folders. But you can view the disk usage for a specific folder, using the -s flag with the basic command as under:
du -s -h <directory_name>
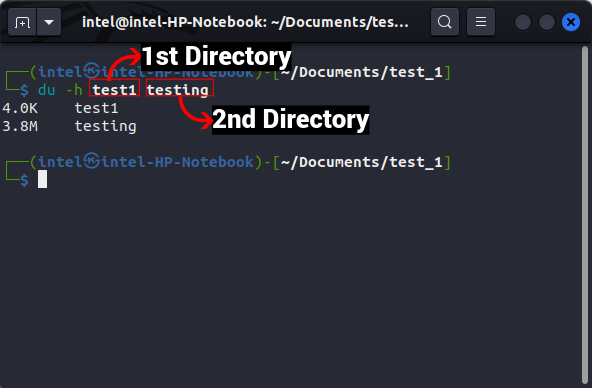
Compare Disk Usage of Two Directories
With the du command, you can also compare the disk usage of two or more directories as shown below:
du <options> <directory_1> <directory_2>
Clean Disk Space Using the Command Line
You can use either of the du and the df commands in combination with other Linux commands to list out the files and directories occupying the most space. Then, you can choose to keep those files or delete files in Linux to free up storage space on your computer.
Sorting Files based on File Size
The du command displays the file size for all files in a directory, but when combined with the sort command using the pipe character ‘|‘, you can see the results sorted in decreasing order of their file size. The syntax to use both commands is:
du -a <directory_path> | sort -rn
Here, the pipe character ‘|‘ is used to send the output of one command as the input for another command. In the second part of the syntax, the -r flag is used to sort in reverse order and the -n flag is used to sort files based on the numeric value. However, do not delete files just on the basis of file size as you could accidentally delete important files which are required for the functioning of the Linux system.

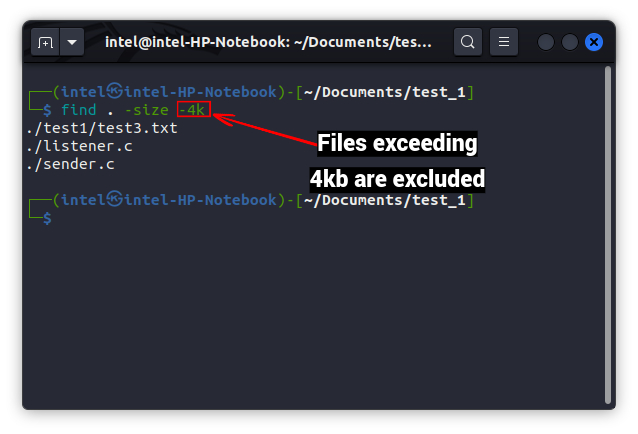
Exclude Files Based on Their File Size
There are numerous ways to exclude files based on their file size by combining various commands, but the easiest way is to use the find command to exclude files exceeding a certain size. The syntax to use the find command to exclude files based on their file size is:
find <directory_path> -size -<file_size_to_exclude>
You can also use the -exec flag to combine with other commands, taking the output of the find command as the input for the other command.
Exclude Files Based on their Types
The du command has a important flag known as the --exclude flag, which can be used to exclude certain file types when the command is used in combination with other commands. The syntax to use the --exclude flag with the du command is:
du -h <path_to_directory> --exclude="*<file_extension>"
Here, the * is used as a wild card which signifies that all the characters should match the input while parsing the directory.

Check Disk Usage Using GUI
The command line output for various disk usage commands can be hard for some people to understand. So there are some GUI alternatives that make the task of monitoring disk usage easy. Some common GUI tools to monitor disk usage are the GDU Disk Usage Analyzer and the Gnome Disks Tool,which can be easily installed using the following command:
Installing disk usage analyzer:
sudo snap install gdu-disk-usage-analyzer
Installing disk-utility tool:
sudo apt-get -y install gnome-disk-utility
Check Disk Usage Using Gnome Disk Tool
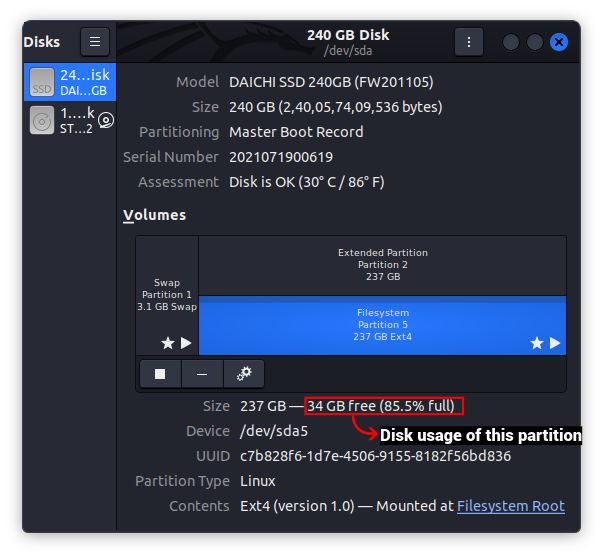
The Gnome disk utility tool is generally used to format storage partitions to a specific type. In the default view, all the storage partitions are shown.
To know details about a partition such as the device name, file system type, available space, and more, you need to click on the partition’s name. The disk utility tool is a useful tool, but you can lose all your important data if used carelessly.
Check Disk Usage Using Disk Usage Analyzer Tool
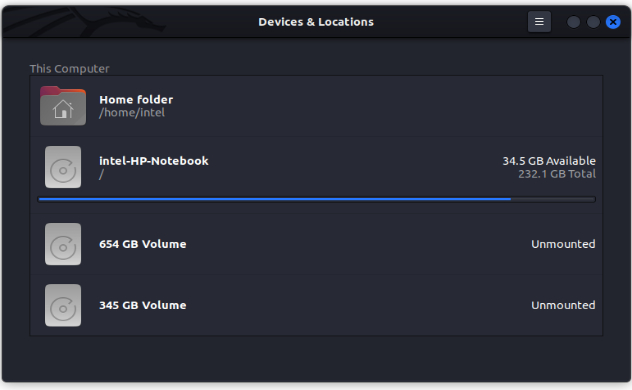
Monitoring disk usage is much easier in GUI using the Disk Usage Analyzer Tool as compared to CLI. After installing this tool, access it via the Applications menu and then follow the steps below:
1. When you first open the Disk Usage Analyzer tool, it will show all the storage partitions connected to your system along with your Home directory.
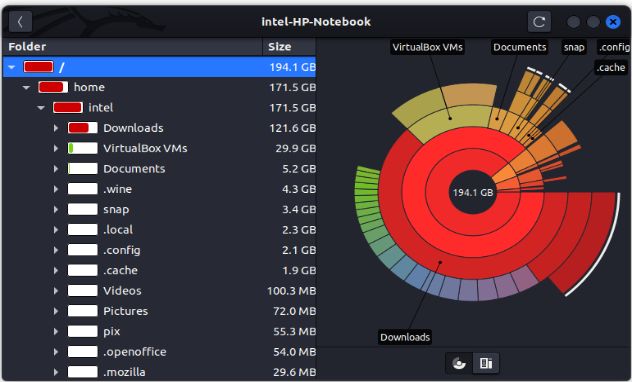
2. To know about the disk usage of any device, click on the device name. It will scan the entire device and display a ring chart of the disk occupancy for all the folders. When you hover over any portion of the graph, you will see which folders are occupying the most disk space.
Cleanup Disk using Disk Usage Analyzer
After analyzing different locations of the file system, you might want to delete some of the storage hogging files. The Disk Usage Analyzer Tool also doubles up as a cleanup tool for the files or folders you want to delete. To delete any files or folders:
1. Navigate to the file you want to delete from the file system tree. Right-click on the item and select the “Move To Trash” option.
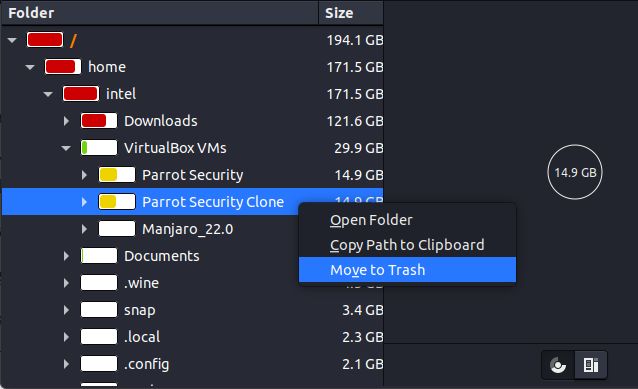
As a safety measure, this tool moves the files and folder to the “Trash” location, so that you don’t delete an important file by accident. The trash location can then be emptied using any file manager.
Managing disk space is an important skill for file management, and it’s crucial to keep disk drives healthy for a long time. We hope that the methods shown in this guide will help you check disk usage in Linux. If you face any issues, do let us know in the comments below.