- Changing your App Store country allows you to access a wide range of apps and digital content exclusive to the country you are transitioning to.
- Before changing the App Store country, you must spend all your store credit and cancel all the active subscriptions beforehand.
- Depending on your new country's requirements, you may need to provide payment information valid in that particular country.
So, you recently came across an app for your iPhone or Mac available exclusively in another country and felt the sting of unavailability. Or perhaps you are planning to move to a different region and want to access local apps and region-specific content seamlessly. Fortunately, Apple allows you to change App Store country to access the diverse world of apps and content. In this post, we’ll walk you through the step-by-step process of changing the App Store country on your iPhone and Mac.
Things to Remember Before Changing App Store Country
- Always remember to spend any remaining funds in your Apple ID, as it might not carry over to the new country’s App Store.
- App Store content availability varies by country, so some apps or content may not be accessible in certain regions.
- Changing your country may affect your ability to use or re-download certain apps purchased/downloaded from your previous region’s store.
- Any region-specific restrictions or pricing differences will apply after the change.
Note:
You won’t be able to change your App Store country if you are a part of a Family Sharing Plan.
How to Change App Store Country on iPhone?
While you can change the App Store country or region within the App Store itself, you can also change the App Store country from your iPhone’s settings. Here’s how you can change App Store country on iPhone:
Via App Store
- Open the App Store on your iPhone and tap your Apple ID Photo at the top right.
- Now, tap your Name at the top.
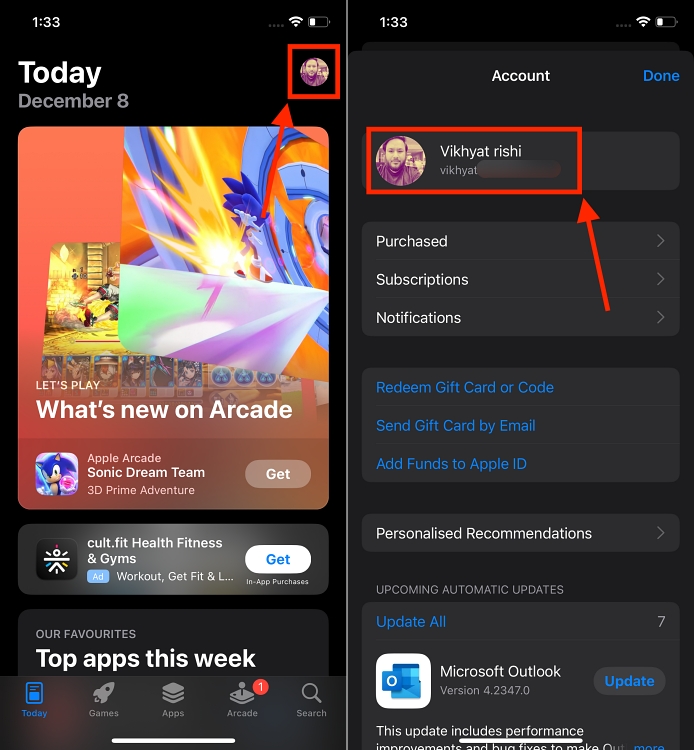
- Here, tap the Country/Region option on the subsequent screen.
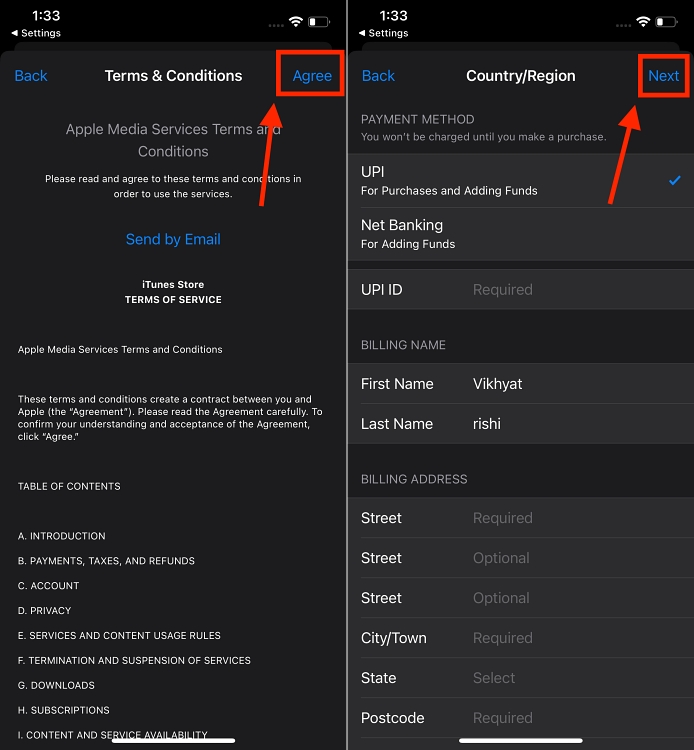
- Now, tap the Change Country or Region button, then select the Country you want to change to.

- Agree to the terms and conditions, enter the payment information and billing address for your new country, and tap the Next button.
Via Settings
- Open the Settings app on your iPhone and tap your Name at the top.
- Now, locate and tap the Media & Purchases option, then tap the View Account button on the pop-up that appears.

- Here, tap the Country/Region option on the subsequent screen.
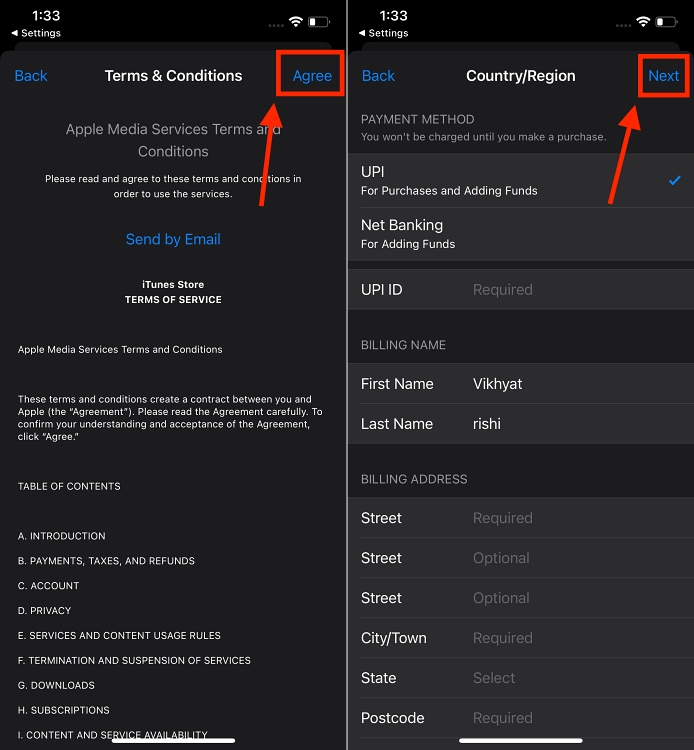
- Now, tap the Change Country or Region button, then select the Country you want to change to.

- Agree to the terms and conditions, enter the payment information and billing address for the selected country, and tap the Next button.
How to Change App Store Country on Mac?
Like the iPhone, changing the App Store country on Mac is also possible via both App Store and System Settings. Below, we have explained both the methods in detail:
Via App Store
- Open the App Store on your Mac and click your Name & Photo button at the bottom right of the window.
- Now, choose the Account Settings option from the available options.

- Here, click the Change Country or Region button.

- Select the Country you want to change to from the drop-down menu.

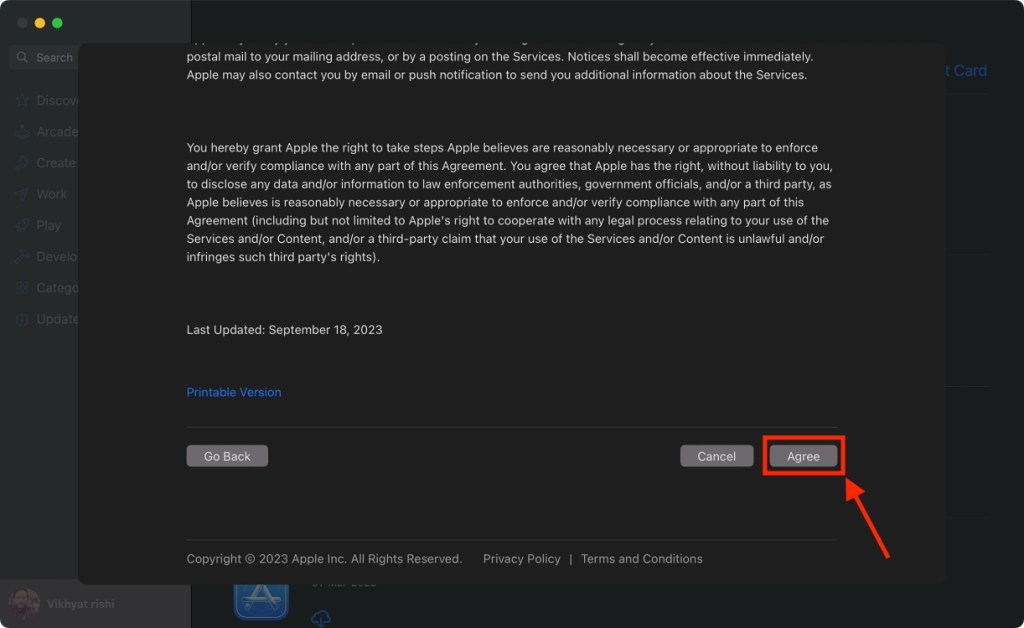
- Now, Read all the terms and conditions and agree to them only if you find them OK.

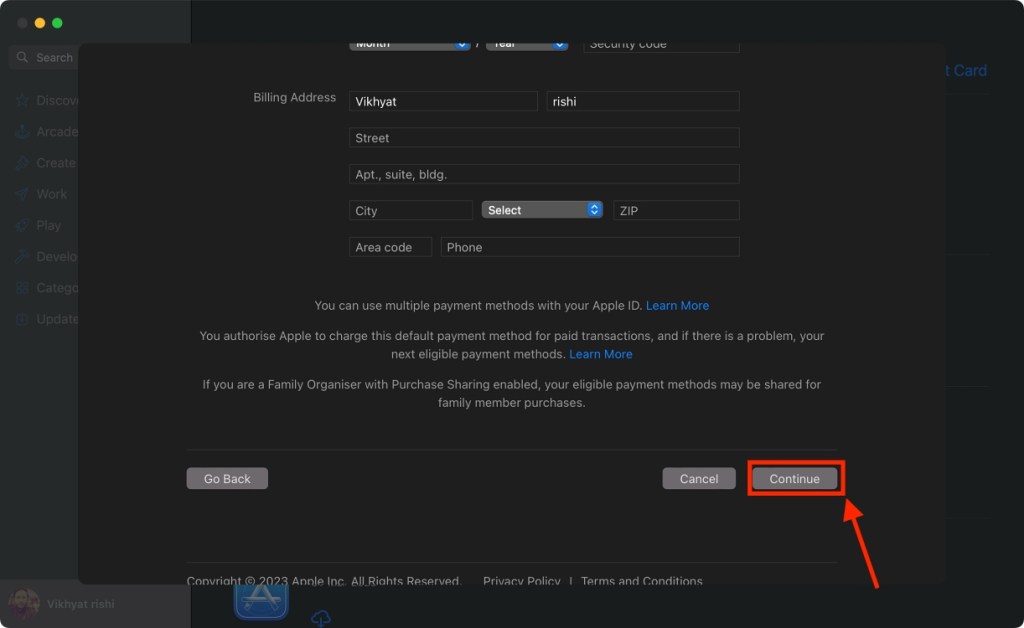
- Here, enter the payment information and billing address for your new country and click the Continue button at the bottom right of the window.

Via System Settings
- Open the System Settings on your Mac and click your Name & Photo tab at the top left of the window.
- Click the Media and Purchases option.
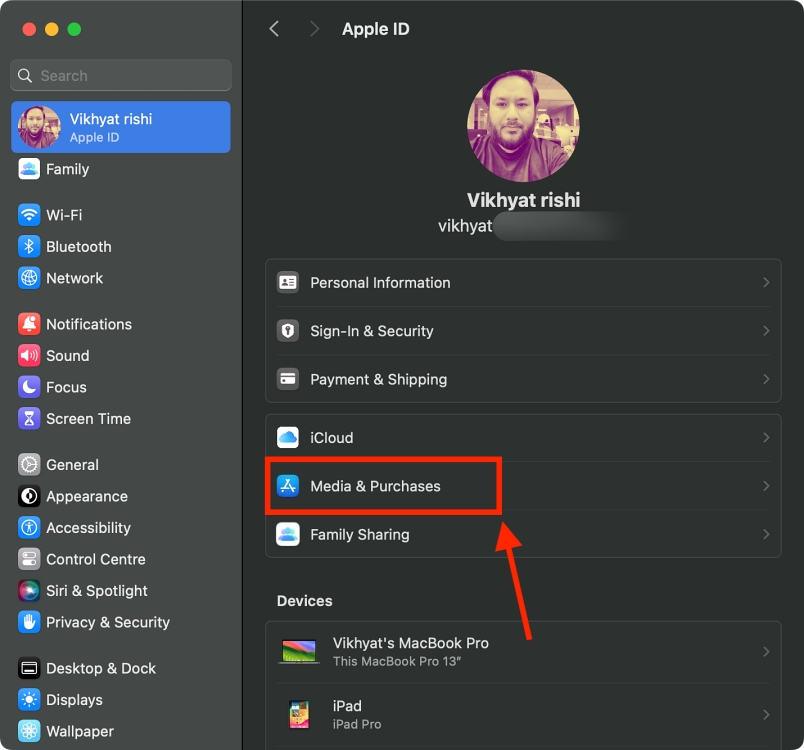
- Now, click the Manage button next to your name in the Account section.
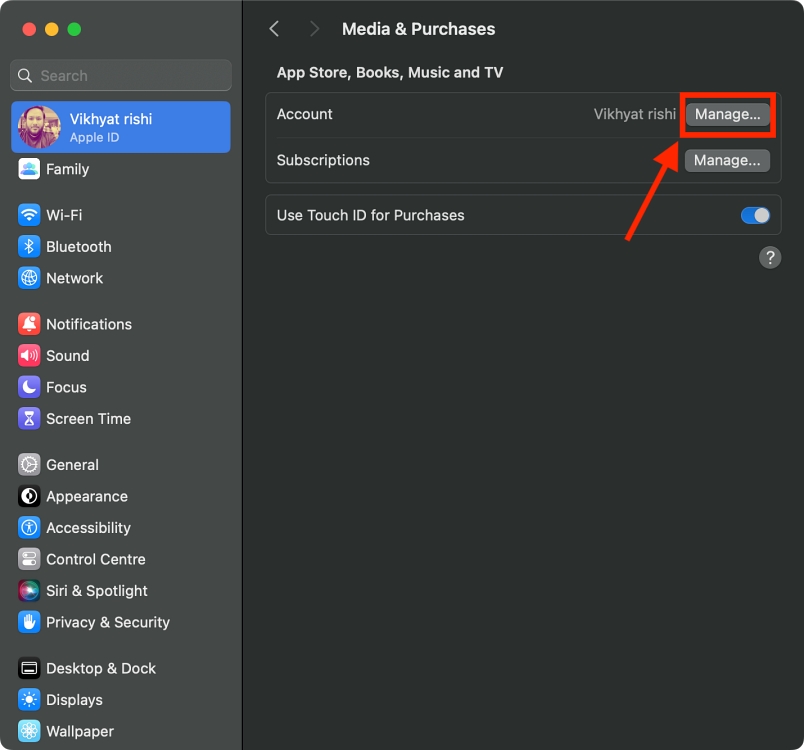
- Here, click the Change Country or Region button.

- Select the Country you want to change to from the drop-down menu.
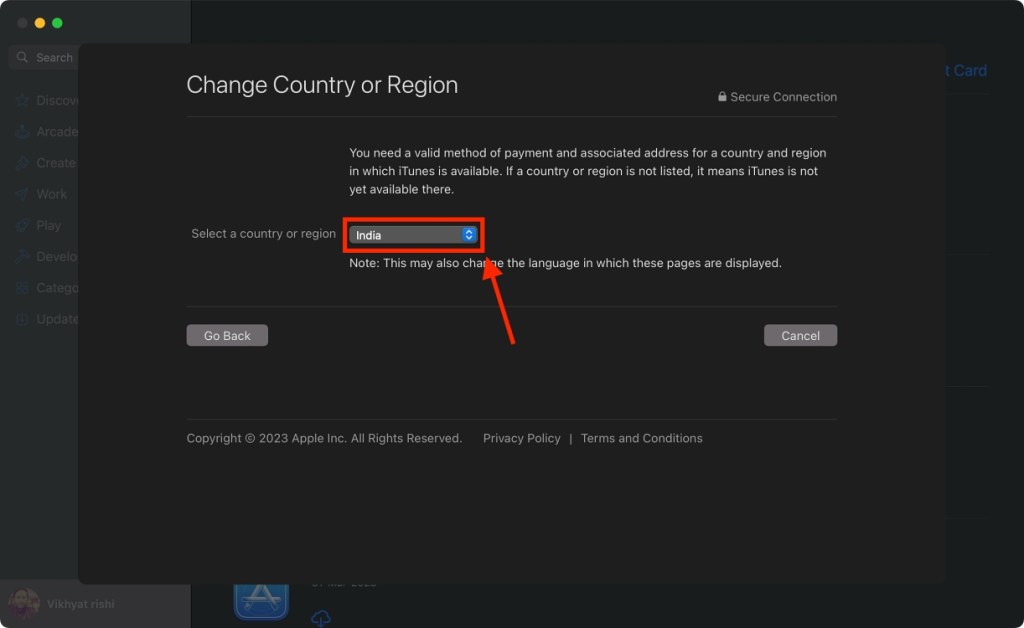
- Now, click on the Agree button to agree to the terms and conditions.
- Enter the payment information and billing address for your new country and click the Continue button at the bottom right of the window.
And that’s it; this is how you can change App Store country or region on your iPhone and Mac. You can now explore a broader range of apps and content around the globe. Also, it is important to remember any implications, such as region-specific limitations or payment requirements, before making these changes.


