Even if ChatGPT’s popularity is slowly stabilizing, it still remains one of the most used AI chatbots. For all intents and purposes, ChatGPT and its best alternatives are used for various things, from professional to personal. However, even ChatGPT is prone to problems. One such problem is ChatGPT’s “Failed to get service status” error, which stops your chats dead in their tracks. But what is this error, and why does it happen? Find out about the ChatGPT “Failed to get service status” error, including ways to fix it right here.
What is the ChatGPT Failed to Get Service Status Error?
Before we head on over to fix it, you should understand what this error actually is. Simply put, the ChatGPT “failed to get service status” error occurs when the client-side interface tries to communicate with the backend but fails. Since ChatGPT cannot accurately get the service status, it cannot respond back to the user in its normal way and hence fails. This is also resulting in some users being accidentally blocked by OpenAI temporarily.
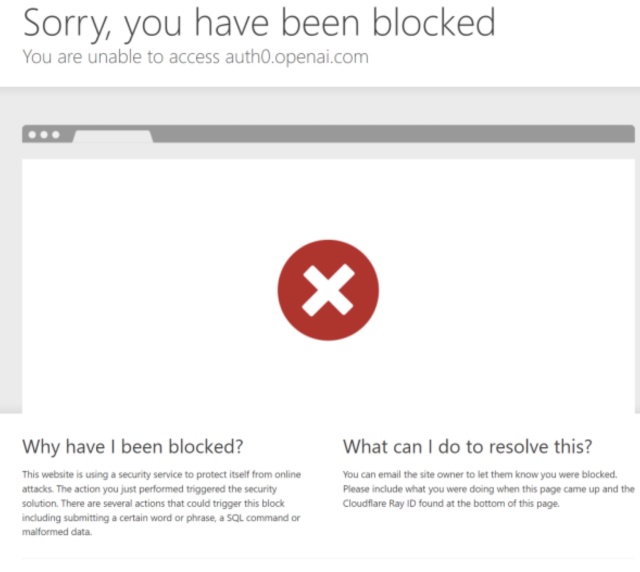
There are a multitude of reasons as to why this error might occur. These include factors like problems with OpenAI servers, a bad server request, a corrupted browser cache, choppy Internet, and many more. However, no matter what the reason, chances are you can fix the failed to get service status error in ChatGPT. While you might need to try multiple methods, using a combination of them might do the trick. So without more delay, let’s begin fixing this pesky error.
How to fix the ChatGPT Failed to Get Service Status Error
1. Check OpenAI Server Status
One of the most prominent reasons for the failed to get service status error in ChatGPT is caused because of lost contact with the servers. This can be primarily because OpenAI’s servers are not functional to begin with. Since ChatGPT is almost always in use, OpenAI does suffer from server outages from time to time. As such, it is not uncommon for ChatGPT users to run into errors, including the failed to get service status one.
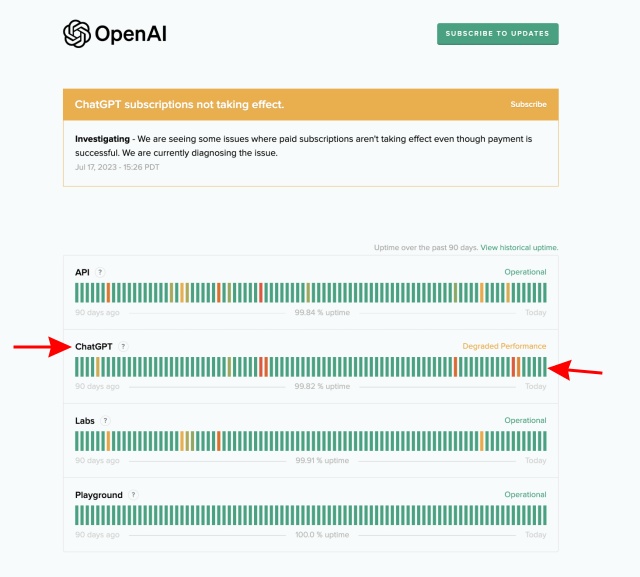
However, instead of guessing, you can find out the exact server status by heading on over to OpenAI’s official server status webpage. Once there, look for the ChatGPT tab, and hopefully, you will see a green bar for the current date. If you do see a red one, however, all you can do is wait for OpenAI to fix the servers and, with it, your pesky error.
2. Check your Internet
If it’s not ChatGPT’s servers, chances are your own Internet connection could be having problems. Since we don’t exactly restart our connections every day, there are chances of the router cache corrupting, which can potentially cause problems. These problems can interfere not only with ChatGPT but across your entire online experience, causing lag and/or stutter.

Thankfully, the fix to this is very easy. Simply turn off your router, count down to ten, and turn it on again. This will flush your Internet cache and also flush out any errors. Once done, open up ChatGPT and see if the failed to get service status error has been resolved or not.
3. Login and Logout Again
If you’ve been logged in to the same ChatGPT session for quite a long time, the error could be occurring because of this. While a single session doesn’t really cause problems, it can lead to random errors, including the failed to ger server status one.
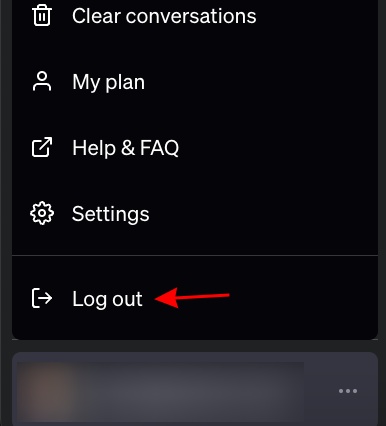
Thankfully, the fix is very easy. Simply click on the ellipsis icon (three dots) on the bottom left to log out. Once done, log in once again and start a new chat. If this indeed was the problem, then it should be resolved by now.
4. Clear Browser Cache
Web browsers on all platforms have a cache that stores metadata like website previews, image snippets, and text. However, improper loading, a failed connection, and general malware can corrupt this cache, thereby leading to issues. If you’re encountering the ChatGPT failed to get service status error, it could be because of this reason. However, it’s very easy to clear out the cache no matter what device you’re on.
Note: While we will be showing all the steps on Google Chrome, the steps should remain the same for almost all browsers.
How to clear the Browser Cache on PC
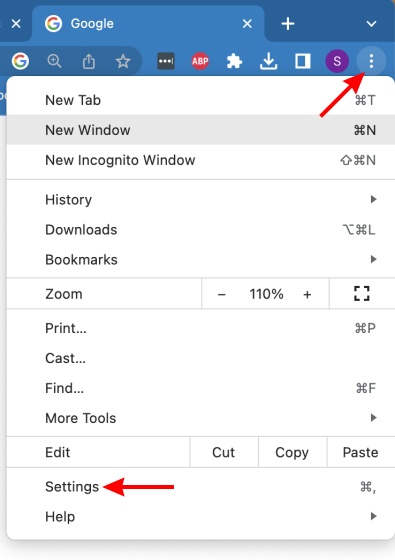
- With Google Chrome open, click on the ellipsis icon (three dots) on the top right and then on Settings in the dropdown menu.
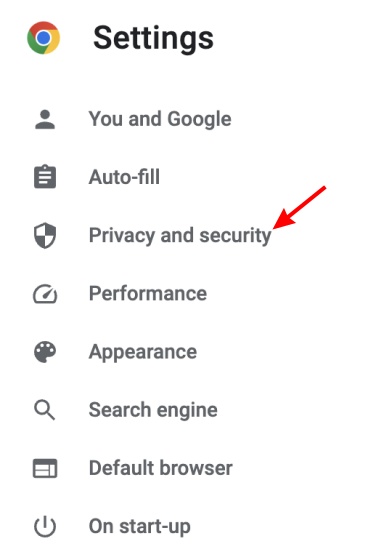
- In the left sidebar, click on ‘Privacy and Security.’
- On the history menu, click on “Clear browsing data.” Under the options, uncheck everything except cached images and files. You can choose the time range and then click on “Clear Data”
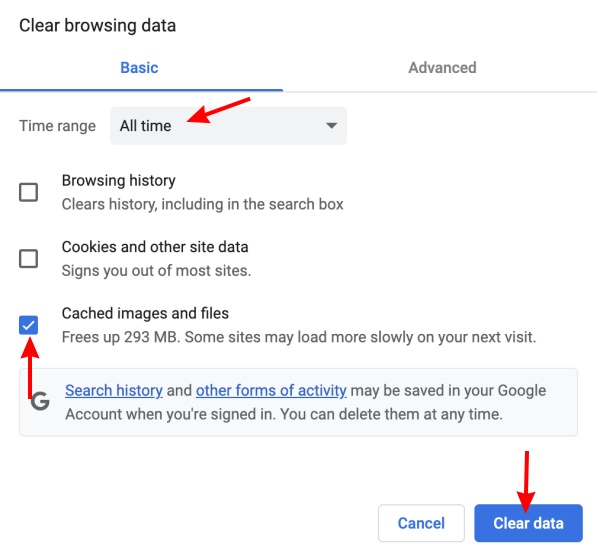
This will clear up the browser cache on your PC and should resolve the ChatGPT failed to get service status error. However, if you’re on mobile devices, follow the sections below.
How to Clear Browser Cache on iOS
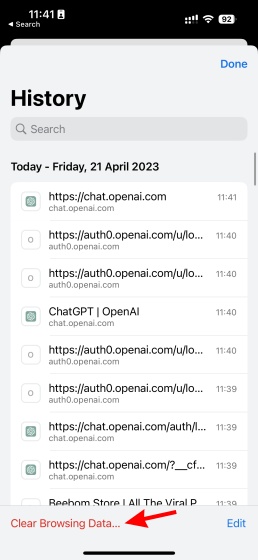
- Open up Google Chrome on your device and tap the ellipsis icon (three dots) on the bottom right. On the drop-up menu that appears, tap on ‘History.’

- Now tap on the ‘Clear Browsing Data‘ option on the bottom left of the screen that appears.
- Another browsing history menu will open up. Uncheck everything except ‘cached images and files.’ Then tap on ‘Clear browsing data‘ in the confirmation message.
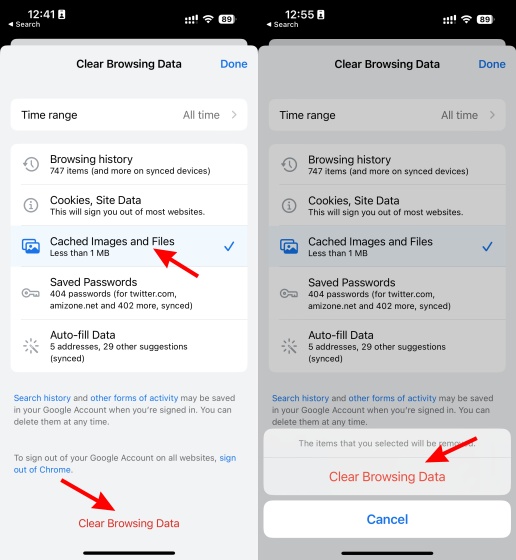
And just like that, you have cleared the browser cache on your iOS device. For Android, follow the section below.
How to Clear Browser Cache on Android
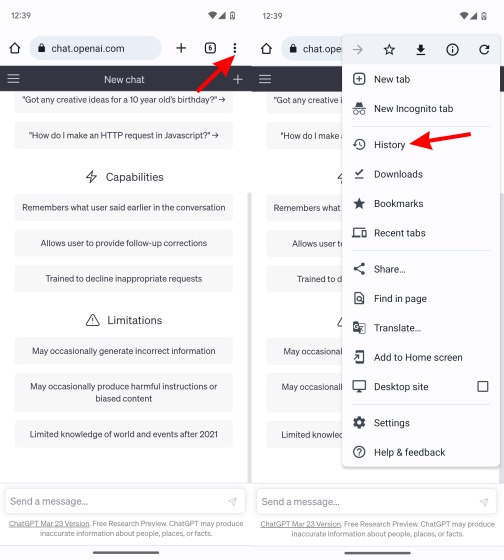
- As before, open up Google Chrome and tap on the ellipsis icon (three dots) on the top right. On the dropdown menu, tap on ‘History.’
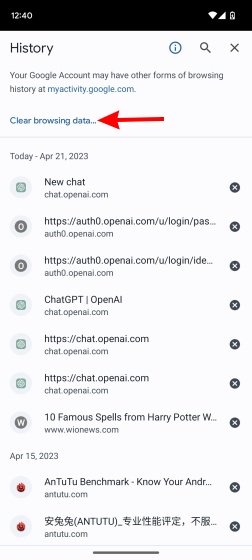
- Tap on the ‘Clear Browsing Data‘ again on the screen that appears.
- Finally, As before, tap on ‘Clear Data‘ and then on ‘Clear‘ to confirm. If you get an option to select other websites or leave them be, you can.
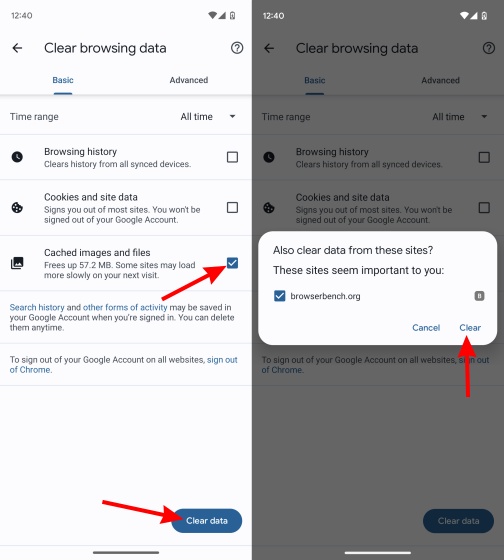
As before, this will clear the browser cache on your Android device. Now head on over and see if the ChatGPT failed to get service status error has been fixed.
5. Try a different browser
If clearing your browser cache on all platforms did not do the trick for you, then perhaps it’s time to switch the browser altogether. While Google Chrome doesn’t really into issues often, there are times when you might encounter an error or two resulting in errors in ChatGPT. In those cases, it is better to switch web browsers temporarily to avoid problems. There are a lot of the best Windows browsers available that work effortlessly. Check them out and install any of them.
6. Connect/Disconnect your VPN Service
For those unaware, a Virtual Private Network (VPN) is a service that essentially creates a virtual tunnel between you and the Internet. This means that anyone outside that tunnel, including your ISP, cannot monitor and record your online activities.
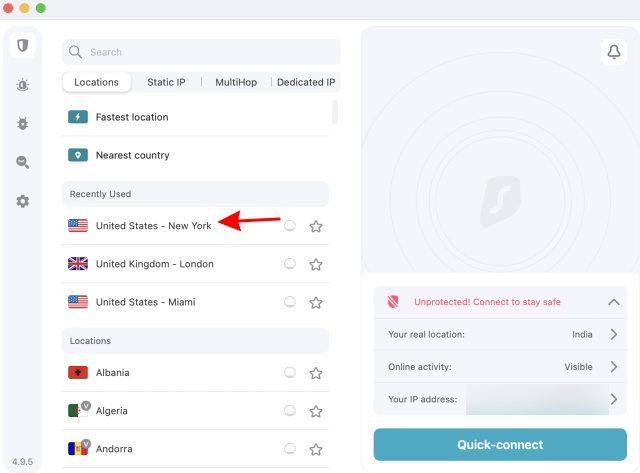
While it’s not very plausible, there are chances your ISP has blocked access to ChatGPT, thereby causing these errors. In those cases, turn on your VPN and select a location like the U.S. or the U.K. to see if you get access. Alternatively, if you have a VPN on, turn it off and see if that fixes that ChatGPT failed to get a service status error.
7. Contact OpenAI Support
As always, if none of the solutions can fix the ChatGPT failed to get service status error, then it’s better to let the company handle it. A lot of users have already contacted OpenAI regarding this issue through their help channels and social media.
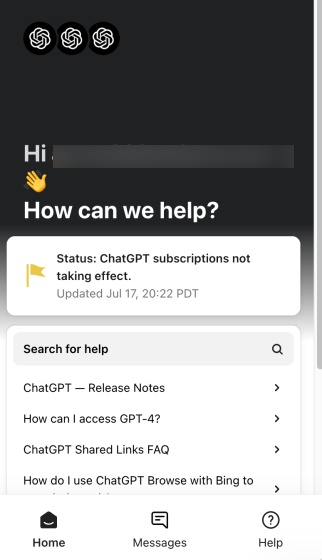
If you want to go either way, then head on over to the OpenAI support page and use the chatbot to get in touch with personnel and resolve your error.


