- The ChatGPT macOS app is now available to download for all users without any subscription plan.
- The app is only available for Apple Silicon Macs (M1 or newer) running macOS 14 Sonoma or later.
- The latest version of ChatGPT, GPT-4o, is available for free but offers a limited number of requests. ChatGPT Plus subscribers can sign in for full access.
The ChatGPT app for Mac is now available to everyone. The app was first rolled out in mid-May, but it was limited to the ChatGPT Plus subscribers. Now, the ChatGPT macOS app is available to download for all users and you don’t need any subscription plan to use it. In this article, we’ll show you how to get the ChatGPT macOS app and how to use it on your Mac. Let’s begin!
How to Download ChatGPT App for Mac
Many users would search the App Store to download the ChatGPT macOS app, but there’s no point in doing so. Currently, the ChatGPT app isn’t available on the Mac App Store. So, you may end up downloading a different or copycat app that may not perform like the original. To avoid any issues, you must download the ChatGPT macOS App from the official OpenAI website. Here are the step-by-step introductions to get ChatGPT on Mac:
Note:
You can download the ChatGPT macOS app only on Apple Silicon Macs (M1 or newer) running macOS 14 Sonoma or later. The app is not available for Intel-powered Macs.
- To download the official ChatGPT Mac app, visit https://openai.com/chatgpt/mac/
- Hit the Download button.

- Once the download completes, it’s time to start with the installation process. For this, go to Downloads on your Mac.
- Now, open the downloaded app and drag it to your Applications.

- Next up, open Applications from Finder and you’ll see a ChatGPT app icon, click on it.

- When you see a pop-up, click on Open.

- Once you’ve opened the app, you can log in with your ChatGPT Plus credentials or sign up to create a free account. If you’ve already signed up with your Google account, click on Sign In with Google.

- This will bring up a small window called launcher desktop widget which you can drag anywhere on the screen.
- The ChatGPT Mac app also adds an icon to the top menu bar. You can use it to open the app or quit the app.

How to Use ChatGPT macOS App
The ChatGPT app for Mac has a clean and minimal interface with application settings and an input box to enter your queries. The leftmost icon in the title bar brings up a sidebar to show previous chats. The ChatGPT title has a small right-arrow icon on the right that reveals a pull-down menu so you can choose the AI large language model (LLM) or a Temporary Chat. On the top-right, you’ll see an icon (with a pen) that starts a new chat.
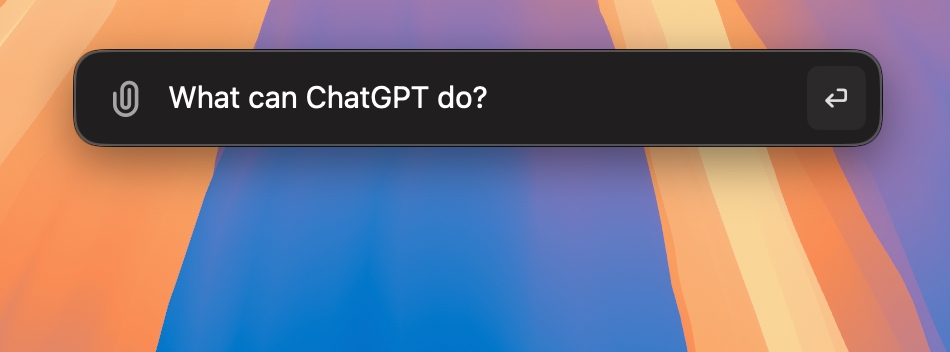
On the bottom, you have a text box with a placeholder text “Message ChatGPT” where you can type your queries. To the left, there’s a paperclip icon to upload files, photos, or screenshots. On the right side, you’ll see a microphone icon to send voice messages to the AI. Lastly, there’s a headphone icon as well to initiate an audio connection for voice conversation.
Now, let’s see how to use the ChatGPT app on Mac.
Note:
The latest version of ChatGPT, GPT-4o, is available for free, but allows a limited number of requests. ChatGPT Plus subscribers can sign in for full access.
Quickly Access ChatGPT on Mac
Once you’ve opened the ChatGPT app, you can use the “Option + Space” keyboard shortcut to access the AI chatbot from any app that you’re currently using. It opens a text bar over any window you’re currently in. It’s similar to how we use the “Command + Space” shortcut to use Spotlight search on Mac.

Just type your question and hit the Return key to submit it. This will open the ChatGPT app window with a response to your query. This is one of the best features of the ChatGPT desktop app for Mac. You can instantly open ChatGPT to look for a synonym, define a term, or plan an itinerary, without having to switch between windows.
It’s worth knowing that the”Option + Space” shortcut doesn’t work after you’ve quit the app.
Ask Questions with ChatGPT
You can ask anything and everything using the ChatGPT Mac app. Simply, enter your question in the text field and hit enter. You can ask ChatGPT to rewrite the text, give you feedback, plan a four-day trip to Italy, help you prepare a five-course meal, compare iOS 18 with Android 15, and more.
ChatGPT also accepts voice commands. For this, click on the small microphone icon on the bottom right. When prompted, hit the Allow button. Now, ask a question and click on the small tick icon when you’re done. Your query will instantly appear in the text-box. Click on the Send button and ChatGPt will immediately give you a response.

Start Voice Conversations with ChatGPT
There’s a built-in Voice Mode to interact with ChatGPT using your voice. To use this feature, simply click on the Headphone icon from the bottom. This will activate a voice session and you can start speaking to initiate a conversation with ChatGPT.

You can practice a new language, brainstorm new ideas for your company’s growth, prepare for an interview, or discuss a topic for your upcoming session. You can also ask ChatGPT to give you written notes for your voice session. To pause the conversation, click on the Pause button on the top-right. To end the voice conversation, click on the Back button.

Open AI said a new version of Voice mode with GPT-4o capabilities will be coming in a few weeks on Mac.
Capture Desktop Screenshots for Discussion
You can capture screenshots for discussion with ChatGPT. This comes in handy when you need help with some settings, wish to draft an email reply, or want AI to check your code. To capture a screenshot, click on the Paperclip icon from the bottom-left and then click on Take Screenshot. You can select a specific window or capture the entire screen.

When you try to take a screenshot for the first time, you’ll be asked to allow access to the screen recording feature in the macOS System Preferences. If you don’t see a prompt, you can go to System Settings -> Privacy & Security -> Screen & System Audio Recording and turn on the ChatGPT toggle.

If you want to capture a photo, select “Take Photo” and allow ChatGPT to use your Mac’s camera. Once you’ve taken a screenshot or a photo, type a message or start a voice conversation. Make sure to attach the screenshots before asking the question.
Upload Files and Photos
Besides capturing screenshots and photos, you can upload files from your Mac. For instance, you may need feedback on your Resume or ask AI to describe an image for you. For this, click on the Paperclip icon and select Upload File. Now, choose a file, hit the Open button, and enter your query.
Access Chat History
By default, ChatGPT stores your chat history which is shared across the desktop app and web browser app. To search your previous conversations, click on the icon present on the left in the title bar. This will open a sidebar to reveal your previous chats. From here, you can jump to your older conversations with ChatGPT.

Start a Temporary Chat
ChatGPT stores all your chats and uses them to train its AI models. If you don’t want ChatGPT to save or use your chat, you can switch to a Temporary Chat mode. It’s basically like an Incognito mode in a web browser. To enter Incognito in ChatGPT, click on ChatGPT from the title bar and turn on the Temporary Chat toggle.

Access ChatGPT Desktop Settings
The ChatGPT Settings menu shows your account information and contains options to change the AI voice, language, app’s appearance, and more. It also allows you to delete the chat history, customize ChatGPT, and manage your account. To access ChatGPT Settings on Mac, click on ChatGPT from the top menu bar and select Settings.
How to Customize ChatGPT on Your Mac
The ChatGPT Desktop Settings also offers a “Customize ChatGPT” option to modify AI responses. You can input the custom instructions to provide additional information so ChatGPT can deliver better responses.
- Click on ChatGPT from the top menu bar and choose Settings.
- Under the Account section, click on Customize ChatGPT.

- Here, you can enter custom instructions which will be applied to your new chats.

How to Delete ChatGPT Conversations on Mac App
By default, ChatGPt stores all your chats and uses your content to improve its models. If you don’t want ChatGPT to use your data or you wish to delete all your ChatGPT conversations, you can do that on your Mac app. Here’s what you need to do:
- While the ChatGPT app is opened, click on ChatGPT from the top menu bar and choose Settings.
- Under the Account section, click on Data Controls.

- Here, click on the Delete Chats button to erase your chat history on ChatGPT.
- Now, click on Confirm. Once you’ve done this, you won’t see anything in your chat history.

- If you want to block ChatGPT from using your content to train its models, turn off the “Improve the model for Everyone” option.

- If you ever want to delete your ChatGPT account, you can hit the Delete Account option.
That’s how you can use the ChatGPT macOS app. I love how the app seamlessly integrates into everything on my MacBook. Thanks to the “Option + Space” shortcut in the ChatGPT Mac app, I can always have the AI chatbot at my fingertips.
Apple has also partnered with OpenAI to integrate ChatGPT in iOS 18, iPadOS 18, and macOS Sequoia. With user permission, Siri can transfer complex AI requests to ChatGPT, while maintaining user privacy and data.
Have you downloaded the ChatGPT app on your Mac? Don’t forget to share your experiences in the comments below.