Like any modern operating system, Windows 10 offers users the ability to have multiple user accounts on one device. This enables you to share a single computer with a number of people, whether at school, at work, or in your home. There are multiple ways to switch between different users in a Windows 10 computer, and the option you choose will depend on what’s the fastest and most effective way for you at any given point in time. So, let’s look at the 6 best ways to switch users in Windows 10.
Best Ways to Switch Users in Windows 10
Today, we’ll look at the best ways to switch between different user accounts in Windows 10 computers. We’ll discuss how to switch users from the lock screen, from the Start Menu, using Task Manager, via the Command Prompt, with keyboard shortcuts, and more. Alongside that, we’ll also discuss fast user-switching, and try to address a few issues that users often report while trying to switch accounts on Windows PCs. But before we start, let’s check out how we can create multiple user accounts in Windows in the first place.
Note: These methods will work on both Windows 10 Home and Pro editions of Windows.
How to Create Multiple User Accounts in Window 10
You can share your Window 10 PC with multiple users. While the first account is always an ‘Administrator’ account that enables that user to make any changes on the computer, the other accounts can either be Admin accounts with similar privileges or guest accounts with reduced privileges. Today, we’ll show you how to do both. So let’s take a look at how how you can create multiple user accounts in Windows 10.
Create a Local User Account
- Open Windows Settings (Windows key + I) > Accounts.

- Now select ‘Family & other users’. It might also say ‘Other Users’ depending on the Windows version. Next, click on ‘Add someone else to this PC’.

- On the next window, click on ‘Add a user without a Microsoft account’ and then enter the user name and password for the guest user. Depending on your version of Windows, you might also have to fill in a password hint (see screenshot below). Now click on ‘Next’.

- That’s it. As you can see, you now have a new account with your chosen username.

Change a Local User Account to Administrator Account
By default, all new local user accounts will be created as ‘Guest’ accounts with no heightened privileges. You can change a local user account to an administrator account using the following method.
- Go to Start > Settings > Accounts > Family & other users, as mentioned above. Now click on the target username and select ‘Change account type’.

- From the drop-down menu, select ‘Administrator’ to change account type. Finally, click on ‘OK’.

Note: You can only change someone’s user account type if you’re signed-in as an Admin yourself.
Best Ways to Switch User Accounts on Window 10
Now that you know how to create new user accounts with or without Admin privileges, let’s take a look at how you can switch between them. So without further ado, here are the 6 best ways to switch user accounts on Windows PCs:
Method 1. From Windows 10 Login Screen
The Windows 10 login screen shows the list of user accounts in the bottom-left corner if the computer has more than one user. Any of the users can just click/tap on their username and sign-in using their credentials.

Note: If you’re already signed-in, you can go to the lock screen by pressing Window key + L simultaneously. This will not close the open programs in your account.
Method 2. Using Windows 10 Start Menu
The easiest way to switch users on Windows 10 is through the Start Menu. For that, just open the Start Menu when you’re logged into your PC and select any user from the list of user accounts on the left of the screen. This will open the login screen for that user, who can then login using their credentials.

Method 3. Using the Alt+F4 Keyboard Shortcut
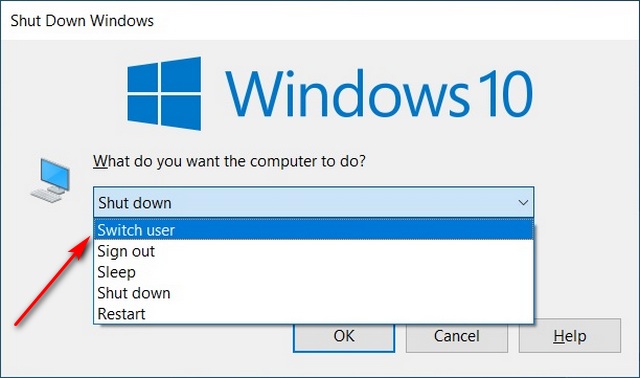
Another easy way to switch between users is by pressing Alt+F4 simultaneously. Normally, pressing Alt+F4 closes the active window. However, if you don’t have an active window on your desktop, this keyboard shortcut will open the shutdown menu. From there, you can select the ‘Switch User’ option.

Pro Tip: you can quickly get to the Windows desktop by hiding all the active windows using the Windows key + D shortcut. From there, press Alt+F4.
Method 4. Using Ctrl+Alt+Del
Another easy way to switch users in Windows 10 is through the Ctrl+Alt+Del shortcut. Pressing the shortcut will bring you to the following screen, from where, you can select the ‘Switch User’ option to go to the lock screen. This is a handy tip that all new Windows 10 users should know.

Method 5. From the Task Manager
You can also switch user accounts on your Widows 10 machine using the good old Task Manager. For that, go to Task Manager (detailed view) > Users. Now right-click on the target user account and select ‘Switch User’. You will be taken directly to the sign-in screen of the selected account.

Method 6. Using Command Prompt (CMD) or PowerShell
Open Command Prompt or PowerShell in your Window 10 PC. Now, type in “tsdiscon” (without quotes) and press ‘Enter’.

The ‘tsdiscon’ command will take you to the lock screen. From there, you can go through the usual process to log into any user account on the PC.
What is Fast User Switching?
Fast User Switching in Windows 10 is not a separate feature, but refers to a set of functionality that lets you switch between accounts without signing out from your current account or closing your apps and files. This is useful because no one is forced to log out for another user to log in, thereby letting every user get back to their work without having to reopen every program and every browser tab.
How to Enable or Disable Fast User Switching in Windows 10
The following tutorial will show you how to enable or disable Fast User Switching for all users in Windows 10. Do note that you must be signed-in as an administrator to enable or disable Fast User Switching.
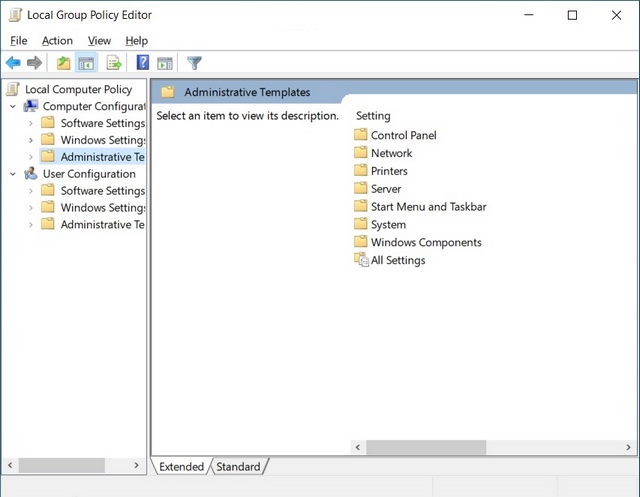
- First off, open the Local Group Policy Editor on your Windows 10 PC (Run > gpedit.msc).

- Now, in the left pane of the Group Policy Editor window, navigate to Computer Configuration > Administrative Templates > System > Logon (Double-click on each option). In the right pane, double-click on the entry that says: ‘Hide entry points for Fast User Switching’.

- On the popup window, you can select ‘Enabled’ to hide fast user switching on your computer. Remember to click on ‘OK’ at the bottom of the screen once you’re done.

Note: Fast User Switching is enabled by default in Windows 10, so you don’t need to access this setting unless you need to disable it for some reason.
How to Change Microsoft Account in Windows 10
Your Microsoft account lets you manage Microsoft services and subscriptions, like Xbox Live, Outlook.com, OneDrive, Skype and Windows 10, from a single account. You can change the email address for the Microsoft account on your computer simply by removing the target Microsoft account from Start > Settings > Accounts. You might have to reboot for the process to complete fully.
This will change that account into a local account (without a linked Microsoft ID). You can now log into that account and simply add a new Microsoft ID to switch that local account into a Microsoft account.
Unable To Switch Users In Windows 10? Here’s the Fix
If you’re unable To switch users In Windows 10, first and foremost try the good old ‘Reboot’ option. Sure, it’s the stuff of legends and has spawned a million memes (and counting), but it really does solve many problems. If that doesn’t work, here are a couple of other ways you can fix this problem on Windows 10 PCs:
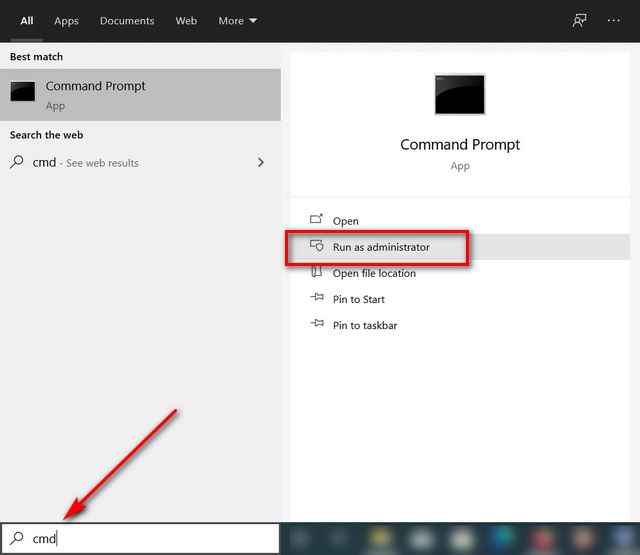
- Open the Command Prompt in Admin mode (search ‘cmd’ in the Windows search box and select the ‘Run as Administrator’ option from the Command Prompt menu).

- In the Command Prompt window, copy+paste the following command and press Enter.
secedit /configure /cfg %windir%\inf\defltbase.inf /db defltbase.sdb /verbose

- Now close the Command Prompt window and reboot the computer. You should be able to change users accounts on your Windows 10 computer now.
Note: If nothing else works, you might need to ‘Reset’ your PC. However, this is the nuclear option that will delete your programs and settings, but at least it should restore the ability to switch user accounts on your device.
Switch User Accounts in Windows 10 Like a Pro
So now that you know all these fast and efficient methods of changing user accounts in Windows 10, try them out and see which one you prefer. While at it, you can also check out some of our other Windows 10 tutorials, including how to group your taskbar shortcuts, how to set alarms and timers and how to disable smartscreen filter, among others.


