Video editing is generally not a very easy task. In fact, most video editors that you may be considering are probably desktop apps which can be difficult to learn or expensive, or both. However, Kapwing Video Editor (visit) is a completely online video editing tool that is easy to use, and requires zero installation. So, if you’re looking to edit a video for your YouTube channel, or even just for your own personal use, here’s everything you need to know about Kapwing, all of its features and more.
Kapwing Video Editor Features
There are a lot of really impressive features in Kapwing Video Editor that make it a very exciting and useful option for anyone looking to edit videos online. Here are some of the most useful features that the video editor offers to its users.
Media Library
Every good video editor needs a solid media library where you can import your unedited and raw footage in order to edit it into a finished video. Kapwing Video Editor brings a dedicated media library that very neatly organizes your footage into two sections: ‘All Media’, and ‘This Project’.
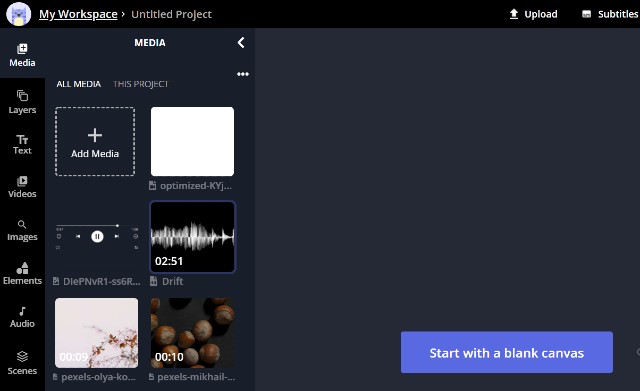
Personally, I like the fact that you can easily switch to ‘All Media’ regardless of which project you’re in, because it makes it easier to drag and drop additional footage and items that you may have previously uploaded to a different project.
The media library also lets you scroll through your uploaded videos and see exactly what the footage is, without having to first add it to the timeline, which can come in very handy when you’re working with a large number of clips.
Timeline
Then there’s the timeline. Kapwing Video Editor brings a really intuitive timeline which is great because as a video editor, that’s where you’ll be spending most of your time. The timeline is neatly arranged, and it offers most of the things you’d need to do.
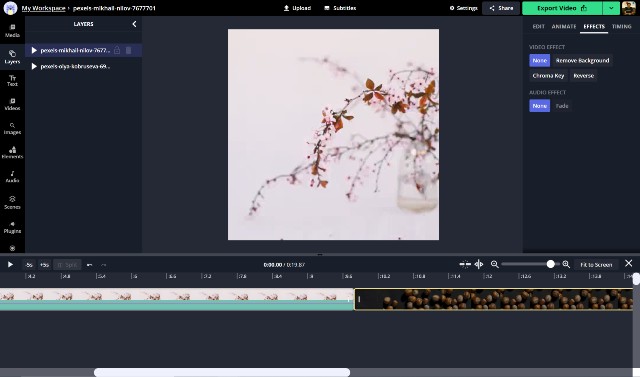
On the Kapwing Video Editor timeline, you can easily trim your clips, split them into multiple parts, and more. The timeline supports layers, which means you can have multiple clips layered on top of each other for projects where you need more complex effects.
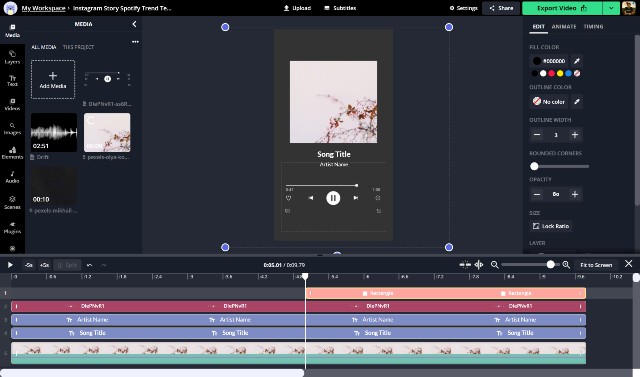
Editing, Animations, and Effects
Once you have the clips on your timeline, you can make use of the many animations and effects that are available built-in to add some flair to your project. Simply select any clip and click on ‘Animate’ or ‘Effects’. Here, you can choose animations like Drop, Flicker, Fade, and more.
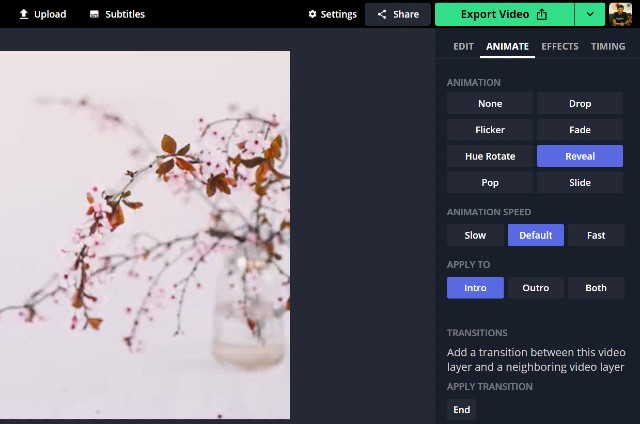
This is also where you can add transitions between clips. You can do this by selecting ‘End’ or ‘Beginning’ under the Animation tab and choosing the kind of transition you want. Kapwing supports two different types of transitions that you can make use of: Cross Dissolve, and Cross Blur.
There are also a bunch of editing options here so you can adjust things like the playback speed of the clip, adjusting volume, zoom and more settings. Also, if your clip is smaller than the project template, you can just click on ‘Fill’ to automatically fill out the canvas with the clip.
Easily Add Elements
Another really useful feature that’s available in Kapwing Video Editor is the ability to easily add elements to your videos. Whether you want to add something simple like an emoji, or some text on top of your clip, it can be done very easily using the elements pane.
What’s more, you can also use it to add some advanced elements that would otherwise take quite a bit of animation to accomplish; things like a progress bar. You can simply drag and drop the progress bar into your video and it will automatically animate according to the length of the video. This is especially useful if you’re trying to edit Instagram videos or something similar.
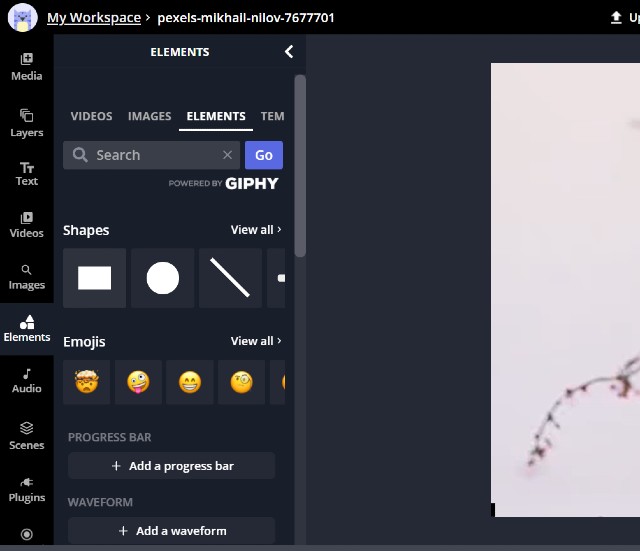
Elements also bring things like backgrounds that you can add, as well as things like waveforms, frames, swipe-up animations and more.
Auto-Generate Subtitles
If you’re looking to add subtitles to your video, Kapwing Video Editor can help you do that as well, and really easily.
Once you have your video all set up in the timeline, you can simply go to the Subtitle tab within the video editor and click on the ‘Auto-generate’ button. This, as the name suggests, will auto-generate subtitles for your video. What’s more, you can even convert these subtitles to different languages if you want.
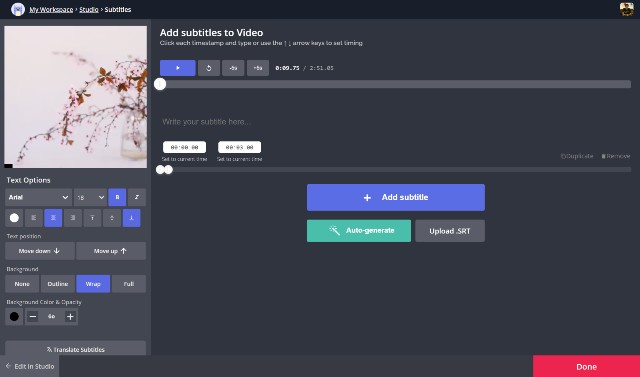
While that’s definitely useful, if you want more control over the subtitles, you can manually upload an SRT file to add that as the subtitle file for your video, or you can even manually type in subtitles directly within Kapwing Video Editor.
Templates
Kapwing’s templates are really impressive as well. Basically, you will find templates in Kapwing for all the most common things that people are making videos for. Whether you’re trying to make an Instagram story, or a video post for Instagram, or even things like LinkedIn posts and memes, you will find templates for all those things.
Kapwing Video Editor: Export Options
Once you’re done with all the editing, applying templates and elements, and creating subtitles for your video, Kapwing makes it just as easy to export the completed project as well.
For one, the website supports exporting in multiple formats. You can export your videos in MP4 format, or you can make a GIF. What’s more, you can even export a single frame as an image file, or just render the audio as an MP3.

The export is quite fast, which is great, and you can directly download the exported video to your computer, or even directly share the video or get an embed link to add it to a website or a blog if that’s what you want to do.
Pricing
Lastly, let’s discuss the pricing model of Kapwing Video Editor.
Kapwing lets you use the video editor for no charge at all if you’re looking for a free video editor. However, there are a few limitations there. You can only export up to 720p in the free tier, and you can only upload files up to 250MB in size.
On the other hand, you can subscribe to the Pro plan for $17 per month (paid annually), which will let you export in 1080p, allow unlimited automatic subtitle generation, support for custom fonts, and more.

Overall, Kapwing Video Editor’s pricing structure is quite approachable. You can easily use it for free if you’re just trying to make a short home video for your personal use, or you can pay and get the Pro features if you’re trying to make more serious, professional videos.
Kapwing Video Editor Makes It Easy to Edit Videos Online
As you can surmise from reading this post, Kapwing Video Editor is a solid online video editor that can do multiple things. Whether you’re trying to edit a home video, making an Instagram Reel, a post on LinkedIn, or the next trending video on YouTube, Kapwing Video Editor can do it all, and pretty easily. Thanks to its easy-to-understand interface, as well as features such as automatic subtitle generation, templates, effects and animations, and more, Kapwing is one of the easiest ways to edit videos online, and you should definitely give it a shot.
Check out Kapwing Video Editor