
The remote desktop feature enables you to access your files and apps remotely on your computer using the Remote Desktop Protocol (RDP). You can use it to offer assistance to someone or control a PC without being physically present at that location. Today, we will show you how you can enable remote desktop on your Windows 11 computer.
Enable Remote Desktop in Windows 11 (2021)
Windows 11 offers a number of ways to enable remote desktop, including through the Settings menu, the Control Panel, Command Prompt, and the Windows PowerShell. In this article, you will learn all of these methods to access files and apps remotely on your computer. So let’s get started.
Steps to Enable Remote Desktop on Your Windows 11 PC
Before we get to the tutorial, there’s something you need to keep in mind. Remote Desktop is only available on Windows 11 Pro and Enterprise. If you are using Windows 11 Home, check out the best third-party remote desktop apps for Windows. We recommend TeamViewer or AnyDesk, but if you don’t need all the fancy features and need a solution that’s entirely free, Chrome Remote Desktop is also a good option.
Method 1: Enable Remote Desktop in Windows 11 Via Settings
The Settings menu includes an easy way to switch on Remote Desktop in Windows 11. So here’s how you do it:
- Open Settings (using Windows 11 keyboard shortcut Win + I) and click “System” on the left sidebar. Now, select “Remote Desktop” on the right pane.


- On the next page, turn on the “Remote Desktop” toggle and click “Confirm” to save the changes.


That’s it. You can now connect to your computer using either the Remote Desktop app (Free) or the Remote Desktop Connection wizard.
Method 2: Enable Remote Desktop in Windows 11 Via Control Panel
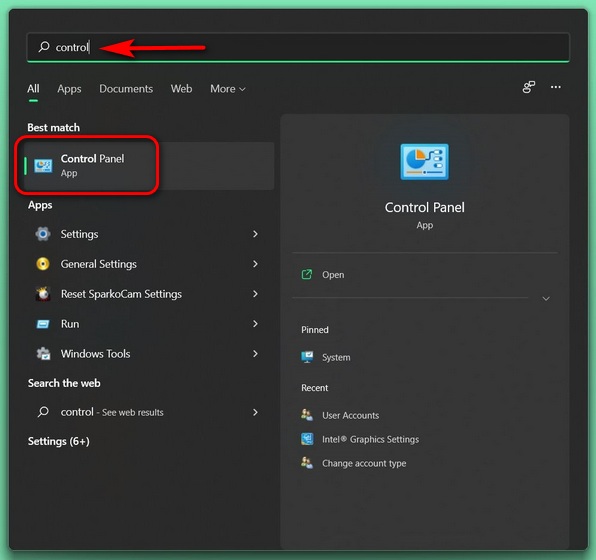
- Open Control Panel on your Windows 11 PC. To do that, search for “control panel” (without quotes) in the Windows search bar and select “Control Panel” from the results.

- In the Control Panel, make sure you are using the “Category” view and select the “System and Security” option.


- On the next page, click “Allow remote access” under System. You will now see a pop-up window with options to connect to a remote desktop.

- On the System Properties pop-up window, choose “Allow remote connections to this computer“. Make sure to select the checkbox next to “Allow connections only from computers running Remote Desktop with Network Level Authentication”. Finally, hit the “OK” button to save the changes.


Once you complete these steps, Remote Desktop will be enabled on your Windows 11 PC, allowing you to access remote computers with ease.
Method 3: Enable Remote Desktop in Windows 11 Via Command Prompt
To turn on remote desktop access on your Windows 11 computer using the Command Prompt, follow the steps below:
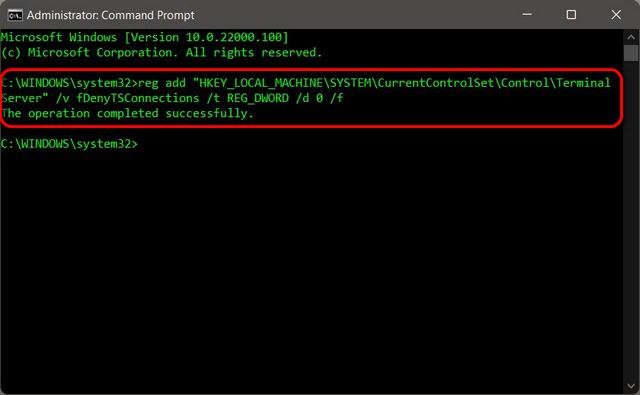
- First, open a Command Prompt window in Admin mode. To do that, search for “cmd” (without quotes) in the Windows search bar and select Run as Administrator.

- Now, copy + paste the following command in the Command prompt window:
reg add "HKEY_LOCAL_MACHINE\SYSTEM\CurrentControlSet\Control\Terminal Server" /v fDenyTSConnections /t REG_DWORD /d 0 /f. Finally, hit Enter to enable remote desktop on your Windows 11 computer.

- Although not essential, you should also ideally execute the following command to allow remote desktop through the Windows Firewall:
netsh advfirewall firewall set rule group="remote desktop" new enable=Yes

Once the commands execute as expected without any error messages, you will be able to use the Remote Desktop app to access other client devices remotely.
Method 4: Enable Remote Desktop in Windows 11 Via PowerShell
Another way to enable the feature is by using Windows PowerShell. Here’s how you do that:
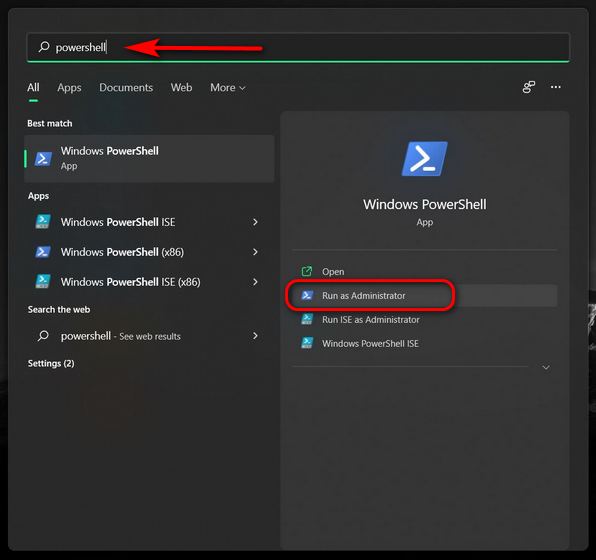
- Open Windows PowerShell in Admin mode on your Windows PC. To do that, search for “powershell” in the Windows search bar and click Run as Administrator.
- In the PowerShell window, copy + paste the following command and press Enter:
Set-ItemProperty -Path 'HKLM:\System\CurrentControlSet\Control\Terminal Server' -name "fDenyTSConnections" -value 0


- Moreover, you can also make sure that the Windows Firewall does not block your remote desktop connection. For that, copy + paste the following command and hit Enter:
Enable-NetFirewallRule -DisplayGroup "Remote Desktop"

That’s it. You have now successfully turned on remote desktop on your Windows 11 PC using PowerShell. You should now be able to access remote computers to offer support or access your work files at home.
Access Windows 11 PCs Remotely in a Few Steps!
As you can see, the process to enable remote desktop in Windows 11 is an easy affair once you know how to do that. So go ahead, enable the feature on your computer to offer technical assistance to your friends and family or to access important files and documents on your own computer while you are away at work. Meanwhile, on the subject of remote access, check out how you can remotely control an Android device and the best apps to control your Windows computer with an Android or iPhone.

