When Microsoft announced regular updates for Windows 10 computers, many praised the decision as the company was not known for releasing timely updates. Fast forward to now and it seems the much-lauded feature has become a nuisance. The updates have become frequent and the constant prompt to install an update disrupts the user workflow. Not to mention, at times, Windows 10 automatically starts installing an update that adds to the user woes. If this is a constant hindrance for you too, here is how you can disable Windows 10 updates permanently.
Disable Windows 10 Updates Permanently (2022)
There are a couple of ways that can help you disable automatic updates with ease. Here, we have mentioned a standard Group Policy method, a third-party way, a few more ways to disable Windows 10 updates permanently. Continue reading to know more.
Stop Windows 10/11 Updates with Registry Editor
Users who want to permanently stop Windows 10 or Windows 11 updates, can tweak the Registry to completely stop updates on their PCs. Just follow the instructions step-by-step.
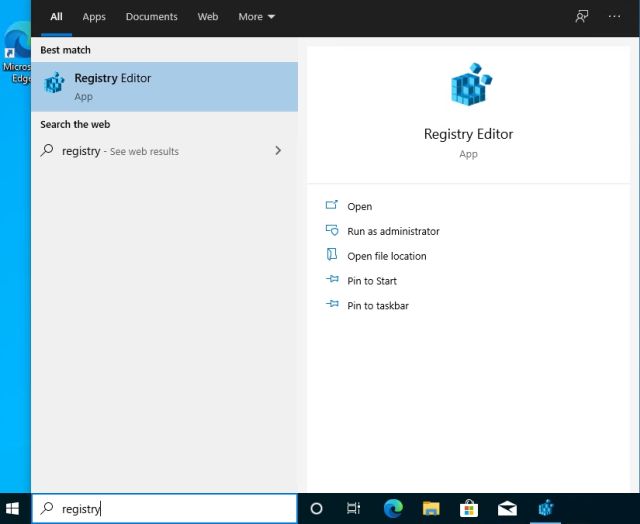
- Press the Windows key once and search for “Registry.” Now, open it.
- After that, copy the path below and paste it into the address bar of the Registry. After that, hit enter.
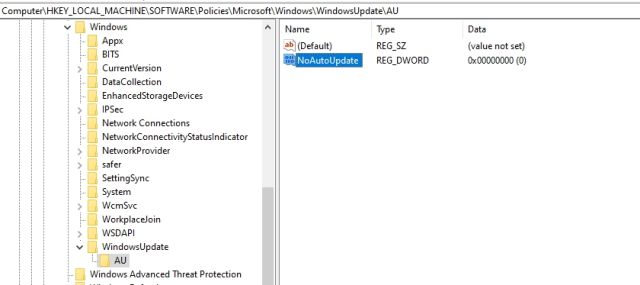
Computer\HKEY_LOCAL_MACHINE\SOFTWARE\Policies\Microsoft\Windows

- Once you are here, right-click on Windows and choose New and then Key.
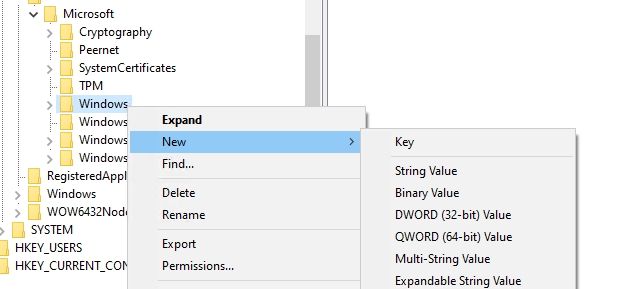
- Rename the new entry to
WindowsUpdate.

- Now, right-click on the WindowsUpdate entry and select New and then Key.
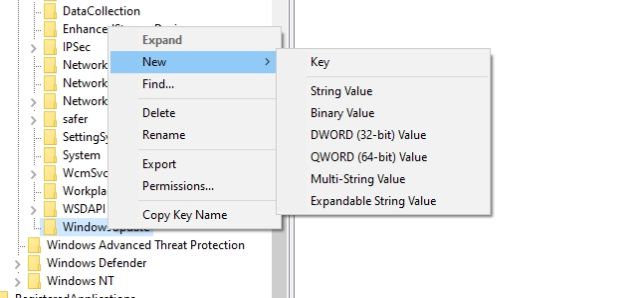
- Following that, rename the new key as
AU.
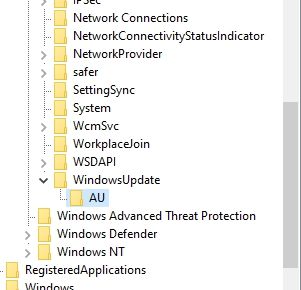
- Now, right-click on the AU key and select New and DWORD (32-bit) Value.
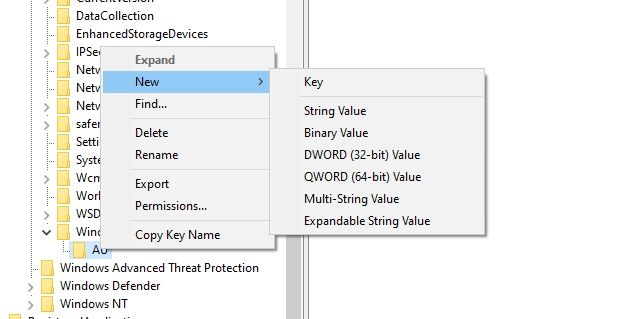
- Rename it to
NoAutoUpdate.
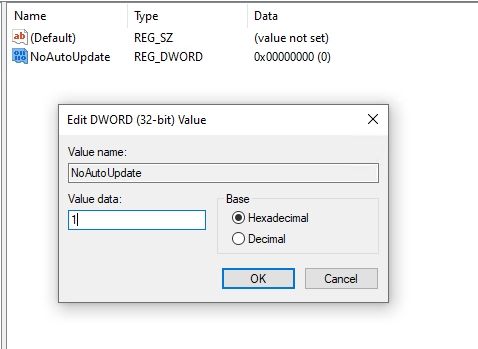
- Now, double-click on “NoAutoUpdate” and change the value data to 1. Press “OK”.
- Now, close the Registry Editor and restart your PC. You will now find that Windows 10/11 update has stopped completely.
Disable Windows 11 and Windows 10 Updates Permanently With Group Policy Editor
This is another that might interest you to turn off Windows 10 updates permanently. This method involves the Group Policy Editor. Here’s what you need to do:
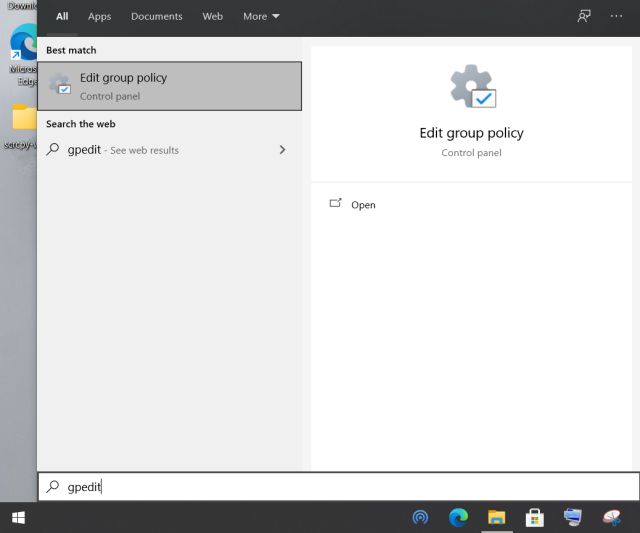
- Press the Windows key once and type gpedit in the search bar. After that, open “Edit Group Policy.” Keep in mind, Group Policy Editor is only available to Pro & Enterprise users. However, there is a way to enable Group Policy Editor on Windows 10 Home, so you can follow the guide to turn it on.
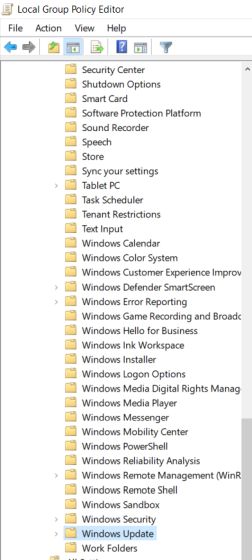
- Next, under Computer Configuration, navigate to Administrative Templates -> Windows Components -> Windows Update.
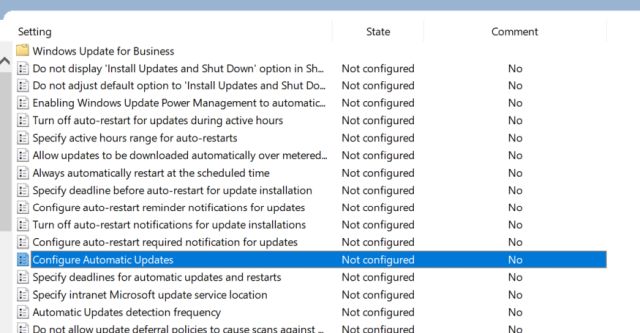
- On the right side, look for Configure Automatic Updates and open it.
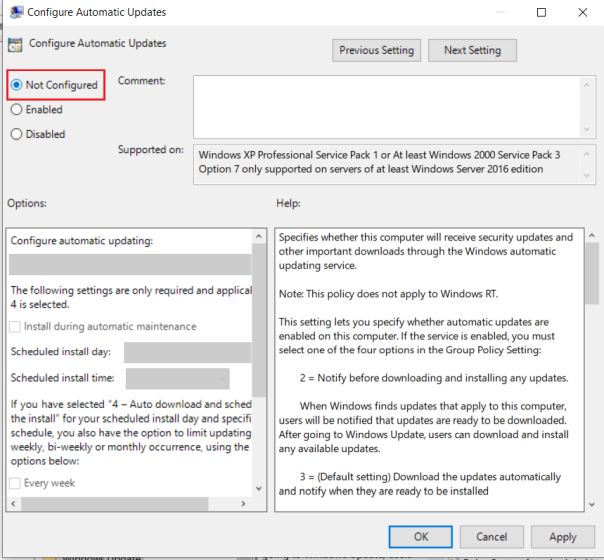
- Here, select Disabled present in the top-left corner and then click on the “Apply” and “OK” buttons.

- And, you have finally disabled Windows 10 automatic update.
Note that if you manually go to the Settings and choose to download an update then it will still work. However, the OS won’t update itself or force you with a prompt to install an update immediately, which is a big relief.

In case you don’t want to manually check for updates and opt for automatic ones on Windows 10 then simply choose “Not Configured” under the same Group Policy.
Prevent Windows 11/10 Updates With Metered Connection
If you want to quickly stop Windows 10 updates on your PC without diving into Registry or Group Policy editor then this method is for you. You just need to configure the metered connection settings and Windows 10 or even Windows 11 will stop downloading updates then and there. Here is how to go about it.
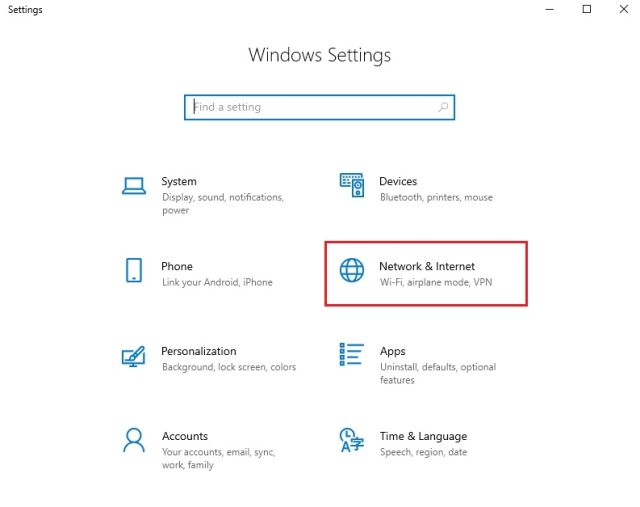
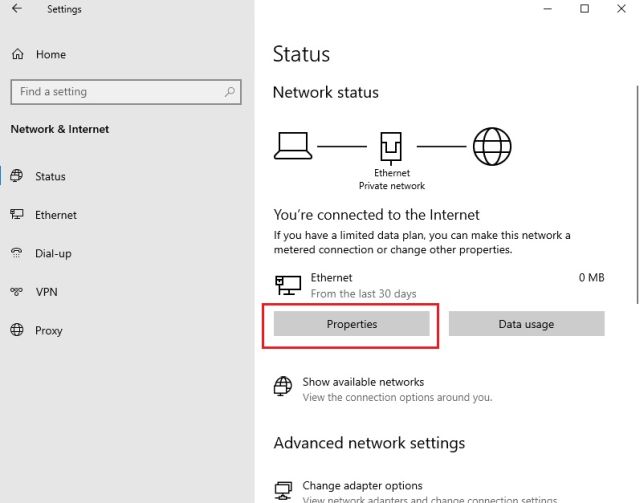
- Open Windows Settings by pressing the “Windows +I” keyboard shortcut. After that, move to “Network and Internet.”
- Next, under the “Status” section, click on “Properties” under your current WiFi/Ethernet connection.
- Now, scroll down and simply enable the toggle for “Set as metered connection.” This will stop Windows 10 updates including feature updates.
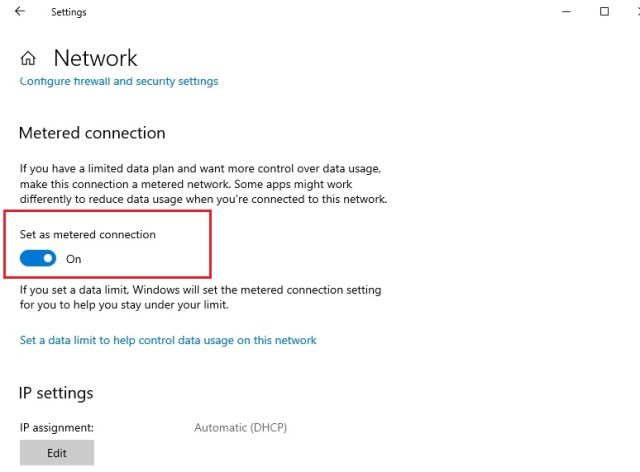
However, you will continue to receive security updates for Windows Defender/Security which is a good thing to keep your PC safe and secure.
Disable Windows 10 and Windows 11 Updates via Update Services
You can also disable the Windows 10 updates by turning off the Windows Update service. Here’s how:
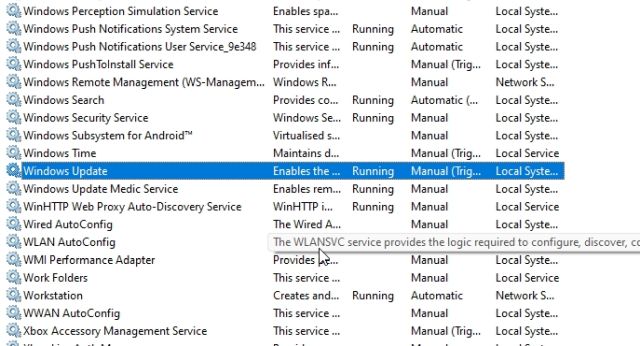
- Head to the Windows option and search for Run. You can also enter Windows+R for the Run prompt. Once the pop-up appears, type “services.msc” and hit OK.

- Under the Services section, head to the Windows Update part and double-click.
- The Windows Update Properties page will pop up and you have to go for the Startup Type option. Tap on the drop-down menu and select the Disabled option. After that, click on “Stop.”
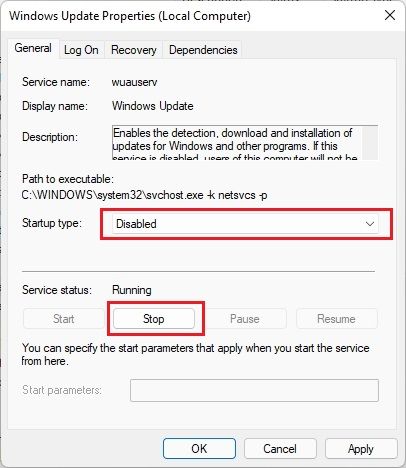
- Following this, just tap on OK and restart the computer to stop getting automatic Windows 10 updates.
Block Windows 10/11 Updates with SimpleWall
If the above-mentioned steps don’t work for you, you can use SimpleWall to block Windows 10 updates on your PC. For those who don’t know, SimpleWall blocks internet access from applications and Windows services. The application uses Window’s native Filtering Platform (WFP) to monitor network activity and block applications and services. The approach is pretty simple; don’t allow Windows Update Services to access the internet and you will have no nagging updates. Here are the steps you need to enable SimpleWall to stop Windows 10 updates:
- Download SimpleWall (Free with donations), install it on your device, and grant it necessary permissions. We have tested the app extensively and it is completely safe.
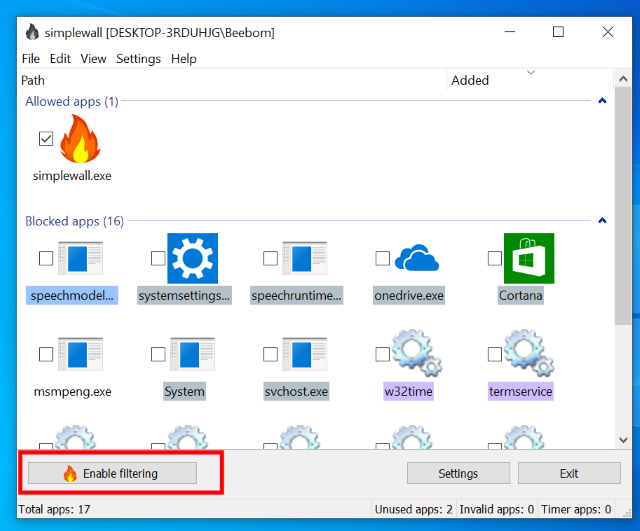
- Now start the app and it will launch with selected services that you need to block to stop Windows 10/11 updates.

- Here, click on the “Enable Filtering” button.
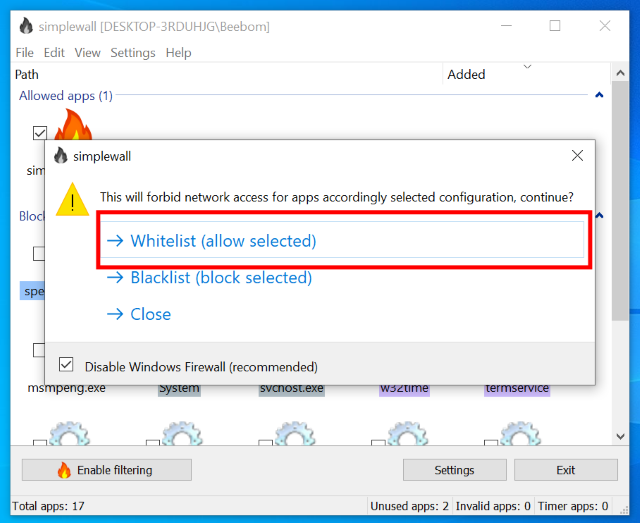
- Next, click on the Whitelist (allow selected) button. This will disable the native Windows Firewall and create a custom Firewall. You may receive a warning to enable Windows Firewall, just ignore it. Now, all the Windows update services will be blocked as they can’t access the internet.
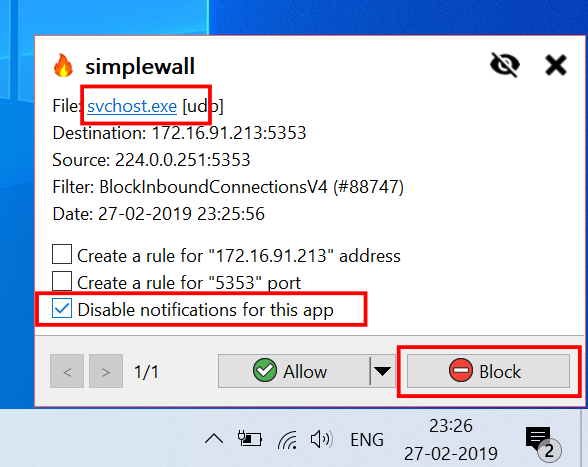
- Note that once you block these services, you may start receiving notifications to either allow or block internet access for various applications and services. Initially, you may get a lot of notifications at once as all these services would want to connect to the internet. Patiently block all the notifications especially from “svchost” and turn on “disable notifications for this app.”
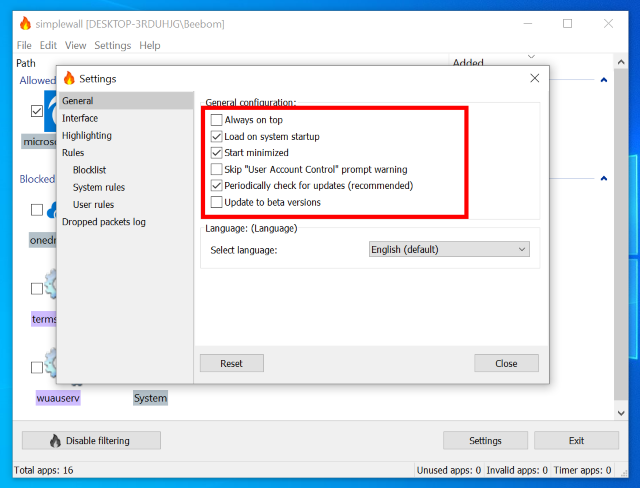
- You can also enable SimpleWall to start automatically after every restart so you don’t have to manually launch the app every time you start the PC. To do that, open Settings and then enable Load on System Startup and Start minimized options.
Few Things to Keep in Mind
While the above steps will be enough to block Windows 10/11 updates, there are a few things to keep in mind if you don’t want problems in the future.
- You will have to grant administrator permission every time the PC restarts.
- You might face problems while connecting with a local computer on your network. To solve this, click on disable filtering option in the app and it will restore the default Windows Firewall.
- The app not only blocks Windows 10 updates services but might also block other essential services that you use like Zoom and other apps.
- You will have to be vigilant when you are dealing with “app wants to connect with internet” notifications. For example, you should allow Cortana, Edge, Zoom, etc. to connect to the internet if you use them. Apart from that, make sure to allow the Windows Defender (msmpeng.exe) service as it will keep your PC’s security up to date.
Disable Windows 10 and Windows 11 Updates via Settings (Temporary)
In case you want to skip the aforementioned steps for now and go for a temporary solution, you can just pause them. All you need to do is:
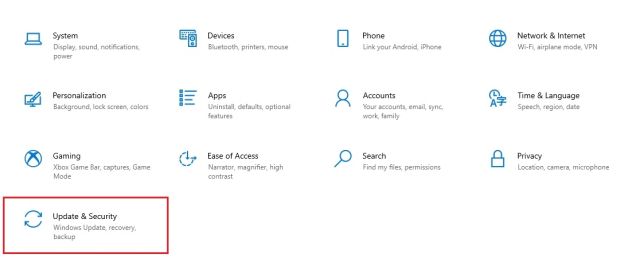
- Tap on the Start menu and head to the Settings option. Over there, select the Updates and Security option.
- Then, go for the Pause updates for 7 days option. If the option is not available then you can follow our guide and bring back Pause Update on Windows 10 which can defer updates up to 1 year.
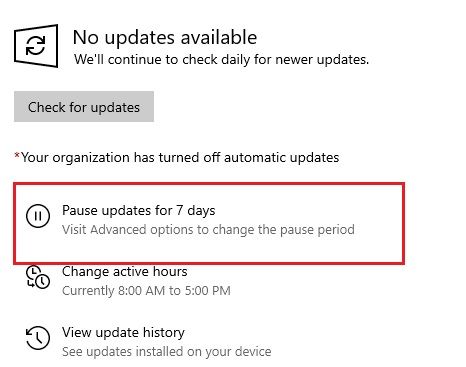
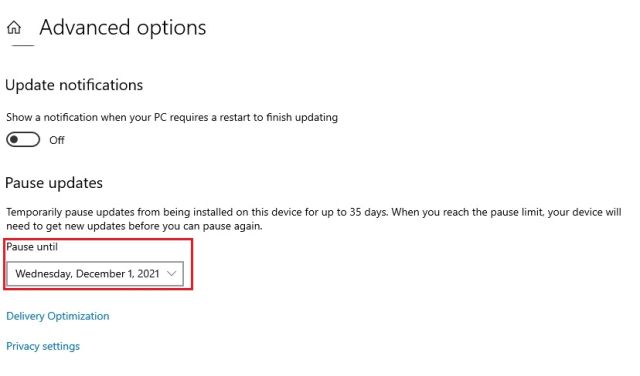
- You can then head to Advanced Options to increase the pause time. You will find the Pause Updates section and you can delay the update prompts for a maximum of 35 days. Just select the date and you are good to go.
Stop Windows 11 and Windows 10 Automatic Update on Your PC
So that’s how you can stop Windows 10 and Windows 11 updates on your PC. The Group Policy and other methods should work on most PCs but if it doesn’t, SimpleWall will have you covered. It will specifically help advanced users as it can block any application from accessing the internet. In the right hands, it can be a powerful tool as it allows users to block tracking services, Microsoft telemetry services, and more.
We hope these methods help you get rid of constant reminders to update Windows. If you encounter any problems, drop your queries in the comments section below and we will be happy to help you out.