Cyberpunk 2077’s latest Edgerunners 2 update (2.5) is finally out, and it brings tons of changes and new features that return lost chooms back to Night City. With the release of the latest anime Edgerunners 2 on Netflix, CD Projekt RED (CDPR) has added a brand new quest called Clampdown that acts as a prequel to the show and takes V on a quest with a legendary merc named King. So if you’re wondering how to start the Cyberpunk 2077 Edgerunners 2 Clampdown quest and its rewards, we’ve got you covered right here.
How to Start Edgerunners 2 Clampdown Quest in Cyberpunk 2077
To start the Clampdown Edgerunners 2 quest in Cyberpunk 2077, you’ll need to meet two basic requirements to begin with:
- You must have completed “The Heist” Quest, which is the very first Act 1 Quest with Jackie
- You must have completed at least 2 gigs for Wakako Okada

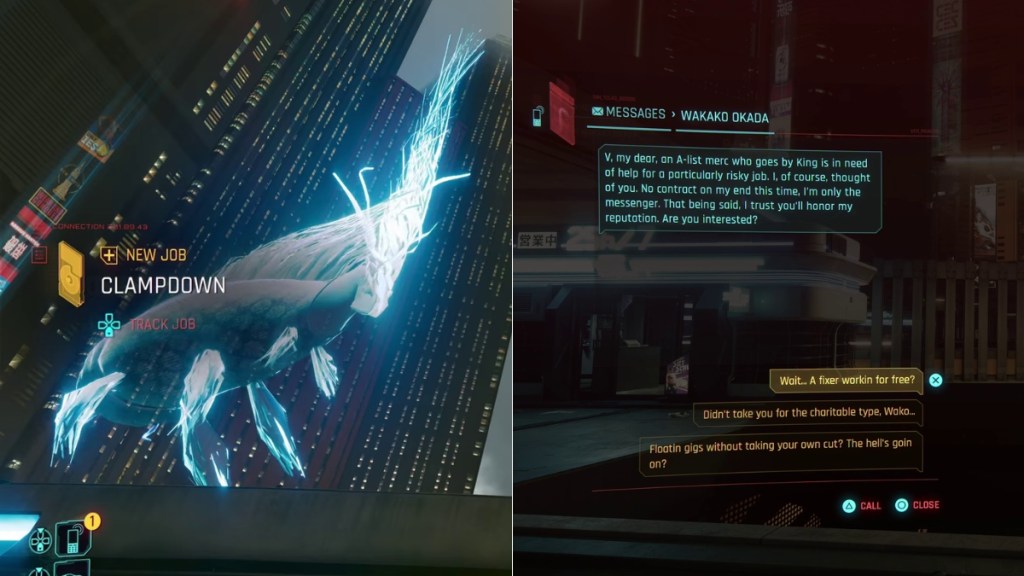
Once you’ve got all of this down, you’ll receive a text from Wakako Okada where she mentions King, who is an A-list merc and is in need of help for a risky job. However, she does mention that this isn’t a contract job, which means there’s no Eddies up for grabs if you’re planning to get rich in Cyberpunk 2077 fast.
But if you still don’t receive a text from Wakako while you’re completing gigs around Night City in the Cyberpunk Edgerunners 2 update, try skipping time for a few days or hang around NC until she drops you a ping.


Upon replying to a few of her texts, she’ll send you a location for a BuryGer joint in the Arroyo area, which is a meeting point with King to kick off the Clampdown Edgerunners 2 Quest in Cyberpunk 2077. Once you reach there, King will call you and brief you on the job, which involves breaking out one of his crew members, Miguel, from Night City Prison, and his crew’s netrunner, Meshuga, will help you do that.
When you accept the job, you’ll be on your way to the NCPD prison, and the Clampdown quest will kick off.
Cyberpunk 2077 Clampdown (Edgerunners 2) Quest Walkthrough
Entering Prison and Escaping Cell Block
When you reach the Night City Prison in Cyberpunk 2077, you’ll be asked to talk to the guard at the Visitor gate via Intercom. Talk to the guard and they’ll let you enter inside. Head through the security check gate and scan your hand on the Visitor Counter scanner.


You’ll be identified as a merc, and the cops will beat you down and lock you up inside one of the prison cells. There you’ll meet another inmate called Wex, who has been arrested and is being tortured by the prison guards into watching BDs, and you discover here that all inmates have a Reaper Chip installed, which allows the guards to kill inmates if they don’t comply with what’s asked of them.
Then, once Wex is taken away by the guards, you’ll be patched with Meshuga, and he’ll ask you to hack the camera outside your cell using Cyberdeck. Enter hacking mode and use Camera Control Quickhack to hack the camera feed.


Once you’re in, cycle through the prison’s camera network system and stop the feed on Camera 117: Security Cortex to locate the Door Terminal to open cells. When you locate it, use the Remote Deactivation Quickhack to open cell blocks, and escape your cell, and free Miguel and other inmates to proceed with the next phase of the Clampdown quest in Cyberpunk 2077.
Locate King’s Gear and Deactivate Reaper Chips
As soon as you’re out of the cell block, you’ll be asked to locate a smuggled package in the prison’s locker room. Follow the map marker, and you’ll find a Duffle Bag stashed under a bench in front of the basin area. Interact with it, and soon you’ll see V wearing King’s attire and holding his Coronation Tech Revolver.


Once you’re all geared up, head near the other cell blocks and start shooting at guards. When all the guards in the area are eliminated, approach a guard’s body and steal an Access Badge. Use it to proceed further and go inside the Security Cortex room.
There, find a terminal and jack in to the terminal to locate files on V, Miguel, and Wex with info about their Reaper Chip IDs so Meshuga can hack and disable them later during the Clampdown quest in Cyberpunk 2077.
Then, in the same room, find a tall Server Tower and jack in to the server farm interface. When you do that, it’ll give you three choices to choose from:
- Deactivate Your Reaper | Hope this works… (CHOOSE FIRST) – This deactivates your Reaper Chip, so choose this first
- Deactivate Miguel’s Reaper | Time to save Miguel. (CHOOSE SECOND) – This deactivates Miguel’s Reaper Chip, so choose this second
- Deactivate Wex’s Reaper | Here we go… (RECOMMENDED) – This deactivates Wex’s Reaper Chip. This choice is optional, so if you choose it, Wex escapes the prison during riots, but if you do nothing, he dies during the prison riots. Either way, you don’t see Wex again.
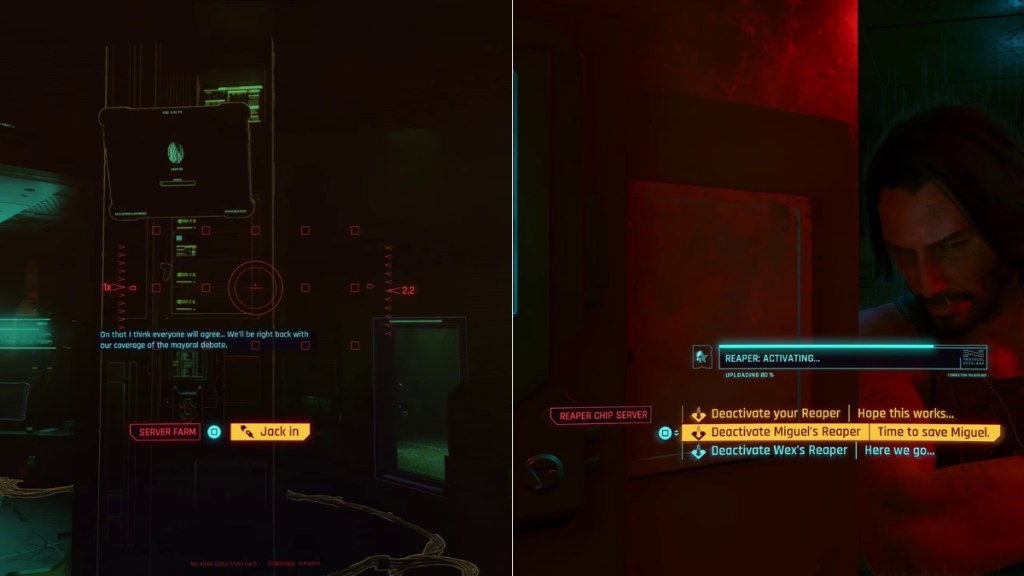
Once you deactivate the Reaper Chips, you’ll be tasked with retrieving your weapons from the armory.
Retrieve Armory Weapons and Cause Prison Riot
As soon as you head out of the Security Cortex, you’ll need to take an elevator down to the Yard. Once you reach the floor and the elevator doors open, you’ll be surprised by a wave of guards in the corridor you need to defeat to progress to the next phase of the Clampdown quest in Cyberpunk 2077. When you reach the Yard finally, defeat waves of guards there and head towards the Armory.


There, shoot the Armory guard and open the door to head inside. You’ll come across a bunch of weapons like Machine Guns and Shotguns, and you’ll even be able to sort them into your inventory by accessing it via the main menu.
Then, head towards another elevator and go down to the Crisis Control Room. Once there, defeat the guards that sabotage you as you reach the main Reaper Chip server terminal. As soon as the area is clear, jack in to the terminal and once again you’ll have two choices:
- Listen to Meshuga | Activating Reaper Chips… – This kills all prisoners and allows King and his team to escape, as they don’t need to fight them during their escape. King isn’t pleased with this decision, but there’s no major consequence or reward either.
- Listen to King | Deactivating Reaper Chips… (RECOMMENDED) – This starts a riot as all prisoners live and allows King and his team to fight through them and escape. King would be pleased with this decision, but the reward stays the same.


Once you’re done making your choice, climb the vents and travel through them to come outside towards the Basketball court, where you’ll find a surprise waiting for you.
Defeat Darius Bale Boss and Escape Prison Through Morgue
As soon as you enter the Basketball court, you’ll encounter Darius Bale, a mecha boss who arrested you in the first place when you entered the prison. He has beefy health and has lasers and explosives he can shoot at you. Keep dodging his shots and aim your shots at the glowing red area on his mech suit for extra damage.


Pop a Bounce Back or MaxDoc when your health gets low, and keep firing shots at Darius while you’re on the move. As soon as he’s eliminated, interact with his corpse to loot some valuable chips, Eddies, and even mods for your build.
Then, make your way through the destruction and the corpses of prisoners and guards lying around, and head towards the Morgue. Enter the Morgue room and plant a mine on its mesh wall. Then, take cover outside the main Morgue door and detonate the mine to blast open the wall to escape the prison. Once the wall bursts open, escape the prison through it.
Lose NCPD to Complete Clampdown Quest in Cyberpunk 2077
As soon as you exit the prison through the busted wall, NCPD cars will rush towards your location. In this case, interact with your vehicle spawn key and call a car near you. Enter the car and keep driving to lose NCPD cops following you.


Once your four-star wanted level goes to zero, and you’re not on NCPD’s radar anymore, Meshuga will call you and thank you for the job. He’ll also inform you that he has cleared all the extra dirt on the records while you hacked the prison servers.
Shortly after, King will also call to thank you for the job, and the Clampdown Quest from Edgerunners 2 will now be complete in Cyberpunk 2077.
Cyberpunk 2077 Clampdown Quest Rewards: King’s Revolver and Outfit
As mentioned earlier, you don’t earn Eurodollars or Eddies, as chooms call it, for completing the Clampdown Edgerunners 2 Quest in Cyberpunk 2077. Instead, you earn cosmetic rewards and gear themed after King, the legendary merc from Edgerunners 2.
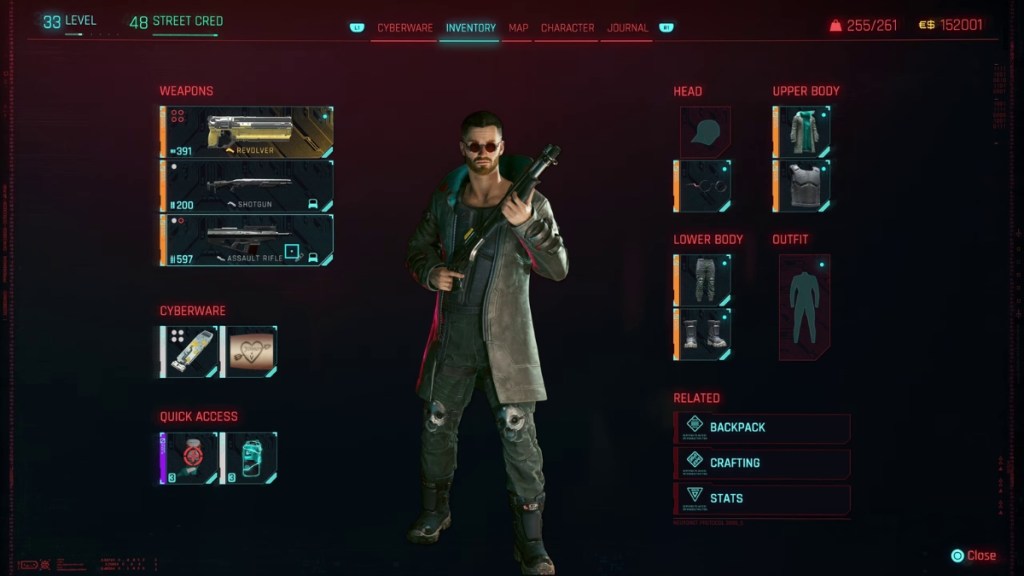
Here’s the full list of free rewards you get after completing the Clampdown Quest in Cyberpunk 2077:
Item Item Type Coronation Tech Revolver Weapon King’s Glasses Head King’s Coat Upper Body (Outer) King’s Bulletproof Vest Upper Body (Inner) King’s Pants Lower Body (Legs) Icon America Dust Devil Utility Boots Lower Body (Feet)
Now that you know what’s up for grabs and how to complete the Clampdown Quest in Cyberpunk 2077, will you help the mercs from Edgerunners 2 on your way to becoming a Night City Legend? Tell us in the comments below!