- Players can unlock the Weapon Amplification system by upgrading the Gunsmith workbench to level 4.
- Then, player can amplify any weapon to level 5.
- Players can customize the weapons as they wish by unlocking various upgrade nodes.
The Arc Raiders Frozen Trail update introduced many new gameplay mechanics, including the Weapon Amplification system. If anyone wants to upgrade their weapon beyond the regular level 4 upgrade, it is now possible in the game. However, if you are confused about the Weapon Amplification System and want to learn more about which weapons can be amplified, here is everything you need to know.
What Is Weapon Amplification in Arc Raiders?

Weapon Amplification system is a new mechanic introduced in the Arc Raiders Frozen Trail update. Previously, the maximum level you could upgrade a weapon to was level 4. Now, the new Weapon Amplification system allows players to upgrade their favorite weapons to a fifth quality level.
More importantly, players can now choose the designated upgrade path they want among the branches of nodes for their weapon. Currently, 15 weapons in Arc Raiders, namely Anvil, Aphelion, Bettina, Burletta, Canto, Equalizer, Hairpin, Hullcracker, Il Toro, Jupiter, Kettle, Osprey, Rascal, Rattler, and Renegade.
How to Unlock Weapon Amplification in Arc Raiders?
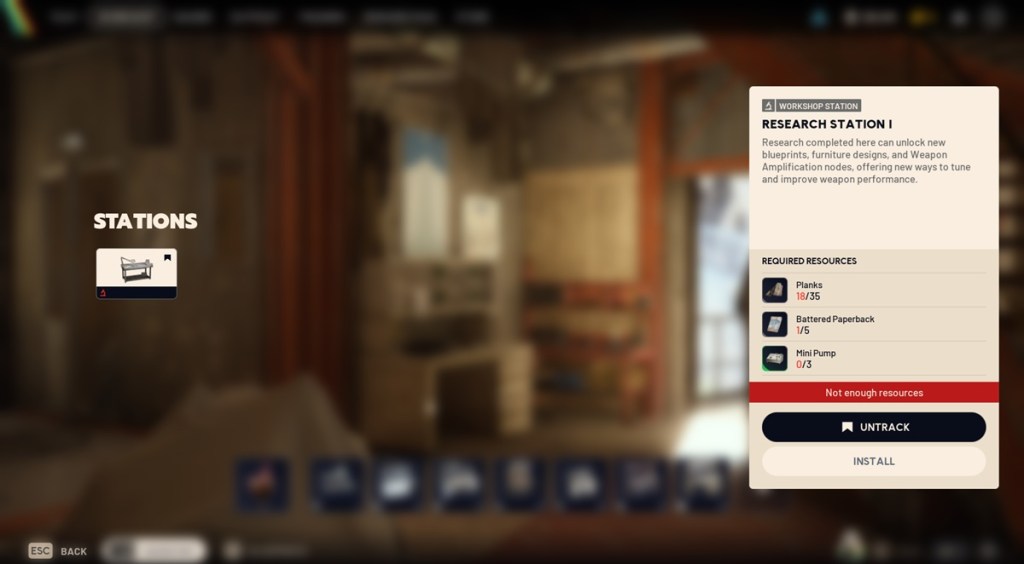
Since Weapon Amplification is endgame content in Arc Raiders, players must grind in order to unlock the system in-game. Players are tasked with finding various resource materials from Amplification Modules to research items needed to amplify the currently available weapons.
With that in mind, here is how to unlock the Weapon Amplification system in Arc Raiders:
- First, players need to research Topside Living Conditions, complete the Gather Building Materials, and Safeguard the Building Site to unlock the Outposts in Arc Raiders.
- Once you have successfully set up an Outpost, you need to expand the space to level 4 by adding your preferred rooms.
- Doing so will unlock upgrades for the new Research Station and the old Gunsmith workbench.
- Now, you need to gather different materials and upgrade both the Gunsmith and Research Station to level 4 in the game
- After you unlock the Gunsmith level 4 workbench, you can see the ‘Amplify’ option available for selected weapons in the Weapon Upgrades tab.
How to Amplify a Weapon in Arc Raiders
Once you have successfully unlocked the Gunsmith IV workbench in Arc Raiders, you are now eligible to amplify 15 different weapons. So, here is how to amplify one in Arc Raiders:
- Go to the Gunsmith level 4 workbench.
- Then head to the Weapon Upgrades tab.
- Make sure your preferred weapon has already been upgraded to level 4.
- You can then select a weapon of your choice and hit the Amplify button to upgrade it to level 5.
- One important thing to note is that an amplified weapon cannot be reverted, as it is a permanent upgrade.

To amplify your favorite weapon in Arc Raiders, you need to collect the desired Amplification Module. Amplification Modules are a new resource material introduced in the Frozen Trail update and are available in five versions, from Mk. I to Mk. V.
Now, if you are amplifying a common weapon, you need an Amplification Module Mk. I. An uncommon weapon means Amplification Module Mk. II, and so on. Basically, as a weapon’s rarity increases, an apt Amplification Module is required for an upgrade. So, here is a list of amplification weapons and their required Amplification Modules:
- Amplification Module Mk. I: Hairpin, Kettle, Rattler (Common)
- Amplification Module Mk. II: Burletta, Il Toro (Uncommon)
- Amplification Module Mk. III: Anvil, Canto, Osprey, Rascal, Renegade (Rare)
- Amplification Module Mk. IV: Bettina, Hullcracker (Epic)
- Amplification Module Mk. V: Aphelion, Equalizer, Jupiter (Legendary)
If you are wondering where you can find the Amplification Modules in the game, you can get these resource materials from the Fallen Emperor as well as the Frigate in Arc Raiders. Additionally, to unlock specific upgrade nodes in the branch, players must also complete certain objectives and gather resource materials for the Research station.
All Weapon Amplifications in Arc Raiders

Now that you have learned about what Weapon Amplifications are and how to amplify one, it’s time to know more about all weapon amplifications available in the game. Through Weapon Amplification, a player can improve various aspects of a weapon, such as changing firing mode, switching bullets, increasing mag size, and more.
We have made a breakdown of all the Weapon Amplifications for the best weapons in Arc Raiders:
| Weapon | Required Amplification Module | Available Amplification Upgrades | Result |
|---|---|---|---|
| Anvil | Mk. III | • Anvil Splitter • X-Rounds | Anvil Splitter: Replaces the Anvil’s bullets with rounds that split into four weaker projectiles. X-Rounds: Adds an explosive compound to the projectile, dealing slightly increased damage to Raiders and significantly increased damage to ARC Armor plating. |
| Aphelion | Mk. V | • Bigger Mag • Charged Burst • Increased Burst • Incendiary Rounds | Bigger Mag: Increases the magazine capacity. Charged Burst: Changes the firing mode to charge and release. The longer the charge is held, the more projectiles are fired upon release. Increased Burst: Increases the number of projectiles fired within a burst. Incendiary Rounds: Adds an incendiary compound to the projectile, setting targets on fire when hit. |
| Bettina | Mk. IV | • Bigger Mag • Semi-Auto • X-Rounds | Bigger Mag: Increases the magazine capacity. Semi-Auto: Makes the weapon semi-automatic. X-Rounds: Adds an explosive compound to the projectile, dealing slightly increased damage to Raiders and significantly increased damage to ARC Armor plating. |
| Burletta | Mk. II | • Burst-Fire • Increased Burst • Full-Auto • Sprint Shooting | Burst Fire: Makes the weapon fire in a burst. Increased Burst: Increases the number of projectiles fired within a burst. Full-Auto: Makes the weapon fully automatic, at the cost of accuracy and stability. Sprint Shooting: Ergonomic fittings that allow the weapon to be comfortably fired while sprinting. |
| Canto | Mk. III | • Carbine Conversion • Incendiary Rounds • Sprint Shooting | Carbine Conversion: Repurposes the Canto as a carbine, greatly improving stability and accuracy at the cost of agility. Incendiary Rounds: Adds an incendiary compound to the projectile, setting targets on fire when hit. Sprint Shooting: Ergonomic fittings that allow the weapon to be comfortably fired while sprinting. |
| Equalizer | Mk. V | • Bigger Mag • Anti-Weak Point • Ramping Damage | Bigger Mag: Increases the magazine capacity. Anti-Weak Point: Deals increased damage to ARC weak points, but deals less damage to ARC armor plating. Ramping Damage: Gradually increases the Equalizer’s damage while its laser remains in contact with a valid target. |
| Hairpin | Mk. I | • Incendiary Rounds • Semi-Auto, Sprint • Shooting • Tracker Rounds | Incendiary Rounds: Adds an incendiary compound to the projectile, setting targets on fire when hit. Semi-Auto: Makes the weapon semi-automatic. Sprint Shooting: Ergonomic fittings that allow the weapon to be comfortably fired while sprinting. Tracker Rounds: Replaces the bullets with tracker rounds that briefly reveal the position of targets they hit. |
| Hullcracker | Mk. IV | • Incendiary Grenade • Mag Reload | Incendiary Grenades: Adds an incendiary compound to the projectile, causing it to spread fire when detonating on ARC. Mag Reload: Removes the need to reload one projectile at a time. |
| Il Toro | Mk. II | • More Reload • Slug Rounds | More Reload: Increases the number of bullets loaded at a time, reducing reload time. Slug Rounds: Replaces the normal shotgun shells with a single large projectile that deals massive damage. |
| Jupiter | Mk. V | • Bigger Mag • Scoped • Ergonomic Bolt | Bigger Mag: Increases the magazine capacity. Scoped: The weapon gets a brand-new scope. Ergonomic Bolt: Ergonomic bolt that allows the user to perform the bolt-action while scoped. |
| Kettle | Mk. I | • Anti-Shield • Full-Auto • X-Rounds | Anti-Shield: Redistributes damage to prioritize breaking shields faster. Full-Auto: Makes the weapon fully automatic, at the cost of accuracy and stability. X-Rounds: Adds an explosive compound to the projectile, dealing slightly increased damage to Raiders and significantly increased damage to ARC Armor plating. |
| Osprey | Mk. III | • Anti-Weak Point • Ergonomic Bolt • Tracker Rounds | Anti-Weak Point: Deals increased damage to ARC weak points, but deals less damage to ARC armor plating. Ergonomic Bolt: Ergonomic bolt that allows the user to perform the bolt-action while scoped. Tracker Rounds: Replaces the bullets with tracker rounds that briefly reveal the position of targets they hit. |
| Rascal | Mk. III | • High Velocity • Incendiary Grenade • Sprint Shooting | High Velocity: Increases the velocity of the projectile fired. Incendiary Grenades: Adds an incendiary compound to the projectile, causing it to spread fire when detonating on ARC. Sprint Shooting: Ergonomic fittings that allow the weapon to be comfortably fired while sprinting. |
| Rattler | Mk. I | • More Reload • Drum Mag • Incendiary Rounds | More Reload: Increases the number of bullets loaded at a time, reducing reload time. Drum Mag: Significantly increases magazine capacity by attaching a drum mag. However, it must still be reloaded a couple of bullets at a time. Incendiary Rounds: Adds an incendiary compound to the projectile, setting targets on fire when hit. |
| Renegade | Mk. III | • More Reload • Scoped | More Reload: Increases the number of bullets loaded at a time, reducing reload time. Scoped: The weapon gets a brand-new scope. |
And that’s everything you need to know about the Weapon Amplifications in Arc Raiders. Let us know which is your favorite amplified weapon in the comments below.