
No one likes to wake up on a fine Sunday morning to realize that a system update has exhausted the fair usage limit of their data plan. Fortunately, Windows 11 comes with built-in features to monitor your internet data usage so that you can keep track of the apps using up your internet data. In this article, you will learn how to track internet usage on your Windows 11 PC.
Track Internet Usage on Windows 11 (2022)
View Internet Data Usage on Windows 11
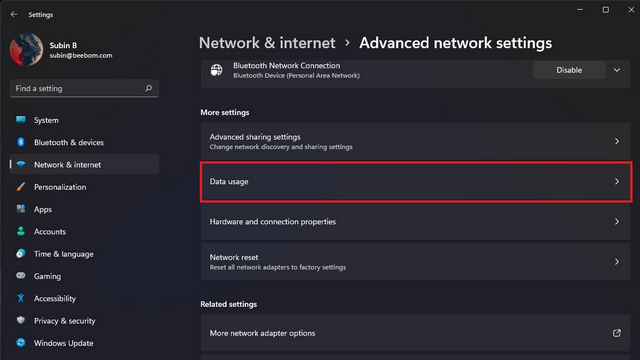
1. Open the Settings app using the Windows 11 keyboard shortcut “Win+I” and switch to the “Network & internet” section from the left sidebar. At the bottom of this page, click on “Advanced network settings” in the right pane.


2. Now, look for the “Data usage” option under the “More settings” section and click on it.
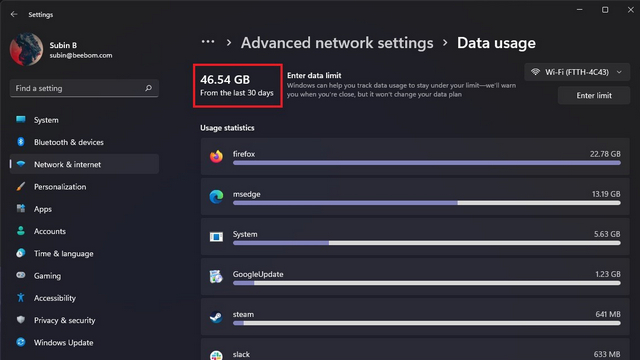
3. You will now see the data you have used for the last 30 days at the top-left corner. Here, you have the option to switch between wired and wireless network modes from the right corner, in case you often use wired connections to access the internet. You will also see the per-app network usage statistics on this page.
Reset Internet Data Usage on Windows 11
You can choose to reset data usage on Windows 11 for a fresh start. Here’s how to do it:
1. Open the Settings app, navigate to the “Network & internet” section from the left sidebar, and click on “Advanced network settings”.
2. From the Advanced network settings page, choose “Data usage” under “More settings”.
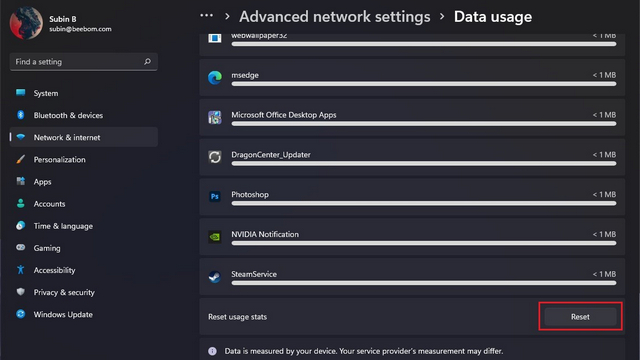
3. Scroll down until you find the “Reset usage stats” option and click the “Reset” button.
Setup Data Limit on Windows 11
If you are not on an internet connection with unlimited data, it would be a great idea to set up a data limit to ensure you don’t exceed that. Your Windows 11 PC will ensure that you get a warning message when you are close to exhausting your data limit for the month.
- To get started, open the Settings app, head to the “Network & internet” section from the left sidebar, and click on “Advanced network settings”.
2. Click on “Data usage” from the “More settings” section.
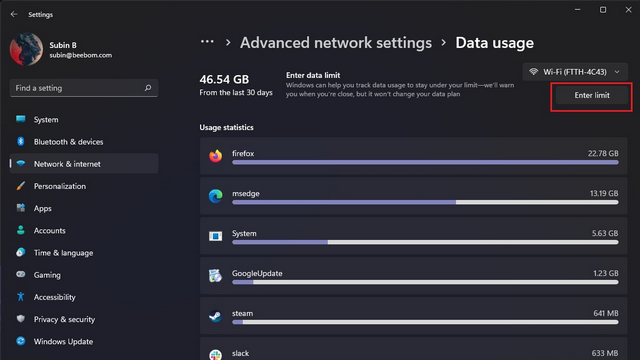
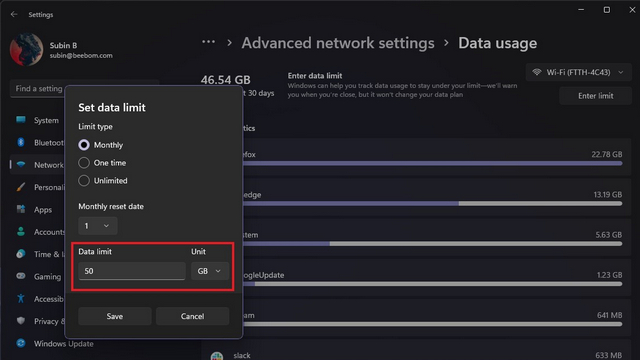
3. At the top-right corner, click the “Enter limit” button just below the network type drop-down.
4. From the pop-up that appears now, enter your preferred data limit in the box and click “Save”. You can also choose between monthly, one-time, or unlimited data limit types.
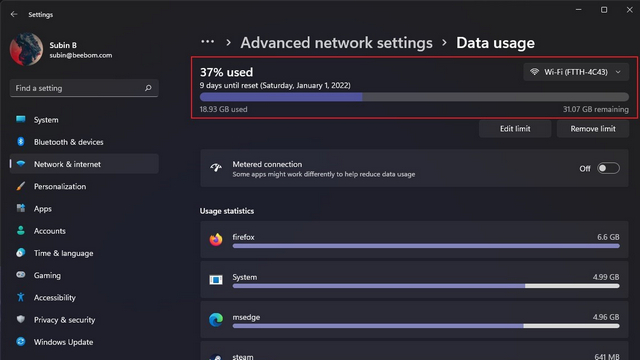
5. After setting the data limit, you will see the percentage of data you have used up for the month on the “Data usage” page.
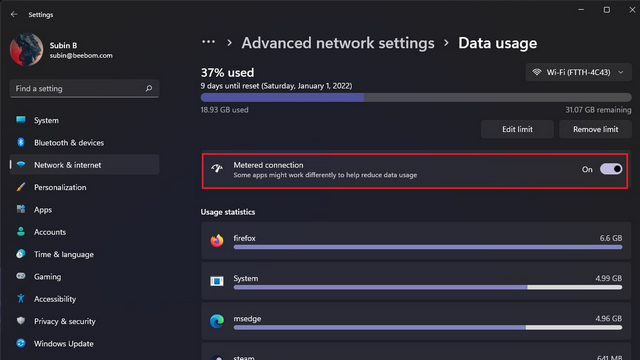
6. Now that you have set up a data limit, you could consider enabling the “Metered connection” toggle. This way, you can reduce and limit data usage on your Windows 11 PC.
Monitor Data Usage on Your Windows 11 PC
The option to check internet data usage helps you get a better idea of the apps consuming your network data. If you have been wondering how your internet data gets used up quickly, we hope this guide helped you find the root cause. For other network-related issues, take a look at our articles on fixing the ‘Network Discovery is Turned Off’ error in Windows 11 and enabling ‘Wake on LAN’ on Windows 11.

