If you share a lot of files with your co-workers or friends, you might have realised how big of a hassle it is. There are basically two ways to share a file. Either you attach the file to emails or any other service which allow you to do that (like WhatsApp, Slack etc), or, you first upload the file on a cloud storage service, generate a shareable link, and then share that link with the person you want to. Both the methods are time consuming and come with their own restrictions. For example, if you are using services like emails to send a file, you are restricted to a very small file size (<20 MB). So, for sharing files bigger than that, you use cloud storages, which come with another set of problems.
Sharing a file is hard and time taking, at least much more than it should be. Now, if you share files only once in a blue moon, you won’t mind these inconveniences, however, if you need to share files as much as I have to, you will feel the pain of lost time and the manual labour that you have to do. This is where Droplr comes to our help. I have been using this software since only a few days, and I am head over heels in love with this one. It’s a tool which has made me really productive and that’s why I wanted to share this one with you. Droplr lets you take the whole process of sharing files and reduce it to a few clicks. If you are intrigued, let’s see how to use Droplr to share files in seconds with ease:
Install Droplr on Your Device
Before we start, the first thing we need to do is to download the Droplr app and install it on our system. Currently, the app is available for macOS, iOS and Android users. However, Windows and Linux users can use its Chrome extension and Web app to enjoy its services. To download the native Mac app or the Chrome extension, just click on this link and then install it.

After you are done installing the app, register for their service by either using your email or directly login using your Google, Slack, or Twitter account.
Using Droplr
Now that you have logged in to your Droplr account, let’s discover its features and learn how to use them. However, let us first understand how it works. Droplr basically allows its users to quickly share files by generating a shareable link. Once you share the link with a person he can download the file directly, without having to log in or doing anything like that. You can also use its built-in tools to directly capture screenshots, screencasts, and webcam videos. If you use its built-in tools, Droplr will automatically create a shareable link for those items. You don’t even need to copy the links as they are automatically copied to your clipboard as soon as they are created. Now, let’s check out the main features of Droplr.
-
Taking and Sharing a Screenshot
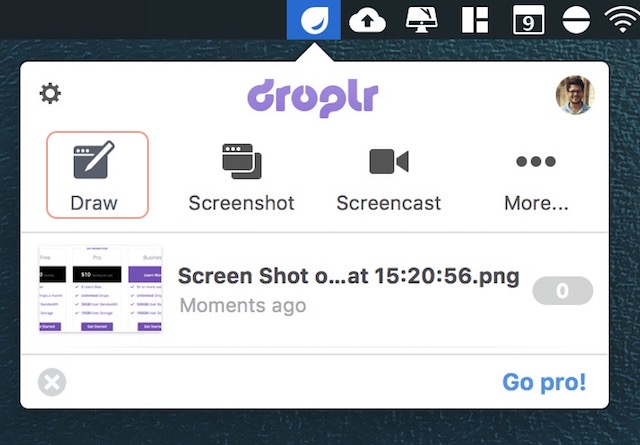
1. Once you launch the app, the app places a menubar icon and everything you need to do can be accessed from there. To take a screenshot, just click on the Droplr’s menu bar icon and click on the screenshot. Now your cursor will turn into a select tool and you can select the area you want to.

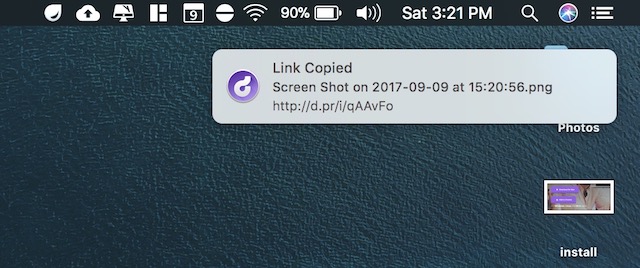
2. As soon as you take the screenshot, Droplr will automatically upload it, create a shareable link, and copy it to your clipboard. If you are on a Mac, you will see a similar notification as the one in the picture below. The notification contains the shareable link which has already been copied to your clipboard.
-
Sharing an Annotated Screenshot
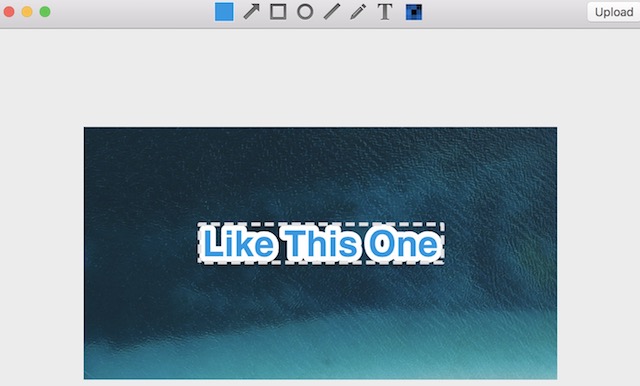
1. To share an annotated screenshot, click on the Droplr icon and select the Draw tool. This is same as the screenshot tool, however, after you take a screenshot with the draw tool, Droplr will open an editing page, where you can annotate on the screenshot.
2. After you are done annotating, just click on the upload button and Droplr will upload the file and create and copy the shareable link to your clipboard.
-
Record and Share Screencast
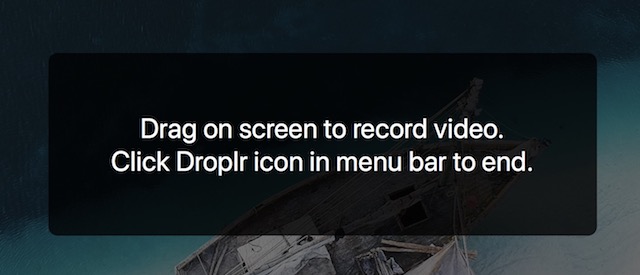
1. Click on the Droplr icon and select the “Screencast” tool. Now, just drag and select the part of the screen that you want to record. You should see the same information on a black window when you click on the screencast tool.
2. Click on the “Start Recording” button to start the recording.
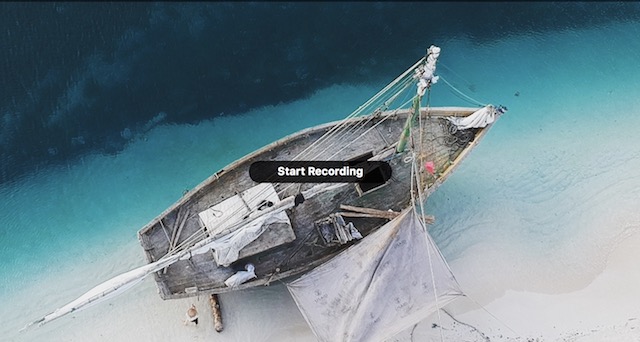
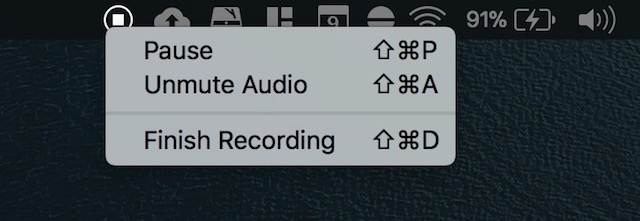
3. As soon as you start recording, you will see that the Droplr icon in the menu bar will change to a recording icon. Once you are done, click on the recording icon and click on “Finish recording”. By the way, from here you can also pause the recording and mute/unmute the audio.
-
Share a File Which is Already On Your Hard Drive
1. To share a file present on your Hard Drive, just drag and drop the file to the Droplr icon in the menu bar.
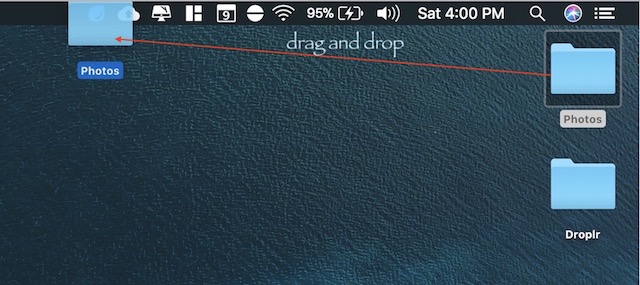
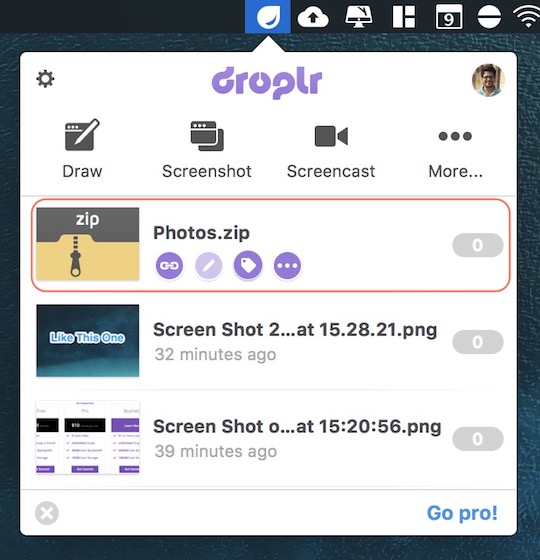
2. If the file is large, Droplr will automatically create a Zip file and upload it to their servers. After the file is uploaded, just like before, Droplr will automatically create a shareable link and copy it to your clipboard.
-
Other Features
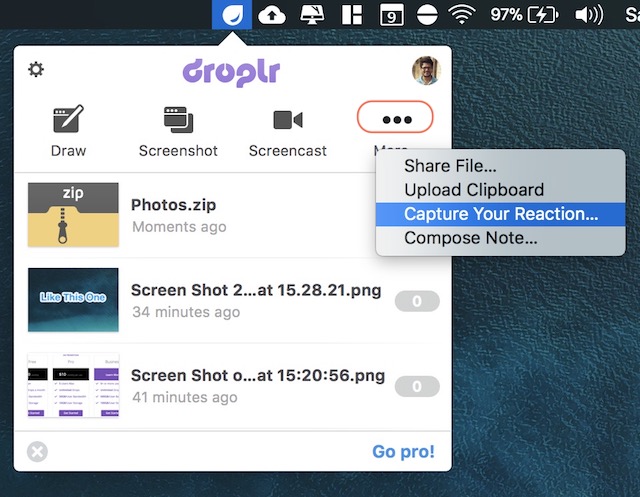
There are other cool things that you can do with Droplr. For example, you can record your webcam for a few seconds and send the file in either a GIF or a Movie format. To do that, click on the Droplr icon and then click on the “More” button. Here, click on the “Capture Your Reaction” button to start recording the video. From here, you can also send a typed note by clicking on the “Compose Note” Button.
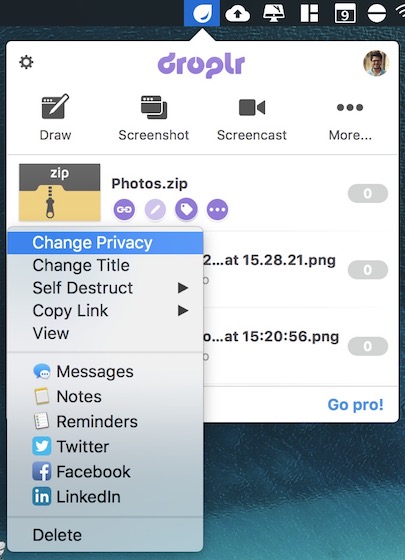
Other things that I like is the ability to password protect your files and the ability to send a self-destructive file. To password protect a file, right click on the file inside Droplr and click on “Change Privacy”. Then enter the password you want to protect your file with. You will need to share the password with anyone whom you want to give access to that file. To make a file self-destruct after a certain period of time. Click on the “Self Destruct” button on the right click menu and select your duration.
Benefits of Using Droplr
If you read our features section carefully, I don’t think I need to tell you the benefits of using Droplr. For me, Droplr is best for sharing quick files like screenshots or screencasts. All I need to do is take the screenshot with Droplr’s tool and Droplr automatically uploads the file, creates a shareable link, and copies it to my clipboard. That’s 3 steps happening with just one click. All that is left for me to do is to share the link. Once I share the link, the receiver can just tap on the link to download the file.
Droplr also has integration with various 3rd party apps like Slack, Hipchat, Twitter, Basecamp, and much more. When you share the link these services, people will be able to see the preview of the file, before they download it. It also has plugins for various creative software like Photoshop, Illustrator, and Sketch. This means that you can share your projects easily without leaving your app. All these added features enhance the user experience of the software. Droplr is one of those apps which you really didn’t know that you needed until you used them. And After you used them, there’s no way you can go back.
Pricing and Availability
As I mentioned earlier, Droplr is only available for macOS and iOS. Windows and Linux users will have to settle for its web app which in my experience is not that bad. As far as pricing goes, it is a costly software. You can use the free account, but that is fairly restrictive and only allows 10 shares (which the call “drops”) a month. If you want unlimited shares you will have to buy the Pro subscription which is about $10/month. Now, that might seem too high for a software which just lets you share things, and quite frankly it is. However, you can get it for as low as $30/year by searching for the coupons code on the internet. You can also get huge discounts if you are buying the software for a team. You can check out the details by clicking here.
SEE ALSO: 10 Best Window Manager Apps for Mac
Share Files In Seconds With Droplr
As you can see, Droplr makes it really easy to share files. Also, not only you can share small files but can share files as large as 2GB in size. This means that you don’t have to switch application for most of your work. Droplr also makes taking and sharing screenshots and screencasts pretty easy. In my entire time with computers, I have never been able to share files so easily. The only thing that can hold you back is its pricing. However, if pricing is no constraint for you, this can highly improve your productivity. Even if you are not going to buy the pro version, I would urge you to check out its free version and then decide. Download and use the app and let us know your thoughts in the comment section below.


