
- The Family Sharing settings on your Apple device allow you to create a tailored Apple ID for your child to have control over their screen time and online exposure.
- To create a child's Apple ID, go to Settings -> Your profile -> Family Sharing -> Add Member button -> Create Child account and follow the on-screen instructions.
- Regularly viewing and adjusting parental control and restrictions based on your child's age and maturity level ensures a balanced and controlled digital experience.
From educational apps to entertainment ones, Apple devices offer a wealth of resources for kids too. However, as a parent, it is crucial for you to manage your child’s access to online content to ensure a safe environment. One way to do that is by setting up an Apple ID specifically tailored for your child through Family Sharing. If that’s something you’re looking for, this guide details how you can create an Apple ID for your child via Family Sharing.
Why Create a Child Apple ID
A designated Apple ID for your kids allows them to access age-appropriate content while allowing you to exercise control and keep a tab over your child’s online activity. Once the Family Sharing setup is complete, parents can manage purchases, set restrictions, and monitor their child’s device usage.
Create an Apple ID for Your Child on iPhone
- Open the Settings app on your iPhone and tap on your name at the top.
- Tap on Family Sharing and then tap the “Add Member” button in the top right corner.


- Now, tap on the Create Child Account button, and proceed to enter your child’s details.
- Tap the Verify You’re an Adult button once you’re done.
- Now, enter your Apple ID password and tap the “Next” button at the top right corner.

- Now, enter the Verification Code received in your email, and agree to all the terms and conditions.

- Here, choose whether you want to use a phone number or email address for your child’s Apple ID. In our case, we chose the Email ID option.
- Now, follow the on-screen instructions to Create an Apple ID for your child. This process includes adding an email address, password, and phone number to receive verification codes.

Once the child’s Apple ID is created, you’ll asked to configure parental controls and other settings for your child’s Apple ID and Apple devices.
Set Restrictions on Apple ID of a Child
Note: Once the child crosses 13 years of age, they can remove themselves from the Family Sharing group without the parent’s consent if they have the Apple ID. Thus, all the parental control settings and restrictions will automatically turn off on the child’s Apple ID.
Even if you can exit at the above step and skip the process altogether, you will find the created Child’s Apple ID in the Family Sharing section in your settings app, from where you can set the restrictions for your child. Here are all the restrictions you can set on your child’s Apple ID:
- Screen Time Restrictions
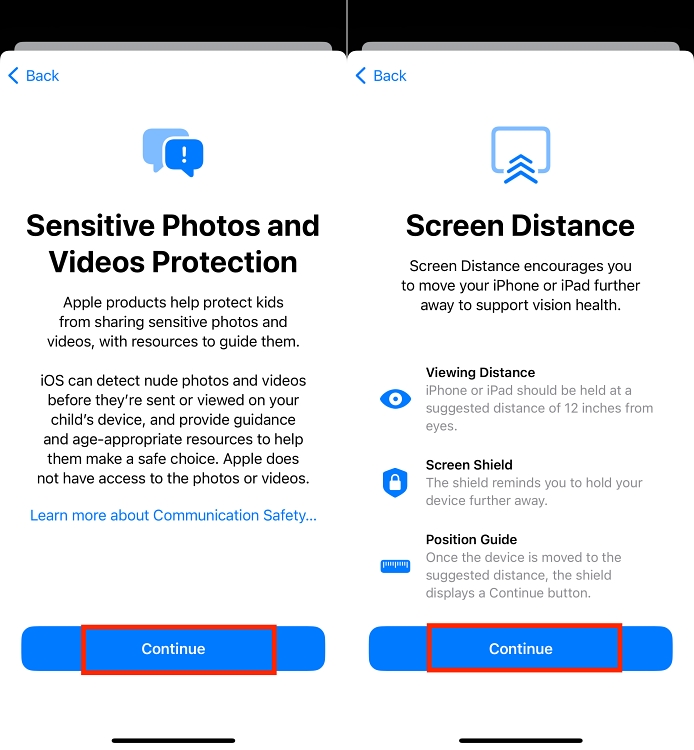
- Sensitive Photos and Video Protection
- Screen Distance
- App and website activity monitoring
- Downtime (time away from the screen)
- App Store purchases approvals
- Location sharing
We have mentioned the steps to enable restrictions on a child’s Apple ID below.
Enable Screen Time Restrictions: Tap the blue Continue button, select what sort of content your child can access, and tap the Turn On Restrictions button.


- Enable the Sensitive Photos and Videos Protection and Screen Distance settings on your child’s Apple Devices.
- Here, tap the Turn on App & Website Activity to monitor your child’s activity.
- Now, set a schedule for time away from the screen for your child and tap Turn On Downtime.

- Enter the passcode you want to use as Parental Control Lock, which you can use later to alter the Screen Time settings.
- Tap the Continue button on the “Ask to Buy is Turned On” for your child’s device.
- Next, tap the Share Location button to share your child’s location with all the members of the Family Sharing group.

- And you are done. You have successfully created an Apple ID for your child.


Create Apple ID for a Child on Mac
- Open System Settings on your Mac, and click on the Family option on the left sidebar.
- Here, click the Add Member button on the right side.


- Now, click the Create Child Account button in the pop-up that appears. The later steps are the same as they are on iPhone.

Moreover, remember to review and manage your child’s activities, app downloads, and screen time through the Family Sharing option on your iPhone, iPad, or Mac.
So this is how you parents can create a secure and tailored Apple ID for their child, allowing them to enjoy the benefits of Apple’s ecosystem while ensuring a safe and controlled digital environment.


