
Spotlight made its first appearance on Mac more than a decade ago and still remains one of the most-loved features of macOS. What originally began as a humble file search tool, has now matured with tons of features up its sleeve. Apple adds new features to Spotlight in every major macOS release, so it’s easy to lose count of all the features. So, today I’ll tell you about all the cool things you can do with Spotlight on a Mac. Whether you’re a casual user or a power user, here are 15 Spotlight tips and tricks for Mac you should know in 2021.
Best Spotlight Tips and Tricks for Mac You Should Try
As Spotlight is available on iOS as well, most of the tricks work on iPhone and iPad as well. So, if you are willing to get the most out of this handy search tool, you shouldn’t fail to try out these tips on iOS/iPadOS devices as well. Bear in mind that not all Spotlight features work in every country/region. If you don’t get the answer to your query, you can head over to Apple’s support page to check if it is supported in your country. That all being said, let’s explore the best Spotlight tips and tricks for macOS!
1. Search using Search operators
When searching for items in Spotlight, you can specify the type of item you’re looking for. To limit your search to a specific item type, just suffix “kind:item-type” after your actual query. Item types can be general file extensions like JPEG, MP3, PDF, or even Apple-specific apps like contacts, reminders, and emails, etc.
For example, here’s how I would frame a query to limit my search scope to the email application only:


If you deal with a large number of emails on a daily basis, you can search for items relative to a date. For example, here’s how to search for emails received after a specific date by using “date: DD/MM/YY”.


You can use “created: DD/MM/YY” to show items created on a particular date and “modified: DD/MM/YY” to search for items modified on a particular date. Also, you can throw in relational operators like “<,>,=” before the date to search before, after, or on a particular date.
Note: If you’re from a different region, the date syntax will vary accordingly.
2. Search Using Boolean Operators
You can use Boolean operators like AND, OR, NOT, AND NOT to create complex search queries. For instance, here’s how I used the Boolean query NOT to find all the emails in a particular date range, excluding the ones from a specific date.


Here’s another query I framed using the OR operator to search for emails from either of the two specified people.


As you can see, you can use various Boolean operators to fine-tune your Spotlight search.
3. Instant Answers in Spotlight
Till now, we’ve seen how to use various search operators to search your files like a pro. But, Spotlight is much more than just a file-indexing engine. In this section, we’ll see how you can get instant answers to some queries. Please note that most of the instant answers should work on the Spotlight search on iOS devices, too.
- Get exchange rates and convert one currency to another.


- Perform calculations and other basic maths operations.


Spotlight can even pull information from a variety of online sources:
- Get scores and schedules for various sports matches using “Team Schedules/Score“

- Show definitions by just typing in a word. If the word’s not present in the inbuilt offline dictionary, it’ll show suggestions from online dictionaries.


Pro tip: Hit CMD+L to jump directly to the inbuilt dictionary entry if there’s one.


- Show weather of any city using “Weather in city name“.


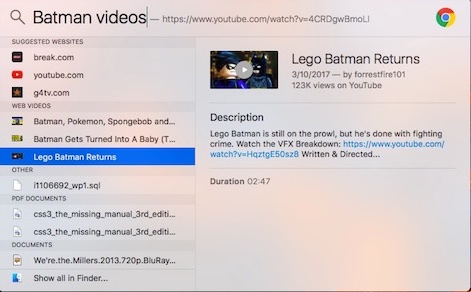
- Search for online videos by using “search keyword videos“.
There are many other queries you can get instant answers for, but I hope this gives you a fair idea of how powerful Spotlight can be. Most of the online results are sourced either from Yahoo or Bing and obviously, require a working Internet connection.
4. Unit Conversion
Apart from being a useful currency converter, Spotlight can also double up as a super handy unit converter. So, the next time you need to convert units like weight, kilometer, temperature, look no further than this built-in search tool to give you the instant answer. For instance, you can enter 450km to miles in the Spotlight to get the exact figure in miles.


5. Search Using Natural Language
If you feel that all the search and Boolean operators are way too technical for you to use, there’s some good news. Starting 10.11 El Capitan, you can perform searches using natural language. Apple says that it “lets you compose your searches in your own words“. What that essentially means is that now you can search as if you’re having a natural conversation with a real person.
Instead of using all those confusing search operators, here’s how you can use Spotlight to show your photos from last year:


Here’s another one I used to find the documents I created last December:


There’s no “special syntax” you need to follow while making a natural language search but, to be honest, it’s very limited in scope. Nevertheless, it’s a pretty good start from Apple’s side. Try to discover on your own what natural language searches work and let me know in the comments!
6. Keyboard Shortcuts in Spotlight
Most of you would definitely know that CMD+Space brings up the Spotlight search, right? Well, let’s learn some keyboard shortcuts you can use to navigate in Spotlight and level up your Mac shortcuts game!
- CMD+arrow down: Jump to the next category of results.
- Hold CMD: Displays the item path.
- CMD+return: Open the location that contains the file.
- CMD+I: Opens the “Get Info” dialog box for the particular item.
- CMD+L: Jump to the dictionary listing for the word. (Works only if the word’s listed in the inbuilt dictionary.)
- CMD+B: Search the web for the entered search query.
- CMD+C: Copy the item directly from the Spotlight entry without actually having to open it.
7. Search Using Emojis
If you’re feeling crazy, you can search Spotlight by typing in an emoji. For instance, when you type in a “Pizza” emoji, it lists all the Pizza places in the neighborhood:


Here’s another example. When I type in a “beer” emoji, it lists all the pubs/restaurants nearby that serve beer:


Behind the scenes, its working is pretty simple. Each emoji in macOS and iOS has a descriptive name that you can verify yourself by going to Character Viewer (Control+CMD+Space). Undoubtedly, the Spotlight search uses this data to “interpret” the meaning behind the emoji and perform a search accordingly.
This works for tacos, dresses, and many other emojis. From here on, let your imagination run wild. Emoji based search should work on iOS devices, too. Feel free to try other emojis and let me know if you happen to spot something interesting.
8. Search for Apps Using Initials
By now, you probably are using Spotlight to quickly open installed apps on your Mac. While it is a swift way to open apps, it may sometimes be inconvenient to type in the name of the app, especially if the app’s name is longer. Thankfully, if an app’s name consists of multiple words, you can simply type in the initial of each word and Spotlight would still bring up that app. This way, you can save some keystrokes and a little bit of time.
Here’s an image to illustrate what I mean:


As you can see, instead of typing the full name “Google Photos Backup”, I just punch in the initials “GPB“. Extremely convenient, right?
9. Track Live Flights
While there is no dearth of live flight tracking apps, nothing can beat the convenience of having a native tool that can get the job done with the desired convenience. So, if you ever wonder what could be the current status of a flight, just enter the flight number in the Spotlight and it would instantly show the real status. For instance, if you want to find out the current status of IndiGo 6E 291, simply enter 6E 291 and it will show you the current status right away.


10. Resize or Move Around the Spotlight Window
Apple finally introduced the option to resize the Spotlight window in El Capitan. To resize the Spotlight window, just drag the cursor from the lower end of the Spotlight window. However, you can only change the height of the window and you cannot make it smaller than the default size. Also, you can drag the window anywhere you like and set its desired position.


If you want to reset Spotlight to its default position, just click and hold on the Spotlight option (which looks like a magnifying glass) in the menu bar above.
11. Show Result from Selected Categories Only
As you already know, Spotlight shows suggestions from a large number of sources, including local sources such as documents, contacts, and online sources such as emails and the web. If you would like to search for specific sources only, it’s possible to do that. Open Spotlight and type in “SP” to open System Preferences and click on “Spotlight” (already seeing the benefit of searching by app initials?).
You will see a list of categories where Spotlight will search for. Feel free to uncheck the box corresponding to the category that you do not want Spotlight to search for.


In earlier versions of macOS, we could prioritize these categories so you can see the search from the categories that matter the most to you. Unfortunately, it seems like Apple has removed this feature.
12. Exclude a Folder/Disk From Spotlight Search
By default, Spotlight indexes most parts of your internal HDD/SSD including external hard disks. Sometimes, it may index temporary files and similar stuff, which in turn, may lead to results that are off the mark. Moreover, this can potentially slow down the Spotlight search.
To counter this, you can easily choose to exclude a folder/disk from being indexed by Spotify. To do this, head over to System Preferences > Spotlight. In the Privacy tab, you can click on the “+” button to add any folder/external drive. Alternatively, you can also drag and drop folders directly into the window.


The folders you specify shall not be indexed by Spotlight, and hence Spotlight will not perform a search in the specified location.

If anytime in the future, you feel like re-indexing them again, just select the folders from the list and click on the “–” icon. Spotlight will begin re-indexing them and results from these folders should show up after a while.
13. Make Spotlight Even Smarter
While Spotlight remains a powerful tool for Mac, it is not perfect in all aspects. So, if you want to further improve its functionality by injecting some nifty plugins, I would recommend you to check out a neat app called “Flashlight” (free). What I love about this app the most is that it works quite reliably and allows you to add a wide assortment of plugins to Spotlight to enhance its capabilities.


For instance, you can use Flashlight to enable Spotlight to let you save a note, add a reminder, and even translate a language. Notably, it’s an open platform that offers developers the needed flexibility to write plugins for it. Bear in mind that it requires OS X Yosemite or later.
14. Clear Spotlight Search Query
The one thing that I don’t like about Spotlight is that it shows the previously searched results, even if you had closed it the last time. But bother not, there is a quick way to clear the Spotlight search query. All you have to do to get rid of the previous search result is to just press the Esc key.


15. Hide Spotlight from Menu Bar
Mac’s menu bar has limited space, so you don’t want to clutter it with unnecessary icons. Since we can invoke Spotlight with a simple CMD+Space keyboard shortcut, it doesn’t make any sense to allow its icon to take precious space on your Menu Bar. To hide Spotlight from appearing in the menu bar, follow the steps below.
Launch System Preferences on your Mac and then choose the Dock & Menu Bar.


Next, scroll all the way to the bottom and choose Spotlight.


Next up, uncheck the box to the left of the Spotlight to hide it. Later if you wished to show it in the menu bar, check the box.

Enhance Your Mac Experience Using These Spotlight Tips
So, this was my list of some of the Spotlight tips and tricks you can try out on your Mac. Chances are that you’re already using Spotlight, and integrating these tricks into your search workflow will help you to be more productive. If you are looking for an upgrade from Spotlight, Alfred for macOS is just what you need. For most other people, Spotlight, when used with these tricks and tips can dramatically enhance the experience on your Mac. What do you think about these Spotlight tips and tricks? If you feel that I’ve missed out on your favorite tip, sound off in the comments section below.

