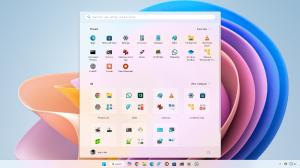
Taking screenshots prior to Windows 7 was a tiresome task involving many clicks. With Windows 7 came the snipping tool, which made the procedure easier, but still it was not 100% user-friendly. With Windows 8 however things changed. The screenshot shortcuts of just two keys made the process simple and short. Now, Windows 10 is on the horizon, we will take a look at all the possible ways by which one can take screenshots in Windows 10.
1. The old PrtScn key

First way is the classic PrtScn key. Press it anywhere and the screenshot of current window is saved in the clipboard. Want to save it in file? It will take some extra clicks. Open paint (or any other image editing app) and hit CTRL+V.
This method is best when you want to edit the screenshot before using it.
2. Shortcut “Win Key + PrtScn key”

This method was introduced in Windows 8. Pressing Windows key with PrtScn will save the screenshot directly in Screenshots folder inside User’s Pictures directory, in .png format. No more opening paint and pasting. A real time saver which is still the same in Windows 10.
3. Shortcut “Alt key + PrtScn key”

This method was also introduced in Windows 8, this shortcut will take the screenshot of the currently active or currently selected window. This way you don’t need to crop up the part (and re-size it). This also remains the same in Windows 10.
4. The Snipping Tool

Snipping Tool was introduced in Windows 7, and available in Widows 10 as well. It has many features such as marking, annotating and sending via email. These features are just fine for occasional screenshot-ter, but for a heavy user (like me), these features aren’t enough.

You can further tweak the tool using the options shown in the screenshot above.
5. Taking screenshots from CMD
Most of the people won’t use CMD for taking screenshots but still knowing about it does no harm, right? It isn’t as difficult as it seems. CMD by default does not have this option, so you need to install a free add-on NirCmd. After downloading it, run it as administrator (imp) and click on copy to Windows Directory.

Now open CMD and write:
nircmd.exe savescreenshot “X:\examplescreenshot.png”
Here,
- X is the drive in which you wish to save the screenshot,
- examplescreenshot is the name of the screenshot.
Of-course you can change the name to your liking , but remember don’t add spaces to the name or it won’t work.
There are some alternatives to NirCmd such as Screenshot-CMD & imagemagik.

6. Third Party Alternatives
Till now, we talked about the inbuilt options. But the truth is external apps are much superior in this aspect. They have more features and intuitive UIs. I cannot crown any one app as best as users choices prefer greatly. Some love Skitch while some swear by Snagit. I personally use Jing, It may not have a slick interface as Skitch or has many features as Snagit but it suits best for what I do.

SEE ALSO: How To Take A Screenshot On A Mac
Conclusion
Screenshots are very helpful for troubleshooting or explaining things. While Windows 10 has improved a lot in various other aspects, but there isn’t a major development in how we take screenshots on Windows based devices. I hope Microsoft adds some more shortcuts for taking screenshots or give the Snipping Tool (much needed) overhaul. Till then find your pick from the above options.


