


In our tutorial on how to speed up Windows 10, we recommended users to debloat Windows 10 to significantly improve the performance. In the same vein, we have come up with another detailed guide on how to debloat Windows 11 from resource-hogging services and apps. While Windows 11 has relatively less bloatware than Windows 10, every bit of optimization helps. Now, if you have an older PC and want a performance boost, learn how to debloat Windows 11 and keep Microsoft’s latest desktop OS lightweight and snappy.
Debloat Windows 11 From Unnecessary Apps and Services (2021)
Here, we are going to use Windows10Debloater, a popular script developed by Sycnex for debloating Windows 10. I tested this script on my Windows 11 computer running the stable build, and it worked successfully without any issue. The program was also able to remove a boatload of unnecessary packages that were eating up the resources.
Sure, the script has not added some Windows 11-centric changes like cleaning up the Start menu, removing stubs, etc., but these features should be added in the next update, hopefully. So, for now, let’s dive in and learn how to debloat Windows 11 from unnecessary junk.
Note: While the script is tried and tested, I would suggest you proceed with caution as it may break things. I have added caveats where to tread carefully in the steps below, so follow the process without fail. If you have an older computer and want to speed up Windows 11, this may help you a lot. But again, do it at your own risk.
1. First, press the Windows key once and type “powershell” in the Windows search bar. From the search results, click on the “Run as Administrator” option on the right pane.


2. Next, copy the below command and paste it into the PowerShell window. After that, hit Enter. It will automatically download the Windows 11 debloater script from the internet and launch the program within a few seconds. The command will also create a System Restore Point so you can easily move back to a working build in case anything goes wrong after performing any actions.
iwr -useb https://git.io/debloat|iex

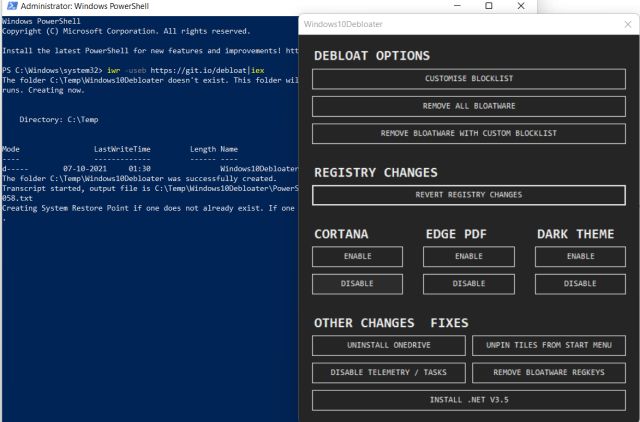
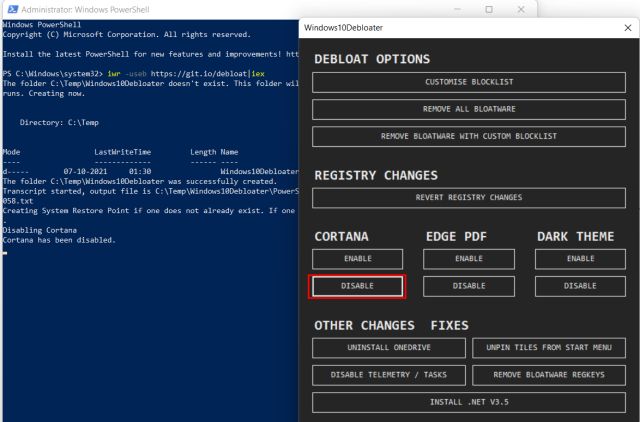
3. After executing the command, Windows10Debloater will open up. Here, first off, I would suggest you click on “Disable Cortana” if you don’t use Microsoft’s voice assistant. This will take a second and completely remove the service from the background.
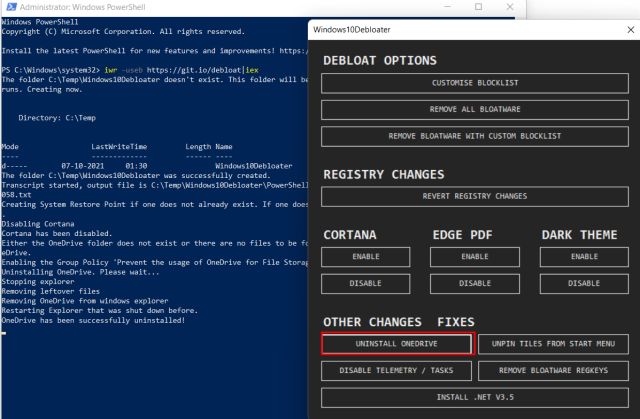
4. Next, go ahead and click on “Uninstall OneDrive” if you don’t use it on your Windows PC. Well, OneDrive will no longer pop up on startup, and you won’t see random backup prompts anymore.

5. After that, click on “Disable Telemetry/ Tasks“. This is an important step and will stop all kinds of background tracking services run by Microsoft. After this operation, you will find your PC’s resources have freed up considerably. Also, from a privacy perspective, you must perform this action to stop any kind of data harvesting.


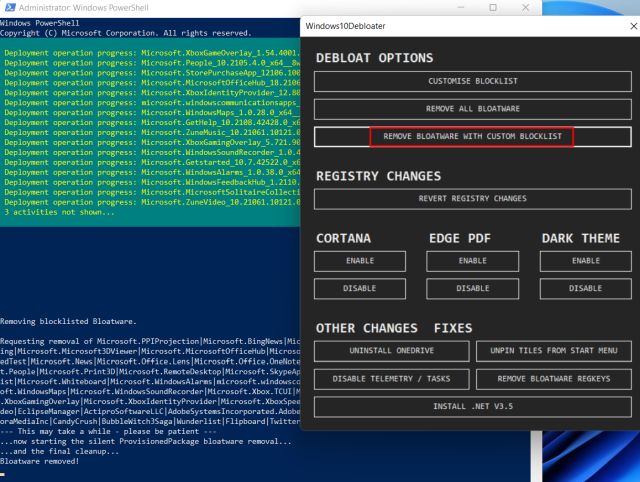
6. Finally, coming to debloating Windows 11 from unnecessary apps and packages. I would not suggest you remove all bloatware at once as the list is configured for Windows 10. Instead, click on “Customize Blocklist“.

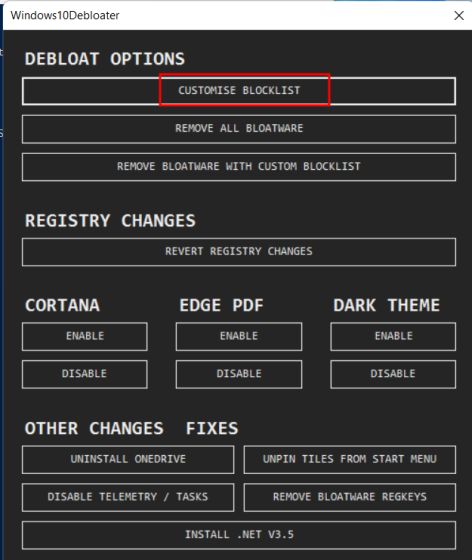
7. Here, go through the list and tick the apps and packages you want to remove.
For example, I found out the list was removing Microsoft Store, Microsoft Photos, Paint, Edge, Calculator, and other essential apps. So I unticked them. Similarly, if you don’t use your Windows PC for gaming, you can tick Xbox and other related services. Basically, if you are unsure about any package, keep it unchecked to be on the safe side. Finally, click the “Save custom….” at the bottom. Note that ticking an app will remove it and unticking will keep the app as it is.


8. Now, click the “Remove Bloatware with Custom Blocklist” button. This process will take some time, so keep patience. After it’s done, restart your PC, and you will find that Windows 11 has been debloated.

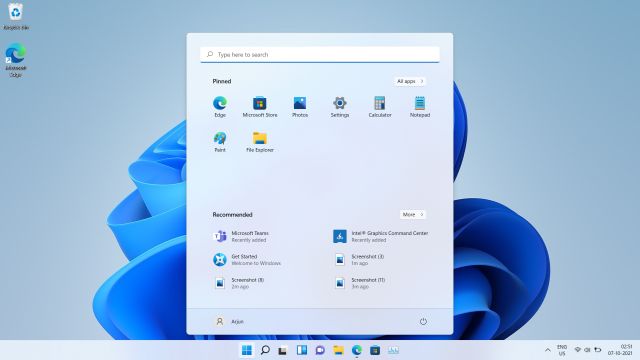
9. Note that you might find Instagram, Facebook, etc. on the Start menu even after debloating. It’s because they are stubs to download a program and not an existing app on the system. In that case, you will have to right-click on the stubs and uninstall them right away. You can find more information from our guide on how to customize the Start menu on Windows 11. We have also compiled an article on how to remove items from the Recommended section in the Windows 11 Start Menu.

Remove Bloatware and Stop Tracking Services on Windows 11
So that is how you can remove all kinds of junk that come pre-installed with Windows 11. Not just that, you can also disable all Telemetry services that take up a huge amount of resources in the background. Keep in mind, these services and apps are not temporarily offloaded but disabled through Registry. So in the future, it’s unlikely these services will start again automatically. Anyway, that is all from us. You can also check out the best Windows 11 settings to change after installation or steps to roll back to Windows 10 from Windows 11 from our linked articles. We hope this guide helped you speed up your Windows 11 PC or laptop. In case you have any questions, let us know in the comment section below.


how can reverse it???? When I am clicking the volume/network button, it’s not opening the menu.
how can reverse it. When I am clicking the volume/network button, it’s not opening the menu.
The script creates a system restore point before debloating the system. You can find instructions here on how to use System Restore https://beebom.com/how-system-restore-windows-11/
Might want to include something about enabling restore points in Windows first… Otherwise it will silently fail to create the restore point, and you’re SOL…
Didn’t help at all and I lost all my very very important files and folders
Awesome stuff ! made my windows 11 a lot snappier . 100% agreed! GJ
I wanted to ask that my desktop and the documents folder is under ondrive so if I unsinstall onedrive then my desktop and documents data will also be deleted
So can u tell that how to completely unlink everything from onedrive in windows and then we can uninstall it…
Plzzzzzzzxz telll this, I beg you!!
While it will not delete your local Desktop and Documents folders, it’s advised to not uninstall OneDrive. Better be on the safer side.
Thxx for telling!! <3
Arjun I think should visit you okhla office as i lost everything on my desktop and which is very very important for me, if you help me that would be better if you can,t I might file a complain that you are stealing people’s data and misusing it
The script creates a restore point, just use it with the guide.
Were your files located inside OneDrive? If so, they should still be contained inside OneDrive.
Is Microsoft defender is affected by debloation
No.
Good tuto just imagine we paid for the stuff we want deleted.
If Microsoft just created the windows flex it would have been better thanks for the tutorial
It’s not accepting ‘save custom Allowlist’
Ok, just X out of the custom list window then follow the next step, it works.
If you don’t know what this does I suggest to leave it alone. Windows 10 and 11 runs fine as it is for “normal” users. This is for nerds and “power users”.
you can keep some of the ppl happy most of the time but not all of the time, lol..
well, this works on windows 10 as well.
ALL OF my desktop items are gone after running “onedrive uninstall” what shall i do??? th itmes are not being show n omatte rwaht though they are there but cant access them tried 100 ways please help
vous pouvez tapper sur la barre de recherche (crée un point de restauration)
vous ouvrez l’application est vous aller dans (restauration du système)
est apprès vous allez dans (choisir un autre point de restauration)
est apprès (Before using ……)
est vous attendez que ça redémarre
est voila:)
Your desktop was in your OneDrive folder that means, you’ll need to install OneDrive again and set your desktop folder to OneDrive.
Worked Perfectly! Big Difference! Thank you!!
works very well thanks “!
Impressive! Thank you!
Windows should not include all the crap it does on a install. I still remember when Windows installs were just the OS and some utilities. I can see a browser and a couple useful apps like for mail and basics. But other third party apps should not be baked into the OS. This is just as bad as what PC makers do with installing apps on new PCs that paid to have them included. Just eats up storage space and makes user have to uninstall Al this stuff upon first boot.
A job well done, thanks for this
no longer working useless article
no longer working
Working just fine..
I just installed a windows update and this is no longer working, any solutions?
i’m happy with everything else, but i just want microstore store back so i can have the nvidia control installed. . . i need that for the my 3070gpu. . .how can i remedy this part.
Install from NVidia page directly. You’ll get newer version that way.
This didn’t fully explain what it did and now my computer runs fast but has nothing of value. Thank you so much. It didn’t seem like you suggested to make a restore point it sounded like THE PROGRAM CREATED ONE FOR YOU. I’ve lost everything. Don’t talk about this not being played with then give out the information without explaining it THOROUGHLY.
I agree with wtf. The wording of your instructions implies that the command creates a restore point when it doesn’t.
I suggest you rewrite this section giving clear instructions on how to create the restore point.
Command creates restore point
bookmarked your tutorial. thank you for this, i tried other scripts but they seemed to be problematic compared to this. easy and useful!
I tried this. The windows is debloated but all of my desktop files and study material on the desktop is gone. Help me how should I retrieve it.
You can’t retrieve deleted files and if you want to recover them try some recovery software.
This is why it suggested that you should create a restore point before attempting something that is dangerous or risk of losing your information. This tool isn’t to be played with.
Well Duh! You should have made a backup of your important stuff before using debloater! What were you thinking?
It’s always recommended to run the script on a new installation of Windows but it’s obvious to backup your data before messing up with your primary laptop/desktop. As other recommend, you can try any recovery software to see what all you can restore.
Thank you for this. I did everything mentioned in this article. My system does feel faster than before but the transparency effects are now gone. Even when the toggle is on, I don’t the effect anywhere. Can you please help me with that?
Awesome stuff ! made my windows 11 a lot snappier ..