When you have a smart AI-powered virtual assistant like “Cortana” ready to answer your queries, offer up the latest news, and even break laughter with tongue in cheek jokes, computing on Windows 10 never seems to be a mundane affair. That being said, Cortana isn’t perfect as there are quite a few hurdles that prevent the personal assistant from realizing its full potential. Also, if you own a budget PC, Cortana can be bad for you as it consumes quite a lot of resources. And then there’s the doubt that it might always be listening to our private conversation. For all these reasons or for a reason of your own, if you want to disable Cortana on Windows 10 you have come to the right place. In this article, we are going to show you step-by-step guide to remove Cortana from Windows 10 devices.
Disable Cortana in Windows 10 with Ease
Why Would You Want to Disable Cortana
Before diving straight into the guide, let’s delve a little deeper into why you may want to disable Cortana on your Windows 10 PC. One of the prime reasons why a lot of PC users aren’t happy with Cortana is that it’s extremely restrictive. Whenever you ask it anything, it uses Edge browser and Bing search to answer the query. Though I have always found Bing up to the mark, it’s not yet at par with Google Search.
The other reason could be privacy. The AI assistant shares some personal information like location, schedule, interests and other data points with Microsoft to offer more accurate and personalized answers. Even though Microsoft promises that your data is secure and never shared with anyone else, the history of pathetic data management by companies like Google and Facebook doesn’t inspire any confidence.
Finally, if you are on a budget or old PC running Windows 10, Cortana might be too taxing on the hardware and making things slow. You might want to disable Cortana to speed up your PC.
What Happens When You Disable Cortana
Remember, Cortana is designed to work with Windows 10 seamlessly and therefore Microsoft doesn’t want you to put it off. When you disable the virtual assistant, you will no longer get personalized news, reminders and natural language search through your files. So, move ahead with the process, keeping these disadvantages in mind.
Earlier, there used to be a simple switch to disable the personal assistant. However, with the introduction of the Windows 10 Anniversary Update, the tech giant has removed that easy option. But bother not, there are a couple of hacks to get over the line. Let’s get started!
Disable Cortana Using Registry in Windows 10
You can use the native Registry Editor to disable Microsoft’s virtual assistant on your computer running Windows 10 Home or Pro. Do note that Registry is meant for serious stuff and therefore you must be very cautious while dealing with it. The better way to go ahead is to create a restore point so that you will always be on the safer side of the stream.
To do so, enter “system restore” in the Windows search box and choose “Create a restore point”. Then, you need to click on “Create” and give it a name. Finally, click on “Create” again. If you want to have an even more reliable safeguard, create a full backup of your computer. Now that your data is fully safe, let’s see how you can disable Cortana.
1. First off, open the Registry Editor on your PC. To do so, press Windows+R keys and type “regedit” into the box. Then, press Enter.

2. Now, head over to the below-given key in the left sidebar.
HKEY_LOCAL_MACHINE\SOFTWARE\Policies\Microsoft\Windows\Windows Search
3. Next, right-click the “Windows Search” key folder in the left pane and choose “New”. Then, select “DWORD (32-bit) Value”.

Note: Just in case, you don’t find the Windows Search key folder under the Windows folder, simply right-click the Windows folder and choose New. Then, Click on Key and name it Windows Search.
4. Next up, you need to name the value of “AllowCortana”. Just double-click on it and be sure to set the value as “0”.

5. To make the changes come into effect, simply sign out and then sign back in or restart your computer.
That’s pretty much it! Now, a regular search bar will take over Cortana. Go ahead and use your computer, knowing the personal assistant will no longer be craving for your attention. Keep in mind, it is just hidden and still running in the background.

Later, if you happen to change your mind and wish to use Cortana again, all you need to do is come back at this very setting and find “AllowCortana” value. Then, you can set it to “1” or delete it to restore the functionality.
Disable Cortana Using Registry Files
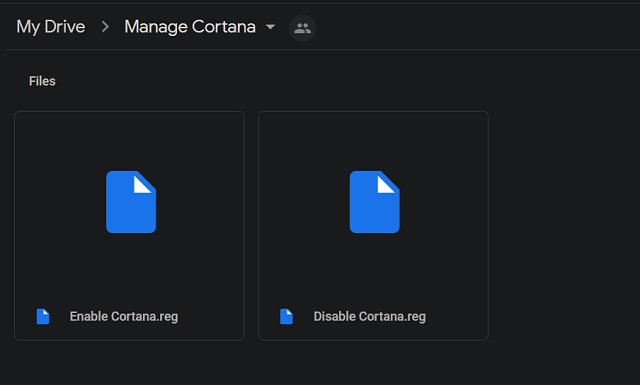
If you found the above process to be a little more intimidating, you can use our registry files to do it in a few simple clicks.
1. We have created two Registry files which can enable or disable Cortana in a click. So download both the files from here.
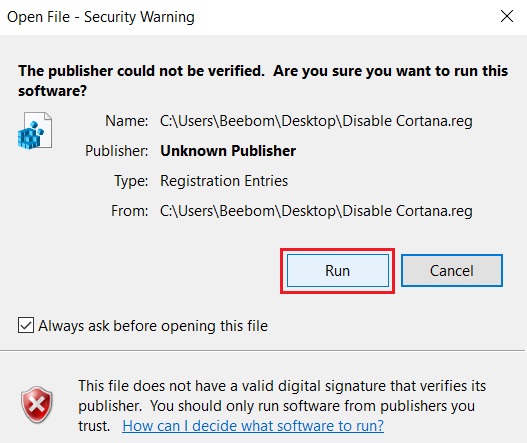
2. After that, double click on “Disable Cortana” and click on “Run”. That’s it. Now restart your computer and Cortana will be gone.
Note: Microsoft keeps adding back Cortana after every Windows update. So you will have to run the same Registry files to disable it again.
Disable Cortana Using Group Policy in Windows 10
If you are using Windows 10 Pro or Enterprise version, you can disable Cortana with ease thanks to Group Policy-the feature that’s aimed at offering centralized management and configuration of operating systems as well as apps.
1. To get started, open Group Policy editor on your computer. To do so,
press Windows + R keys and then type “gpedit.msc” into the box. After that, hit Enter.

2. Now, head over to Computer Configuration and choose “Administrative Templates”. Then, click on Windows Components and select “Search”. Then, find the “Allow Cortana” setting in the right pane and double-click it.

3. Next up, make sure to set the Allow Cortana option to “Disabled” and choose “OK”.

4. Up next, either restart your computer or log out of the group policy editor and log back in.
That’s done! Microsoft Cortana has been disabled on your computer. If you ever want it back, simply return to this same setting and then double-click the “Enable Cortana”. Then, you will need to change it to “Enabled” or “Not Configured”.
SEE ALSO: Windows 10 Home vs Windows 10 Pro: Which One Should You Choose
Keep Cortana Hidden on Your Windows 10 PC
So, that’s how you can keep Cortana under the wrap on your computer. Use these smart hacks whenever you think that you are better off without the virtual assistant or think that your PC has more calm without it. Personally, I’m pretty fond of Microsoft’s personal assistant as it comes in handy for several things but your mileage may vary. Do let us know your reasons for disabling Cortana by writing in the comments section below.