Apple Notes is one of the best built-in apps that come with Apple devices. Apple has been improving the notes app a lot both in terms of features and looks. For example, the iOS 14 beta features a new on-device intelligence mode and a cleaner look. But today, we are not talking about those features. Instead, we will learn about an important Apple Notes feature that was introduced a while back. It’s the ability to lock individual notes on Apple Notes, and today we will show you can do it.
Lock Individual Notes in Apple Notes on Mac and iPhone
Most of us save sensitive information in the Apple Notes app. And while the app is secure, adding an extra layer of security for extra-sensitive information is always warranted. To allow users to protect their data, Apple launched a new feature that lets users lock individual notes. I have divided this article into two sections for showing the different steps on Mac and iPhone. You can click on the link below to switch to the section you want.
Protect Notes on Mac by Locking Apple Notes
The steps to lock your notes on any device are easy. Note that, although you will be locking notes individually, you have to set the password only one time. Once you set the password, all the notes are locked using the same password. And if your Mac supports Touch ID, you can unlock them using it. Okay, with that said, let’s get to our tutorial.
1. Launch the Notes and select the note that you want to lock.

2. We will start by setting a password for the lock. First, click on the lock icon and then click on “Lock Note”.

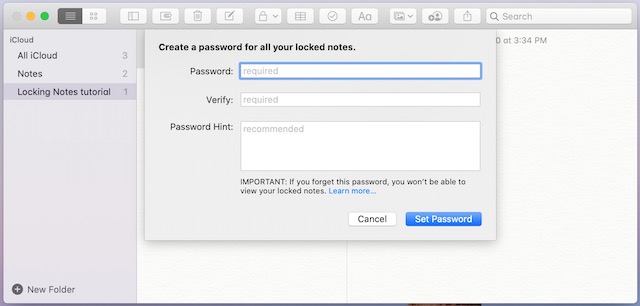
3. Then fill the password fields with the password you want to keep and click on “Set Password”.
4. You will see that the note is still visible. Apple automatically lock notes after a period of inactivity. If you want to manually lock notes, click on the lock icon again and select “Close All Locked Notes”.

5. Another way to lock a note is by swiping right-to-left on a note with two-fingers and click on the lock icon.

6. This is how locked notes look when they are locked. You will have to enter the password or verify with Touch ID to unlock them.

Lock Notes on iPhone and iPad
There are multiple ways for locking notes on your iPhone and iPad. I have explained all of them below.
1. To lock a note, swipe right-to-left on a note, and tap on the lock icon.

2. Another way of locking a note is by using the haptic-touch menu. Long-press on a note, and select the “Lock Note” option.

3. The final method that you can use to lock a note is also easy. Just open the note you want to lock, click on the share icon, and tap on the “Lock Note” option.

Note: When you use any of the above methods to lock your notes for the first time, it will ask you to enter a password for locking notes.
4. If you want to change your locked notes password, go to Settings -> Notes -> Password and reset the password.

Note: You can create different passwords for notes saved on your iPhone and the ones saved on iCloud.
Protect Private Notes by Locking Them Behind a Password
So that’s how you can lock individual notes in Apple Notes app behind a password. I love this feature along with the Apple Notes sharing feature all the time. These two features have made Apple Notes so much better. Do you lock your notes? Let us know in the comments below.