


In our earlier article, we demonstrated how to build an AI chatbot with the ChatGPT API and assign a role to personalize it. But what if you want to train the AI on your own data? For example, you may have a book, financial data, or a large set of databases, and you wish to search them with ease. In this article, we bring you an easy-to-follow tutorial on how to train an AI chatbot with your custom knowledge base with LangChain and ChatGPT API. We are deploying LangChain, GPT Index, and other powerful libraries to train the AI chatbot using OpenAI’s Large Language Model (LLM). So on that note, let’s check out how to train and create an AI Chatbot using your own dataset.
Notable Points Before You Train AI with Your Own Data
1. You can train the AI chatbot on any platform, whether Windows, macOS, Linux, or ChromeOS. In this article, I’m using Windows 11, but the steps are nearly identical for other platforms.
2. The guide is meant for general users, and the instructions are explained in simple language. So even if you have a cursory knowledge of computers and don’t know how to code, you can easily train and create a Q&A AI chatbot in a few minutes. If you followed our previous ChatGPT bot article, it would be even easier to understand the process.
3. Since we are going to train an AI Chatbot based on our own data, it’s recommended to use a capable computer with a good CPU and GPU. However, you can use any low-end computer for testing purposes, and it will work without any issues. I used a Chromebook to train the AI model using a book with 100 pages (~100MB). However, if you want to train a large set of data running into thousands of pages, it’s strongly recommended to use a powerful computer.
4. Finally, the data set should be in English to get the best results, but according to OpenAI, it will also work with popular international languages like French, Spanish, German, etc. So go ahead and give it a try in your own language.
Set Up the Software Environment to Train an AI Chatbot
Install Python and Pip
1. First off, you need to install Python along with Pip on your computer by following our linked guide. Make sure to enable the checkbox for “Add Python.exe to PATH” during installation.


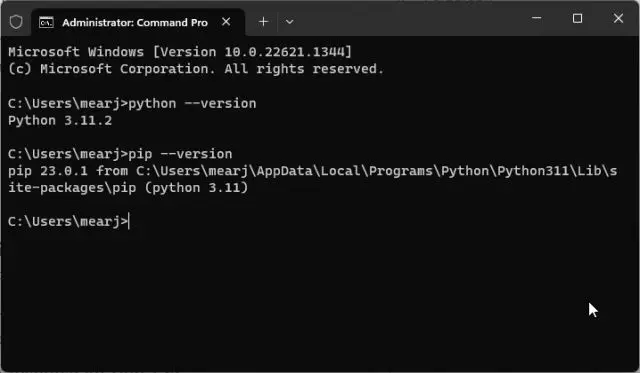
2. To check if Python is properly installed, open the Terminal on your computer. Once here, run the below commands one by one, and it will output their version number. On Linux and macOS, you will have to use python3 instead of python from now onwards.
python --version
pip --version

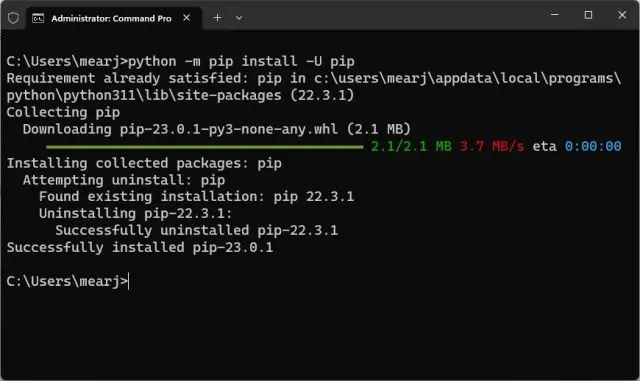
3. Run the below command to update Pip to the latest version.
python -m pip install -U pip

Install OpenAI, GPT Index, PyPDF2, and Gradio Libraries
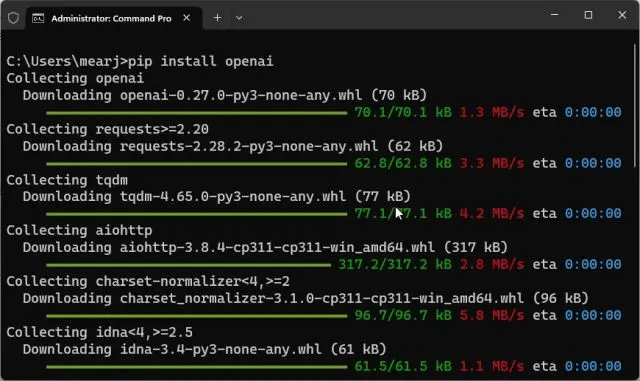
1. Open the Terminal and run the below command to install the OpenAI library.
pip install openai
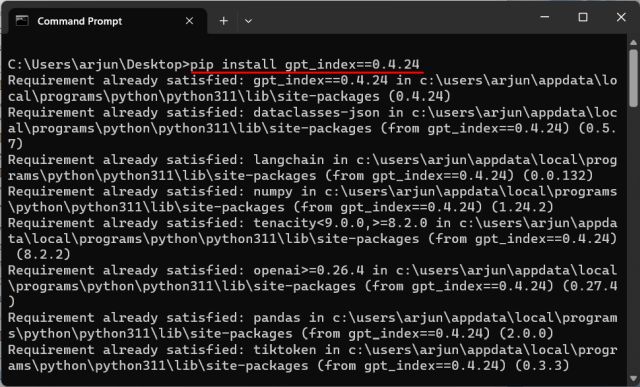
2. Next, let’s install GPT Index.
pip install gpt_index==0.4.24

3. Now, install Langchain by running the below command.
pip install langchain==0.0.148

4. After that, install PyPDF2 and PyCryptodome to parse PDF files.
pip install PyPDF2
pip install PyCryptodome

5. Finally, install the Gradio library. This is meant for creating a simple UI to interact with the trained AI chatbot.
pip install gradio
Download a Code Editor
Finally, we need a code editor to edit some of the code. On Windows, I would recommend Notepad++ (Download). Simply download and install the program via the attached link. You can also use VS Code on any platform if you are comfortable with powerful IDEs. Other than VS Code, you can install Sublime Text (Download) on macOS and Linux.


For ChromeOS, you can use the excellent Caret app (Download) to edit the code. We are almost done setting up the software environment, and it’s time to get the OpenAI API key.
Get the OpenAI API Key For Free
1. Head to OpenAI’s website (visit) and log in. Next, click on “Create new secret key” and copy the API key. Do note that you can’t copy or view the entire API key later on. So it’s recommended to copy and paste the API key to a Notepad file for later use.


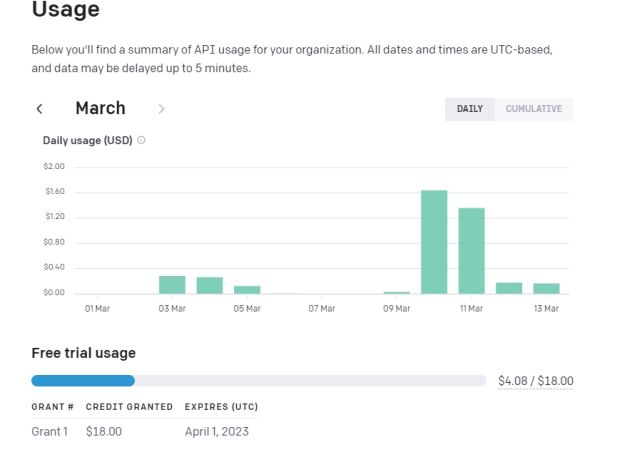
2. Next, go to platform.openai.com/account/usage and check if you have enough credit left. If you have exhausted all your free credit, you need to add a payment method to your OpenAI account.


Train and Create an AI Chatbot With Custom Knowledge Base
Add Your Documents to Train the AI Chatbot
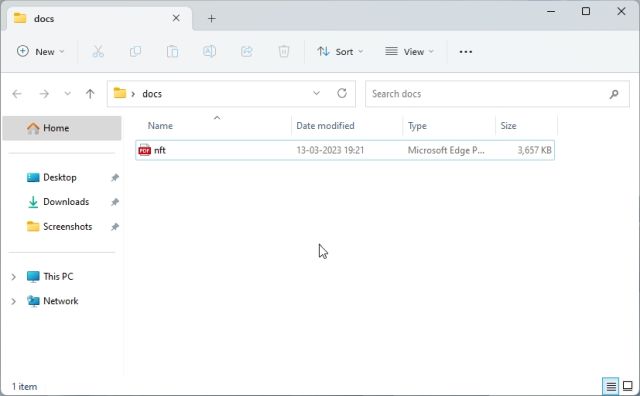
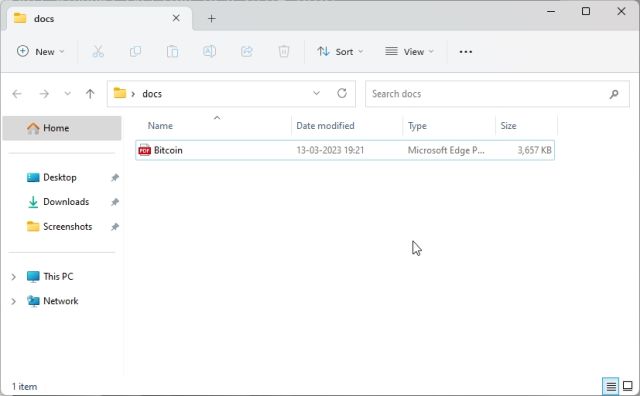
1. First, create a new folder called docs in an accessible location like the Desktop. You can choose another location as well according to your preference. However, keep the folder name docs.


2. Next, move the documents for training inside the “docs” folder. You can add multiple text or PDF files (even scanned ones). If you have a large table in Excel, you can import it as a CSV or PDF file and then add it to the “docs” folder. You can also add SQL database files, as explained in this Langchain AI tweet. I haven’t tried many file formats besides the mentioned ones, but you can add and check on your own. For this article, I am adding one of my articles on NFT in PDF format.
Note: If you have a large document, it will take a longer time to process the data, depending on your CPU and GPU. In addition, it will quickly use your free OpenAI tokens. So in the beginning, start with a small document (30-50 pages or < 100MB files) to understand the process.

Make the Code Ready
1. Now, open a code editor like Sublime Text or launch Notepad++ and paste the below code. Once again, I have taken great help from armrrs on Google Colab and tweaked the code to make it compatible with PDF files and create a Gradio interface on top.
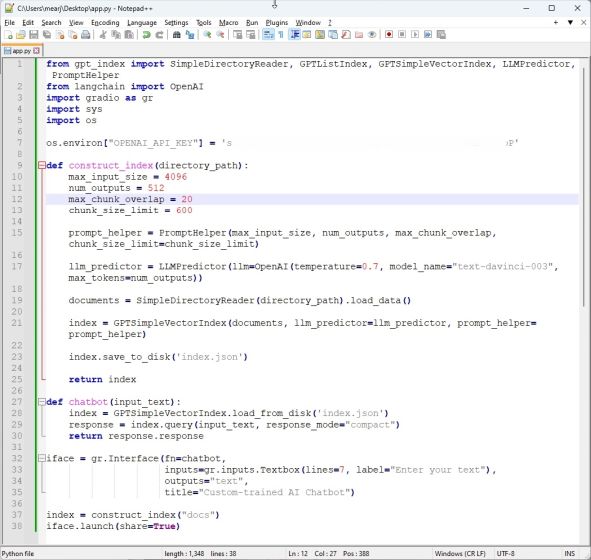
from gpt_index import SimpleDirectoryReader, GPTListIndex, GPTSimpleVectorIndex, LLMPredictor, PromptHelper
from langchain.chat_models import ChatOpenAI
import gradio as gr
import sys
import os
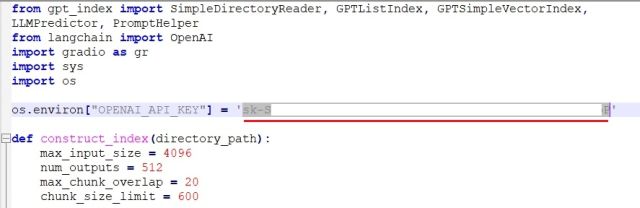
os.environ["OPENAI_API_KEY"] = 'Your API Key'
def construct_index(directory_path):
max_input_size = 4096
num_outputs = 512
max_chunk_overlap = 20
chunk_size_limit = 600
prompt_helper = PromptHelper(max_input_size, num_outputs, max_chunk_overlap, chunk_size_limit=chunk_size_limit)
llm_predictor = LLMPredictor(llm=ChatOpenAI(temperature=0.7, model_name="gpt-3.5-turbo", max_tokens=num_outputs))
documents = SimpleDirectoryReader(directory_path).load_data()
index = GPTSimpleVectorIndex(documents, llm_predictor=llm_predictor, prompt_helper=prompt_helper)
index.save_to_disk('index.json')
return index
def chatbot(input_text):
index = GPTSimpleVectorIndex.load_from_disk('index.json')
response = index.query(input_text, response_mode="compact")
return response.response
iface = gr.Interface(fn=chatbot,
inputs=gr.components.Textbox(lines=7, label="Enter your text"),
outputs="text",
title="Custom-trained AI Chatbot")
index = construct_index("docs")
iface.launch(share=True)
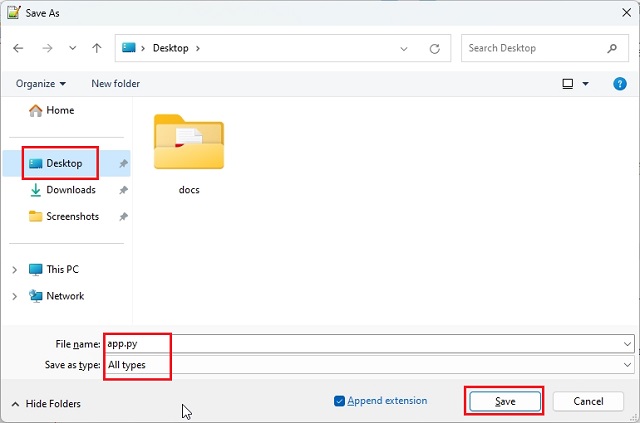
2. Next, click on “File” in the top menu and select “Save As…” . After that, set the file name app.py and change the “Save as type” to “All types”. Then, save the file to the location where you created the “docs” folder (in my case, it’s the Desktop).

3. Make sure the “docs” folder and “app.py” are in the same location, as shown in the screenshot below. The “app.py” file will be outside the “docs” folder and not inside.


4. Come back to the code again in Notepad++. Here, replace Your API Key with the one that you generated above on OpenAI’s website.

5. Finally, press “Ctrl + S” to save the code. You are now ready to run the code.

Create ChatGPT AI Bot with Custom Knowledge Base
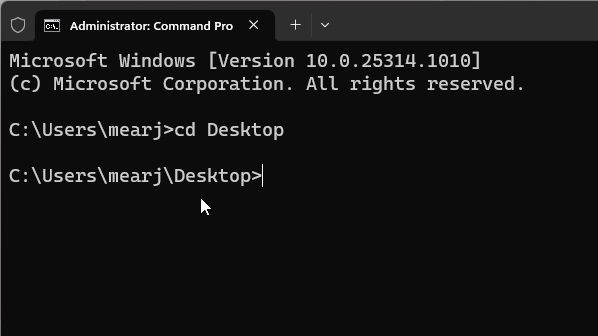
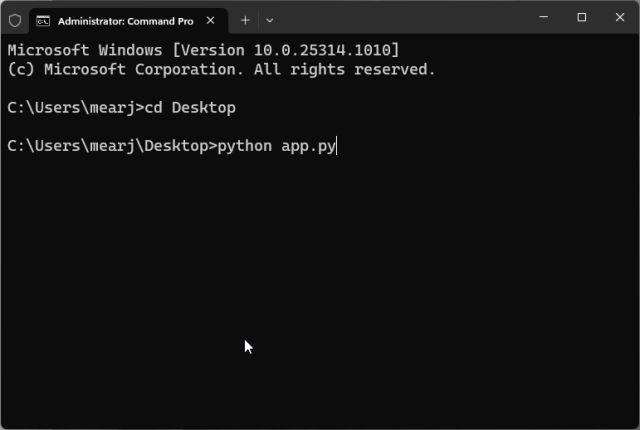
1. First, open the Terminal and run the below command to move to the Desktop. It’s where I saved the “docs” folder and “app.py” file.
cd Desktop

2. Now, run the below command.
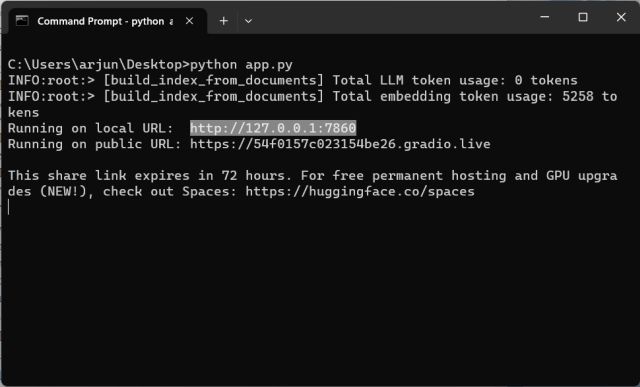
python app.py


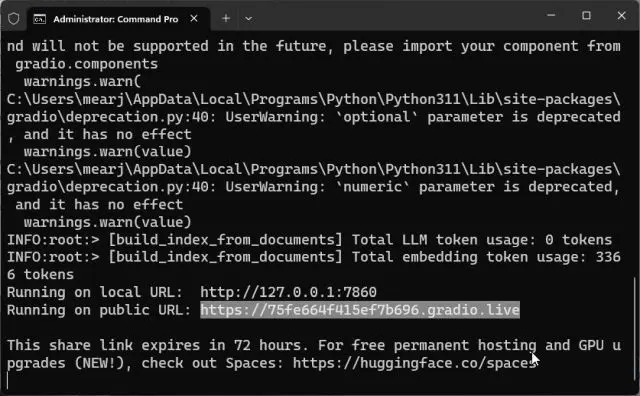
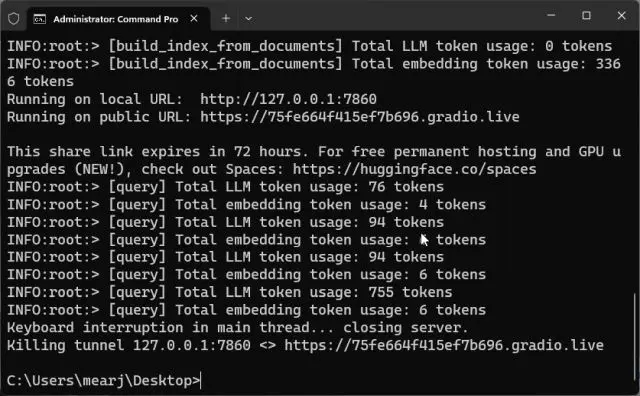
3. It will start indexing the document using the OpenAI LLM model. Depending on the file size, it will take some time to process the document. Once it’s done, an “index.json” file will be created on the Desktop. If the Terminal is not showing any output, do not worry, it might still be processing the data. For your information, it takes around 10 seconds to process a 30MB document.


4. Once the LLM has processed the data, you will find a local URL. Copy it.
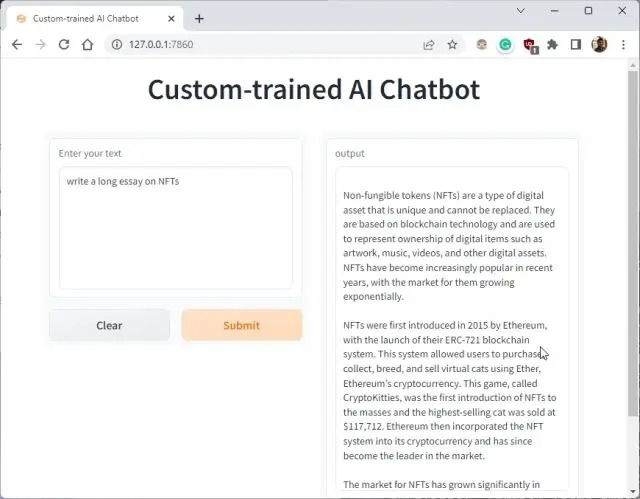
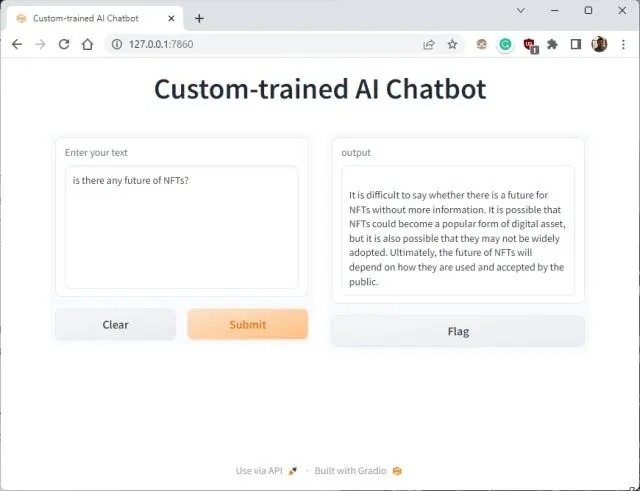
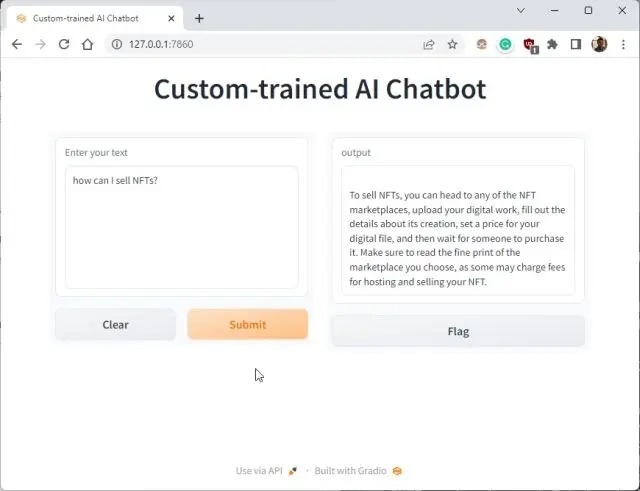
5. Now, paste the copied URL into the web browser, and there you have it. Your custom-trained ChatGPT-powered AI chatbot is ready. To start, you can ask the AI chatbot what the document is about.


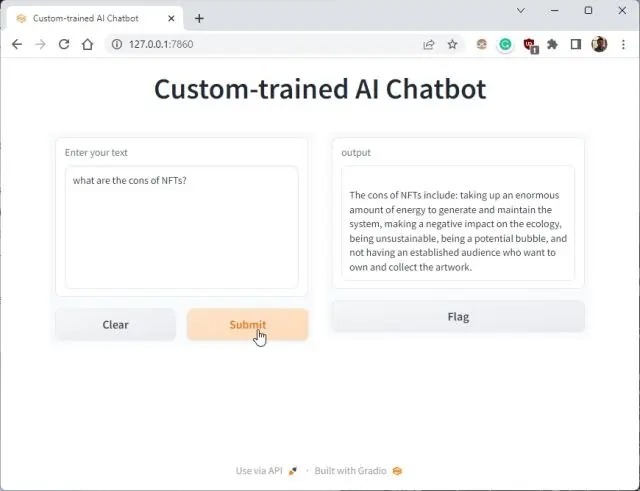
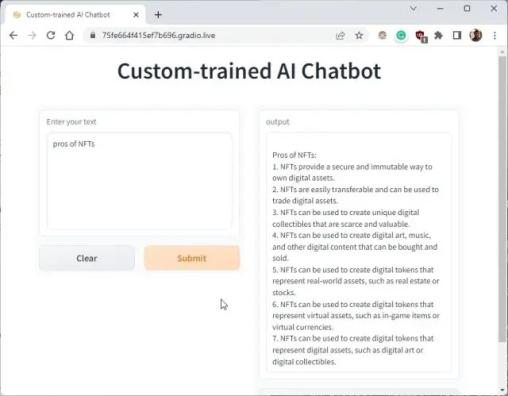
6. You can ask further questions, and the ChatGPT bot will answer from the data you provided to the AI. So this is how you can build a custom-trained AI chatbot with your own dataset. You can now train and create an AI chatbot based on any kind of information you want.


Manage the Custom AI Chatbot
1. You can copy the public URL and share it with your friends and family. The link will be live for 72 hours, but you also need to keep your computer turned on since the server instance is running on your computer.

2. To stop the custom-trained AI chatbot, press “Ctrl + C” in the Terminal window. If it does not work, press “Ctrl + C” again.
3. To restart the AI chatbot server, simply move to the Desktop location again and run the below command. Keep in mind, the local URL will be the same, but the public URL will change after every server restart.
python app.py

4. If you want to train the AI chatbot with new data, delete the files inside the “docs” folder and add new ones. You can also add multiple files, but make sure to add clean data to get a coherent response.
5. Now, run the code again in the Terminal, and it will create a new “index.json” file. Here, the old “index.json” file will be replaced automatically.
python app.py

6. To keep track of your tokens, head over to OpenAI’s online dashboard and check how much free credit is left.

7. Lastly, you don’t need to touch the code unless you want to change the API key or the OpenAI model for further customization.


I got mine working but it lies! I believe the word might be “hallucinates”. I added a CSV of a list of 648 pet food products with prices and other parameters. When I asked how many sold products were cat food it said “one”. When I asked how many total products were cat food it said “three”. Looking at the data, this was clearly incorrect.
I had problems all weekend with authentication error. Since you have the most recent comment, checking if you had the same issue and found a work around?
Same. Can anoyone please help with authentication error?
File “/Library/Frameworks/Python.framework/Versions/3.11/lib/python3.11/site-packages/tenacity/__init__.py”, line 326, in iter
raise retry_exc from fut.exception()
tenacity.RetryError: RetryError[]
I also have the same error, any fix?
I added this after ‘import os’ line and it worked
import openai
openai.api_key = ‘– YOUR API KEY –‘
Have all installed and seemed to be working, except I don’t get the url or the .json file. Here is an error I’m getting at the end
raise ValueError(
ValueError: A single term is larger than the allowed chunk sizes.
Term size: 607
Chunk sizes: 600Effective chunk size: 600
Any ideas?
Increase the chunk size or the document you are using contains characters it doesn’t like. I found one PDF was causing this error.
I get this error:
INFO:openai:error_code=None error_message=’Rate limit reached for default-text-embedding-ada-002 in organization org-{my org id} on tokens per min. Limit: 150000 / min. Current: 1 / min.
Sometimes it even says that current is 0 / min. I do have 5$ credits on my API key.
I have encountered an error:
INFO:openai:error_code=None error_message=’Rate limit reached for default-text-embedding-ada-002 in organization org-vAmu8wHZ5zAeIzaSufri1VTN on tokens per min. Limit: 150000 / min. Current: 1 / min. Contact us through our help center at help.openai.com if you continue to have issues. Please add a payment method to your account to increase your rate limit. Visit https://platform.openai.com/account/billing to add a payment method.’ error_param=None error_type=tokens message=’OpenAI API error received’ stream_error=False
However, I do have 5$ credits on my OpenAI account. Is there a way to fix it?
Thanks. How do I view the responses bot makes after running on the server
Hello! Your article is great and easy to understand! Thank you so much!
– but I have encountered some questions. Can you help me?
1. There is too little text generated by AI, I don’t know how to make the reply longer.
2. AI quickly forgot about the content in my PDF (in my case, PDF is a role-playing introduction, and I want AI to role-play)
Is there any method that allows us to train a chatbot on a custom set of data ONLY? Where it doesn’t have any knowledge from other outside sources?
This is literally what this article does
Getting this error while trying to run python app.py
C:\Users\Red\Desktop>python app.py
Traceback (most recent call last):
File “C:\Users\Red\Desktop\app.py”, line 37, in
index = construct_index(“docs”)
^^^^^^^^^^^^^^^^^^^^^^^
File “C:\Users\Red\Desktop\app.py”, line 19, in construct_index
documents = SimpleDirectoryReader(directory_path).load_data()
^^^^^^^^^^^^^^^^^^^^^^^^^^^^^^^^^^^^^
File “C:\Users\Red\AppData\Local\Programs\Python\Python311\Lib\site-packages\gpt_index\readers\file\base.py”, line 92, in __init__
self.input_files = self._add_files(self.input_dir)
^^^^^^^^^^^^^^^^^^^^^^^^^^^^^^^
File “C:\Users\Red\AppData\Local\Programs\Python\Python311\Lib\site-packages\gpt_index\readers\file\base.py”, line 99, in _add_files
input_files = sorted(input_dir.iterdir())
^^^^^^^^^^^^^^^^^^^^^^^^^^^
File “C:\Users\Red\AppData\Local\Programs\Python\Python311\Lib\pathlib.py”, line 931, in iterdir
for name in os.listdir(self):
^^^^^^^^^^^^^^^^
FileNotFoundError: [WinError 3] The system cannot find the path specified: ‘docs’
Traceback (most recent call last):
File “C:\Users\gofly\Desktop\CUSTAI.PY”, line 37, in
index = construct_index(“docs”)
^^^^^^^^^^^^^^^^^^^^^^^
File “C:\Users\gofly\Desktop\CUSTAI.PY”, line 19, in construct_index
documents = SimpleDirectoryReader(directory_path).load_data()
^^^^^^^^^^^^^^^^^^^^^^^^^^^^^^^^^^^^^
File “C:\Users\gofly\AppData\Local\Programs\Python\Python311\Lib\site-packages\gpt_index\readers\file\base.py”, line 92, in __init__
self.input_files = self._add_files(self.input_dir)
^^^^^^^^^^^^^^^^^^^^^^^^^^^^^^^
File “C:\Users\gofly\AppData\Local\Programs\Python\Python311\Lib\site-packages\gpt_index\readers\file\base.py”, line 99, in _add_files
input_files = sorted(input_dir.iterdir())
^^^^^^^^^^^^^^^^^^^^^^^^^^^
File “C:\Users\gofly\AppData\Local\Programs\Python\Python311\Lib\pathlib.py”, line 931, in iterdir
for name in os.listdir(self):
^^^^^^^^^^^^^^^^
FileNotFoundError: [WinError 3] The system cannot find the path specified: ‘docs’
Kindly help me…. Im stuck
did you find the solution?
Same issue here
FileNotFoundError: [Errno 2] No such file or directory: ‘docs’
Anyone solved it?
I am having valueError: chunk_overlap_ratio must be a float between 0. and 1. Can anyone pls help me with this?
File “/Library/Frameworks/Python.framework/Versions/3.11/lib/python3.11/site-packages/gradio/routes.py”, line 437, in run_predict
output = await app.get_blocks().process_api(
^^^^^^^^^^^^^^^^^^^^^^^^^^^^^^^^^^^
File “/Library/Frameworks/Python.framework/Versions/3.11/lib/python3.11/site-packages/gradio/blocks.py”, line 1346, in process_api
result = await self.call_function(
^^^^^^^^^^^^^^^^^^^^^^^^^
File “/Library/Frameworks/Python.framework/Versions/3.11/lib/python3.11/site-packages/gradio/blocks.py”, line 1074, in call_function
prediction = await anyio.to_thread.run_sync(
^^^^^^^^^^^^^^^^^^^^^^^^^^^^^^^
File “/Library/Frameworks/Python.framework/Versions/3.11/lib/python3.11/site-packages/anyio/to_thread.py”, line 33, in run_sync
return await get_asynclib().run_sync_in_worker_thread(
^^^^^^^^^^^^^^^^^^^^^^^^^^^^^^^^^^^^^^^^^^^^^^^
File “/Library/Frameworks/Python.framework/Versions/3.11/lib/python3.11/site-packages/anyio/_backends/_asyncio.py”, line 877, in run_sync_in_worker_thread
return await future
^^^^^^^^^^^^
File “/Library/Frameworks/Python.framework/Versions/3.11/lib/python3.11/site-packages/anyio/_backends/_asyncio.py”, line 807, in run
result = context.run(func, *args)
^^^^^^^^^^^^^^^^^^^^^^^^
File “/Users/forrester/Central/docs/app.py”, line 25, in chatbot
index = construct_index(“docs”)
^^^^^^^^^^^^^^^^^^^^^^^
File “/Users/forrester/Central/docs/app.py”, line 14, in construct_index
prompt_helper = PromptHelper(max_input_size, num_outputs, max_chunk_overlap, chunk_size_limit=chunk_size_limit)
^^^^^^^^^^^^^^^^^^^^^^^^^^^^^^^^^^^^^^^^^^^^^^^^^^^^^^^^^^^^^^^^^^^^^^^^^^^^^^^^^^^^^^^^^^^^^^^
File “/Library/Frameworks/Python.framework/Versions/3.11/lib/python3.11/site-packages/llama_index/indices/prompt_helper.py”, line 72, in __init__
raise ValueError(“chunk_overlap_ratio must be a float between 0. and 1.”)
ValueError: chunk_overlap_ratio must be a float between 0. and 1.
Did you resolve it? I am getting the same error
I am having the same error pls someone solve this
thank you so much u saved my life
Hi Arjun,
getting error: from langchain.schema import BaseLanguageModel
ImportError: cannot import name ‘BaseLanguageModel’ from ‘langchain.schema’ (C:\Users\SANJEEV\AppData\Local\Programs\Python\Python311\Lib\site-packages\langchain\schema.py)
Getting the same error, would love to know how to fix that.
Same exact error here.
I´m getting the same error, someone knows how to fix it? I´ve been trying but can´t fix it
pip install llama-index==0.5.6
pip install langchain==0.0.148
getting the same error
Most likely you have newer versions installed, needs some code tinkering.
That it worked for me
pip install langchain==0.0.118
pip install gpt_index==0.4.24
Try to install/update the following libraries, it may work for you
I’ve tried installing the above but still doesn’t work. Now I get the error
ModuleNotFoundError: No module named ‘gpt_index’
Can anyone help with this? 🙂
I get the same error when following these directions, no module named gpt-index.
pip install langchain==0.0.118 worked for me
Nice tutorial! One question, it doesn’t seem to hold context between inputs, one very important feature. Am I doing something wrong or is this a limit in the code when using the API?
I am getting on mac , any pointers how to solve this? frpc_darwin_arm64-v0.2 has been blocked. I am on Mac m1 however I tried with Rosette it did not work
I was able to make this work after some struggles with python libraries and having to chunk my dataset into smaller bits. But, running this on my laptop, the outcome is REALLY slow. Anybody else experience that?
I get this frpc_darwin_arm64-v0.2 has been blocked. is this file harmful?
The app working. But GPT working not well, used pdf for the test.
Thanks.
Anyone figure out longer response length? I can’t seem to find anyway to get longer responses. Everything is always cut off part way through the reply.
How to Train an AI Chatbot With Custom Knowledge Base Using ChatGPT API using asp .net core
Is it possible to execute this custom model programmatically instead of via chat?
I had the problem: “ImportError: cannot import name ‘BaseLanguageModel’ from ‘langchain.schema'”
Thanks to the folks above I:
1) uninstalled langchain. (which had been 0.0.181)
( you can check the version with “pip show langchain”)
2) Installed the older version with :
pip install langchain==0.0.132
It worked.
Thanks! this solved it for me too.
Thanks you !!.
I tried to run the python code using Visual Studio Code on a old Windows Machine…. and ran almost flawlessly except for the following error ” ImportError: cannot import name ‘BaseLanguageModel’ from ‘langchain.schema” which is fixed by running “pip install langchain==0.0.153” on the VS Code Terminal…
Thanks again for sharing this code that works !!!!
If my data is confidential, will this expose my data to open ai?
of course, you are sending confidential data to an external entity. Read the agreement that you agreed when you signed up with OpenAI.
worked great on my MAC just had to change “langchain==0.0.153”
Also, if you are having any problems, just copy and paste your error code into Chat GPT, and it will work you through it
thanks