With contactless payments becoming the new standard, Apple Pay is a go-to option for many Apple users. After all, it’s super convenient and secure to use your iPhone or Apple Watch to make payments in stores, apps, or websites that accept Apple Pay. Rather than digging your pockets or wallet to find your cards or the exact amount of cash, you can quickly pay with the device in your hand. If you’re wondering how to set up Apple Pay, it’s actually pretty simple. We’ll show you how to set up and use Apple Pay on iPhone, Apple Watch, iPad, and Mac. Let’s begin!
Note: Currently, Apple Pay is available in 70 countries. Before you begin, check if Apple Pay works in your country/region.
What Do You Need to Activate Apple Pay
- An iPhone, iPad, Apple Watch, or Mac.
- The device should run the latest version of iOS, iPadOS, watchOS, or macOS.
- A supported credit or debit card from a participating bank or card issuer.
- An Apple ID signed in to your iCloud account.
Set up Apple Pay on iPhone
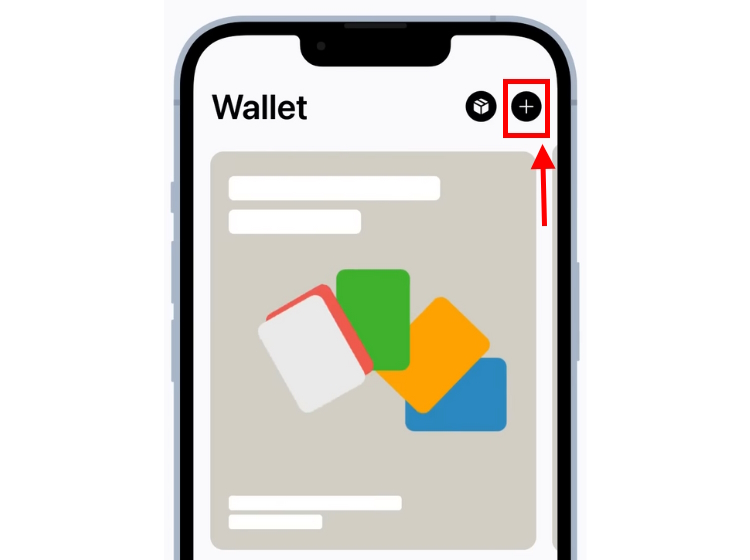
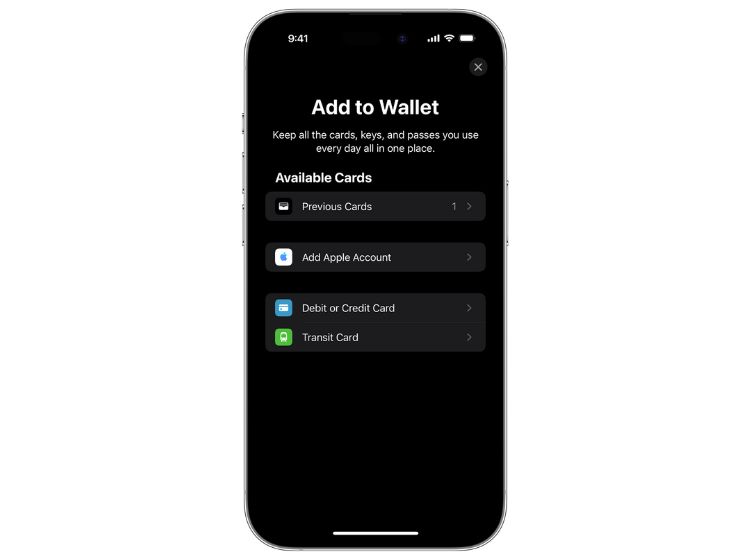
1. Open the Wallet app, tap the “+ icon” from the top-right corner.
2. If prompted, enter your Apple ID and password. Then, tap Next.
3. Now, you’ll get three options: add a new card, a previous card, or a card from a supported app.
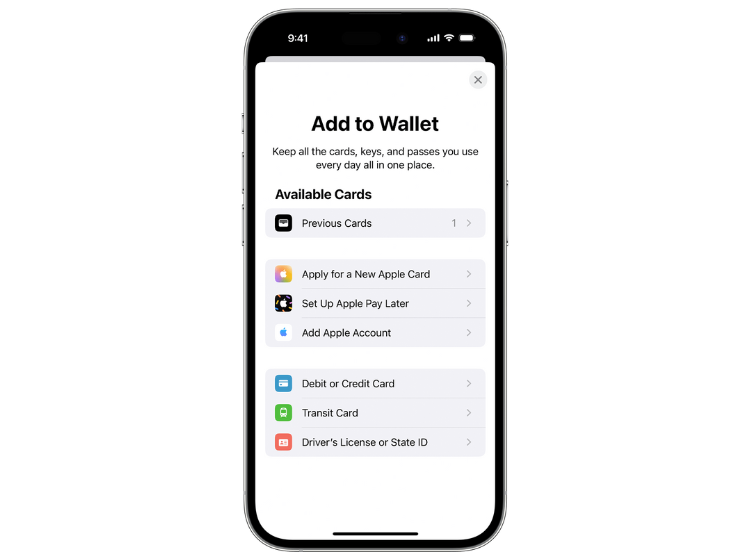
4. We’ve mentioned all three methods below. Jump to the one that you want to use.
Add a New Card in Wallet App on iPhone
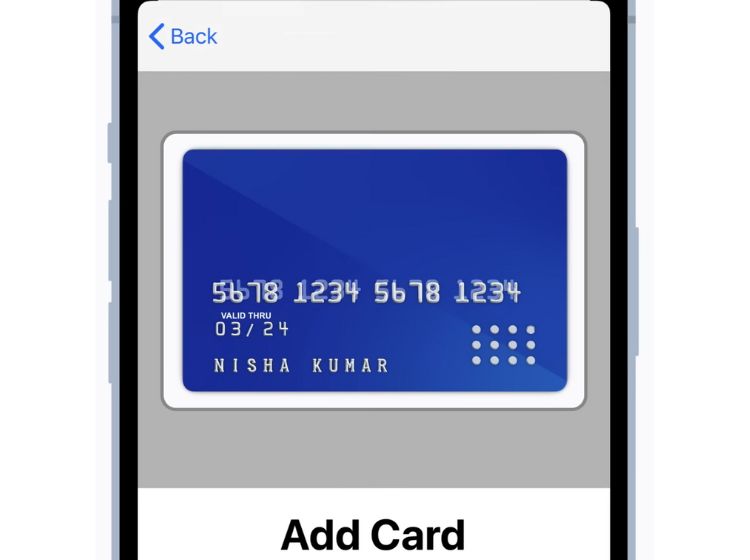
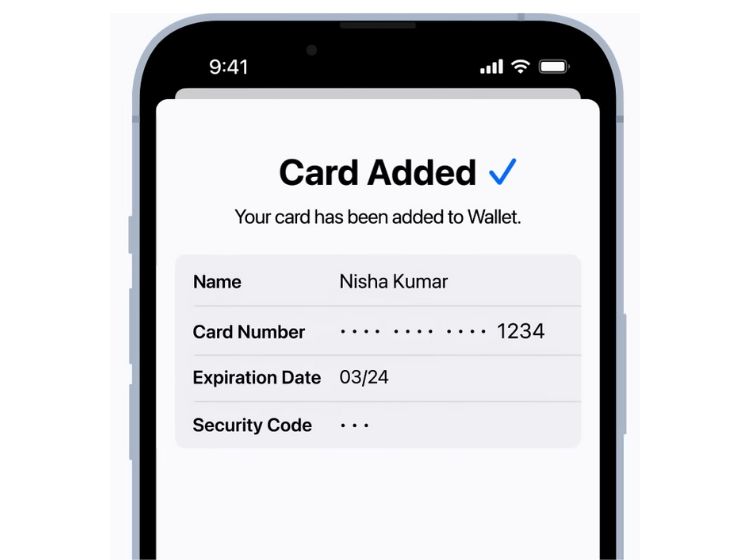
- Tap Debit or Credit card and hit the Continue button. You use your iPhone’s camera to scan the card. Place your card on a flat surface in such a way that the Name and Card Number appear clearly in the frame. Alternatively, you can choose to enter card details manually (option present at the bottom).
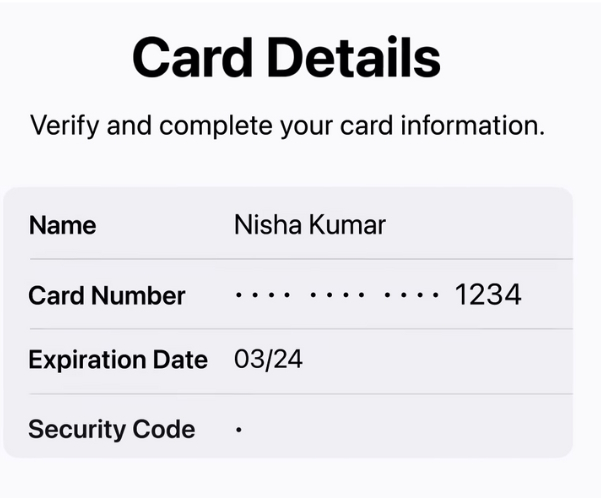
- In both methods, you’ll have to enter the expiration date and security code (CVV) written on the back of the card.
- When prompted, agree to the terms and conditions.
- Next up, you have to email, text, or call your card issuer or bank, asking them to verify your card. Once the card is approved, you’ll get an activation code. Enter that code and tap Next.
- Finally, tap Use as Default Card or Not Now. Once you complete this step, your card will be added to the Wallet app. Going further, you can use Apple Pay on your iPhone.
- You can repeat the steps to add more cards (up to 12) on an iPhone.
Add a Previously Used Card in Wallet app on iPhone
- Tap Previous Cards and select the cards from the list.
- Tap Continue and authenticate with your Face ID or Touch ID.
- Go along the on-screen instructions to add your cards and set up Apple Pay on your iPhone.
Use a Card from a Supported App
- Under the “From Apps on your iPhone” section, tap the app of your bank or the card issuer.
- Follow the on-screen instructions and set up Apple Pay on your iPhone.
Set up Apple Card on iPhone
Apple offers its own credit card, named Apple Card that you can add to the Wallet app and use it with Apple Pay on your iPhone. Here’s how to set up and use Apple Card on an iPhone:
Note: Apple Card is available only in the US.
1. On the Wallet app on your iPhone, tap the “+” icon and then choose “Apply for Apple Card“.
2. Enter your information, including Name, Date of Birth, Phone, and Address.
3. Next, you have to verify your identity. You might be asked to enter the last four digits of your SSN (Social Security Number). Punch the digits and tap Next.
4. Enter your annual income and tap Next.
5. Once you’ve entered all the details, review the terms and conditions and tap Agree to submit your Apple Card application.
6. After your application is approved, you should see a screen showing your Credit Limit, APR, and Fees.
7. Tap Accept Apple Card to get the credit card.
8. To set your Apple Card as the default payment option, choose Set as Preferred Card.
9. You can also choose to get a physical titanium Apple Card to pay at merchants that don’t support Apple Pay. To get the card, tap Continue, double-check your address, and hit the Confirm button.
10. If an app or website doesn’t accept Apple Pay and you don’t have a physical titanium card, you can still use the Apple Card. For this, tap the card in the Wallet app to see its card number, expiration date, and security code.
Set up Apple Pay on Apple Watch
When you add a card to your Wallet on your iPhone, you get an option (at the end) to add it to your paired Apple Watch. You have to tap “Add Now“, enter a security code, and the card will be available on your Apple Watch. If you have missed it, you can set up Apple Pay on your Apple Watch via the Watch app on your iPhone.
1. Open the Watch app on your iPhone paired with Apple Watch.
2. Go to the My Watch tab and tap Wallet & Apple Pay.
3. Tap “Add Card“. To add a new card, tap Debit or Credit Card. To add a card you’ve used previously, tap Previous Cards.
4. Tap “Continue” and follow the on-screen instructions to set up Apple Pay on your watch.
5. If asked, you might need to verify information with your bank or the card issuer. You might be asked to provide more information or download the app to approve your card for using Apple Pay.
6. Once the verification is done, tap Next and you’re ready to use Apple Pay with your watch.
Set up Apple Pay on iPad
There’s no Wallet app on an iPad to make online purchases on apps and websites. Worry not, you can add a card and set up Apple Pay on your iPad by heading to its Settings. Here’s the complete breakdown of steps:
1. Head to Settings -> Wallet & Apple Pay.
2. Tap the “Add Card” button.
3. If you want to add a new card, tap Debit or Credit Card.
4. If you’ve already added a card to the Wallet app on your iPhone and want to use it as your payment option, tap Previous Cards. You’ll see a list of cards added to your iPhone, if you don’t want to add a card to your iPhone, simply uncheck it and tap Continue.
5. Finally, you need a verification check from your bank on the card that you wish to set up and use with Apple Pay on your iPad.
Set up Apple Pay on Mac
Note: You can add a card and use Apple Pay only on Macs with Touch ID.
1. On your Mac with Touch ID, open System Preferences > Wallet & Apple Pay.
2. Then, click the “Add Card” option and follow the on-screen instructions to activate Apple Pay on your Mac.
3. Next up, you need to verify the information with your bank or card issuer. They might ask you to provide more information before they decide if you can use your card for Apple Pay.
4. Once the information gets verified, tap Next and you can use Apple Pay with your Mac.
On Macs without Touch ID, you can make purchases using Apple Pay on your iPhone or Apple Watch. In your iPhone settings or the Watch app, tap Wallet & Apple Pay and toggle ON “Allow Payments on Mac“. The next time you make a purchase using Apple Pay on Mac, you can confirm the payment from your iPhone or watch.