


Fingerprint gestures have been around for quite a while now. Most devices, like the Google Pixel, feature a single swipe down gesture on their fingerprint scanner to reveal the notification shade. Other manufacturers like Motorola have gone further ahead, with the idea to completely replace the navigation bar. For example, on the Moto G5, you can swipe left to go back, tap to return home and swipe right for your recent apps. So, when Android Oreo came to the scene, many users expected the ability to customize fingerprint gestures to come as a native feature in the OS. While Android Oreo did come with a plethora of new features, customizing fingerprint gestures wasn’t one of them. Well, fret not, for if you own an Android Oreo device and wish to make more of the fingerprint sensor on your device, read on as we bring to you how to customize fingerprint gestures on your Android Oreo device:
Customize Fingerprint Gestures on Android Oreo
Note: The following method requires devices to be running on Android Oreo 8.0. I tried it on my Nexus 5X and Pixel, both running stock Android Oreo 8.0, and it worked well.
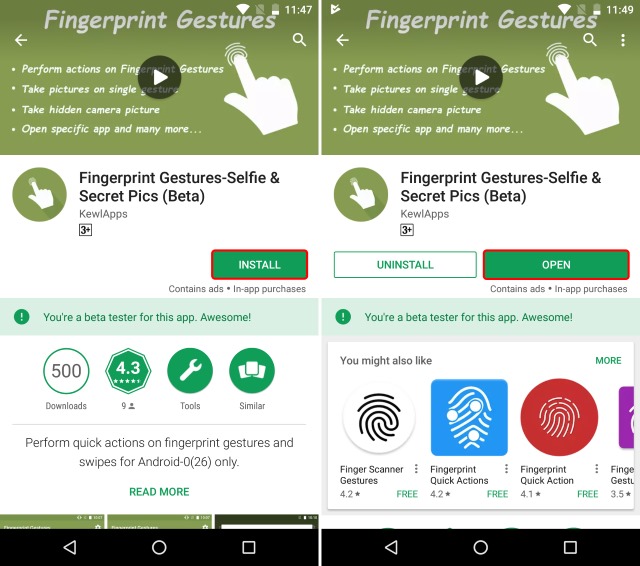
- To start off, download the Fingerprint Gestures-Selfie & Secret Pics (free) app from here to your device.
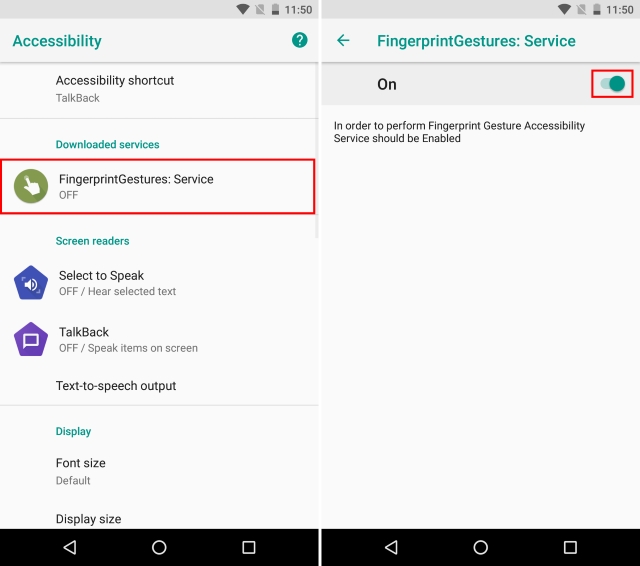
- Once you’ve downloaded the app, head over to Settings -> Accessibility. Under the heading “Downloaded services”, tap on “FingerprintGestures: Service”. In the new page that opens up, enable the toggle to turn on the Fingerprint Gesture Service.
- Now that you’ve enabled the service, open up the Fingerprint Gestures app. You’ll be presented with a menu to customize the various actions. The gestures included are swiping up, down, left or right on the fingerprint sensor.
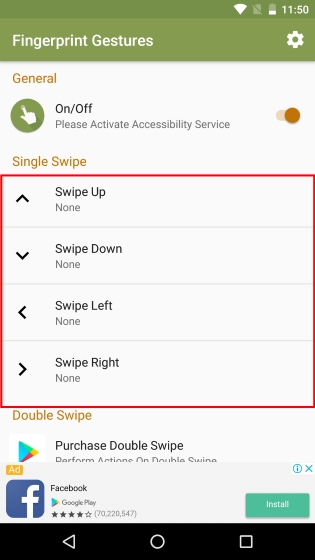
- To assign a specific action to a swipe gesture, tap on that gesture’s entry. You’ll now be presented with a list to select from all the various actions available. Using the app, you can select a single swipe to go back, go to the home screen, switch to the last app, scroll the screen up and down, and much more. Additionally, the app also has support for Tasker, which you can use to create automated actions. Select your preferred action from the list.
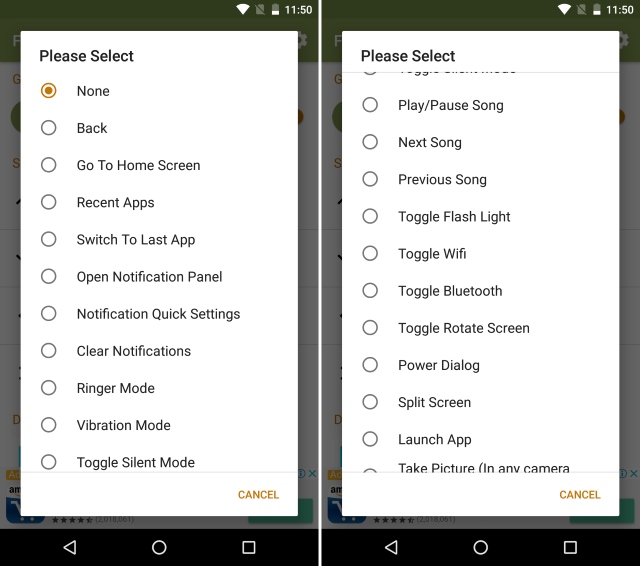
- Similarly, you can assign various actions to each type of swipe on the fingerprint sensor. For example, in my case, I set the up and down swipes to be used to scroll the screen, while the left swipe to go to the home screen and right swipe to switch to the last app.
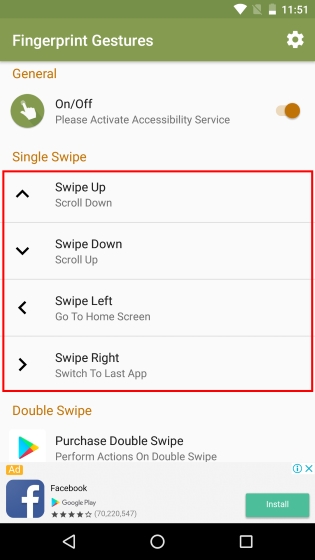
- Additionally, tapping on the gear icon in the top-right corner will take you to the settings menu of the app. Here, you can enable the app’s constant notification which will help it retain in the system’s memory. Furthermore, you can choose to enable a vibration feedback upon the use of the set gestures.

SEE ALSO: How to Check Project Treble Support on Your Android Oreo Device
Do More With Fingerprint Gestures on Your Android Oreo Device
Fingerprint gestures certainly prove to be an easier way to go about carrying normal tasks. As opposed to using the navigation bar or going through various menus, you can use just a single fingerprint sensor on your device to carry out all these tasks. But that is what I feel about fingerprint gestures. What’s your take on fingerprint gestures? Did you customize fingerprint gestures on your Android Oreo device? Let us know in the comments section below.


 Arjun Sha
 Arjun Sha
 Arjun Sha
 Arjun Sha
 Sagnik Das Gupta
 Arjun Sha

 Anshuman Jain
 Arjun Sha
Anshuman Jain
Arjun Sha
Anshuman Jain

Not working on Zenfone max pro 2
good app tried
thanks for this it’s works well 🙂