


Instagram is one of the most widely used image sharing platforms in the world. The app has over 500 million monthly active users. While the Instagram app has constantly improved to support more and more (sometimes copied) features over the years, the web app has one glaring drawback: you can’t upload photos to Instagram from the website. So, if you have taken some shots from your DSLR, or if you want to show off your latest Lightroom project, here is how you can post to Instagram from Mac:
1. InstaMaster
InstaMaster is a macOS app that you can use to easily upload photos and videos to Instagram without having to first transfer them to your iPhone, or Android device. The app is currently free under a promotion, and it works really well.
- When you download and launch the app, it asks for you to login to Instagram with your username and password. Once you’ve done that, the app takes you to the home screen. This looks like the Instagram website running inside something like a WebView.

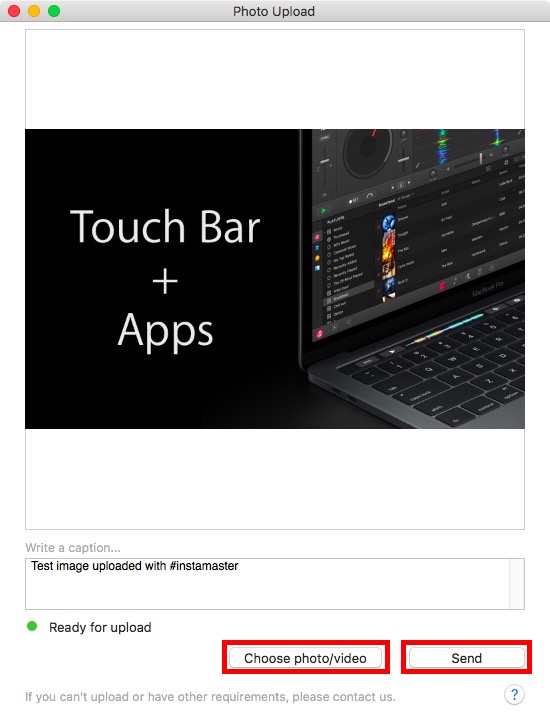
- You can click on the upload icon in the top right of the app, to get to the upload window.
![]()
- Here, you can either drag and drop the photo or video that you want to upload, or click on the “Choose photo/video” button, and select the one that you want to upload. You can then add a caption, and hashtags to your image, and even set it to be shared to other social media platforms, if you like. Once you’re done, just click on the “Send” button, and you’re done. The photo, or video will now be uploaded to Instagram.
The app works very well, and can easily serve as a standalone Instagram desktop app for you.
Download InstaMaster ($4.99)
2. Uplet
Uplet is a Mac app that allows you to easily upload images to Instagram. The app doesn’t try to be a complete Instagram client, and just sticks with uploading images from your Mac. The best part is that it does this well.
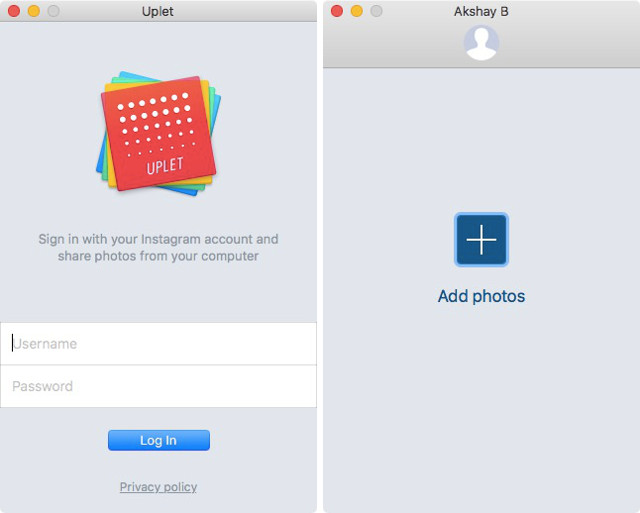
- Using the app is easy, you just log in with your Instagram account, and then click on the “+” icon to select the photo you want to upload on Instagram.
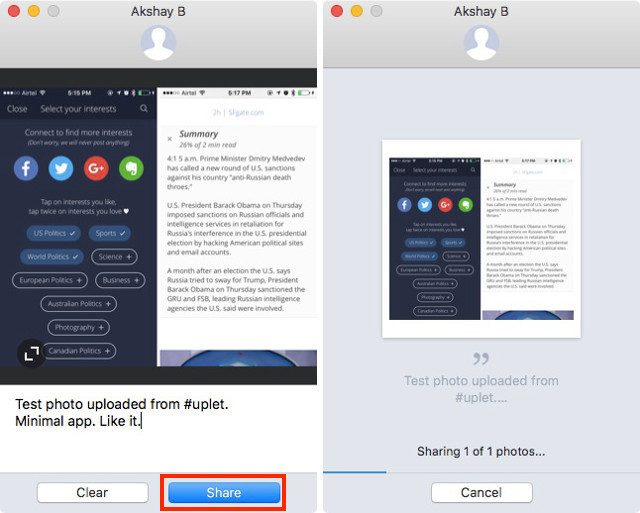
- Type out a caption, include any hashtags, and click on “Share”. The app will display a progress bar, and soon your image will be shared on Instagram.
That’s all. You’ll be able to see the uploaded image on Instagram immediately. The app definitely works very well, and is a great option for people who just want to upload photos to Instagram from Mac.
Download Uplet (Free demo version for up to 5 photos, $9.99)
3. Gramblr
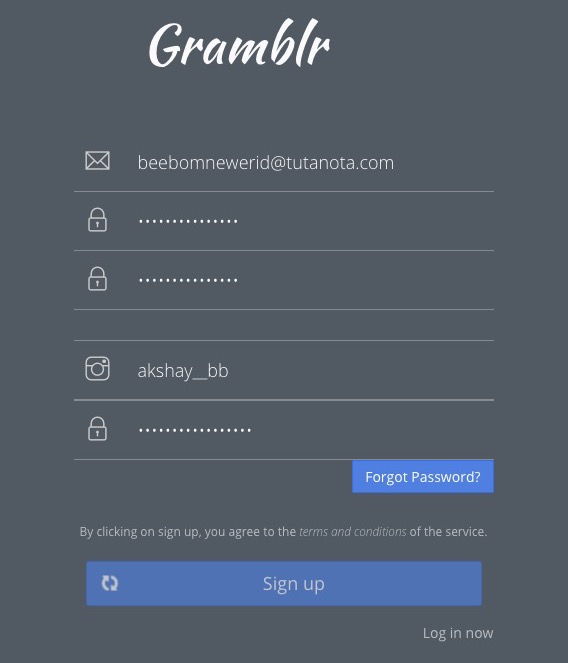
Gramblr is another Mac app that allows you to upload images to Instagram. The app is rather different from other apps that I have used. When you download Gramblr from their website, and run the installed app, you will be taken to a webpage in your browser.
- First, you’ll have to sign up to use Gramblr itself. Once you have done that, you will be taken to the Gramblr interface, where you can manage your Instagram account. You can do things like upload images, schedule posts, and a lot more.
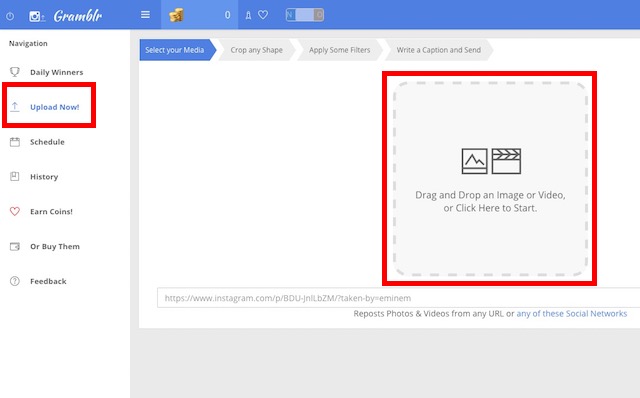
- To upload photos to Instagram, just click on “Upload Now!” in the sidebar. Then, drag and drop the image or video that you want to upload.
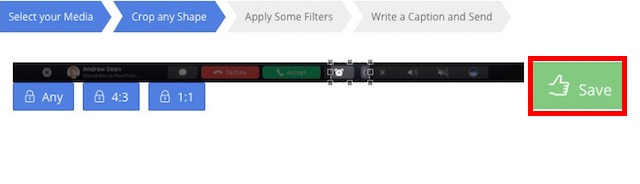
- You will then have to crop the image, by clicking and dragging your cursor over the image to draw a selection box over it. Once done, click on “Save“.
- Then, just apply any filters that you want to, and write the caption. Once you’re done with that, just click on “Send“.

Your photo will be uploaded to Instagram. You can even schedule posts using Gramblr. It is definitely a good app, even though the design is a little weird. However, the app works, and it’s completely free.
Download Gramblr (Free)
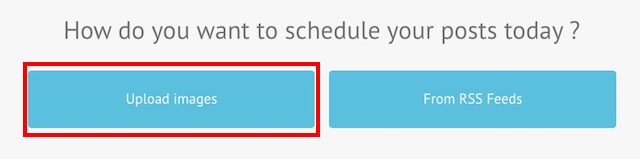
4. Piktoria
Piktoria is a web service that you can use to schedule your Instagram posts directly from your Mac. The website uses Material Design language, and looks (and works) very well. Using the web app is also very easy, and you’ll get hooked in no time.
- When you first open the website, you will have to sign up with your Instagram account. Once you have done that, you can sign in to the website.

- You’ll see a list of accounts that you have associated with your Piktoria account, most probably, you’ll only see Instagram. Click on your username to enter your Piktoria dashboard.
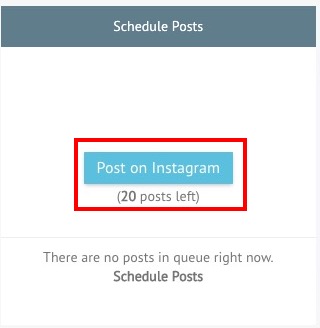
- Here, you can do a lot of things, and track your activity, along with a number of other Instagram factors. You can click on “Post on Instagram” to schedule a post for your Instagram feed. (The trial version of the app only supports 20 posts).
- You can then click on “Upload Images“, and select your image from the sources that the app supports. We’ll use “My Computer” as the source.
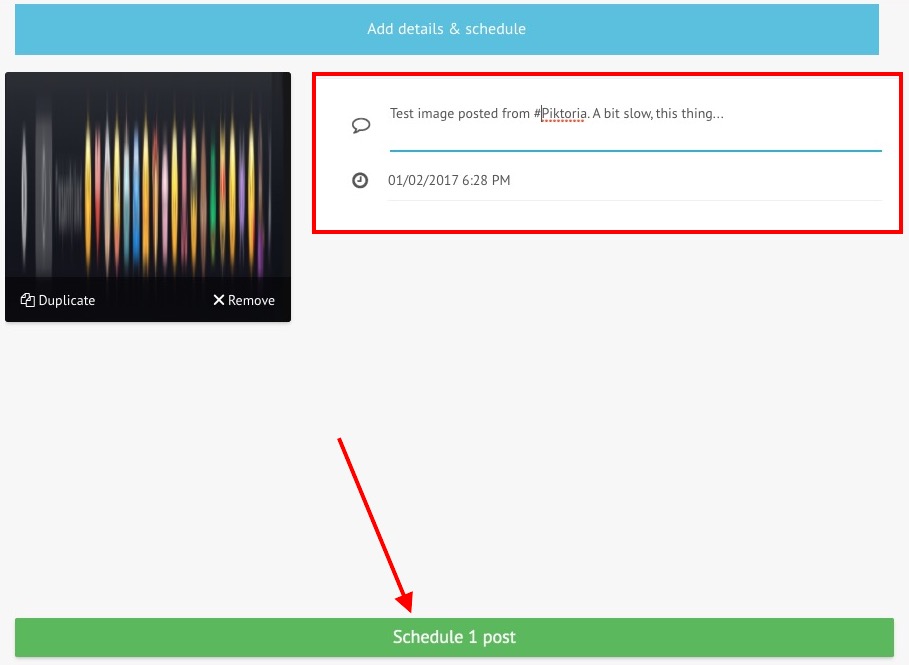
- Select the image you want to upload to Instagram (or drag and drop it into the box).You can then type a caption, and select the time you want to schedule the image for. Then, simply click on “Schedule”, and your image will be uploaded at the scheduled time.
That’s all there is to using Piktoria for uploading photos to Instagram. The web app can do a lot more than just that, and probably works as well for the rest of its features.
Visit the Piktora website (14 days free trial; plans start from $15 per month)
5. Push.Photo
Push.Photo is a web service that can let you upload images to Instagram. The service isn’t free, and will set you back somewhere around $9.75 to $24 depending on the plan you choose. However, they do have a 7 day free trial that you can use to check if the service is worth your money.
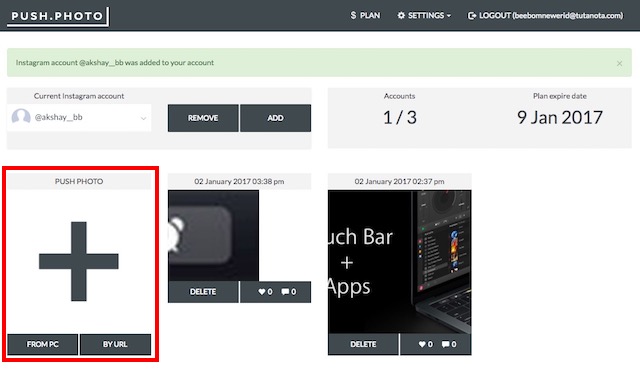
- To upload images using Push.Photo, you will first need to sign up on their website for a free trial. Once you do that, you will be taken to the main interface of the web app. Here, you will have to add your Instagram account.

- Once you connect your Instagram account to the service, it will display your Instagram posts, along with an option to upload more images from your computer, or via a URL.
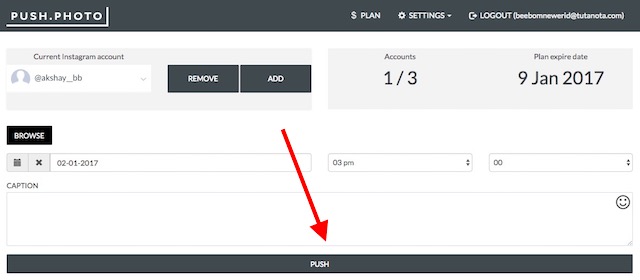
- Once you have clicked on the button to upload an image to Instagram, you’ll be taken to a screen where you can add the image to be uploaded. Simply click on the “Browse” button and choose the image that you want. You can crop the image, and add a caption. Choose the time that you want the image to uploaded at. Then, click on “Push“, and your image will be scheduled to be posted to Instagram.
The only drawback with this service, is the fact that you can’t post images at any arbitrary time. You will have to select a time according to the options in the dropdown menu. However, if that’s something you can overlook, this is a great app to use, especially if you need to manage multiple accounts, as you can manage up to 10 accounts from the same dashboard, using this app.
Visit the Push.Photo website (7 days free trial; plans start from $9.75 per month)
Bonus: Use Android Emulators to Upload to Instagram from Mac
Alternatively, you can download an Android emulator, and install Instagram on it. Then, you can use Instagram’s official app on your Mac. If this is something you want to do, I’d recommend that you use Bluestacks (free). There are some other great Android emulators for Mac, as well, and you can use any one of them to run the Instagram mobile app on your Mac, and upload images to Instagram.
SEE ALSO: 12 Cool Instagram Tricks You Should Know
Post to Instagram from Mac with These Apps
You can use any of the apps in this list to upload photos, and videos to Instagram from Mac. So, you can easily upload those DSLR shots you edited on Lightroom, or Photoshop. You can even schedule posts, and track your Instagram follower count. Each of the apps in this list bring something unique to the table, be it added features, or simplicity; and you should definitely give these a try. Also, if you know of any other Mac apps that can post to Instagram, do let me know about them in the comments section below.


 Sagnik Das Gupta
 Kanika Gogia
 Kanika Gogia
 Satyam Kumar
 Kanika Gogia
![How to Change MacBook Wallpaper [2024 Guide]](https://beebom.com/wp-content/uploads/2024/02/Macbook-wallpaper.jpg?w=300&quality=75) Kanika Gogia
Kanika Gogia
 Kanika Gogia

Awesome guide to upload photos and videos! I would like to share a tip on how you can download these videos fast and easy. You may try to use AceThinker Online Video Downloader. This is a brilliant website where you can download your favorite videos from all video sharing site. It doesn’t need any installation or software download. Simply go to its website and paste the link of your target video there.
What if I am not a MAC user?
I found something else. push.photo. It helps me with posting and even with scheduling. And without downloading any app (really hate having millions of apps)
Awesome Post 😉