


The first thing you lay your eyes upon, when you login to a Windows PC, is the desktop. If you use your PC a lot, chances are, you use the desktop for a large duration of time and if the Windows desktop is not customized to one’s liking, it surely affects the experience. Thankfully, with every new Windows iteration, Microsoft has offered more control over how a user can customize the desktop to their liking. With Windows 10, you get complete control over how you want your desktop to look and function. There are some new and improved features to control your interaction with the Windows desktop, and there’s the new virtual desktops feature. To help you with your Windows 10 desktop customization, we are listing down 12 handy tweaks you will definitely love:
1. Add or Remove System Desktop Icons
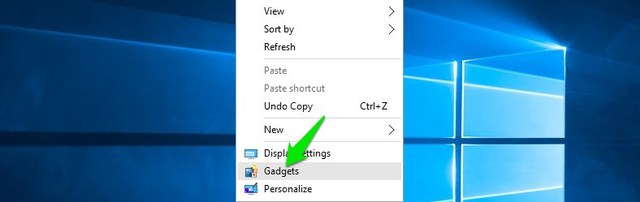
System icons like Recycle bin, This PC and User Files, etc. cannot be removed or added using the usual ways. Many people may not like to see these shortcuts on their desktop or may like to add all of the system icons to the desktop for quick access. If you are one of those people, you can add or remove system icons by right-clicking on the desktop and selecting “Personalize”.
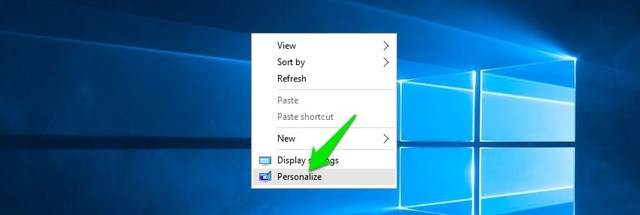
Then, move to the “Themes” section and click on “Desktop icon settings”.
![]()
A dialog will open up where you can check or uncheck the system icons you want on the desktop.
![]()
2. Change Windows Logon Sound
The first thing you usually listen when you log into your system is the Windows Logon sound. If you want to listen to a different sound because your find the default sound annoying or bland, there is a way. You can use another Windows built-in sound or even your own custom sound file, but you will have to make a quick edit in Windows Registry for that.
Note: Before editing the registry, make sure you create a backup of your PC. Any wrong entry in the registry could corrupt your system, a backup will save you such situation. Although, you should have no problem if you follow the below instructions precisely.
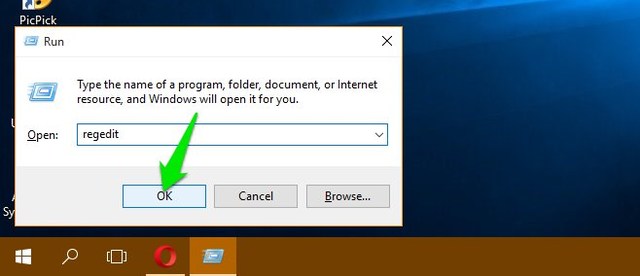
Press Windows+R keys to open the “Run” dialog, and then type “regedit” and hit enter to open the registry.
Here, navigate to the below mentioned location:
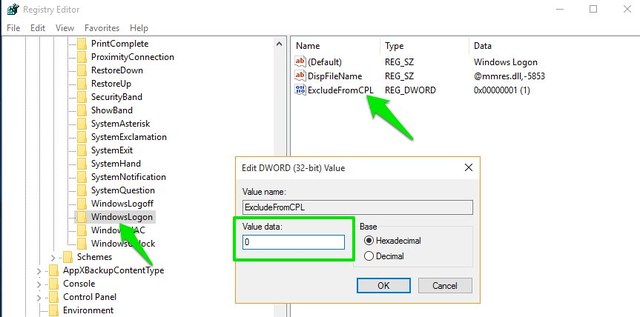
HKEY_CURRENT_USER/AppEvents/EventLabels/WindowsLogon
Click on “WindowsLogon” entry and then double-click on “ExcludeFromCPL” in the right panel. Its value will be set to “1”, change it to “0”.
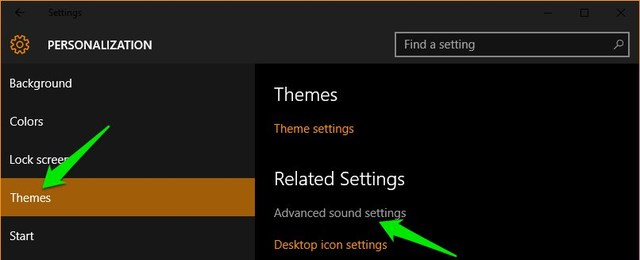
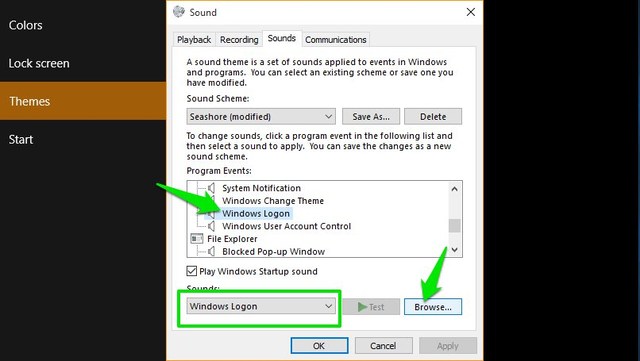
This hack will add a new entry of Windows Logon sound under the original Windows sound options. To access this new entry, go to Settings->Personalization and click on “Advanced sound settings” in the “Themes” section.
Here, under “Program Events”, scroll down until you see “Windows Logon” option and click on it to select it. Now, use the drop down menu below to select a built-in sound or use the “Browse” option to select a custom sound of your own. If you want to select a custom sound, make sure the file size is little and the length is not too long (preferably less than 20 seconds).
3. Remove Cortana Search Bar
Cortana shows a huge search bar in the taskbar, where you can quickly search the system or use the virtual assistant’s other features. However, you don’t necessary need the big search bar in the taskbar all the time. To remove the search bar, right-click on the taskbar and hover your cursor over “Search” option. A side menu will open up, click on “Show search icon” here to remove the search bar and add a search icon.
![]()
![]()
4. Auto-Hide Taskbar
An old feature, but a really handy one. You can set taskbar to automatically hide when it is not in focus and immediately show up when you move your mouse cursor to it. This will keep your desktop clean with more room and also let you access the taskbar when needed.
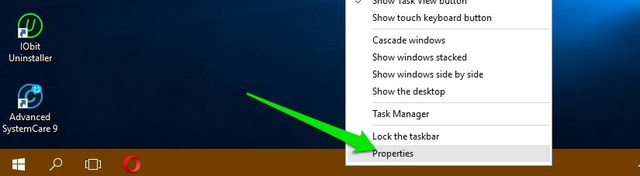
To enable this, right-click on the taskbar and select “Properties” from the menu.
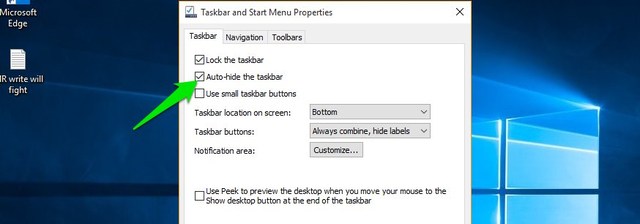
In the Properties, check the checkbox next to “Auto-hide the taskbar”.
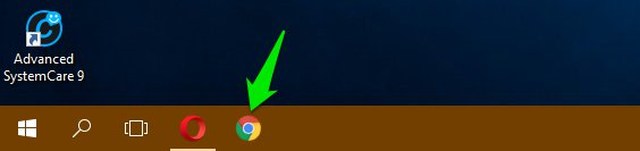
5. Pin Items To Taskbar
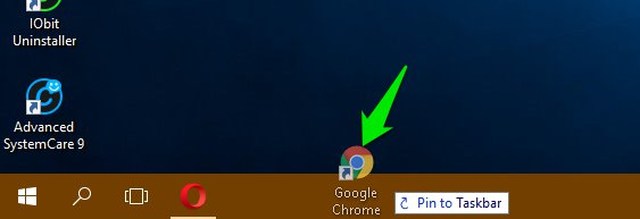
Taskbar has a huge real estate on it, that can be used for adding shortcuts to programs for quick access from anywhere. Just drag and drop the icon of any program from any location to the taskbar and it will be pinned to taskbar. You can also right-click on an item and select “Pin to taskbar” (if available) to pin it to taskbar.
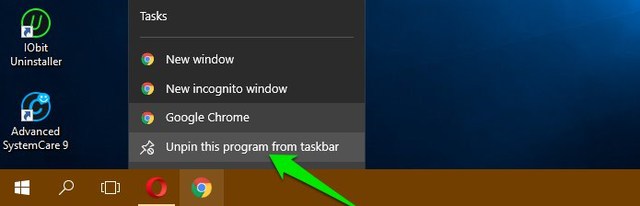
You can also unpin an icon by right-clicking on the icon and selecting “Unpin this program from taskbar”.
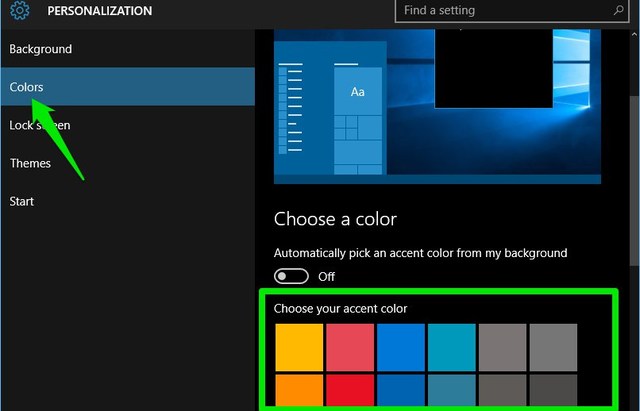
6. Change Taskbar and Menus Color
As you are customizing your desktop, you will surely want to give the taskbar and menus a color you like. Just head to Settings->Personalize->Colors, where you will find two options to change the color. You can either let Windows automatically pick a color based on the Windows 10 background you are using, or simply choose a color from the list. Windows offers a big list of colors to choose from, although I didn’t find any spectrum option to choose an exact color of your liking.
7. Snap Windows
You can also snap windows to the corner of the screen to see multiple windows at the same time and work between them, perfect for multitasking. Windows can both automatically snap windows for you or you can manually drag and adjust them to your required location.
To manually do it, click and hold at the top bar of the window in question to grab it and move it to the extreme top left or right corner of the screen. You will see an outline confirming that the window can be snapped here in a shorter version. When you will leave the click, it will be snapped to that location.
You can repeat this process to snap multiple windows, and you can snap up to 4 windows or more (depending on your display) that can be easily seen and interacted with. This is especially great if you have a larger display.
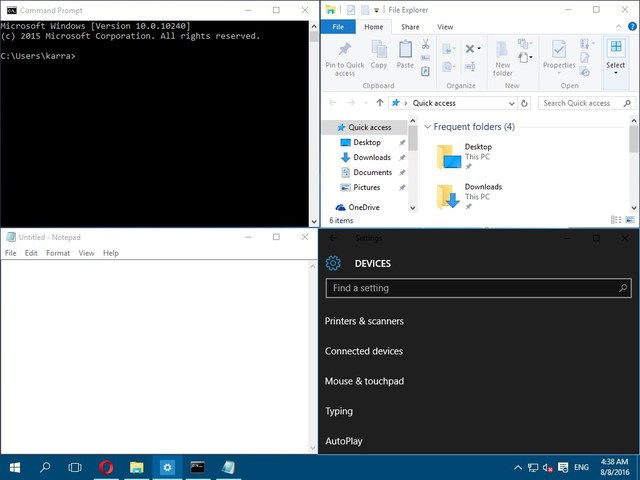
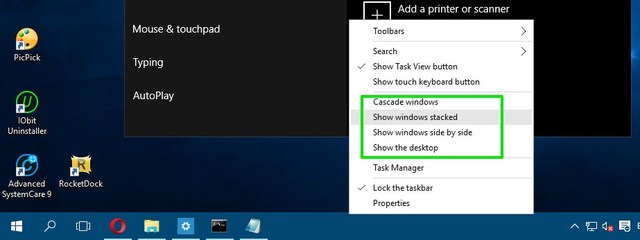
To do this automatically, open up all the windows that you would like to snap (click on them to open them from the taskbar). After that, right-click on the taskbar and choose the desired method of snapping, including stacked, side-by-side and cascade. However, it may not offer the desired results every time and you may have to make some adjustments yourself as well.
8. Use Task View
Task View has been around since Windows 7 but it has been added in Windows 10 again, with a even better interface. Task View lets you quickly see all the windows opened in your PC in a grid like manner and easily interact with them. To access Task View, press Windows+Tab keys or click on the Task View button in the taskbar.
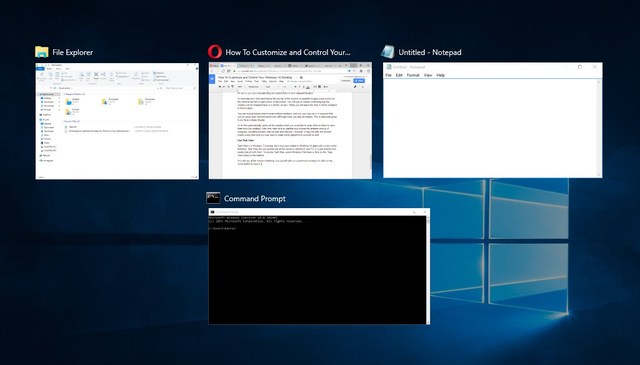
You will see all the opened windows, you can click on a window to access it or click on the cross button to close it.
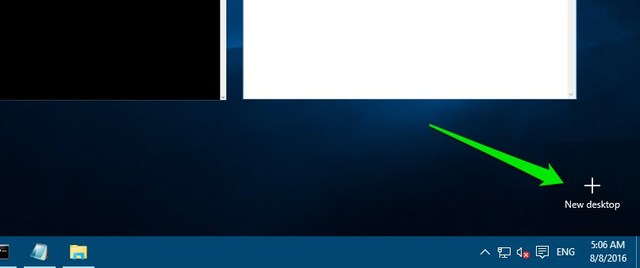
9. Use Virtual Desktops
An old feature in Linux and macOS, but newly added in Windows 10. Virtual Desktops, as the name suggests lets you create unlimited virtual desktops that are not affected by each other. You can open separate applications in each desktop and they will not affect each other. For example, you can create a virtual desktop for your work and one for casual use and easily switch between them.
You can create and access Virtual Desktops from the same “Task View” window. Access Task View like we did above and click on the “New desktop” button at the bottom right corner.
A desktop will be created and you can click on it to access it. This virtual desktop will act as if you have just started Windows and haven’t opened any apps yet. You can easily open apps of your liking here and they will not be seen in other virtual desktops. The Task View will show windows opened in a specific virtual desktop along with the option to switch to another desktop.

Best of all, you can drag and drop applications from one desktop to another in the Task View to quickly move the applications from desktop to desktop. If you want to quickly switch between virtual desktops, press Windows+Ctrl and then press left/right arrow keys to switch.
10. Use Peek Feature
Peek is another good feature of Windows that allows you to quickly access your desktop by hiding all the active windows and then get back to them again. If you have multiple windows open, it can be a pain to minimize all of them to access the desktop; the peek feature will save you here. The peek button is located at the very end of the task bar on the right side (next to date and time). Just click on it and you will see the desktop immediately, and clicking on it again will restore all the opened windows again.

11. Use a Dock Application
A dock application basically allows you to add an extra bar with handy shortcuts and buttons to quickly access them when needed, similar to the taskbar; but more interactive. Windows has many dock applications, but RocketDock is one of the most popular ones. RocketDock is a free tool that will allow you add a bar of shortcuts and apps anywhere on the screen, where you can drag and drop shortcuts to any application, file or folder.
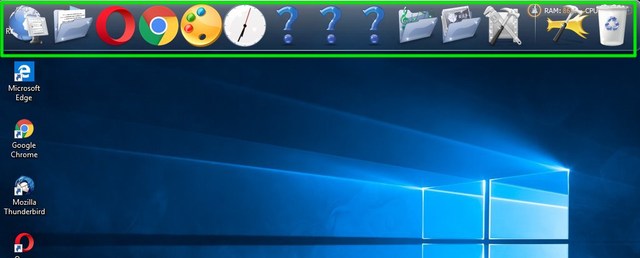
The program itself is very interactive, works smoothly and can be customized in any way you like. I will recommend you to keep it set to “Auto-hide” so it doesn’t get between your work, and the best place for it would be on the right side.
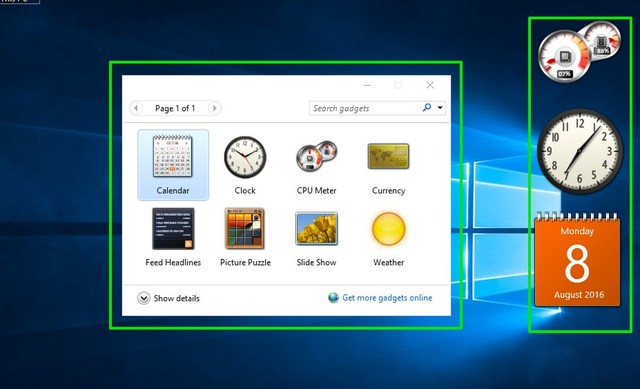
12. Get Desktop Gadgets
Windows dropped support for desktop Gadgets in Windows 8, as the Live Tiles feature removed their need. However, if you’ve been missing desktop gadgets in Windows 10 and want to see them again on the desktop, there’s an app to bring it back. You can get the same Windows 7 gadgets with the Desktop Gadgets Sidebar app.
Once the app is installed, it will add the same “Gadgets” option in the desktop context menu that you can click to see all the gadgets.
Simply dragging the gadgets on the desktop will place them there and the gadgets will bring information in real-time, as per the working of the widget.
SEE ALSO: Best Ways to Customize Windows 10 Start Menu
Some Cool Tips for Windows 10 Desktop Customization
You should definitely customize your Windows 10 desktop to your preference, after all, it is your desktop, right? The above customization options should make your desktop cleaner along with bringing more control and functionality. Task View and Virtual Desktops do require some practicing to use in daily life, but once you get used to it, your productivity will get a boost. Also, the other simple yet effective tips should help you manage and customize your Windows 10 desktop better. Well, that’s all from our side, if you know of any other ways to customize Windows 10 desktop, do share with us in the comments section below.


 Abubakar Mohammed
 Arjun Sha
 Arjun Sha
 Arjun Sha
 Satyam Kumar
 Satyam Kumar
 Arjun Sha
 Arjun Sha
