


Home sharing allows you to share your iTunes content over the local network with other iOS devices, Macs, Apple TV or any Windows PC with iTunes installed. Once Home sharing has been set up, you can stream music/videos from your source library to all these devices without having to physically copy any of those files. You can also stream music from your Windows PC, as long as you’ve iTunes installed. Before we set up iTunes Home Sharing, verify you’ve the following ingredients —
Pre-requisites
- A Mac, Apple TV, any iOS device or a Windows PC with iTunes installed.
- The devices should be connected to the same local network.
- You’re signed in on all the devices with the same Apple ID.
- The host Mac or Windows should be turned on and iTunes should be opened.
Set up iTunes Home Sharing on Mac or Windows
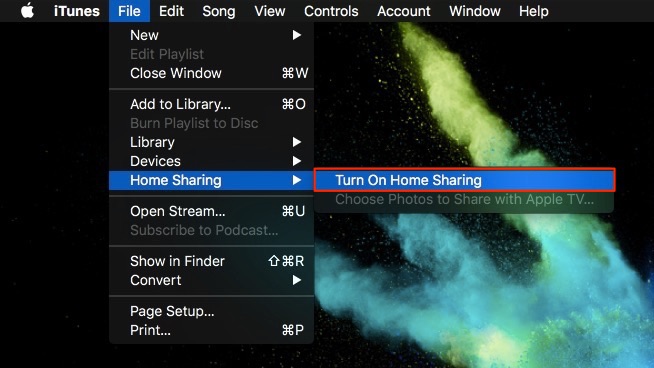
The first step is to enable home sharing on iTunes from your Mac or Windows PC. Open iTunes and click on “File” > “Home Sharing” > “Turn on Home Sharing” from the menu bar.
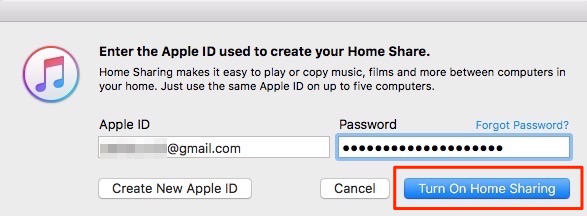
Next, sign-in with your Apple ID credentials and click on “Turn On Home Sharing“.
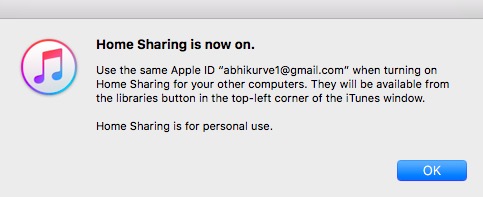
You should see a “Home Sharing is now on” dialogue box similar to as shown below which indicates that you’ve completed the setup on your Mac or Windows.
Enable iTunes Home Sharing on iPhone/iPad
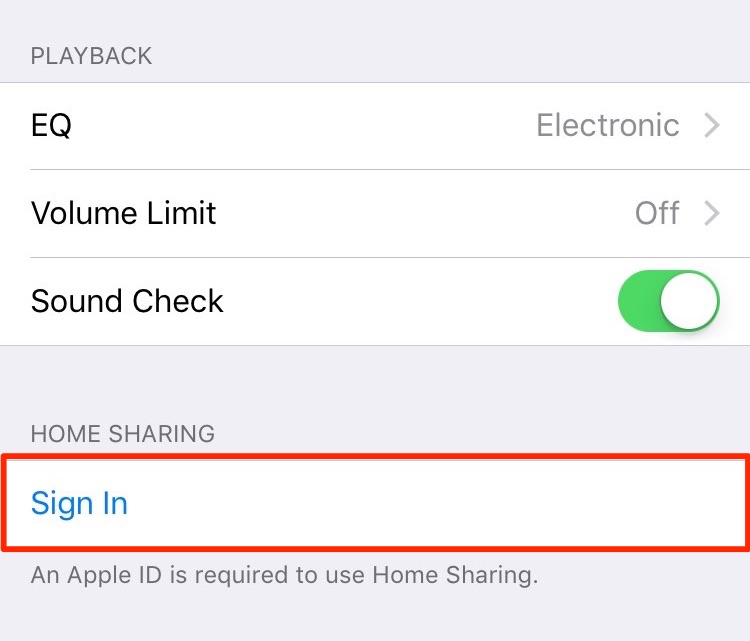
On your iOS device, go to “Settings” > “Music” and tap “Sign In” under Home Sharing.
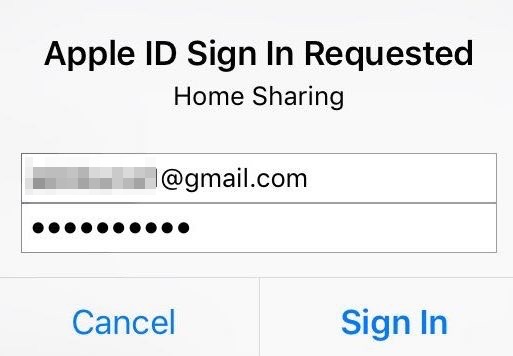
Enter your Apple ID credentials and tap “Sign In“. At this stage, you’ve successfully configured your iOS device.
Access iTunes Music on iOS
Now, to access iTunes Music, open the Music app on your iOS device and tap on “Home Sharing“. Your iTunes library should now be displayed.
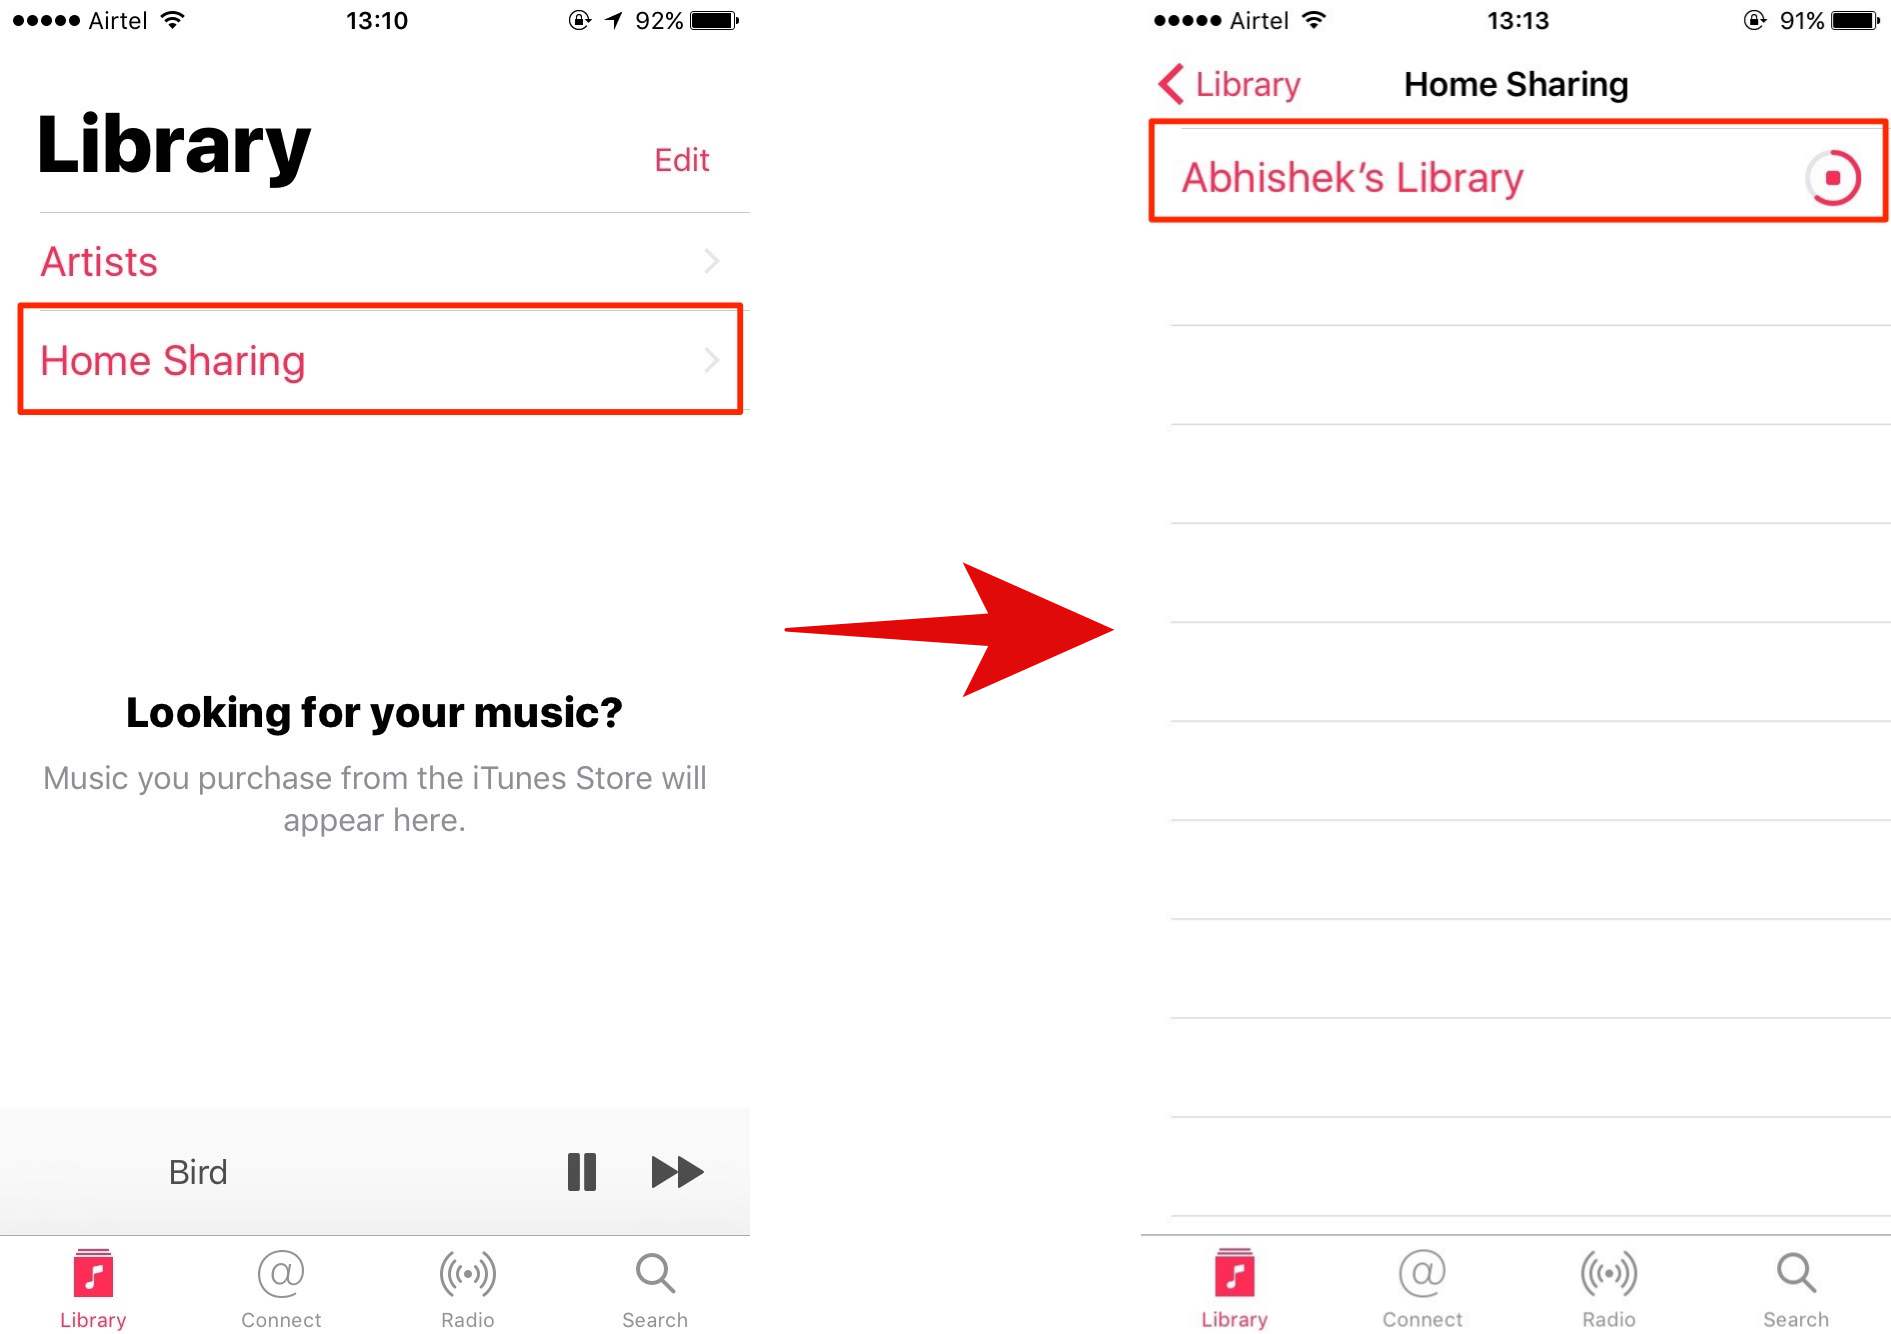
Please note that it may take a few seconds to load it up completely. If you’re unable to see your library, verify that both the devices are connected to the same network and signed in using the same Apple ID and try again.
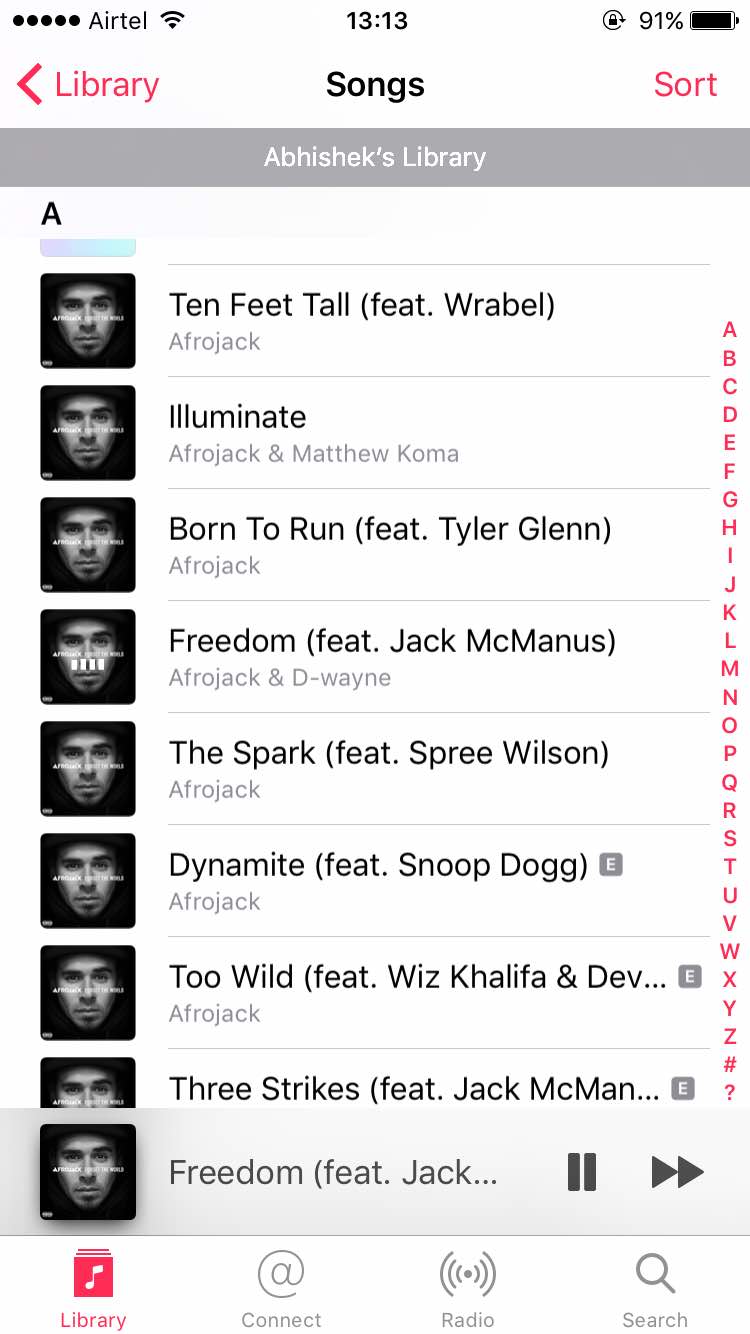
From here, you can access all of your songs, playlists, play/pause music that are stored in your Mac or Windows PC. You can also perform certain actions like deleting the file from the library, rate the song and like/dislike it.
Access iTunes Videos on iPhone/iPad
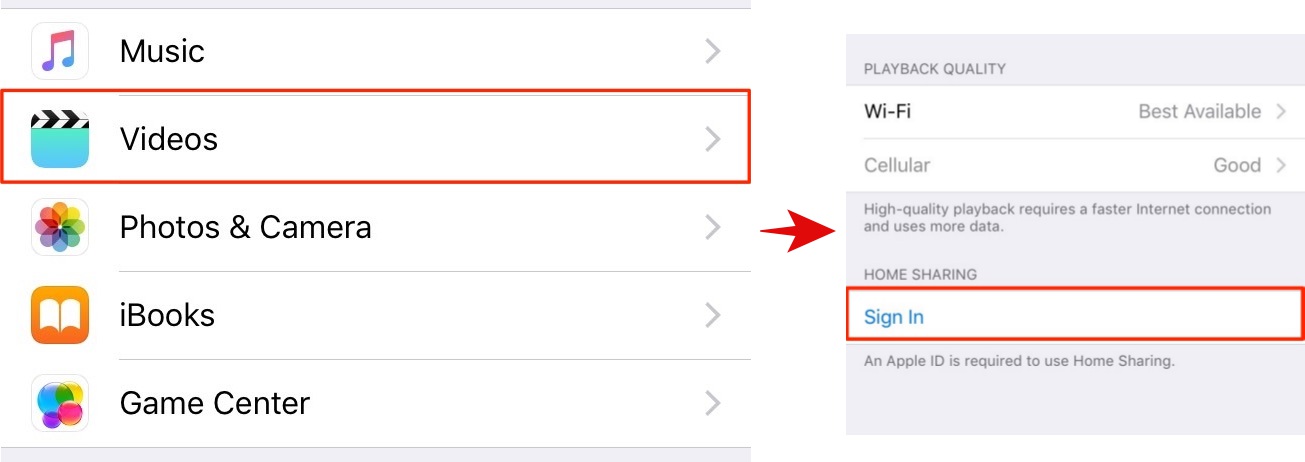
On your iPhone/iPad, go to “Settings” > “Videos” and “Sign in” using your Apple ID.
Open the Videos app and now you should see your videos listed under the shared library.
 Please note that it requires videos to be imported into iTunes on your source Mac or Windows first. The easiest way of doing this is by dragging videos to the iTunes window.
Access iTunes Content on Windows or macOS
Once you’ve set up iTunes Home Sharing on your Windows or Mac, accessing it on another Windows or Mac is quite easy.
Open iTunes on your other Mac or Windows PC and click on the “Music” drop-down menu just below the player controls. You should see your library listed and you can access all the songs from here. If you’re unable to see your library here, verify that both the devices are connected to the same network and try again.

An important thing to remember is that your shared library will be visible to all the users connected to the same network. If you would like to require a password before connecting to the library, click on “iTunes” > “Preferences“. Under the sharing tab, check the box where it says “Require Password” and enter a password and click on “OK”.
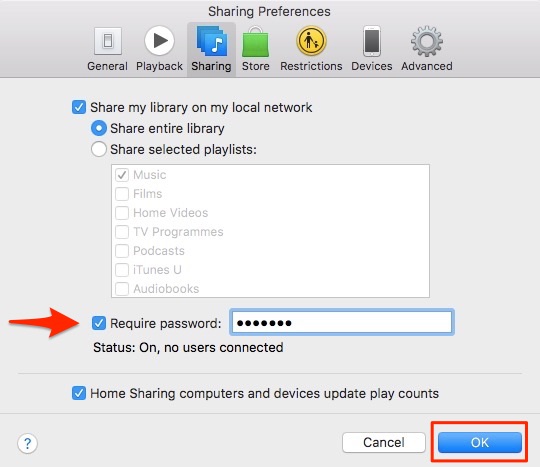
While you’re at it, here you can also choose to share your whole library or just individual playlists selectively.
Access iTunes Content on Apple TV
Note: While we did not get a chance to try this on an Apple TV, the process should be very straightforward and similar to what we’ve done above.
If you’ve 4th gen Apple TV, go to Settings > Accounts > Home Sharing.
If you’ve an Apple TV prior to 4th gen, go to Settings > Computers. Select the “Turn on Home Sharing” option. Enter the same Apple ID credentials that you use to set up on iTunes on your Mac or Windows.
To access this shared library, go to the Main menu > Computers > Choose a Library and select the shared library.
Limitations of iTunes Home Sharing
Home sharing requires all the devices to be connected to the same local network. This implies that it cannot be used to remotely access your iTunes library. If you are looking to access iTunes songs remotely, you may want to upload all your music to iCloud, or better yet, check out the $25 iTunes Match service.
Furthermore, you can use it with up to five computers only — here computers includes any Mac, Windows, iPhone or iPad. This may seem like a lot of devices, but if you’ve multiple Apple devices in the family, you could easily hit the cap of 5 devices. Also, it requires you to sign in with the same Apple ID on all devices.
You’d have to also make sure that your source Mac or Windows is open with iTunes running all the time.
SEE ALSO: 7 Cool Tips and Tricks to Enhance iTunes
Set up and Use iTunes Home Sharing with ease
The ease-of-use and sheer usefulness of iTunes Home sharing easily trump its limitations. Thanks to Home sharing, I can stream my (very large) music library from my Mac to the iPhone, which otherwise wouldn’t have been possible owing to my iPhone’s insufficient storage. Perhaps, the best thing is that it works on Windows too, as long as you’ve iTunes installed. If you’ve never set up iTunes Home Sharing before, you should definitely give it a try now and let me know how it goes.


 Arjun Sha
 Sagnik Das Gupta
 Kanika Gogia

 Abubakar Mohammed
Arjun Sha
Abubakar Mohammed
Arjun Sha
 Arjun Sha
 Kanika Gogia
 Arjun Sha
