


When Apple announced the late 2016 line of MacBook Pros, the brand new Touch Bar was the upgrade that got the most attention (and the 16 GB RAM limit). For better or for worse, the Touch Bar got a lot of people talking, and discussing the pros, and cons of such an interface. However, another thing that the Touch Bar got people talking about, is an app that does pretty much the same thing as the Touch Bar. Like the aforementioned Touch Bar app, Quadro puts context sensitive buttons at your fingertips, on your iPhone, or iPad. The best part about Quadro, is that it works with both Mac, and PC. So, if you’re looking to try out a MacBook-like Touch Bar on Windows, here is how Quadro can help you with it:
Introducing Quadro
Quadro, like I said before, is an iOS app that puts context sensitive buttons on your iPhone, or iPad. Quadro comes with a companion app for macOS, and for Windows, that you can download for free, from their website.
Once you have both the apps installed, they connect to each other, and allow your iPhone, or iPad to know what app is running on your Windows PC, and adapt the buttons according to the most common actions for that app. This definitely makes it a lot easier to perform common functions, without having to engage the mouse, or even a keyboard shortcut. Simply tap on a touchable button, and the action takes place immediately.
Functionality such as this is great; and Quadro has the added advantage of being able to work both on wired USB connections, and over a network. So, as long as your Windows PC, and your iPhone, or iPad are connected to the same network, Quadro can work its magic.
Installing and Setting Up Quadro
The process of installing, and the set up that follows, is very easy, and can be completed in less than 5 minutes. However, for your convenience, here is a complete walkthrough of setting up Quadro on your iPhone, and the Quadro Sync app on your Windows PC:
Note: I’m demonstrating this set up on an iPhone running iOS 10.2, and a Windows PC running a 32-bit version of Windows 10.
- First, download Quadro for your iOS device (free), and the Quadro Sync app for your Windows PC (free).
- Once done, install and launch the app on your Windows PC. In the taskbar, you’ll see the Quadro icon. Click on it to display the Quadro Sync window.
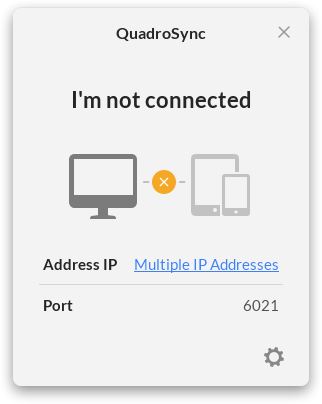
- Then launch the Quadro app on your iPhone. If your PC, and iPhone are connected to the same network, you will be able to see your PC’s name in the Quadro app.
- Tap on it to start connecting. You will see a code displayed on your iPhone, enter the code in the prompt on your PC to connect the devices.

- Now, you’ll have to sign up to use Quadro, and it will load up the predesigned templates for you.
That’s it. Quadro is now set up, and running on your iPhone. You can use the buttons displayed in the app to perform the functions corresponding to them. The actions are performed immediately, and the app works well.
Understanding and Using Quadro
Now that you have Quadro all set up, the only thing left to do, is learn how to use the app. Since the layout, and the actions in the app can be edited and modified to suit your needs, there is no “one way” of doing things in the app. However, allow me to walk you through some of the basics of using Quadro.
Understanding the Quadro UI
Pads, Actions, and Groups
When Quadro first launches on your iPhone, you may well be reminded of Windows Phone devices. The UI looks a lot like that. Anyway, there are two types of “Pads” in the app. The ones that look like perfect squares are called “actions“, and the ones which have the top right corner of the square missing are called “groups“.
The names are pretty self-explanatory, but here’s an explanation, anyway.
- “Actions” are the Pads that perform an action when you tap them. This action may be creating a new tab in Chrome, going back to the desktop of your PC, closing the Chrome window, etc.
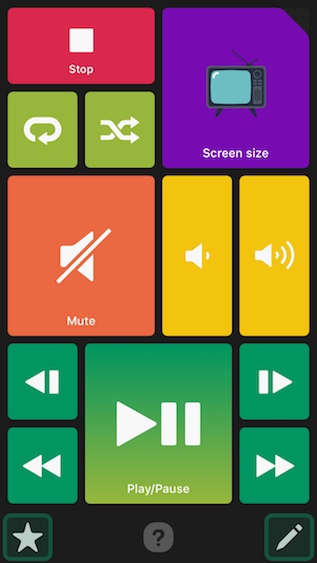
- “Groups”, on the other hand, are Pads that have a number of actions placed inside them for easy categorization. You can understand “Groups”, as folders full of “Actions”. When you tap on a Pad that is a “Group”, it will open up a number of “Actions” that you can then tap on to perform the relevant action.
Virtual Keyboard and Preloaded Palettes
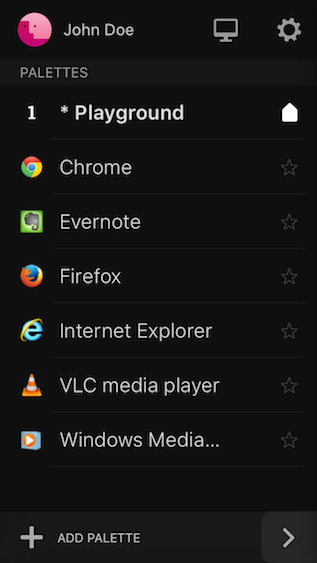
Quadro comes with a number of preloaded palettes that you can use to interact with your Windows PC in easy, and cognitively forgiving ways. There are preloaded palettes for apps such as VLC Media Player, Google Chrome, IE, and some more. You can access these palettes anytime you want, by swiping from the left edge of the screen.
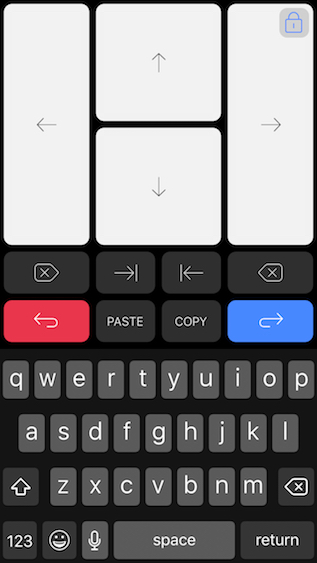
There is also a virtual keyboard inside Quadro, that you can use on your iPhone to interact with your Windows PC. You can use the virtual keyboard to type (obviously), and you can use the arrow keys placed on top of the keyboard to move the cursor around, or to scroll up and down in a web page, etc. The app also has dedicated buttons for going back, and forward, which come in extremely handy while using Google Chrome.
Editing the Quadro UI
While the preloaded palettes will probably work just fine for you, the developers thoughtfully designed the app to offer users an easy way to edit the layout of the palette to suit their taste, and usage style. Editing the Quadro UI is very easy, and highly intuitive. There are some nuances to the way editing works (or doesn’t), but you’ll get the hang of it in no time.
For the purpose of illustration, I’ll be editing the palette for Google Chrome. Either launch Google Chrome on your PC, or just swipe right from the left edge of the screen to show the available palettes, and then tap on “Google Chrome”. Either one of these will display the Google Chrome palette on the screen of your iOS device.
- Now, tap on the edit icon in the bottom right of the screen. You will see crosses on the corner of every Pad in the Google Chrome palette, and tapping on these crosses will delete the Pad off the palette. You can tap and hold on a Pad, to move it around in the screen, and place it wherever it suits you best.
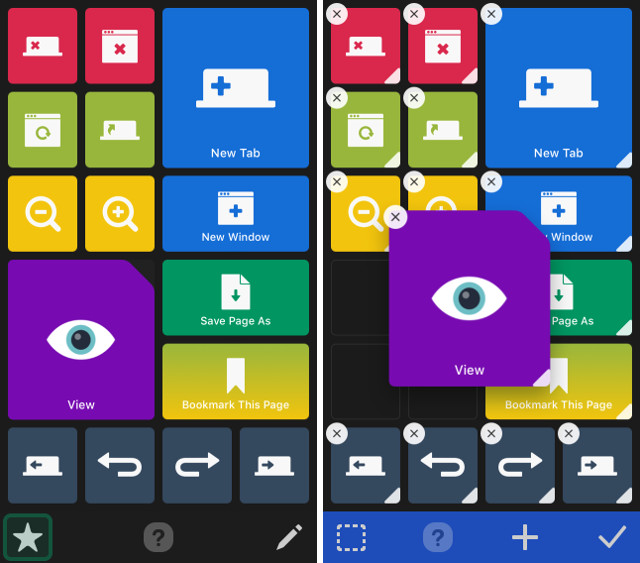
- If you want to resize a Pad, you can just tap and hold on the little white portion on the bottom right corner of the Pad, and you will be able to resize to suit your needs. Once you’re done editing, you can simply tap on the done button (it looks like a “tick mark”), and the Palette will be updated according to the edits you made.

Adding Palettes to Quadro
You can even create palettes in Quadro, so you can simply start using contextual buttons in every app that you commonly use. Creating Palettes in Quadro is easy, and if you need any help, just follow the steps below:
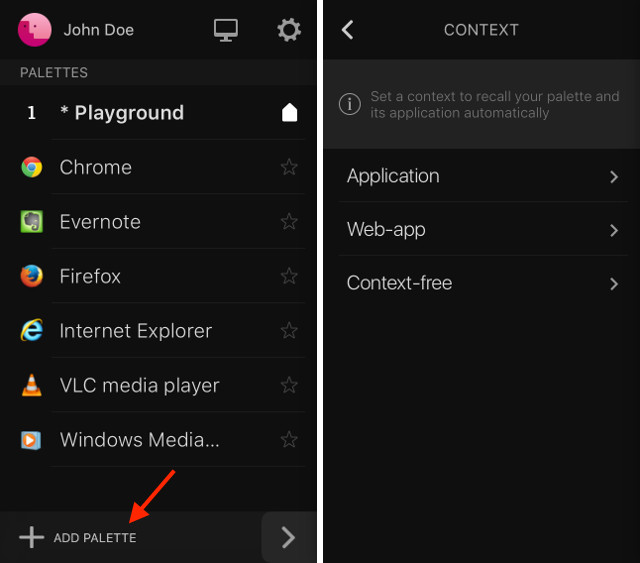
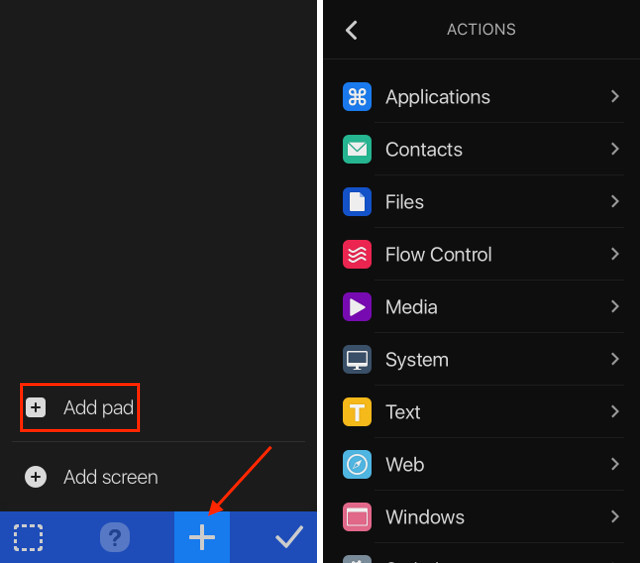
- Swipe from the left edge of the screen to show the list of Palettes. Here, tap on “Add Palette“. In the next screen, you can choose a trigger context for the palette. What a trigger context does, is that it ensures that the proper Palette automatically launches when the corresponding application is opened. This is how the automatic context sensitive switching in Quadro works.
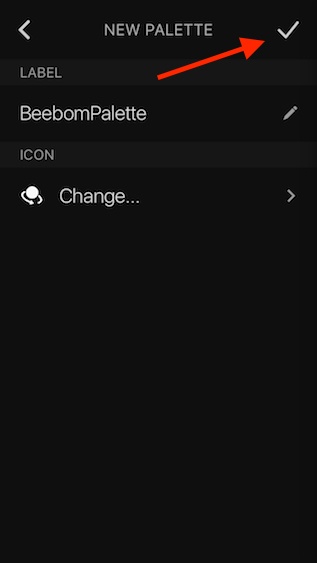
- Once you have selected the application you want to use for the context. You can enter a name for the context, and choose an icon for it, as well. Once done, just tap on the done button (it looks like a “tick mark”).
- You’ll be taken to the list of Palettes. Here, tap on the Palette you just created, and then tap on the edit button on the bottom right.
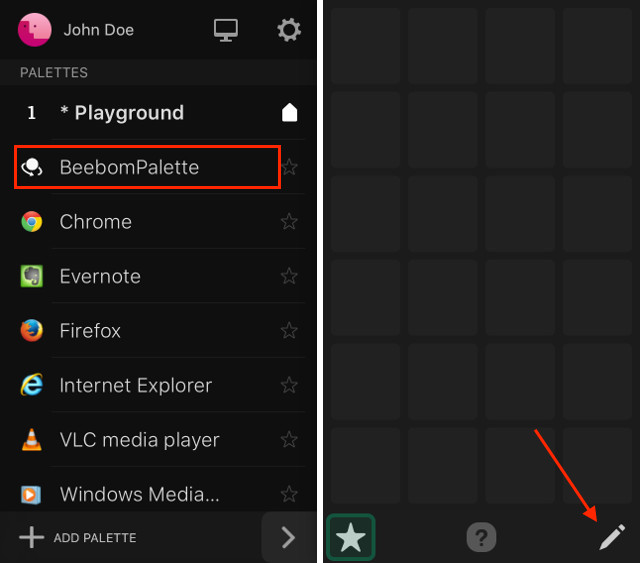
- Tap on the “+” button to add Pads (or screens) to your Palette. You can then choose the action you want the Pad to perform.
SEE ALSO: How to Get Touch Bar Functionality on Any Mac
Use Quadro to Get Touch Bar Functionality on Windows
Quadro is the closest one can come to Touch Bar functionality on a Windows PC. However, the advantage with Quadro is the sheer amount of configurability that it offers, and it’s compatibility with both Windows, and macOS computers. You can easily use Quadro to extend your PC’s functionality to a touch surface like an iPhone, or iPad.
As always, we would like to know your thoughts on the new MacBook Pros, utility of their Touch Bar, and your opinions on using Quadro. Feel free to get a discussion started in the comments section below.


 Abubakar Mohammed
 Arjun Sha
 Arjun Sha
 Arjun Sha
 Abubakar Mohammed
 Satyam Kumar
 Satyam Kumar
 Arjun Sha

can you make an alternative for Android and Windows ..?